dhtmlxGantt with PHP: Laravel
This tutorial describes how to add dhtmlxGantt into a Laravel app.
There are tutorials intended for building server-side integration with the help of other platforms:
- dhtmlxGantt with ASP.NET MVC
- dhtmlxGantt with ASP.NET Core
- dhtmlxGantt with Node.js
- dhtmlxGantt with Python
- dhtmlxGantt with PHP:Slim
- dhtmlxGantt with Salesforce LWC
- dhtmlxGantt with Ruby on Rails
The complete source code is available on GitHub.
You can have a look at the video guide that shows how to create a Gantt chart using PHP Laravel.
Step 1. Initializing a project
Creating a project
Create a new application using Composer:
composer create-project laravel/laravel gantt-laravel-app
It should take a minute to download and create all necessary files. Once everything is done, you can check that everything is correct so far. Go the project folder and run database migrations:
cd gantt-laravel-app
php artisan migrate
Now, you can run the server:
php artisan serve
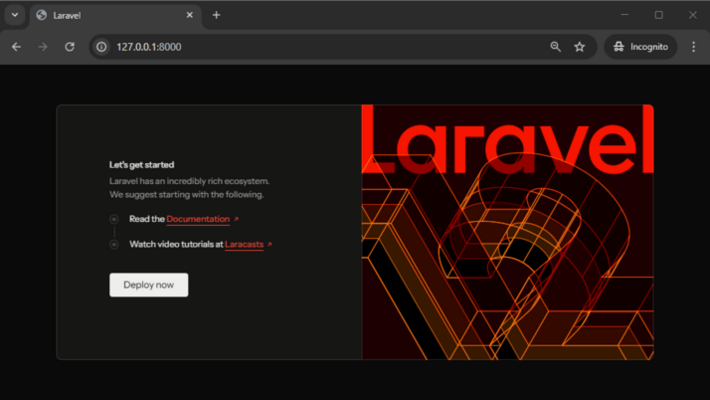
At this step you should get a default Laravel page:
Step 2. Adding Gantt to the page
Adding a View
Firstly, we'll add a new page with dhtmlxGantt to our app. Go to the resources/views folder and create a new view named gantt.blade.php:
<!DOCTYPE html>
<head>
    <meta http-equiv="Content-type" content="text/html; charSet='utf-8'">

    <script src="https://cdn.dhtmlx.com/gantt/edge/dhtmlxgantt.js"></script>
    <link href="https://cdn.dhtmlx.com/gantt/edge/dhtmlxgantt.css" rel="stylesheet">

    <style type="text/css">
        html, body{
            height:100%;
            padding:0px;
            margin:0px;
            overflow: hidden;
        }
    </style>
</head>
<body>
<div id="gantt_here" style='width:100%; height:100%;'></div>
<script type="text/javascript">
    gantt.init("gantt_here");
</script>
</body>
Here we've defined a simple HTML layout, added sources of dhtmlxGantt from CDN and initialized gantt using the method.
Note that we've also specified 100% height for the document body and for the gantt container. Gantt will use the size of its container, so some initial sizes are required.
Changing the default route
After we've added a new page, we need to make it accessible from a browser. For this tutorial, we'll make our gantt the default page of an app.
Go to routes/web.php and change the default route:
<?php

Route::get('/', function () {
    return view('gantt');
});
Run the app again to make sure it did the trick:
Step 3. Creating models and migrations
So, we've got an empty gantt chart. Let's connect it to the database and populate it with data.
Creating a database
Be sure to update database configuration in .env, for example:
DB_CONNECTION="mysql"
DB_HOST="127.0.0.1"
DB_PORT="3306"
DB_DATABASE="gantt-test"
DB_USERNAME="root"
DB_PASSWORD=
The next step is to create model classes and migrations. You can generate classes and migration files using the Artisan command:
php artisan make:model Task --migration
and
php artisan make:model Link --migration
After that find the migrations in the database/migrations folder and define a database schema.
You can find the database schema expected by the gantt here.
The code for the Tasks table looks like this:
<?php

use Illuminate\Support\Facades\Schema;
use Illuminate\Database\Schema\Blueprint;
use Illuminate\Database\Migrations\Migration;

class CreateTasksTable extends Migration
{
    public function up()
    {
        Schema::create('tasks', function (Blueprint $table){
            $table->increments('id');
            $table->string('text');
            $table->integer('duration');
            $table->float('progress');
            $table->dateTime('start_date');
            $table->integer('parent');
            $table->timestamps();
        });
    }

    public function down()
    {
        Schema::dropIfExists('tasks');
    }
}
Below you will find the code for the Links table:
<?php

use Illuminate\Support\Facades\Schema;
use Illuminate\Database\Schema\Blueprint;
use Illuminate\Database\Migrations\Migration;

class CreateLinksTable extends Migration
{
    public function up()
    {
        Schema::create('links', function (Blueprint $table) {
            $table->increments('id');
            $table->string('type');
            $table->integer('source');
            $table->integer('target');
            $table->timestamps();
        });
    }

    public function down()
    {
        Schema::dropIfExists('links');
    }
}
And run the migration:
php artisan migrate
While we're at it, we can generate some test data for our app. Generate a seeder class using the artisan command:
php artisan make:seeder TasksTableSeeder
php artisan make:seeder LinksTableSeeder
Now, open the database/seeders folder and add some data to TasksTableSeeder:
<?php

namespace Database\Seeders;

use Illuminate\Database\Seeder;
use Illuminate\Support\Facades\DB;

class TasksTableSeeder extends Seeder
{
    public function run(): void
    {
        DB::table('tasks')->truncate();
        DB::table('tasks')->insert([
            ['id'=>1, 'text'=>'Project #1', 'start_date'=>'2025-04-01 00:00:00',
                'duration'=>5, 'progress'=>0.8, 'parent'=>0],
            ['id'=>2, 'text'=>'Task #1', 'start_date'=>'2025-04-06 00:00:00',
                'duration'=>4, 'progress'=>0.5, 'parent'=>1],
            ['id'=>3, 'text'=>'Task #2', 'start_date'=>'2025-04-05 00:00:00',
                'duration'=>6, 'progress'=>0.7, 'parent'=>1],
            ['id'=>4, 'text'=>'Task #3', 'start_date'=>'2025-04-07 00:00:00',
                'duration'=>2, 'progress'=>0, 'parent'=>1],
            ['id'=>5, 'text'=>'Task #1.1', 'start_date'=>'2025-04-05 00:00:00',
                'duration'=>5, 'progress'=>0.34, 'parent'=>2],
            ['id'=>6, 'text'=>'Task #1.2', 'start_date'=>'2025-04-11 00:00:00',
                'duration'=>4, 'progress'=>0.5, 'parent'=>2],
            ['id'=>7, 'text'=>'Task #2.1', 'start_date'=>'2025-04-07 00:00:00',
                'duration'=>5, 'progress'=>0.2, 'parent'=>3],
            ['id'=>8, 'text'=>'Task #2.2', 'start_date'=>'2025-04-06 00:00:00',
                'duration'=>4, 'progress'=>0.9, 'parent'=>3]
        ]);
    }
}
Then, do the same for LinksTableSeeder:
<?php

namespace Database\Seeders;

use Illuminate\Database\Seeder;
use Illuminate\Support\Facades\DB;

class LinksTableSeeder extends Seeder
{
	public function run(): void
	{
		DB::table('links')->truncate();
		DB::table('links')->insert([
			['id' => 1, 'source' => 2, 'target' => 3, 'type' => 0],
			['id' => 2, 'source' => 3, 'target' => 4, 'type' => 1]
		]);
	}
}
And call table seeders from DatabaseSeeder.php:
<?php

namespace Database\Seeders;

use App\Models\Task;
use App\Models\Link;
use Database\Seeders\TasksTableSeeder;
use Database\Seeders\LinksTableSeeder;
use Illuminate\Database\Seeder;

class DatabaseSeeder extends Seeder
{
    public function run(): void
    {
        $this->call(TasksTableSeeder::class);
        $this->call(LinksTableSeeder::class);
    }
}
After that we can seed our database from the command line:
php artisan db:seed
Defining model classes
The data is managed via the Eloquent model classes. We've already generated classes for tasks and links at the previous step. They are ready to use and don't require any changes to work with gantt.
What we can do, however, is to add an open attribute of the Task class to JSON response. It will make the project tree expanded when tasks are loaded to the client side. Otherwise, all branches would be closed initially:
The Task model will look as in:
<?php

namespace App\Models;

use Illuminate\Database\Eloquent\Model;

class Task extends Model
{
    protected $appends = ["open"];

    public function getOpenAttribute(){
        return true;
    }
}
And the Link model doesn't need any changes:
<?php

namespace App\Models;

use Illuminate\Database\Eloquent\Model;

class Link extends Model
{
}
Step 4. Loading data
Once the database is created and the models are defined, we can load data into our gantt. The client side requires dates of the following format, so let's create a controller with an action that produces such JSON:
<?php

namespace App\Http\Controllers;

use Illuminate\Http\JsonResponse;
use App\Models\Task;
use App\Models\Link;

class GanttController extends Controller
{
	public function get(): JsonResponse
	{
		$tasks = Task::all();
		$links = Link::all();

		return response()->json([
			"tasks" => $tasks,
			"links" => $links
		]);
	}
}
And register a route, so the client could call this action. Note that we'll add the route to the api.php routes file:
<?php

use Illuminate\Support\Facades\Route;
use App\Http\Controllers\GanttController;

Route::get('/data', [GanttController::class, 'get']); /*!*/
Now, let's configure Laravel to correctly load API routes. Create RouteServiceProvider.php by running the following command:
php artisan make:provider RouteServiceProvider
Then update the file with the following content:
<?php

namespace App\Providers;

use Illuminate\Support\ServiceProvider;
use Illuminate\Support\Facades\Route;

class RouteServiceProvider extends ServiceProvider
{
	public function boot(): void
	{
		Route::prefix('api')
		->middleware('api')
		->group(base_path('routes/api.php'));
	}
}
And finally, call this action from the view:
gantt.config.date_format = "%Y-%m-%d %H:%i:%s";/*!*/

gantt.init("gantt_here");

gantt.load("/api/data");/*!*/
gantt.load sends an AJAX request to the specified URL and will expect a JSON response as we've defined before.
Also, note that we've specified the date_format value. This is how we tell the gantt which format of dates the data source will use, so the client side could parse them.
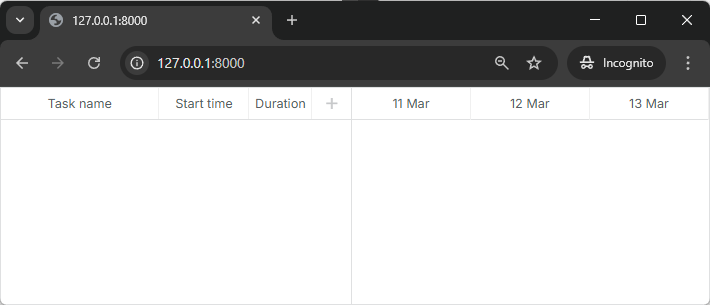
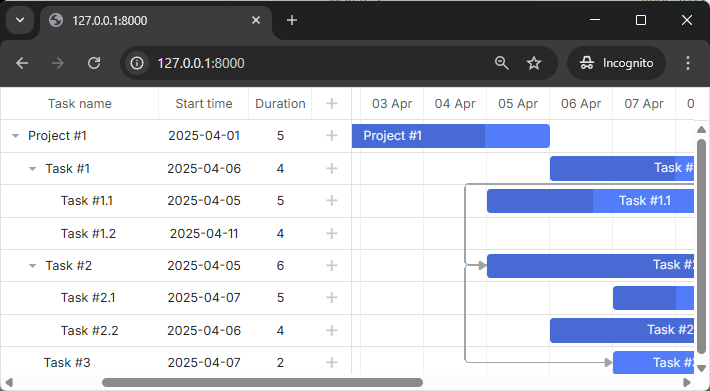
If you check the app now, you should see that there are now tasks in our gantt chart:
Step 5. Saving changes
For now, our gantt can read data from the backend. Let's make it write changes back to the database.
The client side will work in the REST mode, meaning that it will send POST/PUT/DELETE requests for tasks and links actions. You can find the format of requests and all the routes the gantt will use here.
What we need now is to define controllers that handle actions on both models, create routes for them and enable data saving on the client side.
Adding controllers
Let's start with controllers. We'll create one RESTful resource controller for each model. It will contain methods for adding/deleting and updating the model.
Controller for tasks
<?php

namespace App\Http\Controllers;

use Illuminate\Http\Request;
use App\Models\Task;

class TaskController extends Controller
{
	public function store(Request $request)
	{
		$data = $request->only(['text', 'start_date', 'duration', 'parent']);
		$data['progress'] = $request->input('progress', 0);

		$task = Task::create($data);

		return response()->json([
			'action' => 'inserted',
			'tid' => $task->id,
		]);
	}

	public function update(Request $request, $id)
	{
		$task = Task::findOrFail($id);

		$data = $request->only(['text', 'start_date', 'duration', 'parent']);
		$data['progress'] = $request->input('progress', 0);

		$task->update($data);

		return response()->json([
			'action' => 'updated',
		]);
	}

	public function destroy($id)
	{
		$task = Task::findOrFail($id);
		$task->delete();

		return response()->json([
			'action' => 'deleted',
		]);
	}
}
Configuring the Task model
Before the controller methods will work, we need to configure the Task model to allow mass assignment. Laravel's mass assignment protection requires you to explicitly specify which attributes can be filled using the create() and update() methods.
Update your Task model to include the $fillable property:
<?php

namespace App\Models;

use Illuminate\Database\Eloquent\Model;

class Task extends Model
{
    protected $fillable = ['text', 'start_date', 'duration', 'progress', 'parent']; /*!*/
    protected $appends = ["open"];

    public function getOpenAttribute(){
        return true;
    }
}
The $fillable array specifies which fields can be mass-assigned. This is a security feature that protects against unwanted fields being updated through user input.
And a route for it:
<?php

use Illuminate\Support\Facades\Route;
use App\Http\Controllers\GanttController;
use App\Http\Controllers\TaskController;

Route::get('/data', [GanttController::class, 'get']);
Route::resource('task', TaskController::class); /*!*/
A couple of notes regarding this code:
- When a new task is inserted, we return its id back to the client in the tid property of the response object
- We assign a default value to the progress parameter. Many request parameters are optional, which means that if a client-side task doesn't have them assigned, they won't be sent to the server action.
- The response JSON can have any number of additional properties, they all can be accessed from the client-side handler
Now let's implement the same for a LinkController.
Controller for links
<?php

namespace App\Http\Controllers;

use Illuminate\Http\Request;
use App\Models\Link;

class LinkController extends Controller
{
	public function store(Request $request)
	{
		$link = Link::create($request->only(['type', 'source', 'target']));

		return response()->json([
			'action' => 'inserted',
			'tid' => $link->id,
		]);
	}

	public function update(Request $request, $id)
	{
		$link = Link::findOrFail($id);
		$link->update($request->only(['type', 'source', 'target']));

		return response()->json([
			'action' => 'updated',
		]);
	}

	public function destroy($id)
	{
		$link = Link::findOrFail($id);
		$link->delete();

		return response()->json([
			'action' => 'deleted',
		]);
	}
}
Configuring the Link model
Similarly to the Task model, we need to configure the Link model for mass assignment:
<?php

namespace App\Models;

use Illuminate\Database\Eloquent\Model;

class Link extends Model
{
    protected $fillable = ['type', 'source', 'target']; /*!*/
}
And its routes:
<?php

use Illuminate\Support\Facades\Route;
use App\Http\Controllers\GanttController;
use App\Http\Controllers\TaskController;
use App\Http\Controllers\LinkController;

Route::get('/data', [GanttController::class, 'get']);
Route::resource('task', TaskController::class);
Route::resource('link', LinkController::class); /*!*/
Enabling data saving on the client side
Finally, we will configure the client side to use the API we've just implemented:
gantt.config.date_format = "%Y-%m-%d %H:%i:%s";
gantt.init("gantt_here");
gantt.load("/api/data");

const dp = gantt.createDataProcessor({ /*!*/
	url: "/api", /*!*/
	mode: "REST" /*!*/
}); /*!*/
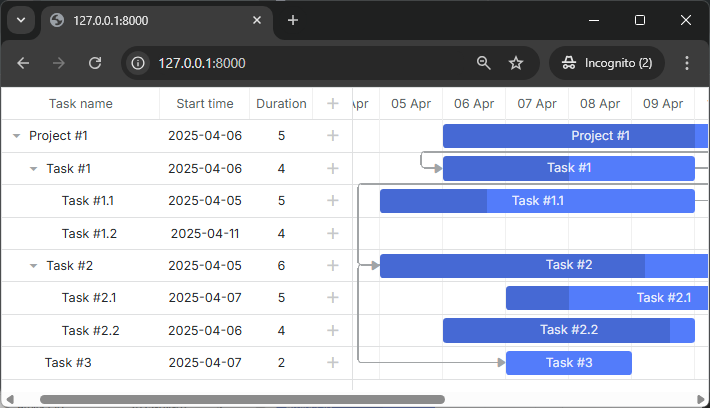
Now you have a fully interactive Gantt chart with the ability to view, add, update and delete tasks and links.
Please check more of our guides for more features of dhtmlxGantt.
Storing the order of tasks
The client-side gantt allows reordering tasks using drag and drop. So if you use this feature, you'll have to store this order in the database. You can check the common description here.
Let's now add this feature to our app.
Enable tasks reordering on the client
Firstly, we need to allow users to change task order in the UI. Open the Index view and update the configuration of gantt:
gantt.config.order_branch = true;/*!*/
gantt.config.order_branch_free = true;/*!*/

gantt.init("gantt_here");
Enable tasks reordering on the server
Now, let's reflect these changes on the backend. We are going to store the order in the column named "sortorder"." A complete tasks' schema may look as follows:
Schema::create('tasks', function (Blueprint $table){
	$table->increments('id');
	$table->string('text');
	$table->integer('duration');
	$table->float('progress');
	$table->dateTime('start_date');
	$table->integer('parent');
	$table->integer('sortorder')->default(0);
	$table->timestamps();
});
Or you can add a migration to the schema we've generated earlier:
php artisan make:migration add_sortorder_to_tasks_table --table=tasks
The code of the Migration file is:
<?php

use Illuminate\Support\Facades\Schema;
use Illuminate\Database\Schema\Blueprint;
use Illuminate\Database\Migrations\Migration;

class AddSortorderToTasksTable extends Migration
{
	public function up()
	{
		Schema::table('tasks', function (Blueprint $table) {
			$table->integer('sortorder')->default(0);
		});
	}

	public function down()
	{
		Schema::table('tasks', function (Blueprint $table) {
			$table->dropColumn('sortorder');
		});
	}
}
And apply the migration:
php artisan migrate
After that we need to update CRUD defined in our controllers.
1 . GET /data must return tasks ordered by the sortorder column:
<?php
namespace App\Http\Controllers;
use Illuminate\Http\JsonResponse;
use App\Models\Task;
use App\Models\Link;

class GanttController extends Controller
{
	public function get(): JsonResponse
	{
		$tasks = Task::orderBy('sortorder')->get(); /*!*/
		$links = Link::all();

		return response()->json([
			"tasks" => $tasks,
			"links" => $links
		]);
	}
}
2 . Newly added tasks must receive the initial value sortorder:
public function store(Request $request)
{
	$data = $request->only(['text', 'start_date', 'duration', 'parent']);
	$data['progress'] = $request->input('progress', 0);
	$data['sortorder'] = Task::max('sortorder') + 1;

	$task = Task::create($data);

	return response()->json([
		'action' => 'inserted',
		'tid' => $task->id,
	]);
}
3 . Finally, when a user reorders tasks, task orders must be updated:
public function update(Request $request, $id)
{
	$task = Task::findOrFail($id);

	$data = $request->only(['text', 'start_date', 'duration', 'parent']);
	$data['progress'] = $request->input('progress', 0);

	$task->update($data);

	if ($request->has('target')) {
		$this->updateOrder($id, $request->input('target'));
	}

	return response()->json([
		'action' => 'updated',
	]);
}

private function updateOrder($taskId, $target)
{
	$nextTask = false;
	$targetId = $target;

	if (str_starts_with($target, 'next:')) {
		$targetId = substr($target, strlen('next:'));
		$nextTask = true;
	}

	if ($targetId === 'null') {
		return;
	}

	$targetTask = Task::find($targetId);
	if (!$targetTask) {
		return;
	}

	$targetOrder = $targetTask->sortorder;
	if ($nextTask) {
		$targetOrder++;
	}

	Task::where('sortorder', '>=', $targetOrder)->increment('sortorder');

	$updatedTask = Task::find($taskId);
	$updatedTask->sortorder = $targetOrder;
	$updatedTask->save();
}
Application security
Gantt doesn't provide any means of preventing an application from various threats, such as SQL injections or XSS and CSRF attacks. It is important that responsibility for keeping an application safe is on the developers implementing the backend. Read the details in the corresponding article.
Trouble shooting
In case you've completed the above steps to implement Gantt integration with PHP but Gantt doesn't render tasks and links on a page, have a look at the article. It describes the ways of identifying the roots of the problems.
What's next
Now you have a fully functioning gantt. You can view the full code on GitHub, clone or download it and use it for your projects.
You can also check guides on the numerous features of gantt or tutorials on integrating Gantt with other backend frameworks.