dhtmlxGantt with ASP.NET Core
This tutorial gives you step-by-step instructions on how to create Gantt with ASP.NET Core on the server side.
You can also read tutorials on other server-side technologies:
- dhtmlxGantt with ASP.NET MVC
- dhtmlxGantt with Node.js
- dhtmlxGantt with Python
- dhtmlxGantt with PHP: Laravel
- dhtmlxGantt with PHP:Slim
- dhtmlxGantt with Salesforce LWC
- dhtmlxGantt with Ruby on Rails
To organize communication with database, the Entity Framework Core is used. The application is built with the help of the Visual Studio 2022.
The complete source code is available on GitHub.
Step 1. Creating a project
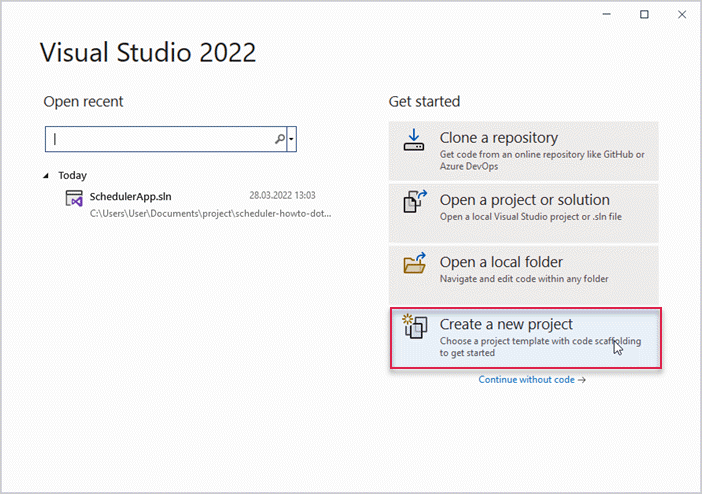
Launch Visual Studio 2022 and create a new project. Select: Create a new project.
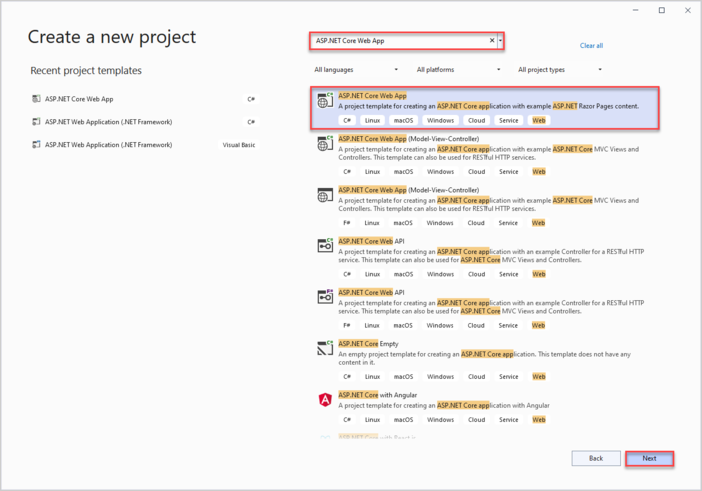
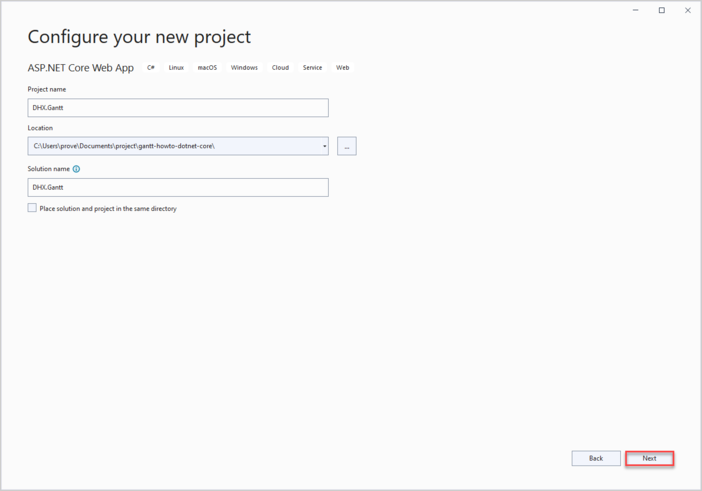
Next select "ASP.NET Core Web App" and name it DHX.Gantt.
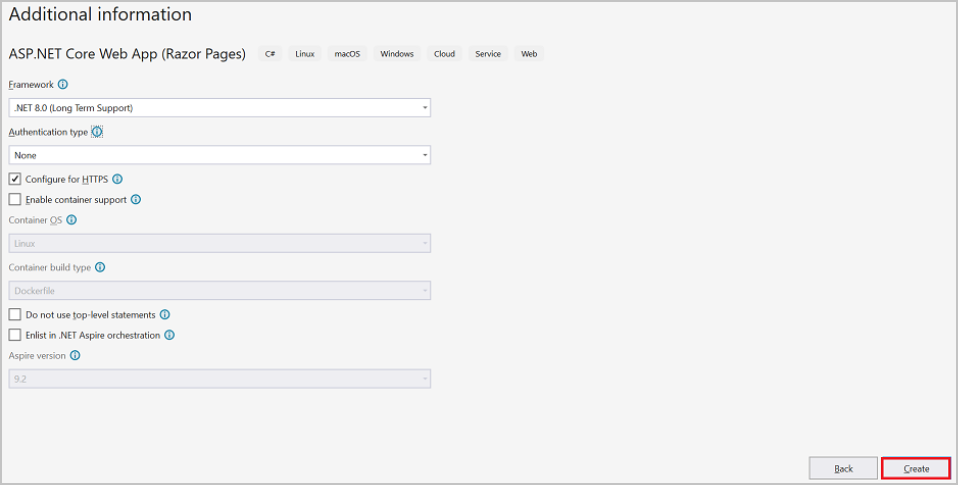
Thus you've created a project and can proceed to add markup and script for Gantt.
Step 2. Adding Gantt markup and JS
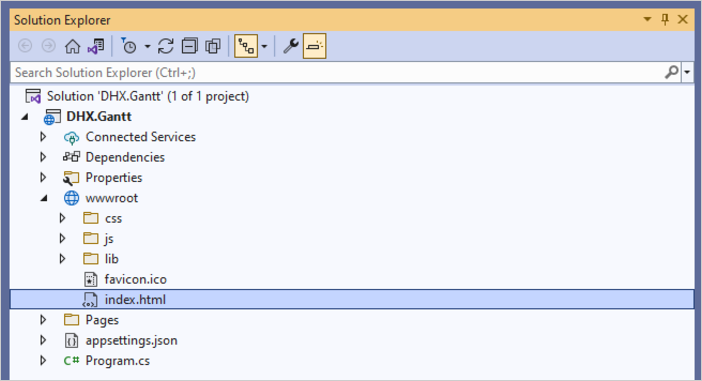
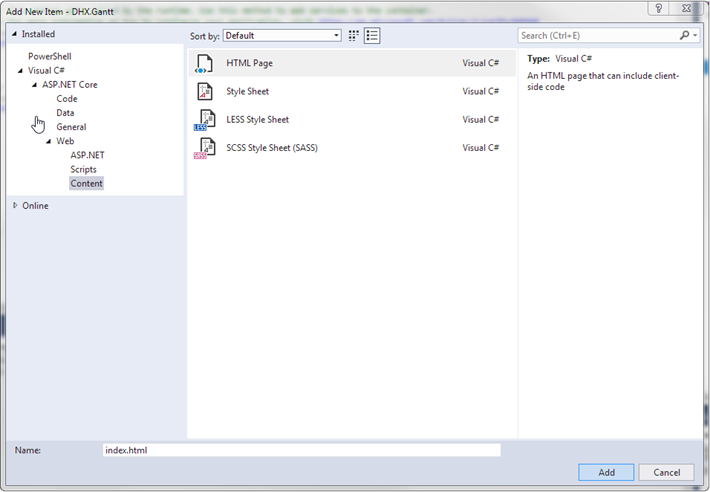
Go to wwwroot and create an index.html file.
In the newly created file make a simple page for a gantt chart.
Note, that gantt files are added from CDN in this demo. If you have a Professional version of the component, you'll need to add gantt files to your project manually.
<!DOCTYPE html>
<html>
<head>
    <meta name="viewport" content="width=device-width" />
    <title>Index</title>
    <link href="https://cdn.dhtmlx.com/gantt/edge/dhtmlxgantt.css" rel="stylesheet" type="text/css" />
    <link href="css/site.css" rel="stylesheet" type="text/css" />
    <script src="https://cdn.dhtmlx.com/gantt/edge/dhtmlxgantt.js"></script>
    <script>
        document.addEventListener('DOMContentLoaded', function () {
        // specifying the date format
        gantt.config.date_format = '%Y-%m-%d %H:%i';
        // initializing gantt
        gantt.init('gantt_here');

        // initiating data loading
        gantt.load('/api/data');
        // creating and configuring dataProcessor
        const dp = gantt.createDataProcessor({
          url: '/api/',
          mode: 'REST',
        });
      });
    </script>
</head>
<body>
    <div id="gantt_here" style="width: 100vw; height: 100vh"></div>
</body>
</html>
When the page is loaded, in addition to initializing gantt chart data loading is immediately called and the
dataProcessor is set up, so all changes made to gantt chart by the user will be saved to the backend. The backend isn't implemented yet, so it will make more sense later.
Next go to Program.cs and tell the application to use the index.html page. In order to do so, you need to configure the app to serve static files from the wwwroot folder.
For this, you need to add the app.UseDefaultFiles() method.
You can find more details here.
var builder = WebApplication.CreateBuilder(args);

// Add services to the container.
builder.Services.AddRazorPages();

var app = builder.Build();

// Configure the HTTP request pipeline.
if (!app.Environment.IsDevelopment())
{
    app.UseExceptionHandler("/Error");
    // The default HSTS value is 30 days.
    // You may want to change this for production scenarios,
    // see https://aka.ms/aspnetcore-hsts.
    app.UseHsts();
}

app.UseHttpsRedirection();

app.UseDefaultFiles(); /*!*/

app.UseStaticFiles();

app.UseRouting();

app.UseAuthorization();

app.MapRazorPages();

app.Run();
The app.UseDefaultFiles() method allows serving default files. It will search the wwwroot folder for the following files:
- index.html
- index.htm
- default.html
- default.htm
Thus, you can choose any of them, while in this tutorial "index.html" is used.
UseDefaultFiles() is just an URL-rewriter that doesn't actually serve the file. For this purpose you need to also add the UseStaticFiles() file.
To make Gantt occupy the entire space of the body, you need to add the following styles to the site.css file located in the wwwroot/css folder:
html {
    font-size: 14px;
}

@media (min-width: 768px) {
    html {
        font-size: 16px;
    }
}

body {
    width: 100%;
    height: 100%;
    padding: 0;
    margin: 0;
}
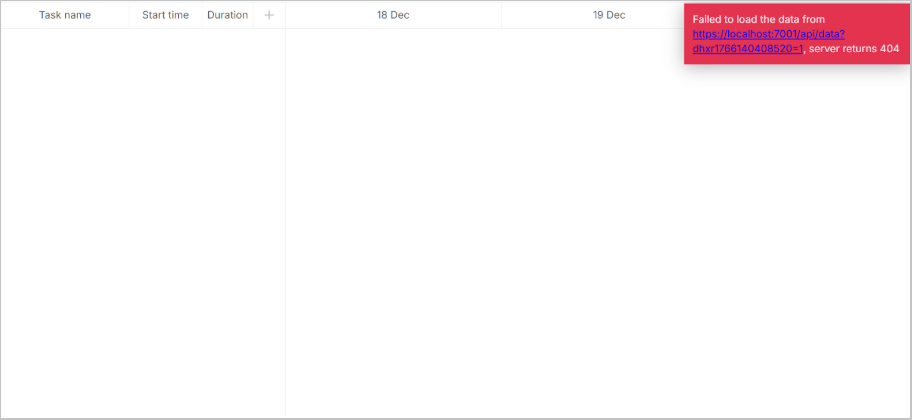
Once you are done with it, an empty gantt should appear on the page when you run the application. Note that the "Invalid data" label at the top right corner shows up because gantt.load() is called,
as there is still no proper backend to serve the data. When the controller will be implemented, gantt will be able to display tasks and links.
Now the basic part is done and it's time to implement the backend. Let's start with implementing model classes and after that proceed to the WebAPI controller.
Step 3. Creating models and database
Let's begin with data models. A data model for Gantt includes links and tasks. dhtmlxGantt uses non-conventional names for model properties from the .NET world perspective. Sometimes the client-side model also contains some properties for the client side or the backend logic, but these properties shouldn't be stored in a database.
To deal with this, the Data Transfer Object (DTO) pattern will be used. Two kinds of models will be defined:
- domain model classes that will be used with EF Core and inside the app
- DTO classes that will be used to communicate with Web API.
Then mapping between the two models should be implemented.
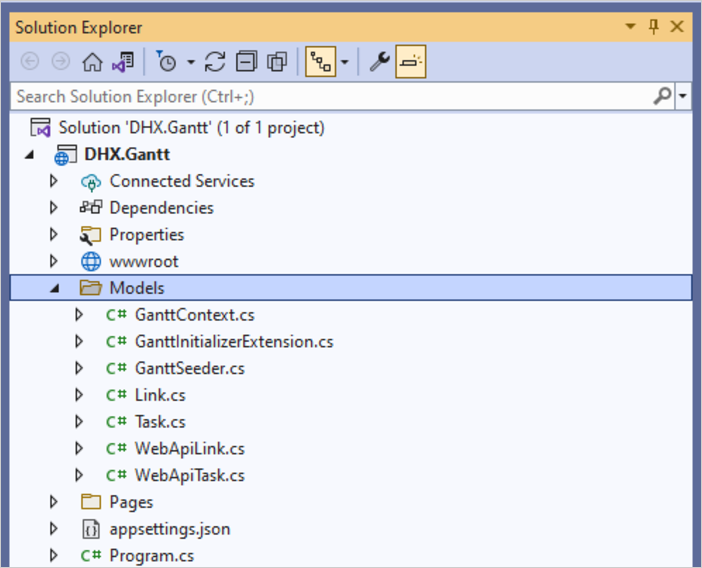
Models
Create a new folder called Models in the project folder. This is where model classes and EF context will be implemented.
Task Model
First, create a class for Tasks. Create a file in the Models folder and name it Task.cs. This can be done by calling the context menu for the Models folder and selecting Add->Class.
This is how the model must look like:
namespace DHX.Gantt.Models
{
    public class Task
    {
        public int Id { get; set; }
        public string? Text { get; set; }
        public DateTime StartDate { get; set; }
        public int Duration { get; set; }
        public decimal Progress { get; set; }
        public int? ParentId { get; set; }
        public string? Type { get; set; }
    }
}
You can look up the list of all properties of the Task object.
Link Model
Add one more file and create a class for Links:
namespace DHX.Gantt.Models
{
    public class Link
    {
        public int Id { get; set; }
        public string? Type { get; set; }
        public int SourceTaskId { get; set; }
        public int TargetTaskId { get; set; }
    }
}
The models are ready, and you can start configuring the database connection.
Configuring DataBase Connection
To configure database connection, you need to take the steps listed below:
Install Entity Framework Core
The Entity Framework Core will be used to manage communication of the app with a database. Let's install the framework:
- find Dependencies of DHTMLX.Gantt in the project tree
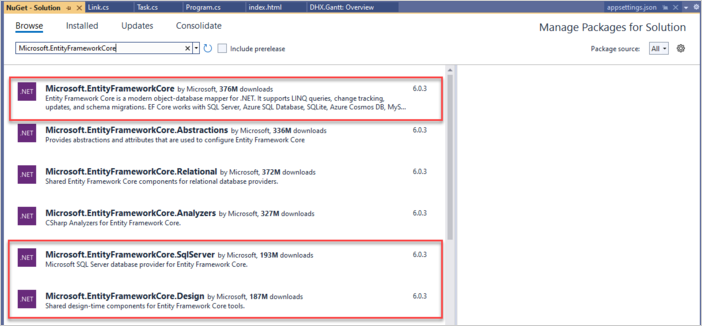
- call the context menu and select Manage NuGet packages
- open the Browse tab and install Microsoft.EntityFrameworkCore.SqlServer, Microsoft.EntityFrameworkCore, and Microsoft.EntityFrameworkCore.Design
Or use the Package Manager command line:
PM> Install-Package Microsoft.EntityFrameworkCore.SqlServer
PM> Install-Package Microsoft.EntityFrameworkCore
PM> Install-Package Microsoft.EntityFrameworkCore.Design
The Entity Framework Core will be used to manage communication of the app with a database.
Create Entity Context
Next you need to define a session with the database and enable loading and saving data. For this, create Context:
- add the GanttContext.cs file in the Models folder
- define the GanttContext class in the created file
using Microsoft.EntityFrameworkCore;

namespace DHX.Gantt.Models
{
    public class GanttContext : DbContext
    {
        public GanttContext(DbContextOptions<GanttContext> options)
           : base(options)
        {
        }
        public DbSet<Task> Tasks { get; set; } = null;
        public DbSet<Link> Links { get; set; } = null;

    }
}
Add First Records to Database
Now you can add records to the database. Let's create the database initializer that will populate the database with tasks. In the Models folder define a class and call it GanttSeeder. The class will have the Seed() method that will add tasks and links to the database.
using Microsoft.EntityFrameworkCore;
namespace DHX.Gantt.Models
{
public static class GanttSeeder
{
public static void Seed(GanttContext context)
{
if (context.Tasks.Any())
{
return; // DB has been seeded
}
using (var transaction = context.Database.BeginTransaction())
{
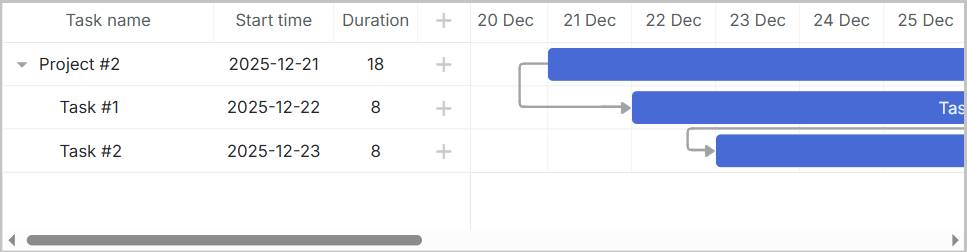
List<Task> tasks = new List<Task>()
{
new Task()
{
Id = 1,
Text = "Project #2",
StartDate = DateTime.Today.AddDays(-3),
Duration = 18,
Progress = 0.4m,
ParentId = null
},
new Task()
{
Id = 2,
Text = "Task #1",
StartDate = DateTime.Today.AddDays(-2),
Duration = 8,
Progress = 0.6m,
ParentId = 1
},
new Task()
{
Id = 3,
Text = "Task #2",
StartDate = DateTime.Today.AddDays(-1),
Duration = 8,
Progress = 0.6m,
ParentId = 1
}
};
tasks.ForEach(s => context.Tasks.Add(s));
context.Database.ExecuteSqlRaw("SET IDENTITY_INSERT Tasks ON;");
context.SaveChanges();
context.Database.ExecuteSqlRaw("SET IDENTITY_INSERT Tasks OFF;");
List<Link> links = new List<Link>()
{
new Link() {Id = 1, SourceTaskId = 1, TargetTaskId = 2, Type = "1"},
new Link() {Id = 2, SourceTaskId = 2, TargetTaskId = 3, Type = "0"}
};
links.ForEach(s => context.Links.Add(s));
context.Database.ExecuteSqlRaw("SET IDENTITY_INSERT Links ON;");
context.SaveChanges();
context.Database.ExecuteSqlRaw("SET IDENTITY_INSERT Links OFF;");
transaction.Commit();
}
}
}
}
Register Database
Now you should register the database in Program.cs. But first you need a connection string for it. It will be stored in a JSON file in the application settings . Create the appsettings.json file (or open it if you have it already) and add a connection string to the database:
{
  "ConnectionStrings": {
    "DefaultConnection": "Server="(localdb)mssqllocaldb;"
        Database=GanttDatabase;Trusted_Connection=True;"
  }
}
The database context will be registered via dependency injection."
Add the following namespaces to Program.cs:
using Microsoft.EntityFrameworkCore;
using DHX.Gantt.Models;
The declaration will look like this:
var connectionString = builder.Configuration.GetConnectionString("DefaultConnection");
builder.Services.AddDbContext<GanttContext>(
    options => options.UseSqlServer(connectionString));
To enable controllers, the services.AddControllers() method is called:
builder.Services.AddControllers();
And we call app.MapControllers() to register our controller routes:
app.MapControllers();
Here is the complete code of Program.cs:
using Microsoft.EntityFrameworkCore;
using DHX.Gantt.Models;

var builder = WebApplication.CreateBuilder(args);

// Add services to the container.
builder.Services.AddRazorPages();

var connectionString = builder.Configuration.GetConnectionString("DefaultConnection");
builder.Services.AddDbContext<GanttContext>(
    options => options.UseSqlServer(connectionString));

builder.Services.AddControllers();

var app = builder.Build();

// Configure the HTTP request pipeline.
if (!app.Environment.IsDevelopment())
{
    app.UseExceptionHandler("/Error");
    // The default HSTS value is 30 days.
    // You may want to change this for production scenarios,
    // see https://aka.ms/aspnetcore-hsts.
    app.UseHsts();
}

app.UseHttpsRedirection();

app.UseDefaultFiles();

app.UseStaticFiles();

app.UseRouting();

app.UseAuthorization();

app.MapRazorPages();

app.MapControllers();

app.Run();
Finally, you need to initialize and seed the database on the app startup. Normally, you'd want to use migrations for that, but for simplicity they aren't used here.
Let's begin with creating a class where initialization will be done. Create the GanttInitializerExtension.cs file in the Models folder:
namespace DHX.Gantt.Models
{
  public static class GanttInitializerExtension
  {
    public static IHost InitializeDatabase(this IHost webHost)
    {
      var serviceScopeFactory =
       (IServiceScopeFactory?)webHost.Services.GetService(typeof(IServiceScopeFactory));

      using (var scope = serviceScopeFactory!.CreateScope())
       {
          var services = scope.ServiceProvider;
          var dbContext = services.GetRequiredService<GanttContext>();
          dbContext.Database.EnsureDeleted();
          dbContext.Database.EnsureCreated();
          GanttSeeder.Seed(dbContext);
       }

       return webHost;
     }
   }
}
Next call InitializeDatabase():
app.InitializeDatabase();
As it was mentioned above, migrations aren't used in this tutorial. Instead simple EnsureCreated and seed are used.
The current part is finished, let's return to Gantt.
Define DTOs and Mapping
It is high time to define DTO classes that will be used for Web API. Let's begin with the DTO class for Task. In the Models folder create a file and define the WebApiTask.cs class:
namespace DHX.Gantt.Models
{
    public class WebApiTask
    {
        public int id { get; set; }
        public string? text { get; set; }
        public string? start_date { get; set; }
        public int duration { get; set; }
        public decimal progress { get; set; }
        public int? parent { get; set; }
        public string? type { get; set; }
        public bool open
        {
            get { return true; }
            set { }
        }

        public static explicit operator WebApiTask(Task task)
        {
            return new WebApiTask
            {
                id = task.Id,
                text = task.Text,
                start_date = task.StartDate.ToString("yyyy-MM-dd HH:mm"),
                duration = task.Duration,
                parent = task.ParentId,
                type = task.Type,
                progress = task.Progress
            };
        }

        public static explicit operator Task(WebApiTask task)
        {
            return new Task
            {
                Id = task.id,
                Text = task.text,
                  StartDate = task.start_date != null ? DateTime.Parse(task.start_date,
                  System.Globalization.CultureInfo.InvariantCulture) : new DateTime(),
                Duration = task.duration,
                ParentId = task.parent,
                Type = task.type,
                Progress = task.progress
            };
        }
    }
}
And this is the DTO class for Link defined in the file called WebApiLink.cs in the Models folder:
namespace DHX.Gantt.Models
{
    public class WebApiLink
    {
        public int id { get; set; }
        public string? type { get; set; }
        public int source { get; set; }
        public int target { get; set; }

        public static explicit operator WebApiLink(Link link)
        {
            return new WebApiLink
            {
                id = link.Id,
                type = link.Type,
                source = link.SourceTaskId,
                target = link.TargetTaskId
            };
        }

        public static explicit operator Link(WebApiLink link)
        {
            return new Link
            {
                Id = link.id,
                Type = link.type,
                SourceTaskId = link.source,
                TargetTaskId = link.target
            };
        }
    }
}
When you finish this step, you should get the following folder structure:
Now you can run the app in order to check that everything is in place. If you don't see a runtime error, then everything is fine.
Step 4. Implementing Web API
Now it's time for the actual REST API implementation.
Adding Controllers
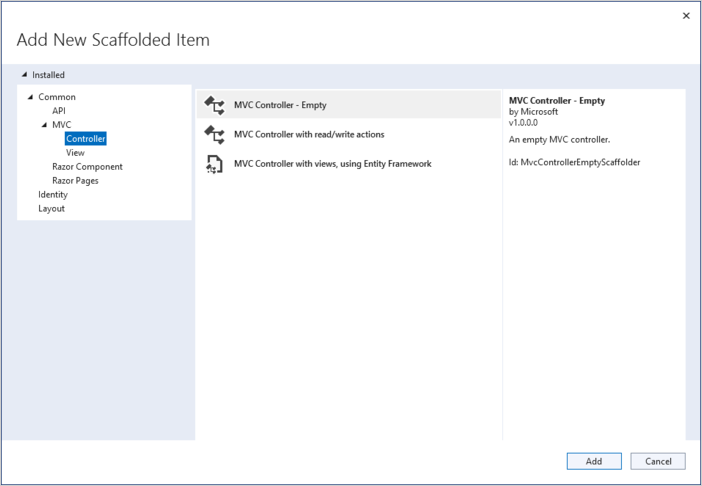
Create the Controllers folder and create three empty API Controllers: one for Tasks, another for Links and one more for the whole dataset:
Task Controller
Let's create a controller for Tasks. It will define basic CRUD operations for Gantt tasks.
How it works:
- in GET requests tasks are loaded from the database and the output is the data transfer objects of the tasks;
- in PUT/POST requests tasks come from the client as WebAPITask classes. They are represented in this way in dhtmlxGantt. So, you should convert them into the format of our data model for EntityFramework (Task class). After that it will be possible to save changes in DatabaseContext.
using Microsoft.AspNetCore.Mvc;
using DHX.Gantt.Models;
using Microsoft.EntityFrameworkCore;

namespace DHX.Gantt.Controllers
{
    [Produces("application/json")]
    [Route("api/task")]
    public class TaskController : ControllerBase
    {
        private readonly GanttContext _context;
        public TaskController(GanttContext context)
        {
            _context = context;
        }

        // GET api/task
        [HttpGet]
        public async Task<IEnumerable<WebApiTask>> Get()
        {
            return await _context.Tasks
                .Select(t => (WebApiTask)t)
                .ToListAsync();
        }

        // GET api/task/5
        [HttpGet("{id}")]
        public async Task<ActionResult<Models.Task>> Get(int id)
        {
            var task = await _context.Tasks.FindAsync(id);

            if (task == null)
                return NotFound();

            return Ok(task);
        }

        // POST api/task
        [HttpPost]
        public async Task<IActionResult> Post(WebApiTask apiTask)
        {
            var newTask = (Models.Task)apiTask;

            await _context.Tasks.AddAsync(newTask);
            await _context.SaveChangesAsync();

            return Ok(new
            {
                tid = newTask.Id,
                action = "inserted"
            });
        }

        // PUT api/task/5
        [HttpPut("{id}")]
        public async Task<IActionResult?> Put(int id, WebApiTask apiTask)
        {
            var updatedTask = (Models.Task)apiTask;
            var dbTask = await _context.Tasks.FindAsync(id);

            if (dbTask == null)
            {
                return NotFound();
            }

            dbTask.Text = updatedTask.Text;
            dbTask.StartDate = updatedTask.StartDate;
            dbTask.Duration = updatedTask.Duration;
            dbTask.ParentId = updatedTask.ParentId;
            dbTask.Progress = updatedTask.Progress;
            dbTask.Type = updatedTask.Type;

            await _context.SaveChangesAsync();

            return Ok(new
            {
                action = "updated"
            });
        }

        // DELETE api/task/5
        [HttpDelete("{id}")]
        public async Task<IActionResult> DeleteTask(int id)
        {
            var task = await _context.Tasks.FindAsync(id);
            if (task != null)
            {
                _context.Tasks.Remove(task);
                await _context.SaveChangesAsync();
            }

            return Ok(new
            {
                action = "deleted"
            });
        }
    }
}
Link Controller
Next you should create a controller for Links:
using Microsoft.EntityFrameworkCore;
using Microsoft.AspNetCore.Mvc;
using DHX.Gantt.Models;

namespace DHX.Gantt.Controllers
{
    [Produces("application/json")]
    [Route("api/link")]
    public class LinkController : ControllerBase
    {
        private readonly GanttContext _context;
        public LinkController(GanttContext context)
        {
            _context = context;
        }

        // GET api/Link
        [HttpGet]
        public async Task<IEnumerable<WebApiLink>> Get()
        {
            return await _context.Links
                .Select(t => (WebApiLink)t)
                .ToListAsync();
        }

        // GET api/Link/5
        [HttpGet("{id}")]
        public async Task<ActionResult<Link>> Get(int id)
        {
            var link = await _context.Links.FindAsync(id);

            if (link == null)
                return NotFound();

            return Ok(link);
        }

        // POST api/Link
        [HttpPost]
        public async Task<IActionResult> Post(WebApiLink apiLink)
        {
            var newLink = (Link)apiLink;

            _context.Links.Add(newLink);
            await _context.SaveChangesAsync();

            return Ok(new
            {
                tid = newLink.Id,
                action = "inserted"
            });
        }

        // PUT api/Link/5
        [HttpPut("{id}")]
        public async Task<IActionResult> Put(int id, WebApiLink apiLink)
        {
            var updatedLink = (Link)apiLink;
            updatedLink.Id = id;
            _context.Entry(updatedLink).State = EntityState.Modified;


            await _context.SaveChangesAsync();

            return Ok(new
            {
                action = "updated"
            });
        }

        // DELETE api/Link/5
        [HttpDelete("{id}")]
        public async Task<IActionResult> DeleteLink(int id)
        {
            var link = await _context.Links.FindAsync(id);
            if (link != null)
            {
                _context.Links.Remove(link);
                await _context.SaveChangesAsync();
            }

            return Ok(new
            {
                action = "deleted"
            });
        }
    }
}
Data Controller
Finally, you need to create a controller for a data action:
using Microsoft.AspNetCore.Mvc;
using Microsoft.EntityFrameworkCore;
using DHX.Gantt.Models;

namespace DHX.Gantt.Controllers
{
    [Produces("application/json")]
    [Route("api/data")]
    public class DataController : ControllerBase
    {
        private readonly GanttContext _context;
        public DataController(GanttContext context)
        {
            _context = context;
        }

        // GET api/data
        [HttpGet]
        public async Task<IActionResult> Get()
        {
            var tasks = await _context.Tasks
                .Select(t => (WebApiTask)t)
                .ToListAsync();

            var links = await _context.Links
                .Select(l => (WebApiLink)l)
                .ToListAsync();

            return Ok(new
            {
                tasks,
                links
            });
        }
    }
}
Everything is ready. You can run the application and see the fully-fledged Gantt.
You can also view the full source code on GitHub.
Error handling
In order to handle errors, you need to declare a special middleware class" that will capture runtime exceptions and write responses. Next it will be added to the app request pipeline. Follow the steps below:
- Create a middleware class from a template in the project folder.
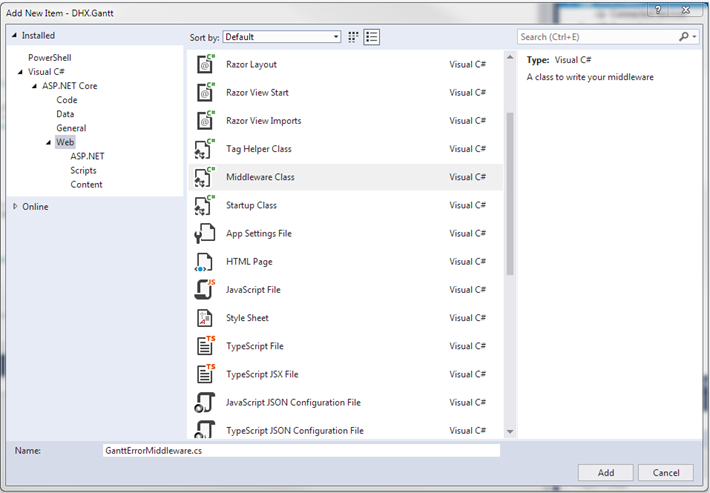
- Install the JSON framework for ASP.NET Core. You can either do it via the NuGet package manager:
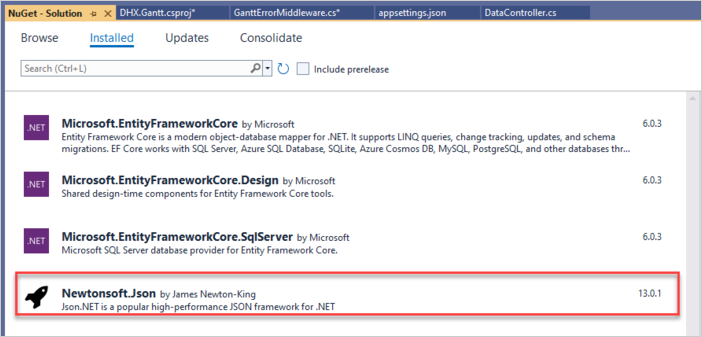
Or use the Package Manager command line:
PM> Install-Package NewtonSoft.JSON
- Find the invoke method and note the
_nextcall. Some handlers can throw exceptions, so let's catch them. Wrap the_nextcall with atry-catchblock and run our handler if an error is captured.
public async Task Invoke(HttpContext httpContext)
{
    try
    {
        await _next(httpContext);
    }catch(Exception e)
    {
        await HandleExceptionAsync(httpContext, e);
    }
}
private static Task HandleExceptionAsync(HttpContext context, Exception exception)
{
    var result = JsonConvert.SerializeObject(new {
        action = "error"
    });
    context.Response.ContentType = "application/json";
    context.Response.StatusCode = StatusCodes.Status500InternalServerError;
    return context.Response.WriteAsync(result);
}
- Add the following namespaces to GanttErrorMiddleware.cs:
using Newtonsoft.Json;
- The middleware is ready. Now go to Program.cs and connect the middleware. Add the following namespaces:
using DHX.Gantt;
Next call the app.UseGanttErrorMiddleware() method:
app.UseGanttErrorMiddleware();
Storing the order of tasks
Users can rearrange tasks with drag and drop in the client-side gantt. If you use this feature, you should store the order of tasks in the database. For details read this section.
Read on to find out how to enable storing the order of tasks for gantt.
Reordering on the Client Side
First enable reordering of tasks on the client side. Add these lines to index.html:
gantt.config.order_branch = true;
gantt.config.order_branch_free = true;

// specifying the date format
gantt.config.date_format = "%Y-%m-%d %H:%i";
// initializing gantt
gantt.init("gantt_here");
Adding tasks order to the model
Next you must change the backend so that it reflected the current order of tasks. Add one more method to the Task model:
namespace DHX.Gantt.Models
{
    public class Task
    {
        public int Id { get; set; }
        public string? Text { get; set; }
        public DateTime StartDate { get; set; }
        public int Duration { get; set; }
        public decimal Progress { get; set; }
        public int? ParentId { get; set; }
        public string? Type { get; set; }
        public int SortOrder { get; set; } /*!*/
    }
}
Updating Controllers
You will also need to update controllers.
- The client side should receive tasks ordered by the SortOrder value. Add the highlighted line to DataController:
[HttpGet]
public async Task<IActionResult> Get()
{
    var tasks = await _context.Tasks
        .OrderBy(t => t.SortOrder) /*!*/
        .Select(t => (WebApiTask)t)
        .ToListAsync();

    var links = await _context.Links
        .Select(l => (WebApiLink)l)
        .ToListAsync();

    return Ok(new
    {
        data = tasks,
        links = links
    });
}
- New tasks should also receive the default value SortOrder:
// POST api/task
[HttpPost]
public async Task<IActionResult> Post(WebApiTask apiTask)
{
    var newTask = (Models.Task)apiTask;

    newTask.SortOrder = await _context.Tasks.MaxAsync(t => t.SortOrder) + 1; /*!*/
    await _context.Tasks.AddAsync(newTask);
    await _context.SaveChangesAsync();

    return Ok(new
    {
        tid = newTask.Id,
        action = "inserted"
    });
}
- sortOrder should be updated when the task order is modified on the client. When a user rearranges tasks, gantt will call a PUT action and provide the info about the positions of the new task in the 'target' property of the request, together with the rest of task properties.
Add target to the WebApiTask.cs class:
public class WebApiTask
{
    public int id { get; set; }
    public string? text { get; set; }
    public string? start_date { get; set; }
    public int duration { get; set; }
    public decimal progress { get; set; }
    public int? parent { get; set; }
    public string? type { get; set; }
    public string? target { get; set; } /*!*/
    public bool open
    {
        get { return true; }
        set { }
    }
}
And now let's implement reordering in our PUT (EditTask) action. Modify the Put action of the Task controller:
// PUT api/task/5
[HttpPut("{id}")]
public async Task<IActionResult?> Put(int id, WebApiTask apiTask)
{
    var updatedTask = (Models.Task)apiTask;
    var dbTask = await _context.Tasks.FindAsync(id);

    if (dbTask == null)
    {
        return NotFound();
    }

    dbTask.Text = updatedTask.Text;
    dbTask.StartDate = updatedTask.StartDate;
    dbTask.Duration = updatedTask.Duration;
    dbTask.ParentId = updatedTask.ParentId;
    dbTask.Progress = updatedTask.Progress;
    dbTask.Type = updatedTask.Type;

    if (!string.IsNullOrEmpty(apiTask.target))                /*!*/
    {                                                         /*!*/
        // reordering occurred                                /*!*/
        await this.UpdateOrdersAsync(dbTask, apiTask.target); /*!*/
    }                                                         /*!*/

    await _context.SaveChangesAsync();

    return Ok(new
    {
        action = "updated"
    });
}
And add the method that will update the order of tasks:
private async Task<IActionResult> UpdateOrdersAsync(Models.Task updatedTask, string orderTarget)
{
    int adjacentTaskId;
    var nextSibling = false;

    var targetId = orderTarget;

    // adjacent task id is sent either as '{id}' or as 'next:{id}' depending
    // on whether it's the next or the previous sibling
    if (targetId.StartsWith("next:"))
    {
        targetId = targetId.Replace("next:", "");
        nextSibling = true;
    }

    if (!int.TryParse(targetId, out adjacentTaskId))
    {
        return NotFound();
    }

    var adjacentTask = await _context.Tasks.FindAsync(adjacentTaskId);
    if (adjacentTask == null)
    {
        return NotFound();
    }
    var startOrder = adjacentTask.SortOrder;

    if (nextSibling)
        startOrder++;

    updatedTask.SortOrder = startOrder;

    var updateOrders = await _context.Tasks
        .Where(t => t.Id != updatedTask.Id)
        .Where(t => t.SortOrder >= startOrder)
        .OrderBy(t => t.SortOrder)
        .ToListAsync();

    var taskList = updateOrders.ToList();
    taskList.ForEach(t => t.SortOrder++);

    return Ok(new
    {
        action = "updated"
    });
}
Application security
Gantt doesn't provide any means of preventing an application from various threats, such as SQL injections, XSS and CSRF attacks. The responsibility for keeping an application safe is on the developers who implement the backend. Read the details in the corresponding article.
XSS protection
A simple solution would be to encode the text properties of your data items when you send them to the client side.
For example, in the below code a built-in HtmlEncoder is used to escape HTML values in the text of tasks. That way your database will contain unmodified data, but the client side will receive safe values of task.text.
using System.Text.Encodings.Web;

public static explicit operator WebApiTask(Task task)
{
    return new WebApiTask
    {
        id = task.Id,
        text = HtmlEncoder.Default.Encode(task.Text != null ? task.Text : ""), /*!*/
        start_date = task.StartDate.ToString("yyyy-MM-dd HH:mm"),
        duration = task.Duration,
        parent = task.ParentId,
        type = task.Type,
        progress = task.Progress
    };
}
Another approach would be to use a specialized library, e.g. HtmlAgilityPack and completely strip any HTML task when you save/load the data.
Trouble shooting
In case you've completed the above steps to implement Gantt integration with ASP.NET Core, but Gantt doesn't render tasks and links on a page, have a look at the Troubleshooting Backend Integration Issues article. It describes the ways of identifying the roots of the problems.
What's next
Now you have a fully functioning gantt. You can view the full code on GitHub, clone or download it and use it for your projects.
You can also check guides on the numerous features of gantt or tutorials on integrating Gantt with other backend frameworks.