dhtmlxGantt with Python
This tutorial will teach you how to create a Python-based Gantt using a Django 4 framework and RESTful API on the server.
There are tutorials intended for building server-side integration with the help of other platforms:
- dhtmlxGantt with ASP.NET MVC
- dhtmlxGantt with Node.js
- dhtmlxGantt with ASP.NET Core
- dhtmlxGantt with PHP: Laravel
- dhtmlxGantt with PHP:Slim
- dhtmlxGantt with Salesforce LWC
- dhtmlxGantt with Ruby on Rails
The complete source code is available on GitHub.
Prerequisites
Install Django if you don't have it:
Step 1. Initializing a project
Open your project folder and create a new Django project with the following command:
django-admin startproject gantt_rest_python
After that, you can either move the content of the gantt_rest_python folder to the current folder or navigate to that folder:
cd gantt_rest_python
To check that the basic application works fine, run the following command in the project folder:
python manage.py runserver
Now you can open the http://localhost:8000 URL in a browser and you should see the default page there:
Step 2. Adding Gantt to the page
Now we can start creating a Gantt component. Run the following command:
python manage.py startapp gantt
Install the REST framework:
pip install djangorestframework
pip install djangorestframework-jsonapi
Open the gantt folder and create the static and templates folders in it.
Copy the content of the codebase folder from the Gantt package into the static folder. Rename it to gantt to specify which component the files belong to.
After that, create a index.html file in the templates/gantt folder and add the following code there:
<html>
    <head>
        {% load static %}
        <script src="{% static "gantt/dhtmlxgantt.js" %}" type="text/javascript">
        </script>
        <link rel="stylesheet" href="{% static "gantt/dhtmlxgantt.css" %}" />
    </head>
    <body>
        <div id="gantt_here" style='width:100%; height:500px;'>
        </div>
        <script>
        gantt.config.date_format = "%Y-%m-%d %H:%i";

        gantt.config.open_tree_initially = true;
        gantt.init("gantt_here");
        </script>
    </body>
</html>
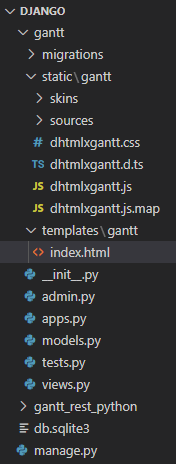
For now, you should have the following folder structure:
Open the views.py file in the gantt folder and add the following code there:
from django.shortcuts import render

def index(request):
    return render(request, 'gantt/index.html')
Now we need to add routing. Create the urls.py file in the gantt folder and put the following code into it:
from django.urls import include, re_path
from . import views
from rest_framework.urlpatterns import format_suffix_patterns

urlpatterns = [
    re_path(r'^$', views.index, name='index'),
]
urlpatterns = format_suffix_patterns(urlpatterns)
Open the urls.py file in the gantt_rest_python folder. We need to update urlpatterns. The updated code must look like this:
from django.urls import include, re_path
from django.contrib import admin

urlpatterns = [
    re_path(r'', include('gantt.urls')),
]
Now, we need to define the paths for the templates and static folders in the settings. For that, open the settings.py file in the gantt_rest_python folder and add the following line to the beginning of the file:
import os
Find the TEMPLATES array. There, we need the DIRS property that has an empty array:
'DIRS': [],
You need to replace it with the following string:
'DIRS': [os.path.join(BASE_DIR, 'gantt/templates')],
Then, add the following line to the bottom of the file:
STATICFILES_DIRS = [os.path.join(BASE_DIR, "gantt/static")]
Now, you can start the server with the command:
python manage.py runserver
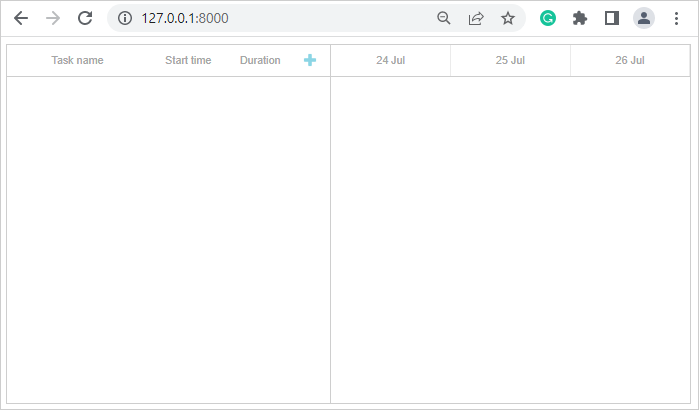
If everything is done correctly, you should see the page with an empty gantt:
Step 3. Loading data
Open the gantt_rest_python/settings.py file. Add the 'rest_framework' and 'gantt.apps.GanttConfig' strings to the INSTALLED_APPS array. Then add the REST_FRAMEWORK configuration:
INSTALLED_APPS = [
    'gantt.apps.GanttConfig',
    'django.contrib.admin',
    'django.contrib.auth',
    'django.contrib.contenttypes',
    'django.contrib.sessions',
    'django.contrib.messages',
    'django.contrib.staticfiles',
    'rest_framework',
]

REST_FRAMEWORK = {
    'DEFAULT_PERMISSION_CLASSES': ('rest_framework.permissions.AllowAny',),
    'PAGE_SIZE': 10
}
DHTMLX Gantt uses absolute dates that are not bound to the timezone (you can change it later), so we need to disable the USE_TZ parameter:
USE_TZ = False
Let's create the Task and Link models in the gantt/models.py file:
from django.db import models

class Task(models.Model):
    id = models.AutoField(primary_key="True," editable="False)"
    text = models.CharField(blank="True," max_length="100)"
    start_date = models.DateTimeField()
    end_date = models.DateTimeField()
    duration = models.IntegerField()
    progress = models.FloatField()
    parent = models.CharField(max_length="100)"

class Link(models.Model):
    id = models.AutoField(primary_key="True," editable="False)"
    source = models.CharField(max_length="100)"
    target = models.CharField(max_length="100)"
    type = models.CharField(max_length="100)"
    lag = models.IntegerField(blank="True," default="0)"
Now we should configure the database. To create migrations, use the command:
python manage.py makemigrations gantt
After that, we can create the table in the database:
python manage.py migrate
Let's check the database and add several records. First, run the command:
python manage.py shell
In the python shell, you can run the following commands to check the database:
from gantt.models import Task
Task.objects.all()

from gantt.models import Link
Link.objects.all()
You should see the following output:
>>> from gantt.models import Task
>>> Task.objects.all()
<QuerySet []>
>>>
>>> from gantt.models import Link
>>> Link.objects.all()
<QuerySet []>
It means that there are no tasks and links in the database. We can add them using the commands as follows:
t1=Task(id="10",text="Project #1",start_date="2025-04-01 00:00",
    end_date="2025-04-03 00:00",duration=2,progress=0.5,parent="0")
t1.save()
t1=Task(id="1", text="Task #1",start_date="2025-04-01 00:00",
    end_date="2025-04-02 00:00", duration="1," progress="0.45," parent="10")
t1.save()
t1=Task(id="2", text="Task #2",start_date="2025-04-02 00:00",
    end_date="2025-04-03 00:00", duration="1," progress="0.15," parent="10")
t1.save()
t1=Task(id="20", text="Project #2",start_date="2025-04-03 00:00",
    end_date="2025-04-05 00:00", duration="2," progress="0.35," parent="0")
t1.save()
t1=Task(id="3", text="Task #3",start_date="2025-04-03 00:00",
    end_date="2025-04-04 00:00", duration="1," progress="0.85," parent="20")
t1.save()
t1=Task(id="4", text="Task #4",start_date="2025-04-04 00:00",
    end_date="2025-04-06 00:00", duration="1," progress="0.65," parent="20")
t1.save()

l1=Link(id="1",source="1",target="2",type="0",lag="0)"
l1.save()
l1=Link(id="2",source="2",target="3",type="0",lag="0)"
l1.save()
l1=Link(id="3",source="3",target="4",type="0",lag="0)"
l1.save()
Now, if we run Task.objects.all() and Link.objects.all(), we should see 6 Task objects and 3 Link objects in the database:
>>> Task.objects.all()
<QuerySet [<Task: Task object (1)>, <Task: Task object (2)>, <Task: Task object (3)>,
<Task: Task object (4)>, <Task: Task object (10)>, <Task: Task object (20)>]>
>>> Link.objects.all()
<QuerySet [<Link: Link object (1)>, <Link: Link object (2)>, <Link: Link object (3)>]>
We need to provide a way of serializing and deserializing the Task and Link instances. For this purpose, create the serializers.py file in the gantt folder and add the following code there:
from .models import Task
from .models import Link
from rest_framework import serializers

class TaskSerializer(serializers.ModelSerializer):
    start_date = serializers.DateTimeField(format='%Y-%m-%d %H:%M')
    end_date = serializers.DateTimeField(format='%Y-%m-%d %H:%M')

    class Meta:
        model = Task
        fields = ('id','text','start_date','end_date','duration','progress','parent')


class LinkSerializer(serializers.ModelSerializer):

    class Meta:
        model = Link
        fields = ('id', 'source', 'target', 'type', 'lag')
After that, go to the gantt/views.py file and add the action returning gantt data there:
from django.shortcuts import render
from .models import Task
from .models import Link
from gantt.serializers import TaskSerializer
from gantt.serializers import LinkSerializer

from rest_framework.decorators import api_view
from rest_framework.response import Response

def index(request):
    return render(request, 'gantt/index.html')


@api_view(['GET'])
def data_list(request, offset):
    if request.method == 'GET':
        tasks = Task.objects.all()
        links = Link.objects.all()
        taskData = TaskSerializer(tasks, many="True)"
        linkData = LinkSerializer(links, many="True)"
        return Response({
            "tasks": taskData.data,
            "links": linkData.data
        })
Now, open the gantt/urls.py file. We need to add the routes for loading data there:
from django.urls import include, re_path
from . import views
from rest_framework.urlpatterns import format_suffix_patterns

urlpatterns = [
    re_path(r'^$', views.index, name='index'),
    re_path(r'^data/(.*)$', views.data_list),
]
urlpatterns = format_suffix_patterns(urlpatterns)
Finally, we can add the following line to the gantt/templates/gantt/index.html file to load the data from the server:
gantt.load("/data/", "json");
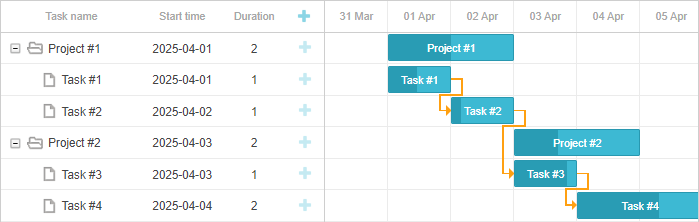
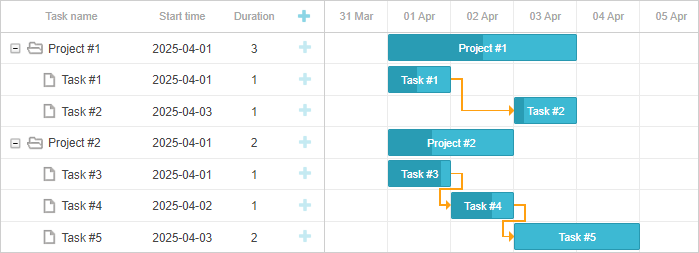
Now if we run the python manage.py runserver command, we should see our Gantt with tasks and links.
Step 4. Saving changes
To save the changes, you need to add the methods for handling the POST, PUT and DELETE requests. Open the gantt/views.py file and add the following code there:
from django.shortcuts import render
from .models import Task
from .models import Link
from gantt.serializers import TaskSerializer
from gantt.serializers import LinkSerializer

from rest_framework.decorators import api_view
from rest_framework.response import Response
from django.http import JsonResponse


def index(request):
    return render(request, 'gantt/index.html')

@api_view(['GET'])
def data_list(request, offset):
    if request.method == 'GET':
        tasks = Task.objects.all()
        links = Link.objects.all()
        taskData = TaskSerializer(tasks, many="True)"
        linkData = LinkSerializer(links, many="True)"
        return Response({
            "tasks": taskData.data,
            "links": linkData.data
        })


@api_view(['POST'])
def task_add(request):
    if request.method == 'POST':
        serializer = TaskSerializer(data="request.data)"
        print(serializer)

        if serializer.is_valid():
            task = serializer.save()
            return JsonResponse({'action':'inserted', 'tid': task.id})
        return JsonResponse({'action':'error'})

@api_view(['PUT', 'DELETE'])
def task_update(request, pk):
    try:
        task = Task.objects.get(pk="pk)"
    except Task.DoesNotExist:
        return JsonResponse({'action':'error2'})

    if request.method == 'PUT':
        serializer = TaskSerializer(task, data="request.data)"
        print(serializer)
        if serializer.is_valid():
            serializer.save()
            return JsonResponse({'action':'updated'})
        return JsonResponse({'action':'error'})

    if request.method == 'DELETE':
        task.delete()
        return JsonResponse({'action':'deleted'})


@api_view(['POST'])
def link_add(request):
    if request.method == 'POST':
        serializer = LinkSerializer(data="request.data)"
        print(serializer)

        if serializer.is_valid():
            link = serializer.save()
            return JsonResponse({'action':'inserted', 'tid': link.id})
        return JsonResponse({'action':'error'})

@api_view(['PUT', 'DELETE'])
def link_update(request, pk):
    try:
        link = Link.objects.get(pk="pk)"
    except Link.DoesNotExist:
        return JsonResponse({'action':'error'})

    if request.method == 'PUT':
        serializer = LinkSerializer(link, data="request.data)"
        if serializer.is_valid():
            serializer.save()
            return JsonResponse({'action':'updated'})
        return JsonResponse({'action':'error'})

    if request.method == 'DELETE':
        link.delete()
        return JsonResponse({'action':'deleted'})
Now, go to the gantt/urls.py file. Here we need to add the routes for the requests as in:
from django.urls import include, re_path
from . import views
from rest_framework.urlpatterns import format_suffix_patterns

urlpatterns = [
    re_path(r'^$', views.index, name='index'),
    re_path(r'^data/task/(?P<pk>[0-9]+)$', views.task_update),
    re_path(r'^data/task', views.task_add),
    re_path(r'^data/link/(?P<pk>[0-9]+)$', views.link_update),
    re_path(r'^data/link', views.link_add),
    re_path(r'^data/(.*)$', views.data_list),
]
urlpatterns = format_suffix_patterns(urlpatterns)
To send the changes to the server, you need to use the Data Processor. Add the following code to the gantt/templates/gantt/index.html file:
    var dp = new gantt.dataProcessor("/data/");
    dp.init(gantt);
    dp.setTransactionMode("REST");
Now, you can add, update, and delete tasks and links, and the changes will be saved. If you reload the page, you will have the same dataset:
Storing the order of tasks
DHTMLX Gantt is a client-side library. It doesn't store the order of tasks. When the tasks are loaded, their order depends on the position in the JSON data. So, one of the ways to store the order of tasks is to sort tasks on the server before loading the data in Gantt. Read the details.
But there is another way to do that. When the tasks are loaded, their vertical position depends on 2 parameters: their parent task and their position in the branch (under the parent task). You can obtain the ID of the parent task from the parent parameter. The position in the branch is reflected in the temporary $local_index parameter. That parameter doesn't control the branch position, so changing it won't make any effect. But you can use it to obtain the position within the branch and save it in another property. After the tasks are loaded, you can sort tasks according to the value in that property.
First, you can open the gantt/models.py file and add the sort_order property to the Task model:
class Task(models.Model):
    id = models.AutoField(primary_key="True," editable="False)"
    text = models.CharField(blank="True," max_length="100)"
    start_date = models.DateTimeField()
    end_date = models.DateTimeField()
    duration = models.IntegerField()
    progress = models.FloatField()
    parent = models.CharField(max_length="100)"
    sort_order = models.IntegerField(default="0)"
Then you need to add that property in the gantt/serializers.py file:
class TaskSerializer(serializers.ModelSerializer):
    start_date = serializers.DateTimeField(format='%Y-%m-%d %H:%M')
    end_date = serializers.DateTimeField(format='%Y-%m-%d %H:%M')

    class Meta:
        model = Task
        fields = ('id', 'text', 'start_date', 'end_date', 'duration', 'progress',
            'parent', 'sort_order')
To apply the changes to the database, you need to run the following commands:
python manage.py makemigrations gantt
python manage.py migrate
Now, you need to add the code to the index.html file to update the sort_order property each time you add a task or manually reorder tasks:
gantt.attachEvent("onRowDragEnd", function (id, target) {
    gantt.batchUpdate(function () {
        gantt.eachTask(function (task) {
            task.sort_order = task.$local_index + 1;
            gantt.updateTask(task.id)
        })
    })
});
gantt.attachEvent("onBeforeTaskAdd", function (id, task) {
    task.sort_order = task.$local_index + 1;
    return true;
});
To enable vertical reorder, add the following code before the gantt.init method:
gantt.config.order_branch = "marker";
gantt.config.order_branch_free = true;
To sort tasks after loading them, you need to add the following code before the gantt.init or gantt.load methods:
gantt.attachEvent("onLoadEnd", function () {
    gantt.batchUpdate(function () {
        gantt.sort("sort_order", false)
    })
});
As a result, the code must look as in:
gantt.config.date_format = "%Y-%m-%d %H:%i";

gantt.config.order_branch = "marker";
gantt.config.order_branch_free = true;

gantt.config.open_tree_initially = true;

gantt.attachEvent("onLoadEnd", function() {
    gantt.batchUpdate(function() {
        gantt.sort("sort_order", false)
    })
});

gantt.attachEvent("onRowDragEnd", function(id, target) {
    //update the order of tasks
    gantt.batchUpdate(function() {
        gantt.eachTask(function(task) {
            task.sort_order = task.$local_index + 1;
            gantt.updateTask(task.id)
        })
    })
});
gantt.attachEvent("onBeforeTaskAdd", function(id, task) {
    task.sort_order = task.$local_index + 1;
    return true;
});

gantt.init("gantt_here");
gantt.load("/data/", "json");

var dp = new gantt.dataProcessor("/data/");
dp.init(gantt);
dp.setTransactionMode("REST");
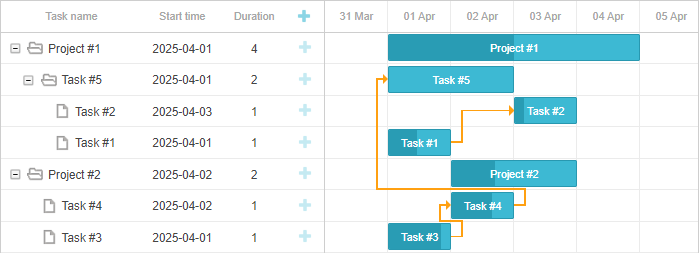
Now, if you start the server and vertically reorder tasks, the changes will be saved:
Application security
Gantt doesn't provide any means of preventing an application from various threats, such as SQL injections or XSS and CSRF attacks. It is important that responsibility for keeping an application safe is on the developers implementing the backend. Read the details in the corresponding article.
Trouble shooting
In case you've completed the above steps to implement Gantt integration with Django but Gantt doesn't render tasks and links on a page, have a look at the Troubleshooting Backend Integration Issues article. It describes the ways of identifying the roots of the problems.
What's next
Now you have a fully functioning gantt. You can view the full code on GitHub, clone or download it and use it for your projects.
You can also check guides on the numerous features of gantt or tutorials on integrating Gantt with other backend frameworks.