Extra Elements in Timeline
This functionality is available only in the PRO edition
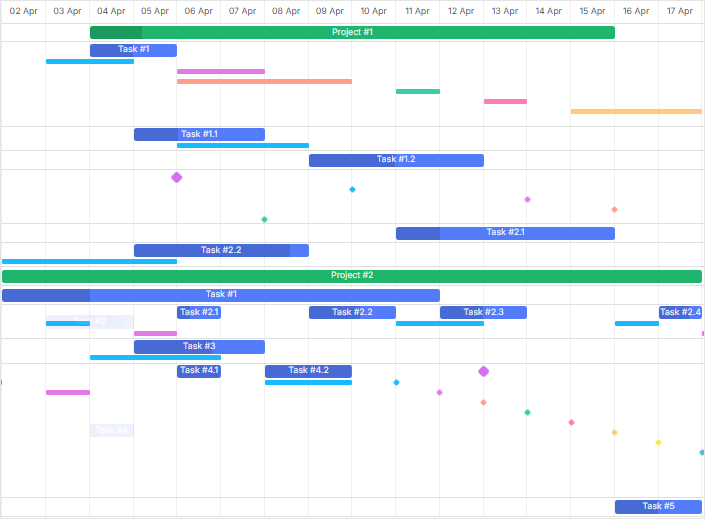
By default, dhtmlxGantt renders elements of the timeline area as layers and does it in the following order:
- Timeline's grid
- Links
- Tasks
- Additional elements
Gantt includes such built-in elements as baselines, deadlines and time constraints. Instead of the default extra elements, you can also create custom ones as additional layers.
Baselines
In project management tools like Gantt charts, baselines are essential for comparing the planned project timeline with the actual progress. Gantt API provides built-in support for baseline entities, greatly simplifying the work with this important element.
Customizing baselines
In case, the default baselines functionality doesn't suit your project requirements, you can disable it using the baselines configuration option.
gantt.config.baselines = false;
After that you can customize the display of baselines in one of the following ways:
- Using the gantt.config.baselines configuration object
The baselines configuration option allows customizing the rendering of baselines in the Gantt chart when set as an object. The object configuration contains the following properties:
- datastore (string) - the name of the datastore used for storing baseline entries. For related functionality, see the
getDatastoremethod. - render_mode (boolean | string) - determines how baselines are displayed:
false- baselines are not shown."taskRow"- baselines are displayed in the same row with the task bar."separateRow"- baselines are shown in a separate subrow, expanding the task row height."individualRow"- each baseline is displayed in its own subrow beneath the task.
- dataprocessor_baselines (boolean) - specifies whether baseline updates trigger the DataProcessor as individual entries.
- row_height (number) - defines the height of the subrow for baselines, applicable only when
render_modeis set to"separateRow"or"individualRow". - bar_height (number) - sets the height of the baseline bar.
For example:
gantt.config.baselines = {
  datastore: "baselines",
  render_mode: false,
  dataprocessor_baselines: false,
  row_height: 16,
  bar_height: 8
};
gantt.init("gantt_here");
If you dynamically modify the display settings of the gantt.config.baselines config, you should use the adjustTaskHeightForBaselines method for proper display of baseline elements.
const task = gantt.getTask(taskId);
gantt.adjustTaskHeightForBaselines(task); /*!*/
gantt.render();
- Creating a custom baseline element for adding into the timeline.
Loading baselines with tasks
Baselines can be loaded directly alongside tasks. Check the example below:
gantt.parse({
  tasks: [
    {
      id: 2,
      start_date: "2025-04-04 00:00:00",
      duration: 2,
      text: "Task #1",
      progress: 0.5,
      parent: 0,
      open: true,
      end_date: "2025-04-06 00:00:00",
    },
    // Additional tasks...
  ],
  links: [],
  baselines: [ /*!*/
    { /*!*/
      id: 2, /*!*/
      task_id: 2, /*!*/
      start_date: "2025-04-03 00:00:00", /*!*/
      duration: 2, /*!*/
      end_date: "2025-04-05 00:00:00", /*!*/
    }, /*!*/
    // Additional baselines... /*!*/
  ], /*!*/
});
Once baselines are loaded, Gantt will automatically display them in the timeline without any additional configuration.
Getting task baselines
You can get the baselines of a particular task using the getTaskBaselines method.
gantt.getTaskBaselines(5);
The method will return an array of baselines objects of the specified task from the datastore.
[
    {
        task_id: 5,
        id: 1,
        duration: 2,
        start_date: "03-04-2019 00:00",
        end_date: "05-04-2019 00:00"
    },
    {
        task_id: 5,
        id: 2,
        duration: 1,
        start_date: "06-04-2019 00:00",
        end_date: "07-04-2019 00:00"
    }
]
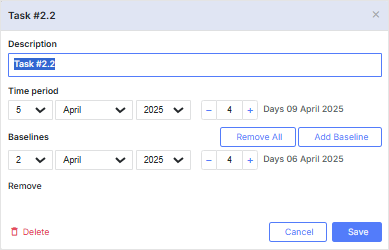
Baselines in the lightbox
You can manage baselines via the lightbox control. Adding, editing and deleting baselines is available directly from the task details.
gantt.config.lightbox.sections = [
  { name: "description", height: 38, map_to: "text", type: "textarea", focus: true },
  { name: "time", type: "duration", map_to: "auto" },
  { name: "baselines", height: 100, type: "baselines", map_to: "baselines" }, /*!*/
];
Baselines rendering modes
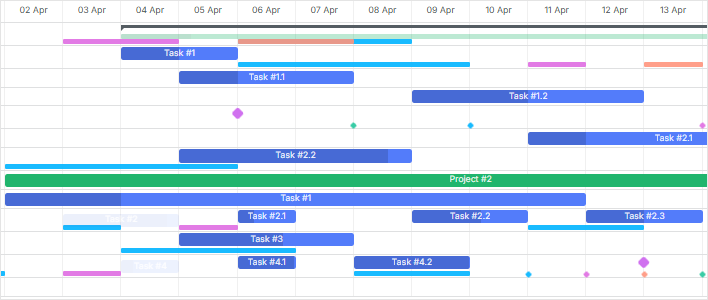
Gantt offers three modes for displaying baselines. You can choose the rendering mode that suits best for your needs by setting the gantt.config.baselines.render_mode configuration option to the corresponding value. There are three modes available:
- In the same row with the task ("taskRow")
Baselines are displayed directly in the same row with the task bars:
gantt.config.baselines.render_mode = "taskRow";
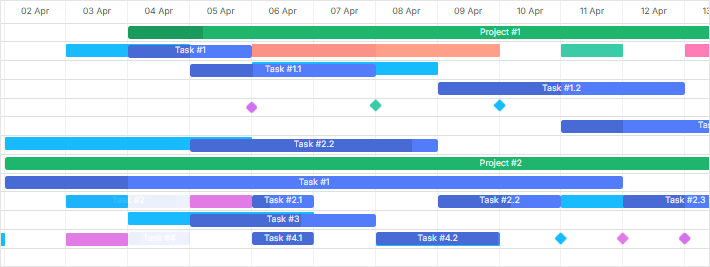
- In a separate subrow below the task ("separateRow")
All baselines are rendered in a single subrow below each task:
gantt.config.baselines.render_mode = "separateRow";
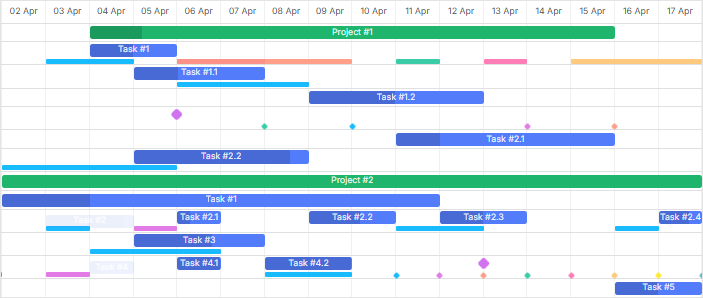
- In an individual subrow ("individualRow")
Each baseline is displayed in its subrow for maximum clarity:
gantt.config.baselines.render_mode = "individualRow";
Setting baseline text
To specify a text that should be displayed inside the baseline element, use the baseline_text template:
gantt.templates.baseline_text = function(task, baseline, index) {
    return "Baseline #" + (index + 1);
};
Deadlines and constraints
In project management, tracking deadlines and understanding task constraints are vital for timely delivery. DHTMLX Gantt comes with built-in visualization for deadlines and constraints, enhancing the ability to manage project timelines effectively.

Deadlines visualization
Gantt supports the task.deadline field. When specified, it displays a visual indicator on the chart, thereby simplifying the tracking of task deadlines.
gantt.parse({
  data: [
    {
      id: 1,
      text: "Task with Deadline",
      start_date: "2025-04-04",
      duration: 5,
      deadline: new Date(2025, 3, 10), // April 10, 2025 /*!*/
    },
    // Additional tasks...
  ],
});
Customizing deadlines
In case, the default deadlines functionality doesn't suit your project requirements, you can disable it using the deadlines configuration option.
gantt.config.deadlines = false;
After that you can customize the display of deadlines by creating a custom deadline element for adding into the timeline.
The gantt.config.deadlines config enables or disables the display of deadline elements for tasks. If enabled, Gantt will check the task.deadline property, and if it contains a valid date, the deadline element will be displayed in the timeline.
Task constraints
Starting from v9.0, when auto scheduling is enabled and works in the Constraint mode (auto_scheduling_compatibility is set to false), Gantt will automatically display constraint dates in the chart.
gantt.parse({
  data: [
    {
      id: 1,
      text: "Task #1",
      start_date: "2025-04-04",
      duration: 4,
      constraint_date: "2025-04-04",
      constraint_type: "snet",
      parent: 0
    },
    // Additional tasks
  ]
})
The display of constraints can be controlled using the show_constraints option in the auto_scheduling config.
By default, constraints are shown, but you can disable them by setting show_constraints to false:
gantt.config.auto_scheduling = {
  enabled: true,
  show_constraints: false
};