dhtmlxScheduler in Plain JS/HTML
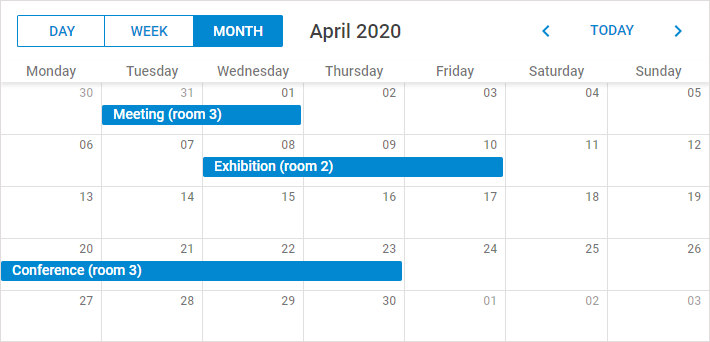
When you develop an application with dhtmlxScheduler, the first thing you need is to initialize or, simply speaking, to display the Scheduler on the page.
This guide tells about initialization of dhtmlxScheduler in plain JS and HTML. You can also check the guides on integration with front-end frameworks:

Use the ready-made ReactScheduler component with props and events.

Integrate Scheduler into Angular projects using the ready-made wrapper.

Use Scheduler inside Vue apps with VueGantt component and reactive configuration.

Embed Scheduler in Svelte with a simple component that binds config and events.

Use Scheduler in Salesforce Lightning Web Components and connect it to org data.
There are two ways of initializing scheduler on a page:
Initializing Scheduler via markup
To display a basic Scheduler on the page through the markup, follow 3 steps:
- Include the dhtmlxScheduler code files on the page.
- Create a DIV container on the page and define the related DIV containers for its elements.
- Initialize dhtmlxScheduler in the newly created container with the init method. As a parameter the method takes an HTML container (or its id) that the Scheduler will be displayed in.
<!DOCTYPE html>
<html>
<head>
<script src="../scheduler/dhtmlxscheduler.js" type="text/javascript"></script>
<link rel="stylesheet" href="../scheduler/dhtmlxscheduler.css"
type="text/css">
</head>
<body>
<!--Container for Scheduler and the standard set of 'divs'-->
<div id="scheduler_here" class="dhx_cal_container" style='width:100%; height:100vh;'>
<div class="dhx_cal_navline">
<div class="dhx_cal_prev_button"> </div>
<div class="dhx_cal_next_button"> </div>
<div class="dhx_cal_today_button"></div>
<div class="dhx_cal_date"></div>
<div class="dhx_cal_tab" data-tab="day"></div>
<div class="dhx_cal_tab" data-tab="week" ></div>
<div class="dhx_cal_tab" data-tab="month"></div>
</div>
<div class="dhx_cal_header"></div>
<div class="dhx_cal_data"></div>
</div>
<script>
scheduler.init("scheduler_here"); /*!*/
</script>
</body>
</html>
Initializing Scheduler via header config
You need to initialize scheduler this way to make it responsive.
To display a basic Scheduler on the page, take the following steps:
- Include the dhtmlxScheduler code files on the page.
- Create a DIV container on the page.
- Specify the structure of the scheduler in the header configuration object.
- Initialize dhtmlxScheduler in the newly created container with the init method. As a parameter the method takes an HTML container (or its id) that the Scheduler will be displayed in.
<!DOCTYPE html>
<html>
<head>
   <script src="../scheduler/dhtmlxscheduler.js"></script>
   <link rel="stylesheet" href="../scheduler/dhtmlxscheduler.css"
        type="text/css">
</head>
<body>
   <!--Container for Scheduler-->
   <div id="scheduler_here" style='width:100%; height:100%;'>
   </div>
</body>
<script>
    //The structure of the scheduler
    scheduler.config.header = [
        "day",
        "week",
        "month",
        "date",
        "prev",
        "today",
        "next"
    ];
    scheduler.init('scheduler_here',new Date(2027,0,1),"week"); /*!*/
</script>
</html>
Required code files
The required code files are:
- dhtmlxscheduler.js
- dhtmlxscheduler.css (you can also explore the available skins)
<script src="../scheduler/dhtmlxscheduler.js"></script>
<link rel="stylesheet" href="../scheduler/dhtmlxscheduler.css" type="text/css">
Let's quickly explore the structure of the dhtmlxScheduler package to find out where to look for the files.
- sources - the source code files of the library. The files are not minified and easy-to-read. The package is mostly intended to be used for component's debugging.
Note that the Trial version of the Scheduler library doesn't contain the sources folder.
- samples - the code samples.
- codebase - the packed code files of the library. These files have much smaller size and intended for use in production. In your apps you need to use files from this folder.
Scheduler sizing
Scheduler takes up the whole size of its container element (scheduler_here div in the above example) without expanding it. Which means that if you don't specify the container height or set it to 0, scheduler will also have zero height and won't be displayed.
In our samples we usually make scheduler full-screen by giving 100% width and height to both the document body and scheduler container element:
<style>
    html, body{
        margin:0px;
        padding:0px;
        height:100%;
        overflow:hidden;
    }
</style>
</head>
<body>
 <div id="scheduler_here" class="dhx_cal_container" style="width:100%; height:100%;">
It can easily go wrong if you place the scheduler_here element into a div with default sizes:
<style>
    html, body{
        margin:0px;
        padding:0px;
        height:100%;
        overflow:hidden;
    }
</style>
</head>
<body>
 <div class="outer_container"> /*!*/
   <div id="scheduler_here" class="dhx_cal_container" style="width:100%;height:100%;">
Scheduler won't be correctly displayed in this case, because "scheduler_here" is set to 100% of its parent, and the size of its parent is not specified.
If you use relative sizes (%, percents) for the .dhx_cal_container element, make sure that its parent element also has some height set. Otherwise, the resulting height might be zero and scheduler won't be displayed.
Or, you can use different units for the main scheduler div sizes. The following elements will have expected sizes regardless of the styles of outer elements:
<div id="scheduler_here" class="dhx_cal_container" style="width:100%; height:100vh;">
or:
<div id="scheduler_here" class="dhx_cal_container" style="width:100%; height:800px;">
Scheduler autoresizing
The container_autoresize extension for dhtmlxScheduler alters the default resizing behavior of the scheduler. By default, dhtmlxScheduler automatically resizes to fit its container and uses internal scrollbars to make all data accessible within the fixed size of the container.
When the container_autoresize extension is enabled, Scheduler dynamically resizes itself to fit all of its content. It means that Scheduler will expand in height and/or width to display all events and data without the need for internal scrollbars.
This behavior ensures that all the content is visible without scrolling within the scheduler, making it ideal for use cases where complete visibility of the scheduler content is required without manual scrolling.
Usage
To enable the container_autoresize extension, include the extension in your scheduler setup as follows:
scheduler.plugins({
    container_autoresize: true
});
Autoresizing the scheduler container
This simple configuration change will activate the container_autoresize behavior, allowing Scheduler to adjust its size based on the content it contains.
Handling headers with container_autoresize
When the container_autoresize extension is activated, Scheduler adjusts its size to fit all the content. This may result in Scheduler exceeding the screen size, which will cause an outer container or the page scrollbar appearing.
In this mode scrolling the page will also scroll the navigation and time headers, making them no longer visible when the page is scrolled down. While this is usually the intended behavior, there are scenarios where you may want the headers to remain fixed. This can be achieved with some additional code and styles.
To keep the headers fixed, you can use the sticky position along with some additional styles, for example:
<style>

  .dhx_cal_container{
    overflow: visible!important;
   }
  .dhx_cal_navline,
  .dhx_cal_header {
      position: sticky;
      z-index: 10;
      background:var(--dhx-scheduler-container-background);

  }
  .dhx_cal_navline{
      z-index: 11;
      top:0;
  }
  .dhx_cal_header{
      /* top coordinate is assigned from JS */
      margin-left: -1px;
      box-shadow: 0 1px 0px 0px var(--dhx-scheduler-base-colors-border);
  }
</style>
Additionally, you need some JavaScript to ensure the correct top position of the sticky time scale, positioning it just below the navigation panel.
Since the navigation panel is flexible and can adjust its height based on other styles and content, you need to dynamically calculate its height and apply it as the top coordinate for the header, as follows:
scheduler.attachEvent("onViewChange", function(){
   const navBar = scheduler.$container.querySelector(".dhx_cal_navline");
   const header = scheduler.$container.querySelector(".dhx_cal_header");
   if(navBar && header){
       header.style.top = `${navBar.offsetHeight}px`;
   }
});
Check the complete demo in the snippet below:
Related sample Container autoresize and sticky header
Making Scheduler responsive
When you initialize Scheduler via the header configuration property you'll be able to choose the header structure that fits the screen size of the client. It will also apply certain styles which will make elements and font sizes responsive on small screens.
You can find more details in a separate article: Mobile Responsive Scheduler.
Import files into ES6/7 and TypeScript apps
Use the following command to import files:
import { scheduler } from 'dhtmlx-scheduler';
For the Commercial, Enterprise or Ultimate version the command looks like this:
import { scheduler, Scheduler } from 'dhtmlx-scheduler';
Using Scheduler with Vite
If you use Vite in your project, the following setting is required for the vite.config.js file to ensure that Scheduler is correctly included into the app:
optimizeDeps: {
    include: [
        'dhtmlx-scheduler',
    ]
}
Include files into a RequireJS-based app
To include dhtmlxScheduler files into a RequireJS-based app, you need to follow the logic shown in the example below:
requirejs(["codebase/dhtmlxscheduler"], function(dhx){
    const scheduler = dhx.scheduler;
    const Scheduler = dhx.Scheduler;// for Enterprise builds

    scheduler.init('scheduler_here',new Date(),"week");
    scheduler.parse([
        {
            id: 1, text: "Event 1", start_date: "2027-07-15 09:00",
            end_date: "2027-07-15 10:00"
        },
        {
            id: 2, text: "Event 2", start_date: "2027-07-15 10:00",
            end_date: "2027-07-15 11:00"
        }
    ]);
});
The dhtmlxScheduler library will return an object with fields scheduler and Scheduler (in Commercial, Enterprise or Ultimate versions) - the scheduler and Scheduler objects described here.
When using Scheduler with custom extensions in RequireJS, you should specify the shim config for RequireJS and directly set the dependency of extensions from Scheduler in it.
The example below demonstrates how a custom extension file custom_tooltip_plugin.js can be set in the correct way:
requirejs.config({
    paths: {
        "dhtmlxscheduler": "../../codebase/dhtmlxscheduler",
        "ext/dhtmlxscheduler_custom_tooltip": "../custom_tooltip_plugin"
    },
    shim: {
        "ext/dhtmlxscheduler_custom_tooltip": ["dhtmlxscheduler"]
    }
});

requirejs(["dhtmlxscheduler"],
function (dhx) {
    const scheduler = dhx.scheduler;

    scheduler.init('scheduler_here',new Date(),"week");
    scheduler.parse([
        {
            id: 1, text: "Event 1", start_date: "2027-07-15 09:00",
            end_date: "2027-07-15 10:00"
        },
        {
            id: 2, text: "Event 2", start_date: "2027-07-15 10:00",
            end_date: "2027-07-15 11:00"
        }
    ]);
});
Check that the module name for any file inside the package is specified as a relative path inside the 'codebase' folder of the package plus the filename, for instance:
core library:
- "dhtmlxscheduler": "./vendor/dhtmlxscheduler/dhtmlxscheduler"