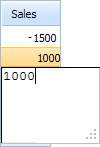
Column Types
Basically, the content type is specified for the whole column with the help of the setColTypes method. As a parameter the method takes a comma-separated list of types' codes.

Setting the content type for columns
mygrid = new dhtmlXGridObject("gridbox");
mygrid.setImagePath("../../codebase/imgs/");
mygrid.setHeader("Sales,Book Title,Author,Price,In Store,Shipping");
mygrid.setColTypes("dyn,ed,ed,price,ch,coro"); mygrid.init();
- By default, the grid assigns the "ed" type to all columns.
- Some of the types can be assigned to any type of data in a column. However, there are types (e.g., the 'price' type ) that are assigned only to the cells with numeric values. Otherwise, data will be omitted or parsed incorrectly.
- A comma-separated list of types' codes must go without spaces. Otherwise, an error will occur.
- If you need, you may set the type for a specific row or cell using the setCellExcellType and setRowExcellType methods (doesn't matter which type the related column has).
- In the Standard Edition you can set types of the columns only. In the Professional Edition you can set either the type of the whole column or the type of each cell in it.
Editable column
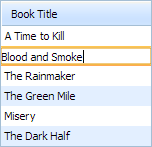
An editable column is presented in 3 variations:
- ed - a simple column with editable cells;
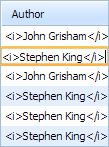
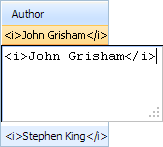
- edtxt - a column with editable text cells that treat data values as plain text, so HTML isn't allowed and any special char must be set without escaping;
- edn - a column with editable numeric cells that allow formatting values through the setNumberFormat method.
Column with standard editable cells
Related sample: Setting cells and column properties
Column with editable cells for plain text
Related sample: Setting cells and column properties
Column with editable numeric cells
Related sample: Date/Decimal format
Read-only column
A column with read-only cells is presented in 3 variations:
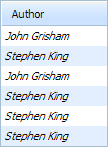
- ro - a column with simple read-only cells without the possibility to edit the content;
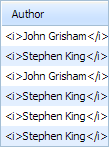
- rotxt - a column with read-only text cells that treat data values as plain text, so HTML isn't allowed and any special char must be set without escaping;
- ron - a column with read-only numeric cells that allow formatting values through the setNumberFormat method.
Column with standard read-only cells
Related sample: Setting cells and column properties
Column with read-only cells for plain text
Related sample: Setting cells and column properties
Column with read-only numeric cells
Related sample: Setting cells and column properties
"Textarea" column
A column with textarea editor is presented in 2 variations:
- txt - a simple column with a multiline editor;
- txttxt - a column with a multi-line editor that treats data values as plain text, so HTML isn't allowed and any special char must be set without escaping.
Simple "textarea" column
Related sample: Setting cells and column properties
"Textarea" column for plain text
Related sample: Setting cells and column properties
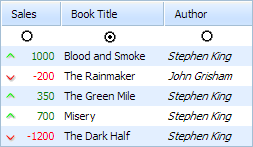
Radio button
A radio-button is presented in 2 variations:
Column-oriented radio button
Related sample: Setting cells and column properties
Row-oriented radio button
Related sample: Row-oriented radio button
Checkbox
Related sample: Setting cells and column properties
Select box
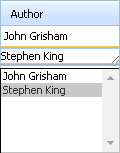
A select-box editor is presented in 3 variations:
- co - an editable select box;
- coro - a not editable select box;
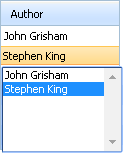
- combo - an editable select box presented by DHTMLX combo;
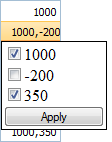
- clist - a multi- selection select box.
Editable select box
Related sample: Counter eXcell
Not editable select box
Related sample: Setting cells and column properties
Read more details in the article Managing Select Box Collection.
DHTMLX Combo as an editor
Related sample: Integration with dhtmlxCombo
Read more information in the article "Integration with dhtmlxCombo".
Multi-selection select box
Related sample: Extra Excell types
Date picker
A date picker presented in 2 variations:
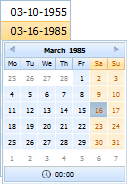
- dhxCalendar - a simple date picker (presented by the DHTMLX calendar);
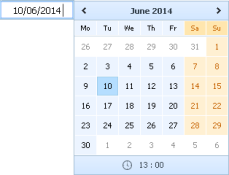
- dhxCalendarA - a date picker with a possibility to input date manually (presented by the DHTMLX calendar).
Date picker
Related sample: Calendar eXcell
Date picker with manual input
Related sample: Calendar eXcell
Color picker
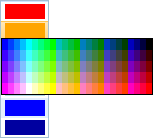
Related sample: Colorpicker eXcell
"Links" column
In the XML configuration you can use the following attributes (specified as a '^'-delimited list):
- text - the link text;
- url - (optional) the URL of the page the link goes to (without quotes) or some javascript function(javascript:function(param1,param2){...};);
- target - (optional) the target attribute specifying where to open the linked document.
- _blank - opens the link in a new window or tab (by default);
- _self - opens the link in the same frame as it was clicked;
- _parent - opens the link in the parent frame;
- _top - opens the link in the full body of the window.
For example, to add a link to the DHTMLX.com site under the text 'Go to DHTMLX' and open it in the same window:
<rows>
    <row id="1">
        <cell>Go to DHTMLX^http://dhtmlx.com^_self</cell>// link to URL
        <cell>Link^javascript:alert(1);^_top</cell>// link to a function
    <row>
    ...
</rows>
"Images" column
Related sample: Extra Excell types
In XML configuration you can use the following attributes (specified as a '^'-delimited list):
- url - (mandatory) the URL of an image;
- alt - (optional) an alternate text for an image;
- link - (optional) the URL of the page you will go to after clicking on image (without quotes) or some javascript function that will be invoked;
- target - (optional) the target attribute specifying where to open the linked page.
- _blank - opens the link in a new window or tab (by default);
- _self - opens the link in the same frame as it was clicked;
- _parent - opens the link in the parent frame;
- _top - opens the link in the full body of the window.
<rows>
    <row id="1">
        <cell>icons/open_icon.png^DHTMLX site^http://dhtmlx.com^_self</cell>
        ...
    <row>
    ...
</rows>
"Price" column
Related sample: Setting cells and column properties
"Sales" column
Related sample: Setting cells and column properties
Context Menu
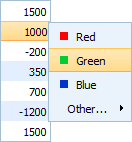
Related sample: Grid linked to menu
Tree-like column
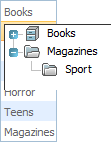
Related sample: Grid linked to tree
For details on the setSubTree() method read the related API article.
Grid-like column
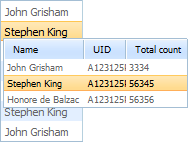
Related sample: Grid linked to grid
For details on the setSubGrid() method read the related API article.
Custom column types
If API doesn't allow you to provide the desired functionality, you can redefine some method of an editor or create a custom type of content.
Creating read-only editors(eXcells)
Read-only editors are used only to describe the way how the incoming data needs to be rendered.
function eXcell_ro(cell){ // the eXcell name is defined here
    if (cell){            // the default pattern, just copy it
        this.cell = cell;
        this.grid = this.cell.parentNode.grid;
    }
    this.edit = function(){} //read-only cell doesn't have edit method
    // the cell is read-only, so it's always in the disabled state
    this.isDisabled = function(){ return true; }
    this.setValue=function(val){
        // actual data processing may be placed here, for now we just set value as it is
        this.setCValue(val);
    }
}
eXcell_ro.prototype = new eXcell;// nests all other methods from the base class
This snippet contains about 10 lines of code, most of them can be copy-pasted. There are only two places you need to pay attention to:
- The name of the type;
- Data processing formula.
For example, the following code will create an eXcell which will render the cell value as a button with a label:
function eXcell_button(cell){ //the eXcell name is defined here
    if (cell){                // the default pattern, just copy it
        this.cell = cell;
        this.grid = this.cell.parentNode.grid;
    }
    this.edit = function(){}  //read-only cell doesn't have edit method
    // the cell is read-only, so it's always in the disabled state
    this.isDisabled = function(){ return true; }
    this.setValue=function(val){
        this.setCValue("<input type='button' value='"+val+"'>",val);
    }
}
eXcell_button.prototype = new eXcell;// nests all other methods from the base class
As you can see, the second snippet differs from the first one only in two places, but it already can automatically convert the incoming data into a button just by defining the column type:
grid.setColTypes("button,...");
You can use any kind of HTML in the process of cell code generation, which allows you to place complex elements inside the grid and style them as necessary. The code mentioned below creates a complex excell type, which will open a new window with details on pressing the button:
function eXcell_details(cell){  // the eXcell name is defined here
    if (cell){                  // the default pattern, just copy it
        this.cell = cell;
        this.grid = this.cell.parentNode.grid;
    }
    this.edit = function(){}   // read-only cell doesn't have edit method
    // the cell is read-only, so it's always in the disabled state
    this.isDisabled = function(){ return true; }
    this.setValue=function(val){
        var row_id=this.cell.parentNode.idd;     // gets the id of the related row
        this.setCValue(val+"<input type='button' onclick='window.open(
        "details.php?for="+row_id)'>",val);
    }
}
eXcell_details.prototype = new eXcell; // nests all other methods from the base class
Creating editable eXcells
The editable eXcells use the same approach as read-only editors do, but with a few additional methods.
Let's analyze the simplest case:
function eXcell_button(cell){ //the eXcell name is defined here
    if (cell){                //the default pattern, just copy it
        this.cell = cell;
        this.grid = this.cell.parentNode.grid;
        eXcell_ed.call(this); //uses methods of the "ed" type
    }
    this.setValue=function(val){
        this.setCValue("<input type='button' value='"+val+"'>",val);
    }
    this.getValue=function(){
        return this.cell.firstChild.value; // get button label
    }
}
eXcell_button.prototype = new eXcell; // nests all other methods from the base class
3 new methods were added there:
- getValue() - returns the current cell value; it may be used by normal API, and it's necessary for a normal edit operation;
- edit() - ( not declared explicitly, nested from the 'ed' type ) called when the grid is switched to the edit state;
- detach() - ( not declared explicitly, nested from the 'ed' type ) called when the grid is switched back to the normal state.
In spite of the fact that we have twice as much rows in this example as we had during the creation of the read-only editor, basically, we have only one row which needs customizing. Both the edit and detach events are fully reused from the already existing excell.
The creation of an editable button is a pretty useless use-case, so let's change it into something more usable:
function eXcell_myprice(cell){ //the eXcell name is defined here
    if (cell){                 //the default pattern, just copy it
        this.cell = cell;
        this.grid = this.cell.parentNode.grid;
        eXcell_ed.call(this); //uses methods of the "ed" type
    }
    this.setValue=function(val){
        this.setCValue("<span>"+val+"</span><span> USD</span>",val);
    }
    this.getValue=function(){
        return this.cell.childNodes[0].innerHTML; // gets the value
    }
}
eXcell_myprice.prototype = new eXcell;// nests all other methods from the base class
As you can see, only the text marked in bold was changed, and now, instead of a useless button we have a value formatted with some postfix. This value can be edited as an Integer value.
In the most complex cases you may need to create an eXcell with a custom editor. Let's have a look at a sample code of an excell which can be used for an hour selecting instead of a simple text input. In addition to the default input the cell editor will have an extra time selector:
function eXcell_mytime(cell){                  // excell name is defined here
    if (cell){                                 // default pattern, just copy it
        this.cell = cell;
        this.grid = this.cell.parentNode.grid;
    }
    this.setValue=function(val){
        this.setCValue(val);
    }
    this.getValue=function(){
        return this.cell.innerHTML; // get value
    }
    this.edit=function(){
        this.val = this.getValue(); // save current value
        this.cell.innerHTML = "<input type='text' style='width:50px;'>"
        + "<select style='width:50px;'><option value='AM'>AM"
        + "<option value='PM'>PM</select>"; // editor's html
        this.cell.firstChild.value=parseInt(val); // set the first part of data
        if (val.indexOf("PM")!=-1) this.cell.childNodes[1].value="PM";
          // blocks onclick event
          this.cell.childNodes[0].onclick=function(e){ (e||event).cancelBubble=true;}
          // blocks onclick event
          this.cell.childNodes[1].onclick=function(e){ (e||event).cancelBubble=true;}
    }
    this.detach=function(){
          // sets the new value
          this.setValue(this.cell.childNodes[0].value+" "+this.cell.childNodes[1].value);
          return this.val!=this.getValue(); // compares the new and the old values
    }
}
eXcell_mytime.prototype = new eXcell;    // nests all other methods from base class
As you can see, this sample contains some additional code, but there is still nothing really complex.
HTML code of the editor is defined inside of the edit() method. Thus, the editor is filled with the current values.
Values from the editor are combined to get a new cell value inside the detach() method.
Back to top