dhtmlxGantt 与 Node.js 集成指南
本教程将指导你如何在服务端使用 Node.js 和 REST API 搭建 dhtmlxGantt。如果你使用的是其他技术栈,可以参考以下其它集成选项:
- dhtmlxGantt와 ASP.NET Core 사용하기
- dhtmlxGantt와 ASP.NET MVC
- dhtmlxGantt와 Python
- dhtmlxGantt와 PHP: Laravel 연동
- dhtmlxGantt와 PHP:Slim 연동하기
- dhtmlxGantt와 Salesforce LWC 연동하기
- dhtmlxGantt와 Ruby on Rails 연동하기
我们的 Node.js 实现将通过 REST API 与服务端通信。由于 Node.js 提供了许多现成的工具,无需从头开发所有内容。同时,我们将使用 MySQL 作为数据存储。
完整源码可在 GitHub 获取。
你还可以观看视频教程,了解如何用 Node.js 创建甘特图。
步骤 1. 创建项目
首先,创建一个项目文件夹并添加必要的依赖。我们将使用以下模块:
- Express - 轻量级 Node.js 框架
- body-parser - 解析请求体的工具
创建名为 "dhx-gantt-app" 的项目文件夹:
mkdir dhx-gantt-app
cd dhx-gantt-app
添加依赖
接下来,通过以下命令创建 package.json 文件:
npm init -y
文件创建后,打开它并添加上述依赖。内容大致如下:
package.json
{
  "name": "dhx-gantt-app",
  "version": "1.0.2",
  "description": "",
  "main": "server.js",
  "dependencies": {
    "body-parser": "^1.19.1",
    "express": "^4.17.2"
  },
  "scripts": {
    "test": "echo "Error: no test specified" && exit 1",
    "start": "node server.js"
  },
  "keywords": [],
  "author": "",
  "license": "MIT"
}
然后使用以下命令安装依赖:
npm install
准备后端
我们将搭建一个基础的 express 后端:一个服务端 JavaScript 文件("server.js")、一个用于静态文件的文件夹("public")以及一个 HTML 页面。
项目结构如下:
dhx-gantt-app
├── node_modules
├── server.js
├── package.json
└── public
    └── index.html
创建名为 server.js 的文件,并添加如下代码:
server.js
const express = require('express');
const bodyParser = require('body-parser');
const path = require('path');

const port = 1337;
const app = express();

app.use(express.static(path.join(__dirname, "public")));
app.use(bodyParser.urlencoded({ extended: true }));

app.listen(port, () =>{
    console.log("Server is running on port "+port+"...");
});
此代码实现了以下功能:
- 从 'public' 文件夹提供静态文件
- 在本地 1337 端口启动应用
接下来,创建 "public" 文件夹。该文件夹将存放应用的主页面 index.html。
此文件夹也是你放置 dhtmlxGantt 的 js 和 css 文件的地方。但在本教程中,我们将从 CDN 加载 gantt,因此这里只需放置 HTML 页面。
步骤 2. 在页面中添加 Gantt
创建 public 文件夹,并在其中添加 index.html 文件。打开 index.html,添加如下内容:
index.html
<!DOCTYPE html>
<head>
  <meta http-equiv="Content-type" content="text/html; charSet="utf-8"">

  <script src="https://cdn.dhtmlx.com/gantt/edge/dhtmlxgantt.js"></script>
  <link href="https://cdn.dhtmlx.com/gantt/edge/dhtmlxgantt.css" rel="stylesheet">

  <style type="text/css">
    html, body{
      height:100%;
      padding:0px;
      margin:0px;
      overflow: hidden;
    }
  </style>
</head>
<body>
  <div id="gantt_here" style='width:100%; height:100%;'></div>
  <script type="text/javascript">
    gantt.init("gantt_here");
  </script>
</body>
要查看效果,在项目文件夹下运行:
node server.js
然后在浏览器中打开 http://127.0.0.1:1337。你将看到如下空白的甘特图:

步骤 3. 准备数据库
接下来配置数据库。我们将创建一个简单的数据库,包含两个表:一个用于 tasks,一个用于 links:
CREATE TABLE `gantt_links` (
  `id` int(11) NOT NULL AUTO_INCREMENT,
  `source` int(11) NOT NULL,
  `target` int(11) NOT NULL,
  `type` varchar(1) NOT NULL,
  PRIMARY KEY (`id`)
);
CREATE TABLE `gantt_tasks` (
  `id` int(11) NOT NULL AUTO_INCREMENT,
  `text` varchar(255) NOT NULL,
  `start_date` datetime NOT NULL,
  `duration` int(11) NOT NULL,
  `progress` float NOT NULL,
  `parent` int(11) NOT NULL,
  PRIMARY KEY (`id`)
);
插入一些示例数据:
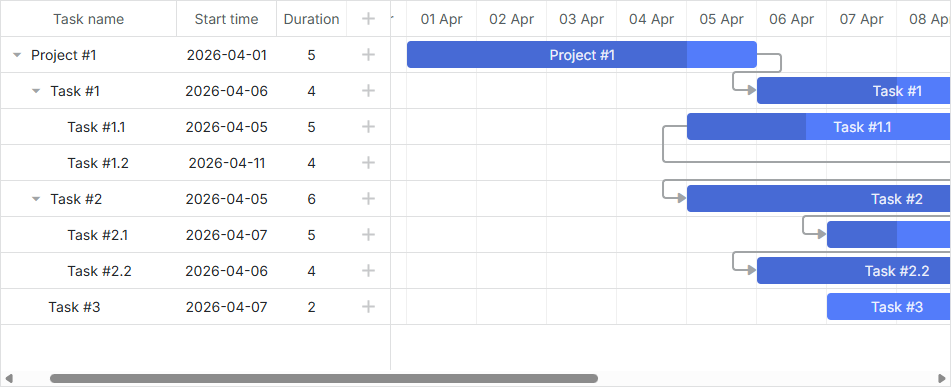
INSERT INTO `gantt_tasks` VALUES ('1', 'Project #1', '2017-04-01 00:00:00',
  '5', '0.8', '0');
INSERT INTO `gantt_tasks` VALUES ('2', 'Task #1', '2017-04-06 00:00:00',
  '4', '0.5', '1');
INSERT INTO `gantt_tasks` VALUES ('3', 'Task #2', '2017-04-05 00:00:00',
  '6', '0.7', '1');
INSERT INTO `gantt_tasks` VALUES ('4', 'Task #3', '2017-04-07 00:00:00',
  '2', '0', '1');
INSERT INTO `gantt_tasks` VALUES ('5', 'Task #1.1', '2017-04-05 00:00:00',
  '5', '0.34', '2');
INSERT INTO `gantt_tasks` VALUES ('6', 'Task #1.2', '2017-04-11 13:22:17',
  '4', '0.5', '2');
INSERT INTO `gantt_tasks` VALUES ('7', 'Task #2.1', '2017-04-07 00:00:00',
  '5', '0.2', '3');
INSERT INTO `gantt_tasks` VALUES ('8', 'Task #2.2', '2017-04-06 00:00:00',
  '4', '0.9', '3');
更多细节请�参考 此处示例。
步骤 4. 加载数据
现在开始设置数据加载。
由于我们使用 MySQL,需要安装访问数据库的相关模块。本教程在 CRUD 操作中使用 promise,因此我们选择 promise-mysql 作为 MySQL 的 promise 方案,以及 bluebird 作为 promise 库。
通过控制台安装它们,确保版本兼容:
npm install bluebird@3.7.2 --save
npm install promise-mysql@5.1.0 --save
npm install date-format-lite@17.7.0 --save
你也可以根据喜好使用其它模块,因为逻辑较为简单。
客户端需要的数据格式为 JSON 格式。因此,我们将创建一个返回该格式数据的路由。
由于 "start_date" 字段是日期对象,需要以正确格式发送给客户端。为此,我们使用 date-format-lite。
npm install date-format-lite --save
现在,更新 server.js,添加如下内容:
server.js
const express = require('express');
const bodyParser = require('body-parser');
const path = require('path');

const port = 1337;
const app = express();

app.use(express.static(path.join(__dirname, "public")));
app.use(bodyParser.urlencoded({ extended: true }));

app.listen(port, () =>{
    console.log("Server is running on port "+port+"...");
});

const Promise = require('bluebird');
require("date-format-lite");

const mysql = require('promise-mysql');
async function serverСonfig() {
    const db = await mysql.createPool({
        host: 'localhost',
        user: 'root',
        password: '',
        database: 'gantt_howto_node'
    });
    app.get("/data", (req, res) => {
        Promise.all([
            db.query("SELECT * FROM gantt_tasks"),
            db.query("SELECT * FROM gantt_links")
        ]).then(results => {
            let tasks = results[0],
                links = results[1];

            for (let i = 0; i < tasks.length; i++) {
              tasks[i].start_date = tasks[i].start_date.format("YYYY-MM-DD hh:mm:ss");
              tasks[i].open = true;
            }

            res.send({
                data: tasks,
                collections: { links: links }
            });

        }).catch(error => {
            sendResponse(res, "error", null, error);
        });
    });

    function sendResponse(res, action, tid, error) {

        if (action == "error")
            console.log(error);

        let result = {
            action: action
        };
        if (tid !== undefined && tid !== null)
            result.tid = tid;

        res.send(result);
    }
};
serverСonfig();
此代码的作用如下:
- 连接到 MySQL 数据库
- 定义 GET /data 路由,获取 tasks 和 links,格式化 start_date,并将数据发送给客户端
open 属性用于确保任务树默认展开。
现在,在客户端调用此路由:
public/index.html
gantt.config.date_format = "%Y-%m-%d %H:%i:%s";/*!*/

gantt.init("gantt_here");

gantt.load("/data");/*!*/
date_format 配置项用于告诉 gantt 如何解析来自服务端的日期格式。
再次运行应用并打开 http://127.0.0.1:1337。此时 gantt 应能显示数据库中的测试数据。

步骤 5. 保存更改
最后,设置数据保存功能。 即将客户端的更改发送回服务端。 打开 public/index.html 并添加 gantt.dataProcessor:
public/index.html
gantt.config.date_format = "%Y-%m-%d %H:%i:%s";

gantt.init("gantt_here");

gantt.load("/data");

const dp = new gantt.dataProcessor("/data");/*!*/
dp.init(gantt);/*!*/
dp.setTransactionMode("REST");/*!*/
下面将详细介绍其工作原理。
请求与响应
每当用户添加、修改或删除任务或链接时,DataProcessor 都会通过 AJAX 请求向相应的 URL 发送数据。该请求包含了将更改保存到数据库所需的所有参数。
由于 DataProcessor 以 REST 模式运行,因此它会根据操作类型使用不同的 HTTP 动词。你可以在 Server-Side Integration 文章中找到这些 HTTP 动词的列表及其请求和响应的详细信息。
接下来,我们需要在 server.js 文件中添加必要的路由和处理程序,用于将客户端的更改应用到数据库中。最终的代码如下:
server.js
// 添加新任务
app.post("/data/task", (req, res) => {
    let task = getTask(req.body);

    db.query("INSERT INTO gantt_tasks(text, start_date, duration, progress, parent)"
        + " VALUES (?,?,?,?,?)",
        [task.text, task.start_date, task.duration, task.progress, task.parent])
    .then(result => {
        sendResponse(res, "inserted", result.insertId);
    })
    .catch(error => {
        sendResponse(res, "error", null, error);
    });
});

// 更新任务
app.put("/data/task/:id", (req, res) => {
    let sid = req.params.id,
        task = getTask(req.body);

    db.query("UPDATE gantt_tasks SET text = ?, start_date = ?, "
        + "duration = ?, progress = ?, parent = ? WHERE id = ?",
        [task.text, task.start_date, task.duration, task.progress, task.parent, sid])
    .then(result => {
        sendResponse(res, "updated");
    })
    .catch(error => {
        sendResponse(res, "error", null, error);
    });
});


// 删除任务
app.delete("/data/task/:id", (req, res) => {
    let sid = req.params.id;
    db.query("DELETE FROM gantt_tasks WHERE id = ?", [sid])
    .then(result => {
        sendResponse(res, "deleted");
    })
    .catch(error => {
        sendResponse(res, "error", null, error);
    });
});

// 添加链接
app.post("/data/link", (req, res) => {
    let link = getLink(req.body);

    db.query("INSERT INTO gantt_links(source, target, type) VALUES (?,?,?)",
        [link.source, link.target, link.type])
    .then(result => {
        sendResponse(res, "inserted", result.insertId);
    })
    .catch(error => {
        sendResponse(res, "error", null, error);
    });
});

// 更新链接
app.put("/data/link/:id", (req, res) => {
    let sid = req.params.id,
        link = getLink(req.body);

    db.query("UPDATE gantt_links SET source = ?, target = ?, type = ? WHERE id = ?",
        [link.source, link.target, link.type, sid])
    .then(result => {
        sendResponse(res, "updated");
    })
    .catch(error => {
        sendResponse(res, "error", null, error);
    });
});

// 删除链接
app.delete("/data/link/:id", (req, res) => {
    let sid = req.params.id;
    db.query("DELETE FROM gantt_links WHERE id = ?", [sid])
    .then(result => {
        sendResponse(res, "deleted");
    })
    .catch(error => {
        sendResponse(res, "error", null, error);
    });
});


function getTask(data) {
    return {
        text: data.text,
        start_date: data.start_date.date("YYYY-MM-DD"),
        duration: data.duration,
        progress: data.progress || 0,
        parent: data.parent
    };
}

function getLink(data) {
    return {
        source: data.source,
        target: data.target,
        type: data.type
    };
}
在这里,我们为 tasks 实体和 links 实体分别创建了一组路由。"/data/task" URL 用于处理与任务相关的请求�,"/data/link" 用于处理与链接相关的请求。
请求类型说明如下:
- POST - 向数据库插入新项
- PUT - 更新现有记录
- DELETE - 删除项
响应为 JSON 对象,指示执行的操作类型,或者在出错时返回 "error"。
对于 POST 请求,响应还会包含新记录在数据库中的 ID。这有助于客户端将新项映射到数据库中的对应实体。
就是这样。打开 http://127.0.0.1:1337 即可看到一个完整可用的甘特图。
任务顺序的存储
客户端的 gantt 支持通过拖拽重新排序任务。如果启用该功能,顺序需要保存到数据库。你可以在这里找到相关概述。
下面我们为应用添加此功能。
在客户端启用任务排序
首先,用户需要能在界面中重新排序任务。打开 "Index" 视图并更新 gantt 配置:
public/index.html
gantt.config.order_branch = true;/*!*/
gantt.config.order_branch_free = true;/*!*/

gantt.init("gantt_here");
接下来,需要在后端反映这些更改。我们将在名为 "sortorder" 的列中存储顺序。更新后的 gantt_tasks 表结构如下:
CREATE TABLE `gantt_tasks` (
  `id` int(11) NOT NULL  AUTO_INCREMENT PRIMARY KEY,
  `text` varchar(255) COLLATE utf8_unicode_ci NOT NULL,
  `start_date` datetime NOT NULL,
  `duration` int(11) NOT NULL,
  `progress` float NOT NULL DEFAULT 0,
  `parent` int(11) NOT NULL,
  `sortorder` int(11) NOT NULL /*!*/
) ENGINE="InnoDB" DEFAULT CHARSET="utf8" COLLATE="utf8_unicode_ci;"
或者,你可以为现有表添加该列:
ALTER TABLE `gantt_tasks` ADD COLUMN `sortorder` int(11) NOT NULL;
然后,按如下方式更新 server.js 文件:
- GET /data 路由应返回按
sortorder列排序的任务:
server.js
app.get("/data", (req, res) => {
    Promise.all([
        db.query("SELECT * FROM gantt_tasks ORDER BY sortorder ASC"), /*!*/
        db.query("SELECT * FROM gantt_links")
    ]).then(results => {
        let tasks = results[0],
            links = results[1];

        for (let i = 0; i < tasks.length; i++) {
            tasks[i].start_date = tasks[i].start_date.format("YYYY-MM-DD hh:mm:ss");
            tasks[i].open = true;
        }

        res.send({
            data: tasks,
            collections: { links: links }
        });

    }).catch(error => {
        sendResponse(res, "error", null, error);
    });
});
- 添加新任务时,为
sortorder分配初始值:
server.js
app.post("/data/task", (req, res) => { // 向数据库添加新任务
    let task = getTask(req.body);

    db.query("SELECT MAX(sortorder) AS maxOrder FROM gantt_tasks")
    .then(result => { /*!*/
        // 为新任务分配最大的排序值
        let orderIndex = (result[0].maxOrder || 0) + 1; /*!*/
        return db.query("INSERT INTO gantt_tasks(text, start_date, duration,"
          + "progress, parent, sortorder) VALUES (?,?,?,?,?,?)",
          [task.text, task.start_date, task.duration, task.progress, task.parent,
            orderIndex]); /*!*/
    })
    .then(result => {
        sendResponse(res, "inserted", result.insertId);
    })
    .catch(error => {
        sendResponse(res, "error", null, error);
    });
});
- 最后,当任务顺序被调整时,相应地更新它们的顺序:
server.js
// 更新任务
app.put("/data/task/:id", (req, res) => {
  let sid = req.params.id,
    target = req.body.target,
    task = getTask(req.body);

  Promise.all([
    db.query("UPDATE gantt_tasks SET text = ?, start_date = ?,"
      + "duration = ?, progress = ?, parent = ? WHERE id = ?",
      [task.text, task.start_date, task.duration, task.progress,
        task.parent, sid]),
    updateOrder(sid, target) /*!*/
  ])
    .then(result => {
      sendResponse(res, "updated");
    })
    .catch(error => {
      sendResponse(res, "error", null, error);
    });
});

function updateOrder(taskId, target) {
  let nextTask = false;
  let targetOrder;

  target = target || "";

  if (target.startsWith("next:")) {
    target = target.substr("next:".length);
    nextTask = true;
  }

  return db.query("SELECT * FROM gantt_tasks WHERE id = ?", [target])
    .then(result => {
      if (!result[0])
        return Promise.resolve();

      targetOrder = result[0].sortorder;
      if (nextTask)
        targetOrder++;

      return db.query("UPDATE gantt_tasks SET sortorder"+
        " = sortorder + 1 WHERE sortorder >= ?", [targetOrder])
      .then(result => {
        return db.query("UPDATE gantt_tasks SET sortorder = ? WHERE id = ?",
          [targetOrder, taskId]);
      });
    });
}
已完成的演示可在 GitHub 上查看:https://github.com/DHTMLX/gantt-howto-node。
应用安全
Gantt 本身不提供防护 SQL 注入、XSS 或 CSRF 攻击等威胁的机制。确保应用安全是后端开发者的责任。更多细节可参见本文。
故障排查
如果你已按照所有步骤将 Gantt 集成到 Node.js,但页面上未显示任务和链接,请参阅 백엔드 통합 문제 해결 文章。该文档提供了识别和解决常见问题的指导。
后续内容
此时,甘特图已具备完整功能。完整代码可在 GitHub 获取,你可以克隆或下载用于项目开发。
你还可以进一步阅读涵盖各种甘特功能的指南,或查阅关于与其他后端框架集成 Gantt 的教程。