dhtmlxGantt와 Vue.js 연동하기
이 가이드는 Vue의 기본 개념과 패턴을 이해하고 있다고 가정합니다. Vue가 처음이라면 Vue 3 공식 문서를 참고하여 빠르게 시작해 보세요.
DHTMLX Gantt는 Vue와 잘 호환됩니다. 관련 예제는 GitHub에서 확인할 수 있습니다: DHTMLX Gantt with Vue Demo.
프로젝트 생성
새 프로젝트를 시작하기 전에 Node.js가 설치되어 있는지 확인하세요.
Vue 프로젝트를 생성하려면 다음 명령어를 실행하세요:
npm create vue@latest이 명령어는 공식 Vue 프로젝트 생성 도구인 create-vue를 설치하고 실행합니다. 자세한 내용은 Vue.js 빠른 시작에서 확인할 수 있습니다.
의존성 설치
다음으로, 앱 디렉터리로 이동하세요. 프로젝트 이름은 gantt-vue로 하겠습니다:
cd gantt-vue패키지 매니저를 사용하여 의존성을 설치하고 개발 서버를 실행하세요:
- yarn 사용 시:
yarn install
yarn dev
- npm 사용 시:
npm install
npm run dev
이제 Vue 프로젝트가 http://localhost:5173에서 실행됩니다.

Gantt 생성
DHTMLX Gantt를 프로젝트에 추가하려면, 먼저 터미널에서 Ctrl+C를 눌러 실행 중인 앱을 중지하세요. 그 다음 Gantt 패키지를 설치합니다.
1단계. 패키지 설치
라이브러리의 PRO 버전은 당사 프라이빗 저장소에서 npm/yarn을 통해 설치할 수 있습니다. 접근 방법은 이 안내서를 참고하세요.
Evaluation 버전을 받았다면, 아래 명령어 중 하나로 설치하세요:
- npm 사용 시:
npm install @dhx/trial-gantt
- yarn 사용 시:
yarn add @dhx/trial-gantt
또는, 라이브러리 zip 패키지는 npm 모듈 구조이므로 로컬 폴더에서 설치할 수도 있습니다.
2단계. 컴포넌트 생성
Gantt를 앱에 임베드하기 위해 Vue 컴포넌트를 만듭니다. src/components/ 디렉터리에 Gantt.vue 파일을 추가하세요.
소스 파일 임포트
Gantt.vue를 열고 Gantt 소스 파일을 임포트합니다. 설치 방식에 따라 임포트 경로가 다릅니다:
- 로컬 폴더에서 설치했다면:
Gantt.vue
import { Gantt} from "dhtmlx-gantt";
import "dhtmlx-gantt/codebase/dhtmlxgantt.css";
- trial 버전을 설치했다면:
Gantt.vue
import { Gantt} from "@dhx/trial-gantt";
import "@dhx/trial-gantt/codebase/dhtmlxgantt.css";
이 가이드에서는 trial 버전을 사용합니다.
컨테이너 지정 및 Gantt 추가
Gantt를 페이지에 렌더링하려면 컨테이너 요소를 지정해야 합니다. 예시는 다음과 같습니다:
Gantt.vue
<script>import { Gantt } from "@dhx/trial-gantt";
import "@dhx/trial-gantt/codebase/dhtmlxgantt.css";
export default {
mounted() {
let gantt = Gantt.getGanttInstance();
gantt.init(this.$refs.cont);
this.gantt = gantt;
},
unmounted() {
this.gantt.destructor();
this.$refs.cont.innerHTML = "";
},
};
</script>
<template>
<div ref="cont" style="width: 100%; height: 100%"></div>
</template>
Gantt 컨테이너가 전체 body를 채우게 하려면 src/assets의 main.css에서 기본 스타일을 제거하고 다음을 추가하세요:
src/assets/main.css
body, #app {
  margin: 0;
  padding: 0;
  height: 100vh;
  width: 100%;
}
3단계. 앱에 Gantt 추가
다음으로, Gantt 컴포넌트를 앱에 포함시킵니다. src/App.vue를 열고 기본 내용을 다음으로 교체하세요:
src/App.vue
<script>import Gantt from "./components/Gantt.vue";
export default {
components: { Gantt }
};
</script>
<template>
<Gantt/>
</template>
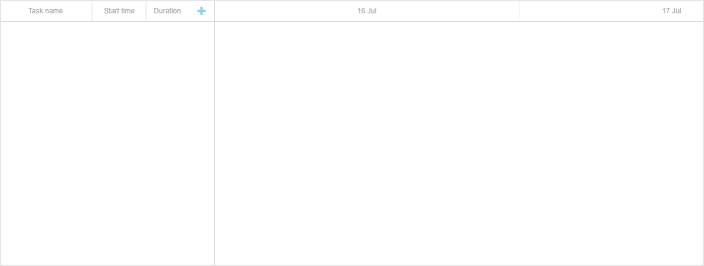
앱을 실행하면 빈 Gantt가 표시됩니다:

4단계. 데이터 제공
Gantt에 태스크를 표시하려면 데이터셋을 제공해야 합니다. src/ 디렉터리에 data.js 파일을 만들고 아래 데이터를 입력하세요:
src/data.js
export function getData() {
  const tasks = {
    data: [
      {
        id: "10",
        text: "Project #1",
        start_date: "01-04-2025",
        duration: 3,
        order: 10,
        progress: 0.4,
        open: true,
      },
      {
        id: "1",
        text: "Task #1",
        start_date: "01-04-2025",
        duration: 1,
        order: 10,
        progress: 0.6,
        parent: "10",
      },
      {
        id: "2",
        text: "Task #2",
        start_date: "02-04-2025",
        duration: 2,
        order: 20,
        progress: 0.6,
        parent: "10",
      },
    ],
    links: [{ id: 1, source: 1, target: 2, type: "0" }],
  };
  return tasks;
}
이 데이터를 App.vue에서 Gantt 컴포넌트의 props로 전달하세요:
App.vue
<script>import Gantt from "./components/Gantt.vue";
import { getData } from "./data";
export default {
components: { Gantt },
data() {
return {
tasks: getData(),
};
},
};
</script>
<template>
<Gantt :tasks="tasks" />
</template>
그리고 Gantt 컴포넌트에서 gantt.parse()로 이 props를 사용하세요:
Gantt.vue
<script>import { Gantt } from "@dhx/trial-gantt";
import "@dhx/trial-gantt/codebase/dhtmlxgantt.css";
export default {
props: ["tasks"],
mounted() {
let gantt = Gantt.getGanttInstance();
gantt.init(this.$refs.cont);
gantt.parse(this.tasks);
this.gantt = gantt;
},
unmounted() {
this.gantt.destructor();
this.$refs.cont.innerHTML = "";
},
};
</script>
<template>
<div ref="cont" style="width: 100%; height: 100%"></div>
</template>
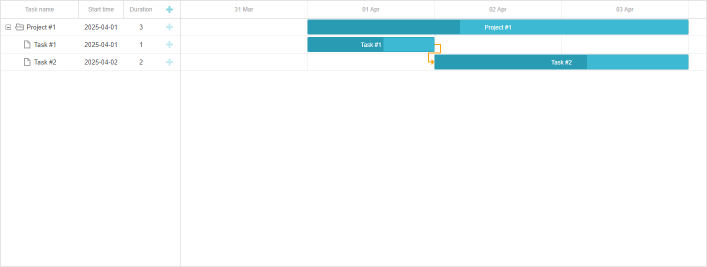
앱 페이지를 새로고침하면 태스크가 표시된 Gantt를 볼 수 있습니다:

5단계. 데이터 저장
Gantt에서 변경된 내용을 추적하려면, 백엔드와의 통신을 관리하는 dataProcessor 핸들러를 사용하세요. 이 핸들러는 함수 또는 라우터 객체가 될 수 있습니다. dhtmlxGantt는 핸들러에서 Promise 반환을 지원하므로, 작업 완료 시점을 정확히 처리할 수 있습니다.
createDataProcessor()로 DataProcessor를 생성하고 변경 사항을 다음과 같이 감지할 수 있습니다:
gantt.createDataProcessor(function(entity, action, data, id) {
gantt.message(`${entity} ${action}`);
});
백엔드에서 새로운 레코드를 생성할 때 태스크 ID가 변경되는 경우(많은 시스템에서 일반적임), Promise에서 {id: databaseId} 또는 {tid: databaseId} 객체를 반환해야 합니다. 이를 통해 Gantt가 새 데이터베이스 ID로 레코드를 갱신할 수 있습니다. 자세한 내용은 server side integration을 참고하세요.
이로써 Vue Gantt 설정이 완료됩니다. 전체 데모는 GitHub에서 확인할 수 있습니다: https://github.com/DHTMLX/vue-gantt-demo.
XSS, CSRF 및 SQL Injection 공격
Gantt 자체는 SQL 인젝션, XSS, CSRF와 같은 위협에 대한 보호 기능을 제공하지 않습니다. 애플리케이션의 보안은 백엔드 개발자의 책임입니다.
일반적인 취약점과 앱 보안 강화 방법은 Application Security 문서를 참고하세요.
Back to top