dhtmlxGantt와 Angular 연동하기
이 가이드는 Angular의 기본 개념과 패턴에 대한 이해를 전제로 합니다. 복습이 필요하다면 Angular 공식 문서에서 시작 가이드를 참고하세요.
DHTMLX Gantt는 Angular와 원활하게 연동됩니다. 관련 예제는 GitHub에서 확인할 수 있습니다: DHTMLX Gantt with Angular Demo.
프로젝트 생성
새 프로젝트를 만들기 전에 Angular CLI와 Node.js가 설치되어 있는지 확인하세요.
ng new my-angular-gantt-app
이 명령어는 필요한 도구와 의존성을 모두 설정해 주므로 추가 설치 명령은 필요하지 않습니다.
의존성 설치
다음으로 앱 디렉토리로 이동하세요:
cd my-angular-gantt-app
아래 명령어 중 하나로 앱을 실행할 수 있습니다:
yarn start
또는
npm start
앱은 이제 http://localhost:4200에서 접속할 수 있습니다.
Gantt 생성
다음 단계는 DHTMLX Gantt 코드를 가져오는 것입니다. 먼저 Ctrl+C로 앱 실행을 중지한 후, Gantt 패키지를 설치하세요.
1단계. 패키지 설치
라이브러리의 PRO 버전은 npm/yarn을 통해 당사 프라이빗 저장소에서 제공합니다. 액세스 방법은 이 안내를 참고하세요.
Gantt 평가판을 받았다면, 다음 명령어 중 하나로 설치하세요:
- npm 사용 시:
npm install @dhx/trial-gantt
- yarn 사용 시:
yarn add @dhx/trial-gantt
또는, zip 패키지는 npm 모듈 구조이므로 로컬 폴더에서 설치도 가능합니다.
2단계. 컴포넌트 생성
Gantt를 애플리케이션에 통합할 컴포넌트를 만듭니다. src/app/ 디렉토리 안에 gantt 폴더를 만들고, gantt.component.ts와 gantt.component.css 파일을 추가하세요.
소스 파일 가져오기
gantt.component.ts를 열고 Gantt 소스 파일을 가져오세요. 설치 방식에 따라 import 경로가 달라집니다:
- 로컬 폴더에서 설치한 경우:
gantt.component.ts
import { Gantt } from 'dhtmlx-gantt';
gantt.component.css
@import "@dhtmlx-gantt/codebase/dhtmlxgantt.css";
- trial 버전을 사용하는 경우:
gantt.component.ts
import { Gantt } from '@dhx/trial-gantt';
gantt.component.css
@import "@dhx/trial-gantt/codebase/dhtmlxgantt.css";
이 튜토리얼에서는 trial 버전을 사용합니다.
gantt.component.ts 파일은 Gantt 컴포넌트의 템플릿 역할을 합니다. 다음 코드를 추가하세요:
gantt.component.ts
import { Component, ElementRef, OnInit,
    ViewChild, ViewEncapsulation } from '@angular/core';
import { Gantt, GanttStatic } from "@dhx/trial-gantt";

@Component({
    encapsulation: ViewEncapsulation.None,
    selector: 'gantt',
    styleUrls: ['./gantt.component.css'],
    template: `<div #gantt_here class='gantt-chart'></div>`,
})
export class GanttComponent implements OnInit {
    @ViewChild('gantt_here', { static: true }) ganttContainer!: ElementRef;
    private _gantt?: GanttStatic;

    ngOnInit() {
        let gantt = Gantt.getGanttInstance();
        gantt.init(this.ganttContainer.nativeElement);

        this._gantt = gantt;
    }
    ngOnDestroy() {
        if (this._gantt) this._gantt.destructor();
    }
}
여기서 ngOnInit() 메서드는 Gantt를 초기화하며, ngOnDestroy()는 컴포넌트가 제거될 때 gantt.destructor()를 호출하여 정리 작업을 수행합니다.
Gantt 스타일은 gantt.component.css에 작성합니다. 기본 스타일 예시는 다음과 같습니다:
gantt.component.css
@import "@dhx/trial-gantt/codebase/dhtmlxgantt.css";
.gantt-chart {
    position: relative;
    width: 100%;
    height: 600px;
}
3단계. Gantt를 앱에 추가
다음으로, Gantt 컴포넌트를 앱에 포함시킵니다. src/app/app.component.ts를 열고 기본 내용을 아래와 같이 교체하세요:
src/app/app.component.ts
import { Component } from '@angular/core';

@Component({
  selector: 'app-root',
  templateUrl: './app.component.html',
  styleUrls: ['./app.component.css']
})
export class AppComponent {
  title = 'DHTMLX Gantt with Angular';
}
src/app/에 app.module.ts를 생성하고 GanttComponent를 포함시키세요:
src/app/app.module.ts
import { NgModule } from "@angular/core";
import { BrowserModule } from "@angular/platform-browser";

import { AppComponent } from "./app.component";
import { GanttComponent } from './gantt/gantt.component';

@NgModule({
  declarations: [AppComponent, GanttComponent],
  imports: [BrowserModule],
  providers: [],
  bootstrap: [AppComponent],
})
export class AppModule {}
src/app/app.component.html의 기본 내용을 아래로 교체하세요:
src/app/app.component.html
<gantt></gantt>
마지막으로 src/main.ts의 내용을 다음과 같이 변경하세요:
src/main.ts
import { platformBrowserDynamic } from "@angular/platform-browser-dynamic";
import { AppModule } from "./app/app.module";

platformBrowserDynamic()
  .bootstrapModule(AppModule)
  .catch((err) => console.error(err));
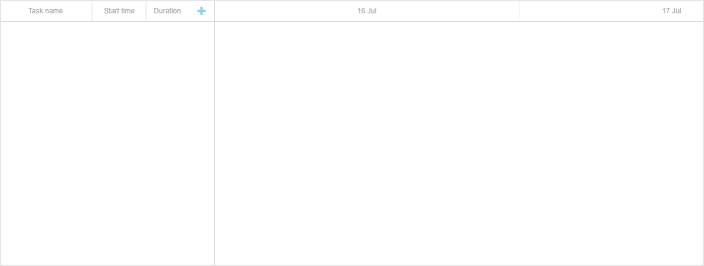
앱을 실행하면 빈 Gantt 차트가 표시됩니다:
4단계. 데이터 제공
Angular Gantt에 데이터를 로드하려면 task와 link 서비스를 추가해야 합니다. 그 전에 task와 link 모델을 정의하세요.
아래 명령어로 task와 link 모델을 생성합니다:
ng generate class models/task --skip-tests
ng generate class models/link --skip-tests
models/task.ts 파일에 다음 내용을 추가하세요:
models/task.ts
export class Task {
    id!: number;
    start_date!: string;
    text!: string;
    progress!: number;
    duration!: number;
    parent!: number;
}
models/link.ts 파일에는 다음을 추가하세요:
models/link.ts
export class Link {
     id!: number;
    source!: number;
    target!: number;
    type!: string;
}
다음으로 task와 link 서비스를 생성합니다. Angular의 서비스는 특정 작업이나 기능을 처리하는 클래스이며, 필요한 곳에 주입할 수 있습니다.
서비스는 다음 명령어로 생성하세요:
ng generate service services/task --flat --skip-tests
ng generate service services/link --flat --skip-tests
services/task.service.ts 파일에 다음 코드를 추가하세요:
services/task.service.ts
import { Injectable } from '@angular/core';
import { Task } from '../models/task';

@Injectable()
export class TaskService {
    get(): Promise<Task[]>{
        return Promise.resolve([
            { id: 1, text: 'Task #1', start_date: '2023-04-15 00:00',
                duration: 3, progress: 0.6, parent: 0 },
            { id: 2, text: 'Task #2', start_date: '2023-04-18 00:00',
                duration: 3, progress: 0.4, parent: 0 }
        ]);
    }
}
services/link.service.ts 파일에는 다음을 추가하세요:
services/link.service.ts
import { Injectable } from '@angular/core';
import { Link } from '../models/link';

@Injectable()
export class LinkService {
    get(): Promise<Link[]> {
        return Promise.resolve([
            { id: 1, source: 1, target: 2, type: '0' }
        ]);
    }
}
@Injectable() 데코레이터는 Angular의 의존성 주입 시스템이 해당 서비스를 인스턴스화할 수 있게 해줍니다. get() 메서드는 현재 하드코딩된 데이터를 Promise로 반환하지만, 서버에서 데이터를 가져오도록 수정할 수도 있습니다.
이제 Gantt 컴포넌트에서 이 서비스들을 사용하려면 gantt.component.ts에서 import 하세요:
gantt.component.ts
import {TaskService} from "../services/task.service";
import {LinkService} from "../services/link.service";
@Component 데코레이터의 providers에 서비스를 추가하세요:
gantt.component.ts
@Component({
    encapsulation: ViewEncapsulation.None,
    selector: 'gantt',
    styleUrls: ['./gantt.component.css'],
    providers: [TaskService, LinkService],
    template: `<div #gantt_here class='gantt-chart'></div>`,
})
이렇게 하면 GanttComponent가 생성될 때마다 각 서비스의 새 인스턴스가 생성됩니다.
생성자에 서비스를 주입하는 코드를 추가하세요:
gantt.component.ts
constructor(private taskService: TaskService, private linkService: LinkService) { }
ngOnInit()를 업데이트해서 날짜 포맷을 설정하고, Gantt를 초기화한 후 서비스에서 데이터를 불러오세요:
gantt.component.ts
let gantt = Gantt.getGanttInstance();
gantt.config.date_format = '%Y-%m-%d %H:%i';
gantt.init(this.ganttContainer.nativeElement);

Promise.all([this.taskService.get(), this.linkService.get()])
    .then( ([data, links]) => {
        gantt.parse({ data, links });
    });
this._gantt = gantt;
gantt.component.ts 전체 코드는 아래와 같습니다:
gantt.component.ts
import { Component, ElementRef, OnInit,
    ViewChild, ViewEncapsulation } from '@angular/core';
import { TaskService } from '../services/task.service';
import { LinkService } from '../services/link.service';
import { Gantt, GanttStatic } from "@dhx/trial-gantt";

@Component({
    encapsulation: ViewEncapsulation.None,
    selector: 'gantt',
    styleUrls: ['./gantt.component.css'],
    providers: [TaskService, LinkService],
    template: `<div #gantt_here class='gantt-chart'></div>`,
})
export class GanttComponent implements OnInit {
    @ViewChild('gantt_here', { static: true }) ganttContainer!: ElementRef;
    private _gantt?: GanttStatic;
    constructor(private taskService: TaskService, private linkService: LinkService) { }

    ngOnInit() {
        let gantt = Gantt.getGanttInstance();
        gantt.config.date_format = '%Y-%m-%d %H:%i';
        gantt.init(this.ganttContainer.nativeElement);
        Promise.all([this.taskService.get(), this.linkService.get()])
            .then(([data, links]) => {
                gantt.parse({ data, links });
            });
        this._gantt = gantt;
    }
    ngOnDestroy() {
        if (this._gantt) this._gantt.destructor();
    }
}
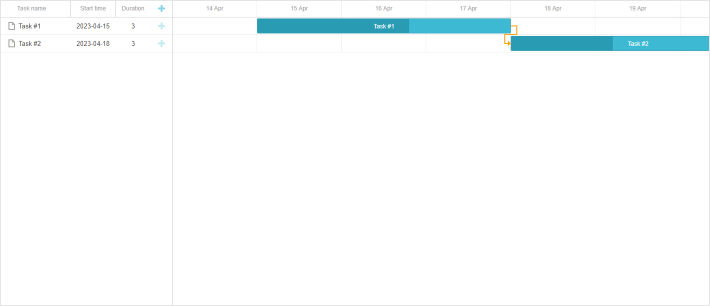
이제 앱을 새로고침하면 작업이 채워진 Gantt 차트가 나타납니다:
5단계. 데이터 저장
Gantt에서 변경 사항을 추적하려면 dataProcessor 핸들러를 사용할 수 있습니다. 이 핸들러를 통해 서버와 통신할 수 있으며, 함수나 라우터 객체로 설정할 수 있습니다. dhtmlxGantt는 핸들러에서 Promise를 반환하는 것도 지원하여, 작업 완료 시점을 적절히 처리할 수 있습니다.
createDataProcessor() API 메서드를 사용해 DataProcessor를 생성하고 다음과 같이 변경 사항을 감지할 수 있습니다:
gantt.createDataProcessor(function(entity, action, data, id) {
gantt.message(`${entity} ${action}`);
});
서비스에서 새 레코드를 추가한 후 task id를 수정하는 경우(일반적임), Promise가 {id: databaseId} 또는 {tid: databaseId} 객체를 반환하도록 해야 합니다. 이렇게 하면 Gantt가 새 데이터베이스 id로 레코드를 업데이트할 수 있습니다. 자세한 내용은 서버 사이드 정보를 참고하세요.
이제 Angular Gantt가 모두 준비되었습니다. GitHub의 전체 데모를 참고해 더 다양한 기능을 확인해보세요.
XSS, CSRF 및 SQL 인젝션 공격
Gantt 자체는 SQL 인젝션, XSS, CSRF와 같은 보안 위협에 대한 보호 기능을 제공하지 않습니다. 애플리케이션의 보안은 백엔드 개발자의 책임입니다.
구성 요소의 취약 지점과 애플리케이션 보안을 강화할 수 있는 방법은 Application Security 문서를 참고하세요.
Back to top