dhtmlxGantt 与 PHP:Slim
本教程将为您提供所有必要步骤,使用 Slim 4 框架和服务器端的 RESTful API 构建基于 PHP 的甘特图。
本教程使用 Slim Framework v4.x。如果您正在使用旧版本,请参考 Slim Framework v3.x 指南。
此外,我们还提供了与其他平台和框架集成的教程:
- dhtmlxGantt와 ASP.NET Core 사용하기
- dhtmlxGantt와 ASP.NET MVC
- dhtmlxGantt와 Node.js 연��동하기
- dhtmlxGantt와 Python
- dhtmlxGantt와 PHP: Laravel 연동
- dhtmlxGantt와 Salesforce LWC 연동하기
- dhtmlxGantt와 Ruby on Rails 연동하기
在本指南中,将使用 Slim 4 框架进行路由,MySQL 作为数据存储。CRUD 操作通过 PDO 实现,并设计得足够灵活,可适配其他框架。
完整源代码可在 GitHub 获取。
步骤 1. 初始化项目
创建项目
我们将从使用为 Slim 4 提供的 skeleton application 开始。
首先,导入项目并使用 Composer 安装依赖:
php composer.phar create-project slim/slim-skeleton gantt-rest-php
如果您的系统已全局安装 Composer,可以运行:
composer create-project slim/slim-skeleton gantt-rest-php
接下来,进入项目文件夹并启动 web 服务器,验证设置是否正确:
cd gantt-rest-php
php -S 0.0.0.0:8080 -t public public/index.php
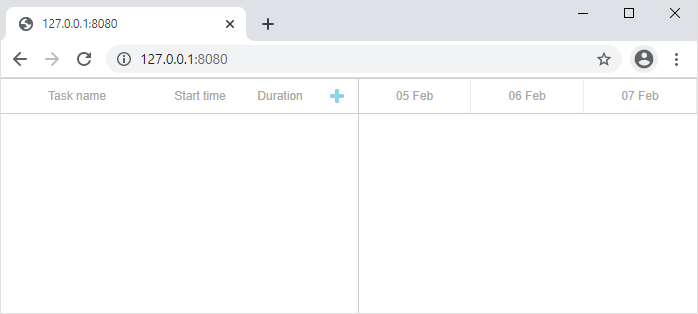
然后,在浏览器中打开 http://127.0.0.1:8080,即可看到 Slim 的默认欢迎页面。
步骤 2. 在页面中添加 Gantt
下一步是创建一个显示甘特图的页面。这将分为两个简单的步骤完成。
创建视图
首先,在 app/templates 文件夹中创建一个名为 basic.html 的文件。该文件将用于显示甘特图,并包含加载数据所需的基本设置。
完整代码如下:
app/templates/basic.html
<!DOCTYPE html>
<html>
<head>
  <meta http-equiv="Content-type" content="text/html; charSet="utf-8"">

  <script src="https://cdn.dhtmlx.com/gantt/edge/dhtmlxgantt.js"></script>
  <link href="https://cdn.dhtmlx.com/gantt/edge/dhtmlxgantt.css" rel="stylesheet">

  <style type="text/css">
    html, body{
      height:100%;
      padding:0px;
      margin:0px;
      overflow: hidden;
    }
  </style>
</head>
<body>
  <div id="gantt_here" style='width:100%; height:100%;'></div>
  <script type="text/javascript">
    gantt.init("gantt_here");
  </script>
</body>
</html>
这样便在��页面上创建了一个空的甘特图。用户可以创建和修改任务及链接,但刷新页面后更改不会被保存。
设置路由
新页面准备好后,需要通过浏览器访问。请在 app/routes.php 中添加如下路由:
app/routes.php
$app->get('/', function (Request $request, Response $response) {
$payload = file_get_contents(__DIR__.'/templates/basic.html');
$response->getBody()->write($payload);
return $response;
});
使用以下命令重启应用程序:
command line
php -S 0.0.0.0:8080 -t public public/index.php
现在,在浏览器访问 http://127.0.0.1:8080/,即可在页面上显示甘特图。
步骤 3. 配置数据库
甘特图页面显示后,下一步是创建数据库并将其连接到应用程序。
创建数据库
可以使用任何常用的 MySQL 客户端(如 phpMyAdmin)或直接通过命令行来创建数据库。下面提供了一个 SQL 脚本,用于创建包含两个数据表的简单数据库。
CREATE DATABASE  IF NOT EXISTS `gantt`;
USE `gantt`;

CREATE TABLE `gantt_links` (
  `id` int(11) NOT NULL AUTO_INCREMENT,
  `source` int(11) NOT NULL,
  `target` int(11) NOT NULL,
  `type` varchar(1) NOT NULL,
  PRIMARY KEY (`id`)
);
CREATE TABLE `gantt_tasks` (
  `id` int(11) NOT NULL AUTO_INCREMENT,
  `text` varchar(255) NOT NULL,
  `start_date` datetime NOT NULL,
  `duration` int(11) NOT NULL,
  `progress` float NOT NULL,
  `parent` int(11) NOT NULL,
  PRIMARY KEY (`id`)
);
数据库创建完成后,可以向 gantt_tasks 表中插入一些示例数据用于测试。请使用如下 SQL 命令:
INSERT INTO `gantt_tasks` VALUES ('1', 'Project #1', '2020-03-31 00:00:00',
  '4', '0.8', '0');
INSERT INTO `gantt_tasks` VALUES ('2', 'Task #1', '2020-03-31 00:00:00',
  '3', '0.5', '1');
INSERT INTO `gantt_tasks` VALUES ('3', 'Task #2', '2020-04-01 00:00:00',
  '2', '0.7', '1');
INSERT INTO `gantt_tasks` VALUES ('4', 'Task #3', '2020-04-02 00:00:00',
  '2', '0', '1');
INSERT INTO `gantt_tasks` VALUES ('5', 'Task #1.1', '2020-04-03 00:00:00',
  '3', '0.34', '2');
INSERT INTO `gantt_tasks` VALUES ('6', 'Task #1.2', '2020-04-03 13:22:17',
  '2', '0.5', '2');
INSERT INTO `gantt_tasks` VALUES ('7', 'Task #2.1', '2020-04-04 00:00:00',
  '3', '0.2', '3');
INSERT INTO `gantt_tasks` VALUES ('8', 'Task #2.2', '2020-04-05 00:00:00',
  '2', '0.9', '3');
如需更详细的示例,请参阅此处。
项目配置完成后,下一步是加载数据。
步骤 4. 加载数据
现在需要配置从数据库加载数据。在客户端,数据将通过 gantt.load 方法请求:
app/templates/basic.html
gantt.config.date_format = "%Y-%m-%d %H:%i:%s";/*!*/

gantt.init("gantt_here");
gantt.load("/data");/*!*/
该命令会向指定的 URL 发送 AJAX 请求,期望返回的数据为 JSON 格式。
同时,请注意指定的 date_format 值。这会告知 gantt 当前数据源所用的日期格式,以便客户端正确解析日期。
接下来,需要为该请求添加后端处理程序。打开 app/routes.php 文件,添加一个新的 路由:
app/routes.php
$app->get('/data', 'getGanttData');
随后,需要实现 getGanttData 函数。为了保持 index.php 的整洁,所有 gantt 相关的代码将放在独立文件中。
新建文件 app/gantt.php,并添加如下代码:
app/gantt.php
<?php

function getConnection()
{
    return new PDO("mysql:host=localhost;dbname=gantt", "root", "root",
    // "host" - 主机名,
    // "dbname" - 数据库名
    // "root" - 用户名
    // "root" - 密码
    [
      PDO::ATTR_ERRMODE => PDO::ERRMODE_EXCEPTION,
      PDO::ATTR_DEFAULT_FETCH_MODE => PDO::FETCH_ASSOC
    ]);
}

function getGanttData($request, $response, $args) {
  $db = getConnection();
  $result = [
    "data"=> [],
    "links"=> []
  ];

  foreach($db->query("SELECT * FROM gantt_tasks") as $row){
    $row["open"] = true;
    array_push($result["data"], $row);
  }

  foreach ($db->query("SELECT * FROM gantt_links") as $link){
    array_push($result["links"], $link);
  }

  $payload = json_encode($result);

  $response->getBody()->write($payload);
  return $response->withHeader("Content-Type", "application/json");
};
然后在 app/routes.php 中引入 app/gantt.php:
app/routes.php
<?php
declare(strict_types="1);"

use AppApplicationActionsUserListUsersAction;
use AppApplicationActionsUserViewUserAction;
use PsrHttpMessageResponseInterface as Response;
use PsrHttpMessageServerRequestInterface as Request;
use SlimApp;
use SlimInterfacesRouteCollectorProxyInterface as Group;

// 添加 dhtmlxGantt CRUD
require __DIR__ . "/gantt.php";

return function (App $app) {
    $app->get("/", function (Request $request, Response $response) {
        $payload = file_get_contents(__DIR__."/templates/basic.html");
        $response->getBody()->write($payload);
        return $response;
    });

    $app->get("/data",  "getGanttData");

    $app->group("/users", function (Group $group) {
        $group->get("", ListUsersAction::class);
        $group->get("/{id}", ViewUserAction::class);
    });
};
上面代码的主要内容如下:
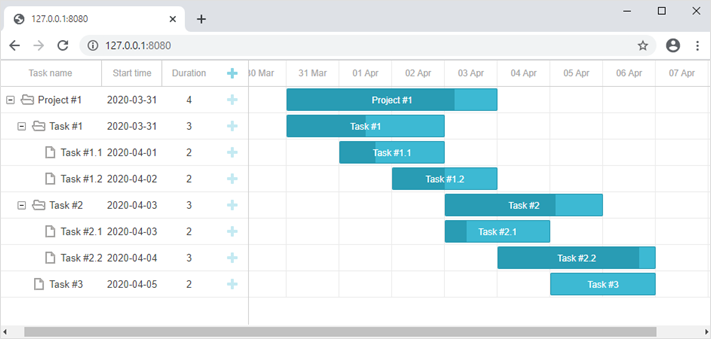
至此,Gantt 的数据加载功能已实现。打开 http://127.0.0.1:8080/ 即可看到填充了示例数据的甘特图。
步骤 5. 保存更改
下一步是在客户端将所做更改保存回服务器。通常,这通过 gantt 内置的 dataProcessor 库实现。
打开 basic.html 并添加如下代码:
app/templates/basic.html
gantt.config.date_format = "%Y-%m-%d %H:%i:%s";

gantt.init("gantt_here");
gantt.load("/data");

var dp = new gantt.dataProcessor("/data");/*!*/
dp.init(gantt);/*!*/
dp.setTransactionMode("REST");/*!*/
dataProcessor 会监听客户端的添加、修改或删除等操作,并发送相应的 AJAX 请求到服务器。它以 REST 模式工作,对不同操作使用不同的 HTTP 方法。完整的路由列表可查阅相关文档。
接下来需要在应用中添加这些路由并实现对应逻辑。首先,更新 app/routes.php:
app/routes.php
<?php

declare(strict_types="1);"

use AppApplicationActionsUserListUsersAction;
use AppApplicationActionsUserViewUserAction;
use PsrHttpMessageResponseInterface as Response;
use PsrHttpMessageServerRequestInterface as Request;
use SlimApp;
use SlimInterfacesRouteCollectorProxyInterface as Group;

// 添加 dhtmlxGantt CRUD
require __DIR__ . "/gantt.php";

return function (App $app) {
    $app->get("/", function (Request $request, Response $response) {
        $payload = file_get_contents(__DIR__."/templates/basic.html");
        $response->getBody()->write($payload);
        return $response;
    });

    $app->get("/data",  "getGanttData");

    $app->post("/data/task", "addTask");
    $app->put("/data/task/{id}", "updateTask");
    $app->delete("/data/task/{id}", "deleteTask");

    $app->post("/data/link", "addLink");
    $app->put("/data/link/{id}", "updateLink");
    $app->delete("/data/link/{id}", "deleteLink");
};
路由添加好后,可以实现对应的方法:
app/gantt.php
function getConnection()
{
    return new PDO("mysql:host=localhost;dbname=gantt", "root", "root", [
        PDO::ATTR_ERRMODE => PDO::ERRMODE_EXCEPTION,
        PDO::ATTR_DEFAULT_FETCH_MODE => PDO::FETCH_ASSOC
    ]);
}

function getGanttData($request, $response, $args) {
  $db = getConnection();
  $result = [
    "data"=> [],
    "links"=> []
  ];

  foreach($db->query("SELECT * FROM gantt_tasks") as $row){
    $row["open"] = true;
    array_push($result["data"], $row);
  }

  foreach ($db->query("SELECT * FROM gantt_links") as $link){
    array_push($result["links"], $link);
  }
  $payload = json_encode($result);

  $response->getBody()->write($payload);
  return $response->withHeader("Content-Type", "application/json");
};

// 从请求数据获取任务
function getTask($data)
{
  return [
    ":text" => $data["text"],
    ":start_date" => $data["start_date"],
    ":duration" => $data["duration"],
    ":progress" => isset($data["progress"]) ? $data["progress"] : 0,
    ":parent" => $data["parent"]
  ];
}

// 从请求数据获取链接
function getLink($data) {
  return [
    ":source" => $data["source"],
    ":target" => $data["target"],
    ":type" => $data["type"]
  ];
}

// 创建新任务
function addTask($request, $response, $args) {
  $task = getTask($request->getParsedBody());
  $db = getConnection();
  $query = "INSERT INTO gantt_tasks(text, start_date, duration, progress, parent) ".
    "VALUES (:text,:start_date,:duration,:progress,:parent)";
  $db->prepare($query)->execute($task);

  $result = [
    "action"=>"inserted",
    "tid"=> $db->lastInsertId()
  ];
  $payload = json_encode($result);

  $response->getBody()->write($payload);
  return $response->withHeader("Content-Type", "application/json");
}

// 更新任务
function updateTask($request, $response, $args) {
  $sid = $request->getAttribute("id");
  parse_str(file_get_contents("php://input"), $body);
  $task = [
      "text" => $body["text"],
      "start_date" => $body["start_date"],
      "duration" => $body["duration"],
      "progress" => $body["progress"],
      "parent" => $body["parent"]
  ];
  $db = getConnection();
  $query = "UPDATE gantt_tasks ".
    "SET text = :text, start_date = :start_date, duration = :duration,".
      "progress = :progress, parent = :parent ".
    "WHERE id = :sid";
  $db->prepare($query)->execute(array_merge($task, [":sid"=>$sid]));

  if (isset($body["target"]) && $body["target"])
  updateOrder($sid, $body["target"], $db);


  $result = [
    "action"=>"updated"
  ];
  $payload = json_encode($result);

  $response->getBody()->write($payload);
  return $response->withHeader("Content-Type", "application/json");
}

// 删除任务
function deleteTask($request, $response, $args) {
  $sid = $request->getAttribute("id");
  $db = getConnection();
  $query = "DELETE FROM gantt_tasks WHERE id = :sid";

  $db->prepare($query)->execute([":sid"=>$sid]);
  $result = [
    "action"=>"deleted"
  ];
  $payload = json_encode($result);

  $response->getBody()->write($payload);
  return $response->withHeader("Content-Type", "application/json");
}

// 创建新链接
function addLink($request, $response, $args) {
  $link = getLink($request->getParsedBody());
  $db = getConnection();
  $query = "INSERT INTO gantt_links(source, target, type) ".
    "VALUES (:source,:target,:type)";
  $db->prepare($query)->execute($link);

  $result = [
    "action"=>"inserted",
    "tid"=> $db->lastInsertId()
  ];
  $payload = json_encode($result);

  $response->getBody()->write($payload);
  return $response->withHeader("Content-Type", "application/json");
}

// 更新链接
function updateLink($request, $response, $args) {
  $sid = $request->getAttribute("id");
  parse_str(file_get_contents("php://input"), $body);
  $link = [
      "source" => $body["source"],
      "target" => $body["target"],
      "type" => $body["type"]
  ];
  $db = getConnection();
  $query = "UPDATE gantt_links SET ".
    "source = :source, target = :target, type = :type ".
    "WHERE id = :sid";

  $db->prepare($query)->execute(array_merge($link, [":sid"=>$sid]));
  $result = [
    "action"=>"updated"
  ];
  $payload = json_encode($result);

  $response->getBody()->write($payload);
  return $response->withHeader("Content-Type", "application/json");
}

// 删除链接
function deleteLink($request, $response, $args) {
  $sid = $request->getAttribute("id");
  $db = getConnection();
  $query = "DELETE FROM gantt_links WHERE id = :sid";

  $db->prepare($query)->execute([":sid"=>$sid]);
  $result = [
    "action"=>"deleted"
  ];
  $payload = json_encode($result);

  $response->getBody()->write($payload);
  return $response->withHeader("Content-Type", "application/json");
}
虽然代码较长,但每个方法都很直接:用于创建、更新和��删除任务或链接。插入操作会将新建项的数据库 ID 返回给客户端。
请注意,这里并未处理数据库关系,例如删除任务时不会自动删除其子任务或相关链接。默认情况下,这种行为由客户端处理,Gantt 会为每个子任务和链接分别发送删除请求。
如果需要在后端处理此逻辑,则需启用 cascade_delete 配置。
至此,应用已准备就绪。访问 http://127.0.0.1:8080 可看到完整功能的甘特图。

保存任务顺序
客户端 gantt 支持通过拖拽进行任务排序。如果启用此功能,任务顺序应保存到数据库。通用说明见此。
下一步可将该功能集成到应用中。
启用客户端任务排序功能
首先,用户需要能够在界面中直接重新排列任务。请打开 basic.html 文件,并按如下方式修改 gantt 配置:
app/templates/basic.html
gantt.config.order_branch = true;/*!*/
gantt.config.order_branch_free = true;/*!*/

gantt.init("gantt_here");
接下来,这些更改需要在后端进行同步。任务顺序将保存在名为 "sortorder" 的列中。以下是 gantt_tasks 表的定义示例:
CREATE TABLE `gantt_tasks` (
  `id` int(11) NOT NULL  AUTO_INCREMENT PRIMARY KEY,
  `text` varchar(255) COLLATE utf8_unicode_ci NOT NULL,
  `start_date` datetime NOT NULL,
  `duration` int(11) NOT NULL,
  `progress` float NOT NULL DEFAULT 0,
  `parent` int(11) NOT NULL,
  `sortorder` int(11) NOT NULL /*!*/
);
或者,如果你已经有了该表,可以通过如下方式添加新列:
ALTER TABLE `gantt_tasks` ADD COLUMN `sortorder` int(11) NOT NULL;
完成数据库更新后,需要相应地调整 app/gantt.php 文件中的 CRUD 操作。
- GET /data 接口应按照
sortorder列排序返回任务:
app/gantt.php
function getGanttData($request, $response, $args) {
  $db = getConnection();
  $result = [
    "data"=> [],
    "links"=> []
  ];

  foreach($db->query("SELECT * FROM gantt_tasks ORDER BY sortorder ASC") as $row){
    $row["open"] = true;
    array_push($result["data"], $row);
  }

  foreach ($db->query("SELECT * FROM gantt_links") as $link){
    array_push($result["links"], $link);
  }
  $payload = json_encode($result);

  $response->getBody()->write($payload);
  return $response->withHeader("Content-Type", "application/json");
};
- 添加新任务时,应为其分配初始的
sortorder值:
app/gantt.php
function addTask($request, $response, $args) {
  $task = getTask($request->getParsedBody());
  $db = getConnection();
  $maxOrderQuery = "SELECT MAX(sortorder) AS maxOrder FROM gantt_tasks";
  $statement = $db->prepare($maxOrderQuery);
  $statement->execute();

  $maxOrder = $statement->fetchColumn();
  if(!$maxOrder)
    $maxOrder = 0;

  $task[":sortorder"] = $maxOrder + 1;

  $query = "INSERT INTO gantt_tasks(text, start_date, duration, progress, parent, sortorder) ".
    "VALUES (:text, :start_date, :duration, :progress, :parent, :sortorder)";
  $db->prepare($query)->execute($task);

  $result = [
    "action"=>"inserted",
    "tid"=> $db->lastInsertId()
  ];
  $payload = json_encode($result);

  $response->getBody()->write($payload);
  return $response->withHeader("Content-Type", "application/json");
}
- 最后,当用户重新排序任务时,任务顺序也需要相应更新,具体说明见此处:
app/gantt.php
// update a task
function updateTask($request, $response, $args) {
  $sid = $request->getAttribute("id");
  parse_str(file_get_contents("php://input"), $body);
  $task = [
      "text" => $body["text"],
      "start_date" => $body["start_date"],
      "duration" => $body["duration"],
      "progress" => $body["progress"],
      "parent" => $body["parent"],
      "sortorder" => $body["sortorder"]
  ];
  $db = getConnection();
  $query = "UPDATE gantt_tasks ".
    "SET text = :text, start_date = :start_date, duration = :duration,".
      "progress = :progress, parent = :parent, sortorder = :sortorder ".
    "WHERE id = :sid";
  $db->prepare($query)->execute(array_merge($task, [":sid"=>$sid]));

  if(isset($body["target"]) && $body["target"])
    updateOrder($sid, $body["target"], $db);


  $result = [
    "action"=>"updated"
  ];
  $payload = json_encode($result);

  $response->getBody()->write($payload);
  return $response->withHeader("Content-Type", "application/json");
}


function updateOrder($taskId, $target, $db){
  $nextTask = false;
  $targetId = $target;

  if(strpos($target, "next:") === 0){
    $targetId = substr($target, strlen("next:"));
    $nextTask = true;
  }

  if($targetId == "null")
    return;

  $sql = "SELECT sortorder FROM gantt_tasks WHERE id = :id";
  $statement = $db->prepare($sql);
  $statement->execute([":id"=>$targetId]);

  $targetOrder = $statement->fetchColumn();
  if($nextTask)
      $targetOrder++;

  $sql = "UPDATE gantt_tasks SET sortorder = sortorder + 1 ".
    "WHERE sortorder >= :targetOrder";
  $statement = $db->prepare($sql);
  $statement->execute([":targetOrder"=>$targetOrder]);

  $sql = "UPDATE gantt_tasks SET sortorder = :targetOrder WHERE id = :taskId";
  $statement = $db->prepare($sql);
  $statement->execute([
    ":targetOrder"=>$targetOrder,
    ":taskId"=>$taskId
  ]);
}
完整可用示例可在 GitHub 获取:https://github.com/DHTMLX/gantt-howto-php。
使用 dhtmlxConnector
实现 PHP 后端的另一种方式是使用 dhtmlxConnector 库。详细教程可见 这里。
应用安全性
Gantt 本身不提供针对 SQL 注入、XSS 或 CSRF 等常见安全威胁的防护。确保应用安全是后端开发者的责任。更多信息请参阅本文。
故障排查
如果按照上述步骤操作后,Gantt 图未能显示任务和链接,请参考 백엔드 통합 문제 해결 中的故障排查指南。该指南提供了识别和解决常见问题的方法。
后续步骤
至此,gantt 已经可以正常运行。完整源码可在 GitHub 获取,你可以克隆或下载以供使用。
如需进一步学习,请查阅涵盖各种 gantt 功能的指南或关于集成 Gantt 与其他后端框架的教程。