그리드에서의 인라인 편집
dhtmlxGantt는 콘텐츠를 편집하는 두 가지 옵션을 제공합니다:
- Lightbox 편집 양식을 이용한 편집
- 그리드 영역에서 인라인 편집기를 사용하는 편집
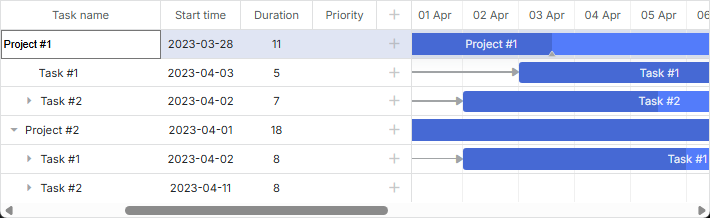
인라인 편집을 통해 그리드를 통해 바로 변경할 수 있습니다: 작업을 생성 및 업데이트하고, 작업 간 연결을 설정하며, 시작일과 종료일을 정의하거나 지속 기간을 수정하는 등 모든 작업은 내장 편집기를 통해 이루어집니다.
인라인 편집을 활성화하려면 다음을 수행해야 합니다:
- 편집기 구성의 목록을 지정하고 편집기 객체의 map_to 속성을 사용하여 필요한 편집기를 그리드 열에 매핑합니다
const textEditor = { type: "text", map_to: "text" };
const dateEditor = { type: "date", map_to: "start_date", min: new Date(2025, 0, 1),
    max: new Date(2026, 0, 1) };
const durationEditor = { type: "number", map_to: "duration", min: 0, max: 100 };
- 열 구성에서 editor 속성을 사용해 열에서 사용할 편집기를 정의합니다
gantt.config.columns = [
    { name: "text", tree: true, width: "*", editor: textEditor, resize: true },
    { name: "start_date", align: "center", editor: dateEditor, resize: true },
    { name: "duration", align: "center", editor: durationEditor },
    { name: "add", width: 44 }
];
inlineEditors 객체 API에 대한 자세한 내용은 Inline Editors Extension 문서를 참조하십시오.
그리드에서 인라인 편집을 구현하는 방법을 보여주는 비디오 가이드를 확인할 수 있습니다.
편집기 유형
인라인 편집기는 editor_types 구성 객체에 저장됩니다.
다음은 미리 정의된 몇 가지 인라인 편집기입니다:
- text 편집기 - 텍스트 열 편집용, 예: 작업 이름
- number 편집기 - 숫자 열 편집용, 예: 작업 지속 시간, 순서 등
- duration 편집기 - 지속 시간 열 편집용, 예: 작업 지속 시간. 이 편집기는 map_to: "duration" 구성이 사용되고 편집기 타입이 "duration" 타입으로 설정된 경우에만 작동합니다:
{ type: "duration", map_to: "duration", formatter: formatter }
이 편집기 타입은 숫자와 duration unit을 모두 포함하는 지속 시간을 지정해야 할 때 유용합니다. 예: 5 days. 기본적으로 Duration Formatter가 사용됩니다. 기본 지속 기간 포매터를 사용하지 않고 구성을 바꾸거나 커스텀 포매터를 설정할 수도 있습니다.
- date 편집기 - 날짜 열 편집용, 예: 작업의 시작일과 종료일
- select 편집기 - 목록에서 옵션을 선택하기 위해
- predecessor 편집기 - 현재 편집 중인 작업에 대한 선행 작업을 설정하기 위해. 이 편집기는 선행 작업과의 연결을 설정하기 위해 작업들의 WBS 코드를 사용합니다.
const editors = {
    text: { type: "text", map_to: "text" },
    start_date: { type: "date", map_to: "start_date", min: new Date(2025, 0, 1),
        max: new Date(2026, 0, 1) },
    end_date: { type: "date", map_to: "end_date", min: new Date(2025, 0, 1),
        max: new Date(2026, 0, 1) },
    duration: { type: "number", map_to: "duration", min: 0, max: 100 },
    priority: { type: "select", map_to: "priority",
        options: gantt.serverList("priority") },
    predecessors: { type: "predecessor", map_to: "auto" }
};
Dates limits in the Date editor
v6.3부터는 date 인라인 편집기의 최소값/최대 입력 값에 대한 기본 제한이 없습니다.
타임스케일에 표시되는 날짜가 최소값과 최대값을 제한하도록 하려면(사용자가 사용자 정의 min/max 값을 제공하지 않은 경우) 동적 min/max 값을 지정할 수 있습니다:
const dateEditor = {
    type: "date",
    map_to: "start_date",
    min: taskId => gantt.getState().min_date,
    max: taskId => gantt.getState().max_date
};
End 날짜를 포함하는 편집기
작업의 inclusive end dates 형식을 사용하고 그리드의 인라인 편집과 함께 올바르게 작동하도록 하려면 작업의 inclusive end dates 편집을 위한 특별한 편집기를 만들어야 합니다. 예시는 다음과 같습니다:
// inclusive editor for end dates
// use the default editor, but override the set_value/get_value methods
const dateEditor = gantt.config.editor_types.date;

gantt.config.editor_types.end_date = gantt.mixin({
    set_value: function(value, id, column, node) {
        const correctedValue = gantt.date.add(value, -1, "day");
        return dateEditor.set_value.apply(this, [correctedValue, id, column, node]);
    },
    get_value: function(id, column, node) {
        const selectedValue = dateEditor.get_value.apply(this, [id, column, node]);
        return gantt.date.add(selectedValue, 1, "day");
    }
}, dateEditor);

const textEditor = { type: "text", map_to: "text" };
const startDateEditor = { type: "date", map_to: "start_date" };
const endDateEditor = { type: "end_date", map_to: "end_date" };
const durationEditor = { type: "number", map_to: "duration", min: 0, max: 100 };

gantt.config.columns = [
    { name: "text", label: "Name", tree: true, width: 200, editor: textEditor,
        resize: true },
    { name: "duration", label: "Duration", width: 80, align: "center",
        editor: durationEditor, resize: true },
    { name: "start_date", label: "Start", width: 140, align: "center",
        editor: startDateEditor, resize: true },
    { name: "end_date", label: "Finish", width: 140, align: "center",
        editor: endDateEditor, resize: true }
];

// change lightbox and grid templates to display dates of tasks in an inclusive format
gantt.templates.task_end_date = date =>
    gantt.templates.task_date(new Date(date.valueOf() - 1));

const gridDateToStr = gantt.date.date_to_str("%Y-%m-%d");
gantt.templates.grid_date_format = (date, column) =>
    column === "end_date"
        ? gridDateToStr(new Date(date.valueOf() - 1))
        : gridDateToStr(date);
Related sample Inclusive end date editor
For more details on formatting end dates, see the Task end date display & Inclusive end dates article.
Formatting values of the Predecessor editor
이 기능은 PRO 에디션에서만 사용할 수 있습니다.
v6.3부터 Gantt는 inline 편집기에서 직접 링크의 유형과 랙/리드 값도 지정할 수 있습니다. 이를 위해 Link Formatter 모듈을 사용하고 predecessor 편집기에 LinksFormatter 인스턴스를 제공해야 합니다:
const formatter = gantt.ext.formatters.durationFormatter({
    enter: "day",
    store: "day",
    format: "auto"
});

const linksFormatter = gantt.ext.formatters.linkFormatter({
    durationFormatter: formatter
});

const editors = {
    text: { type: "text", map_to: "text" },
    start_date: { type: "date", map_to: "start_date", min: new Date(2025, 0, 1),
        max: new Date(2026, 0, 1) },
    end_date: { type: "date", map_to: "end_date", min: new Date(2025, 0, 1),
        max: new Date(2026, 0, 1) },
    duration: { type: "duration", map_to: "duration", min: 0,
        max: 100, formatter: formatter },
    priority: { type: "select", map_to: "priority",
        options: gantt.serverList("priority") },
    predecessors: { type: "predecessor", map_to: "auto", formatter: linksFormatter }
};

gantt.config.columns = [
    { name: "wbs", label: "#", width: 60, align: "center", template: gantt.getWBSCode },
    { name: "text", label: "Name", tree: true, width: 200,
        editor: editors.text, resize: true },
    { name: "start_date", label: "Start", width: 80, align: "center",
        editor: editors.start_date, resize: true },
    { name: "predecessors", label: "Predecessors", width: 80, align: "left",
        editor: editors.predecessors, resize: true, template: task => {
            const links = task.$target || [];
            const labels = links.map(id => {
                const link = gantt.getLink(id);
                return linksFormatter.format(link);
            });
            return labels.join(", ");
        }
    },
    { name: "add" }
];
Inline editing - keyboard navigation mode
다음 코드는 다음과 같은 사용자 정의 편집기를 위한 예제 샘플입니다:
Custom inline editor
커스텀 인라인 편집기를 추가로 정의할 수도 있습니다. 이를 위해 아래와 같이 새 편집기 객체를 생성해야 합니다:
gantt.config.editor_types.custom_editor = {
    show: (id, column, config, placeholder) => {
        // called when input is displayed, put html markup of the editor into
        // placeholder and initialize your editor if needed:
        const html = "<div><input type='text' name='" + column.name + "'/></div>";
        placeholder.innerHTML = html;
    },
    hide: () => {
        // called when input is hidden
        // destroy any complex editors or detach event listeners from here
    },
    set_value: (value, id, column, node) => {
        // set input value
    },
    get_value: (id, column, node) => {
        // return input value
    },
    is_changed: (value, id, column, node) => {
        // called before save/close
        // return true if the new value differs from the original one
        // returning true will trigger saving changes, while false will skip saving
    },
    is_valid: (value, id, column, node) => {
        // validate, changes will be discarded if the method returns false
        return true/false;
    },
    save: (id, column, node) => {
        // only for inputs with map_to:auto. complex save behavior goes here
    },
    focus: (node) => {
        //
    }
};
Here is a more detailed type description:
- show (id, column, config, placeholder): void - 이 함수는 인라인 편집기를 열 때 호출됩니다. 여기서는 DOM 요소를 담는 컨테이너를 추가하고 필요하면 서드파티 라이브러리를 초기화할 수 있습니다. 매개변수는:
- id - (string | number) - 작업 ID
- column - (GridColumn) - 열 구성 객체
- config - (any) - 커스텀 인라인 편집기의 구성 객체
- placeholder - (HTMLElement) - 인라인 편집기의 DOM 요소
- hide? (): void - 선택적이며 인라인 편집기가 숨겨질 때 호출됩니다.
- set_value (value, id, column, node): void - show 함수 이후에 호출됩니다. 그곳에서 task 객체의 값들을 인라인 편집기 요소에 설정해야 합니다. 매개변수는:
- value - (any) - 작업 속성의 값
- id - (string | number) - 작업 ID
- column - (GridColumn) - 열 구성 객체
- node - (HTMLElement) - 인라인 편집기의 DOM 요소
- get_value (id, column, node): any - 편집기를 닫기 전에 호출됩니다. 인라인 편집기에서 값을 얻어 작업 객체에 추가해야 합니다. 매개변수는:
- id - (string | number) - 작업 ID
- column - (GridColumn) - 열 구성 객체
- node - (HTMLElement) - 인라인 편집기의 DOM 요소
- is_changed? (value, id, column, node): boolean - 선택적이며, 편집기를 닫기 전에 호출됩니다. 항상 true를 반환하면 변경 내용이 저장되며, 그렇지 않으면 취소됩니다. 매개변수는:
- value - (any) - 작업 속성의 값
- id - (string | number) - 작업 ID
- column - (GridColumn) - 열 구성 객체
- node - (HTMLElement) - 인라인 편집기의 DOM 요소
- is_valid? (value, id, column, node): boolean - 선택적이며, 잘못된 값의 입력을 방지하기 위한 검증 로직을 추가할 수 있습니다. false를 반환하면 변경 내용이 취소됩니다. 매개변수는:
- value - (any) - 작업 속성의 값
- id - (string | number) - 작업 ID
- column - (GridColumn) - 열 구성 객체
- node - (HTMLElement) - 인라인 편집기의 DOM 요소
- save? (id, column, node): void - 선택적이며, 편집기에
map_to:auto가 설정�된 경우에 한해 복합 저장 동작을 위한 함수입니다. 매개변수는:- id - (string | number) - 작업 ID
- column - (GridColumn) - 열 구성 객체
- node - (HTMLElement) - 작업 객체
- focus? (node): void - 선택적이며, 이 함수는 인라인 편집기가 포커스를 받을 때 호출됩니다.
- node - (HTMLElement) - 인라인 편집기의 DOM 요소
재사용 가능한 편집기를 구현하기 위해 기억해야 할 핵심 포인트가 있습니다:
- 일반적으로 **
get_value**는 작업 객체를 수정하지 않습니다. 이 메서드는 인라인 편집기의 현재 값을 반환하는 역할만 합니다. 값이 유효하다고 판단되면 Gantt가 이 값을 관련 작업에 자동으로 업데이트합니다. - 편집기가 업데이트할 작업의 어떤 속성을 변경할지 지정하기 위해 편집기의 구성 옵션인 **
map_to**를 사용하되, 편집기 내부에 하드코딩하지 마십시오. 이렇게 하면 편집기를 서로 다른 열에 재사용할 수 있습니다. - 복잡한 자바스크립트 위젯을 사용하지 않는 한
hide함수에 로직을 지정할 필요가 없으므로 비워 두어도 됩니다. 그렇지 않으면 편집기를 표시할 때 연결한 이벤트 핸들러를 정리하는 소멸자 로직을 이 메서드에서 구현하십시오. - **
is_changed**와is_valid함수를 구현해야 합니다:- 만약 **
is_changed**가 항상 true를 반환하면 편집기가 닫힐 때마다 업데이트를 트리거합니다(백엔드로 보낼 수 있음). 이 메서드는 입력 값이 초기 상태와 실제로 변경된 경우에만 true를 반환해야 합니다. - **
is_valid**는 잘못된 값의 입력을 방지하는 데 사용됩니다.
- 만약 **
- 값 하나를 변경하는 대신 여러 작업 속성을 동시에 수정하거나 작업이 아닌 다른 객체를 수정해야 하는 편집기를 구현하는 경우를 위해서는
save함수를 구현하고 입력의map_to옵션을"auto"로 지정해야 합니다. 이 경우 gantt는 작업 객체를 수정하지 않고 편집기에 적용된 변경 사항을 적용할 때save함수를 호출합니다.
다음은 간단한 숫자 입력 구현 예시입니다.
참고로 hide 메서드는 비워 두어도 되고, save 메서드는 생략해도 됩니다.
const getInput = node => node.querySelector("input");

gantt.config.editor_types.simpleNumber = {
    show: (id, column, config, placeholder) => {
        const min = config.min ?? 0,
            max = config.max ?? 100;
        const html = "<div><input type='number' min='" + min +
            "' max='" + max +
            "' name='" + column.name + "'/></div>";
        placeholder.innerHTML = html;
    },
    hide: () => {
        // can be empty since we don't have anything to clean up after the editor
        // is detached
    },
    set_value: (value, id, column, node) => {
        getInput(node).value = value;
    },
    get_value: (id, column, node) => {
        return getInput(node).value || 0;
    },
    is_changed: function(value, id, column, node) {
        const currentValue = this.get_value(id, column, node);
        return Number(value) !== Number(currentValue);
    },
    is_valid: (value, id, column, node) => {
        return !isNaN(parseInt(value, 10));
    },
    focus: node => {
        const input = getInput(node);
        if (!input) return;
        if (input.focus) input.focus();
        if (input.select) input.select();
    }
};
그런 다�음에는 내장 편집기와 동일한 방식으로 이 편집기를 사용할 수 있습니다:
const numberEditor = { type: "simpleNumber", map_to: "quantity", min: 0, max: 50 };

gantt.config.columns = [
    ...
    { name: "quantity", label: "Quantity", width: 80, editor: numberEditor,
        resize: true },
    ...
];
참고: 이 경우에는 편집기가 닫힌 후 DOM 요소를 Gantt가 자동으로 분리하기 때문에 hide 메서드를 구현할 필요가 없으며, 편집기가 닫힌 후 정리할 다른 내용도 없습니다.
editor.hide
복잡한 위젯을 인라인 편집기에 사용할 경우 hide �로직을 추가해야 할 수 있습니다.
예를 들어 jQuery 기반 DatePicker 입력을 사용하는 구현을 생각해 봅시다. 이 경우 DOM에서 제거된 후 Date Picker 위젯을 파괴해야 합니다.
전제 조건:
<link rel="stylesheet" href="//code.jquery.com/ui/1.12.1/themes/base/jquery-ui.css">
<script src="https://code.jquery.com/jquery-1.12.4.js"></script>
<script src="https://code.jquery.com/ui/1.12.1/jquery-ui.js"></script>
편집기:
gantt.config.editor_types.custom_datepicker_editor = {
    show: (id, column, config, placeholder) => {
        placeholder.innerHTML =
            `<div><input type="text" id="datepicker" name="${column.name}"/></div>`;
        $("#datepicker").datepicker({
            dateFormat: "yy-mm-dd",
            onSelect: () => gantt.ext.inlineEditors.save()
        });
    },
    hide: (node) => {
        $("#datepicker").datepicker("destroy");
    },
    set_value: (value, id, column, node) => {
        $("#datepicker").datepicker("setDate", value);
    },
    get_value: (id, column, node) => {
        return $("#datepicker").datepicker("getDate");
    },
    is_changed: (value, id, column, node) => {
        return +$("#datepicker").datepicker("getDate") !== +value;
    },
    is_valid: (value, id, column, node) => {
        return !isNaN(+$("#datepicker").datepicker("getDate"));
    },
    save: (id, column, node) => {
    },
    focus: (node) => {
    }
};

const dateEditor = { type: "custom_datepicker_editor", map_to: "start_date" };

gantt.config.columns = [
    { name: "text", tree: true, width: '*', resize: true },
    { name: "start_date", align: "center", resize: true, editor: dateEditor },
    { name: "duration", align: "center" },
    { name: "add", width: 44 }
];
Related sample Using jQuery Datepicker in the editor
editor.save
편집기가 한 번에 여러 속성을 수정해야 하거나 작업 이외의 객체를 수정하도록 해야 하는 경우에만 save 함수를 사용해야 합니다.
이 경우에는 기본 제공 검증을 위해 **get_value**의 적절한 구현을 유지할 수 있지만, gantt 자체는 편집기의 값을 작업에 적용하려고 하지 않고 대신 save 함수를 호출합니다.
save 메소드가 호출된 후에는 입력 값을 해석하고 커스텀 코드로 gantt에 변경 사항을 적용해야 합니다. 수정이 완료된 후에는 onSave 이벤트가 호출되지만 수정된 행에 대해 gantt.updateTask를 호출하지는 않습니다.
참고! save 메서드는 구성에서 **map_to:"auto"**를 지정한 경우에만 호출됩니다:
const editors = {
    ...
    predecessors: { type: "predecessor", map_to: "auto" }
};
이와 같은 제어의 좋은 예는 내장된 선행 편집기입니다. 관련 샘플에서 간단한 구현을 확인할 수 있습니다:
Related sample Built-in predecessor editor
Inline editing modes
Basic inline editing
이 모드는 셀에 포커스를 설정하기 위해 마우스 포인터를 사용하고 셀 간 이동을 가능하게 하는 핫키를 사용합니다:
- Tab - 다음 편집기로 포커스를 이동
- Shift+Tab - �이전 편집기로 포커스를 되돌림
Keyboard navigation mode
이 모드에서는 키보드를 사용해 탐색하고 미리 정의된 키 입력 또는 키 조합으로 그리드 셀을 편집합니다.
- Enter - 편집기를 열고 닫습니다
- Space 바 - 편집기를 엽니다
- 방향키 - 그리드 셀을 탐색합니다
- Shift+Right Arrow Key - 작업을 오른쪽으로 이동시켜 중첩된 작업로 만들고 위의 작업은 프로젝트가 됩니다
- Shift+Left Arrow Key - 프로젝트를 간단한 작업으로 바꿉니다
- Shift+Up Arrow Key - 분기를 축소합니다
- Shift+Down Arrow Key - 분기를 확장합니다
편집용 키보드 내비게이션을 활성화하려면 다음을 수행해야 합니다:
- gantt.plugins 방법을 사용해 keyboard_navigation 플러그인을 활성화합니다.
gantt.plugins({
    keyboard_navigation: true
});
- keyboard navigation 및 셀 간 탐색을 활성화합니다:
gantt.config.keyboard_navigation = true;
gantt.config.keyboard_navigation_cells = true;
필요한 경우 작업 목록 끝에 표시되는 비어 있는 행인 placeholder_task도 활성화할 수 있습니다. 최종 사용자는 이를 편집하여 gantt에 새 작업을 추가할 수 있습니다.
gantt.config.placeholder_task = true;
또는 새 작업을 추가한 후 포커스가 placeholder 작업으로 이동하도록 하려면 아래 구성을 사용하십시오:
gantt.config.placeholder_task = {
    focusOnCreate: true
};
필요한 경우 작업 유형의 자동 감지도 추가할 수 있습니다:
gantt.config.auto_types = true;
Inline editing - keyboard navigation mode
Custom inline editing
사용자 정의 키보드 매핑을 제공할 수도 있으며, 즉 사용자가 편집기를 여는 로직을 기술하고, 편집기 관련 이벤트(열림, 닫힘, 편집 시작 및 종료 등)의 핸들러를 별도의 객체에 정의한 뒤 이 객체를 매핑 체계를 적용하는 특수 메서드에 전달합니다:
const mapping = {
    init: (inlineEditors) => {
        // inlineEditor 모듈이 초기화됩니다
        // 시작/종료 편집에 대한 글로벌 리스너를 추가합니다
    },

    onShow: (inlineEditors, node) => {
        // 편집기가 표시됩니다
    },

    onHide: (inlineEditors, node) => {
        // 편집기가 숨겨집니다
        // 필요하다면 onShow 변경 내용을 정리합니다
    }
};

gantt.ext.inlineEditors.setMapping(mapping);
Inline editing - Custom keyboard mapping
Custom mapping for placeholder task
키보드 네비게이션, 인라인 편집기 및 플레이스홀더 작업을 사용하는 gantt를 상정하고 실제 시나리오 두 가지를 살펴봅시다.
시나리오 1. 새 플레이스홀더 작업의 이름을 입력하고 Tab을 누르면 Gantt가 이 작�업에 대해 다음 셀을 열어주길 기대합니다. 그런데 Gantt는 아래의 새 플레이스홀더 작업으로 포커스를 옮기고 인라인 편집기를 열지 않습니다.
시나리오 2. 새 플레이스홀더 작업의 이름을 입력하고 다음 셀을 클릭하면 클릭한 셀로 포커스가 이동하는 대신 다음 플레이스홀더 작업으로 포커스가 이동합니다.
커스텀 매핑은 위에서 설명한 문제를 해결하는 데 도움이 됩니다. 마우스 및 키보드 클릭을 인라인 편집기가 어떻게 처리할지의 로직만 지정하면 됩니다. 예제를 확인하십시오:
Related sample Gantt. Custom mapping for placeholder task
Validation of input values
그리드에서 셀을 편집하는 동안 실수를 할 수 있습니다.
잘못된 값을 저장하지 않도록 편집기를 닫기 전에 입력 값을 검증해야 합니다. 이는 다음 두 가지 방식 중 하나로 구현할 수 있습니다:
- custom editor object의 is_valid 메서드를 통해
- inlineEditors 객체의 onBeforeSave 이벤트를 통해
다음은 검증이 활성화되었을 때 편집기가 어떻게 동작하는지의 예시입니다.
예를 들어 그리드 셀에서 마우스로 편집기를 열었습니다. 이후의 동작은 다음과 같이 적용됩니다:
- 셀 편집 후 Escape를 누르면 변경 내용을 저장하지 않고 편집기가 닫힙니다.
- Enter를 누르면 값이 유효하면 편집기가 확인되고 닫히며, 그렇지 않으면 입력 값이 버려집니다.
- 편집 중에 Tab을 누르거나 마우스로 클릭해 다른 셀로 이동하면 유효한 값은 저장되고 포커스가 다른 셀로 이동하되, 유효하지 않은 값은 재설정되고 편집기가 닫힙니다.
클라이언트 측 검증이나 서버 측 검증에 대한 자세한 내용은 Validation 문서를 참조하십시오.
Preventing editor from closing
검증이 활성화된 경우 Gantt는 잘못된 입력 값을 저장하지 않고 이를 재설정한 뒤 편집기를 닫습니다. 따라서 셀을 열고 값을 다시 변경해야 합니다.
편집기가 닫히지 않도록 ��하는 좋은 방법은 사용자가 잘못된 값을 수정할 수 있도록 하는 경고 창을 띄우는 것입니다. 이를 위해서는 위에서 설명한 커스텀 키보드 매핑을 사용해야 합니다. 예시:
function customValidation() {
    const state = gantt.ext.inlineEditors.getState()
    if (!state.id){
        return
    }
    const value = gantt.ext.inlineEditors.getValue()
    if (state.columnName == "start_date" || state.columnName == "end_date") {
        if (value.getFullYear() != 2025) {
            gantt.message({ text: "Validation failed", type: "error" })
            return false
        }
    }
    if (state.columnName == "duration") {
        if (value > 4) {
            gantt.message({ text: "Validation failed", type: "error" })
            return false
        }
    }

    return true
}

const mapping = {
    init: function (inlineEditors) {
        keyNav.attachEvent("onBeforeFocus", function (e) {
            if (gantt.ext.inlineEditors.isVisible()) {
                return false;
            }
        });

        gantt.attachEvent("onTaskClick", function (id, e) {
            const cell = inlineEditors.locateCell(e.target);
            if (!gantt.ext.inlineEditors.isVisible()) {
                if (cell && inlineEditors.getEditorConfig(cell.columnName)) {
                    inlineEditors.startEdit(cell.id, cell.columnName);
                    return false;
                }
            }
            return true;

        });

        keyNav.attachEvent("onKeyDown", function (id, e) {

            const editorOpened = gantt.ext.inlineEditors.isVisible();
            if (editorOpened && e.keyCode >= 37 && e.keyCode <= 40) return false;
            return true;
        });

        gantt.attachEvent("onEmptyClick", function () {

            if (customValidation()) {
                inlineEditors.hide();
            }
            return true;
        });
    },

    onShow: function (inlineEditors, node) {

        node.onkeydown = function (e) {
            e = e || window.event;
            if (e.defaultPrevented) {
                return;
            }

            const keyboard = gantt.constants.KEY_CODES;

            let shouldPrevent = true;
            switch (e.keyCode) {
                case gantt.keys.edit_save:
                    if (customValidation()) {
                        inlineEditors.save();
                    }

                    break;
                case gantt.keys.edit_cancel:
                    inlineEditors.hide();

                    break;
                case keyboard.TAB:
                    if (e.shiftKey) {
                        inlineEditors.editPrevCell(true);
                    } else {
                        inlineEditors.editNextCell(true);
                    }
                    break;
                default:
                    shouldPrevent = false;
                    break;
            }


            if (shouldPrevent) {
                e.preventDefault();
            }
        };
    },

    onHide: function (inlineEditors, node) { }
};

gantt.ext.inlineEditors.setMapping(mapping);
gantt.init("gantt_here");
Related sample Validation for inline editors via custom mapping
Opening editor with one click
단일 선택 모드에서 Gantt는 작업을 클릭하면 인라인 편집기를 엽니다.
다중 선택 모드에서는 선택되지 않은 작업을 클릭한 후에야 편집기가 열립니다. 처음 클릭에 의해 인라인 편집기를 열기를 원하면, inline_editors_multiselect_open 구성을 활성화하십시오.
gantt.plugins({
  multiselect: true
});

...

gantt.config.inline_editors_multiselect_open = true;