Inline Editing in Grid
dhtmlxGantt provides two options for editing the content:
- with the help of the Lightbox edit form
- by using inline editors in the Grid area
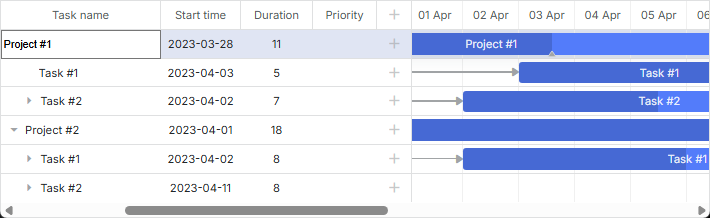
Inline editing lets you make any changes right through the grid: create and update tasks, set connections between them, define the start and end dates, or modify the duration - all via the built-in editors.
To enable inline editing, you need to:
- specify the list of editors configurations and use the map_to property of an editor object to map the necessary editor to a grid column
const textEditor = { type: "text", map_to: "text" };
const dateEditor = { type: "date", map_to: "start_date", min: new Date(2025, 0, 1),
    max: new Date(2026, 0, 1) };
const durationEditor = { type: "number", map_to: "duration", min: 0, max: 100 };
- in the column configuration use the editor property to define the editor that should be used in the column
gantt.config.columns = [
    { name: "text", tree: true, width: "*", editor: textEditor, resize: true },
    { name: "start_date", align: "center", editor: dateEditor, resize: true },
    { name: "duration", align: "center", editor: durationEditor },
    { name: "add", width: 44 }
];
Read details about the inlineEditors object API in the Inline Editors Extension article.
You can take a look at the video guide that shows how to implement inline editing in the grid.
Types of editors
The inline editors are stored in the editor_types configuration object.
There are several predefined inline editors:
- text editor - for editing text columns, e.g. task name
- number editor - for editing number columns, e.g. task duration, order, etc.
- duration editor - for editing duration columns, i.e. task duration. Works only when the map_to: "duration" config is used and the editor type is set to the "duration" type:
{ type: "duration", map_to: "duration", formatter: formatter }
This type of an inline editor is useful if you need to specify the duration that contains both a number and the duration unit.
For example: 5 days.
Uses the Duration Formatter by default.
Instead of using the default duration formatter, you can also change its configuration or set a custom formatter.
- date editor - for editing date columns, e.g. start and end dates of the task
- select editor - for choosing an option from a list
- predecessor editor - for setting task-predecessor for the currently edited task. This editor gets the WBS codes of tasks to set connection with the predecessor task.
const editors = {
    text: { type: "text", map_to: "text" },
    start_date: { type: "date", map_to: "start_date", min: new Date(2025, 0, 1),
        max: new Date(2026, 0, 1) },
    end_date: { type: "date", map_to: "end_date", min: new Date(2025, 0, 1),
        max: new Date(2026, 0, 1) },
    duration: { type: "number", map_to: "duration", min: 0, max: 100 },
    priority: { type: "select", map_to: "priority",
        options: gantt.serverList("priority") },
    predecessors: { type: "predecessor", map_to: "auto" }
};
Dates limits in the Date editor
Starting from v6.3, there are no default limits to minimal and maximal input values of date inline editors.
In case you want the dates visible on the time scale to limit the minimal and maximal values of the date inline editor (unless custom min/max values are provided), you can specify dynamic min/max values:
const dateEditor = {
    type: "date",
    map_to: "start_date",
    min: taskId => gantt.getState().min_date,
    max: taskId => gantt.getState().max_date
};
Editor for inclusive end dates
If you are using the format for inclusive end dates of tasks and want to make it work correctly with inline editing in the grid, you have to create a special editor for editing inclusive end dates of tasks, as in:
// inclusive editor for end dates
// use the default editor, but override the set_value/get_value methods
const dateEditor = gantt.config.editor_types.date;

gantt.config.editor_types.end_date = gantt.mixin({
    set_value: function(value, id, column, node) {
        const correctedValue = gantt.date.add(value, -1, "day");
        return dateEditor.set_value.apply(this, [correctedValue, id, column, node]);
    },
    get_value: function(id, column, node) {
        const selectedValue = dateEditor.get_value.apply(this, [id, column, node]);
        return gantt.date.add(selectedValue, 1, "day");
    }
}, dateEditor);

const textEditor = { type: "text", map_to: "text" };
const startDateEditor = { type: "date", map_to: "start_date" };
const endDateEditor = { type: "end_date", map_to: "end_date" };
const durationEditor = { type: "number", map_to: "duration", min: 0, max: 100 };

gantt.config.columns = [
    { name: "text", label: "Name", tree: true, width: 200, editor: textEditor,
        resize: true },
    { name: "duration", label: "Duration", width: 80, align: "center",
        editor: durationEditor, resize: true },
    { name: "start_date", label: "Start", width: 140, align: "center",
        editor: startDateEditor, resize: true },
    { name: "end_date", label: "Finish", width: 140, align: "center",
        editor: endDateEditor, resize: true }
];

// change lightbox and grid templates to display dates of tasks in an inclusive format
gantt.templates.task_end_date = date =>
    gantt.templates.task_date(new Date(date.valueOf() - 1));

const gridDateToStr = gantt.date.date_to_str("%Y-%m-%d");
gantt.templates.grid_date_format = (date, column) =>
    column === "end_date"
        ? gridDateToStr(new Date(date.valueOf() - 1))
        : gridDateToStr(date);
Related sample Inclusive end date editor
For more details on formatting end dates, see the Task end date display & Inclusive end dates article.
Formatting values of the Predecessor editor
This functionality is available in the PRO edition only.
Starting from v6.3 Gantt allows specifying types of links as well as lag/lead values directly from inline editor.
In order to do so, you need to use the Link Formatter module and provide an instance of the LinksFormatter into the predecessor editor:
const formatter = gantt.ext.formatters.durationFormatter({
    enter: "day",
    store: "day",
    format: "auto"
});

const linksFormatter = gantt.ext.formatters.linkFormatter({
    durationFormatter: formatter
});

const editors = {
    text: { type: "text", map_to: "text" },
    start_date: { type: "date", map_to: "start_date", min: new Date(2025, 0, 1),
        max: new Date(2026, 0, 1) },
    end_date: { type: "date", map_to: "end_date", min: new Date(2025, 0, 1),
        max: new Date(2026, 0, 1) },
    duration: { type: "duration", map_to: "duration", min: 0,
        max: 100, formatter: formatter },
    priority: { type: "select", map_to: "priority",
        options: gantt.serverList("priority") },
    predecessors: { type: "predecessor", map_to: "auto", formatter: linksFormatter }
};

gantt.config.columns = [
    { name: "wbs", label: "#", width: 60, align: "center", template: gantt.getWBSCode },
    { name: "text", label: "Name", tree: true, width: 200,
        editor: editors.text, resize: true },
    { name: "start_date", label: "Start", width: 80, align: "center",
        editor: editors.start_date, resize: true },
    { name: "predecessors", label: "Predecessors", width: 80, align: "left",
        editor: editors.predecessors, resize: true, template: task => {
            const links = task.$target || [];
            const labels = links.map(id => {
                const link = gantt.getLink(id);
                return linksFormatter.format(link);
            });
            return labels.join(", ");
        }
    },
    { name: "add" }
];
Inline editing - keyboard navigation mode
The section below provides you with code samples for the following custom editors:
Custom inline editor
You can also specify a custom inline editor. For this, you need to create a new editor object in the following way:
gantt.config.editor_types.custom_editor = {
    show: (id, column, config, placeholder) => {
        // called when input is displayed, put html markup of the editor into
        // placeholder and initialize your editor if needed:
        const html = "<div><input type='text' name='" + column.name + "'/></div>";
        placeholder.innerHTML = html;
    },
    hide: () => {
        // called when input is hidden
        // destroy any complex editors or detach event listeners from here
    },
    set_value: (value, id, column, node) => {
        // set input value
    },
    get_value: (id, column, node) => {
        // return input value
    },
    is_changed: (value, id, column, node) => {
        // called before save/close
        // return true if the new value differs from the original one
        // returning true will trigger saving changes, while false will skip saving
    },
    is_valid: (value, id, column, node) => {
        // validate, changes will be discarded if the method returns false
        return true/false;
    },
    save: (id, column, node) => {
        // only for inputs with map_to:auto. complex save behavior goes here
    },
    focus: (node) => {
        //
    }
};
Here is a more detailed type description:
- show (id, column, config, placeholder): void - the function is called when you open the inline editor. Here, you can add a container for the DOM elements and initialize the third-party libraries. The parameters are:
- id - (string | number) - task ID
- column - (GridColumn) - the column configuration object
- config - (any) - the configuration object of the custom inline editor
- placeholder - (HTMLElement) - the DOM element of the inline editor
- hide? (): void - optional, the function is called when hiding the inline editor
- set_value (value, id, column, node): void - the function is called after the show function. There, you need to set the values to the inline editor elements from the task object. The parameters are:
- value - (any) - the value of the task property
- id - (string | number) - task ID
- column - (GridColumn) - the column configuration object
- node - (HTMLElement) - the DOM element of the inline editor
- get_value (id, column, node): any - the function is called before hiding the inline editor. You need to obtain the values from the inline editor and add it to the task object. The parameters are:
- id - (string | number) - task ID
- column - (GridColumn) - the column configuration object
- node - (HTMLElement) - the DOM element of the inline editor
- is_changed? (value, id, column, node): boolean - optional, the function is called before hiding the inline editor. If you return true the changes will be saved, otherwise, they will be cancelled. The parameters are:
- value - (any) - the value of the task property
- id - (string | number) - task ID
- column - (GridColumn) - the column configuration object
- node - (HTMLElement) - the DOM element of the inline editor
- is_valid? (value, id, column, node): boolean - optional, the function where you can add validation. If you return false, the changes will be cancelled. The parameters are:
- value - (any) - the value of the task property
- id - (string | number) - task ID
- column - (GridColumn) - the column configuration object
- node - (HTMLElement) - the DOM element of the inline editor
- save? (id, column, node): void - optional, the function for a complex save behavior, when the editor has the
map_to:autoproperty. The parameters are:- id - (string | number) - task ID
- column - (GridColumn) - the column configuration object
- node - (HTMLElement) - the Task object
- focus? (node): void - optional, this function is called when the inline editor receives focus.
- node - (HTMLElement) - the DOM element of the inline editor
There are some key points to remember in order to implement a reusable editor:
- As a rule,
get_valuedoes not modify the task object. The method only returns the current value of the inline editor. If the value is deemed valid, Gantt will automatically update the related task with this value. - Use the
map_toconfiguration option of the editor to specify which property of the task should be updated by the editor, but don't hardcode it into the editor. This way allows you to reuse the editor for different columns. - Unless you use a complex javascript widget, you don't need to specify any logic in the
hidefunction, so you can leave it empty. Otherwise, use this method to call a destructor or to clean up any of event handlers you've attached when displaying the editor. - Make sure to implement the
is_changedandis_validfunctions:- If
is_changedalways returns true, the editor will trigger the update (which can be sent to the backend) each time the editor is closed. This method should return true only if the input value was actually changed in comparison to the initial state; is_validis used for preventing input of invalid values.
- If
- If you're implementing an editor that makes something more complex than writing a value to a property of a task - a good example is the built-in predecessor editor - you need to implement a required logic in the
savefunction and specify themap_tooption of the input to "auto". In this case, the gantt won't modify the task object, but instead will call thesavefunction when it's time to apply the changes made to the editor.
Here is an example of the implementation of a simple number input.
Note, that the hide method can be an empty function, and the save method can be skipped completely.
const getInput = node => node.querySelector("input");

gantt.config.editor_types.simpleNumber = {
    show: (id, column, config, placeholder) => {
        const min = config.min ?? 0,
            max = config.max ?? 100;
        const html = "<div><input type='number' min='" + min +
            "' max='" + max +
            "' name='" + column.name + "'/></div>";
        placeholder.innerHTML = html;
    },
    hide: () => {
        // can be empty since we don't have anything to clean up after the editor
        // is detached
    },
    set_value: (value, id, column, node) => {
        getInput(node).value = value;
    },
    get_value: (id, column, node) => {
        return getInput(node).value || 0;
    },
    is_changed: function(value, id, column, node) {
        const currentValue = this.get_value(id, column, node);
        return Number(value) !== Number(currentValue);
    },
    is_valid: (value, id, column, node) => {
        return !isNaN(parseInt(value, 10));
    },
    focus: node => {
        const input = getInput(node);
        if (!input) return;
        if (input.focus) input.focus();
        if (input.select) input.select();
    }
};
After that, you can use the editor in the same way as built-in editors:
const numberEditor = { type: "simpleNumber", map_to: "quantity", min: 0, max: 50 };

gantt.config.columns = [
    ...
    { name: "quantity", label: "Quantity", width: 80, editor: numberEditor,
        resize: true },
    ...
];
Note, that we don't need to implement the hide method in this case, since Gantt detaches the DOM element of the editor automatically and there is nothing else that we need to clean up after the editor closes.
editor.hide
You may need to add a hide logic if you use a complex widget inside an inline editor.
For example, let's consider the following implementation of the DatePicker input using the jQuery one. In this case we need to destroy the date picker widget after it's detached from DOM.
Prerequisites:
<link rel="stylesheet" href="//code.jquery.com/ui/1.12.1/themes/base/jquery-ui.css">
<script src="https://code.jquery.com/jquery-1.12.4.js"></script>
<script src="https://code.jquery.com/ui/1.12.1/jquery-ui.js"></script>
Editor:
gantt.config.editor_types.custom_datepicker_editor = {
    show: (id, column, config, placeholder) => {
        placeholder.innerHTML =
            `<div><input type="text" id="datepicker" name="${column.name}"/></div>`;
        $("#datepicker").datepicker({
            dateFormat: "yy-mm-dd",
            onSelect: () => gantt.ext.inlineEditors.save()
        });
    },
    hide: (node) => {
        $("#datepicker").datepicker("destroy");
    },
    set_value: (value, id, column, node) => {
        $("#datepicker").datepicker("setDate", value);
    },
    get_value: (id, column, node) => {
        return $("#datepicker").datepicker("getDate");
    },
    is_changed: (value, id, column, node) => {
        return +$("#datepicker").datepicker("getDate") !== +value;
    },
    is_valid: (value, id, column, node) => {
        return !isNaN(+$("#datepicker").datepicker("getDate"));
    },
    save: (id, column, node) => {
    },
    focus: (node) => {
    }
};

const dateEditor = { type: "custom_datepicker_editor", map_to: "start_date" };

gantt.config.columns = [
    { name: "text", tree: true, width: '*', resize: true },
    { name: "start_date", align: "center", resize: true, editor: dateEditor },
    { name: "duration", align: "center" },
    { name: "add", width: 44 }
];
Related sample Using jQuery Datepicker in the editor
editor.save
You need to make use of the save function only when your editor needs to modify multiple properties of the task at once, or if you want it to modify objects different from tasks.
In this case, you can keep a proper implementation of get_value for the sake of built-in validation, but the gantt itself won't try to apply the value of the editor to the task and will call the save function instead.
After save is called, you need to interpret the input values and apply changes to the gantt with a custom code.
Gantt will call the onSave event after the save method is completed, but won't call gantt.updateTask for the modified row.
Note! The save method will be called only if you specify map_to:"auto" in the configuration of the editor:
const editors = {
    ...
    predecessors: { type: "predecessor", map_to: "auto" }
};
A good example of such a control is a built-in predecessor editor. You can find its simplified implementation in the related sample:
Related sample Built-in predecessor editor
Inline editing modes
Basic inline editing
This mode presupposes the use of a mouse pointer for setting focus on cells and hotkeys that allow navigating the cells:
- Tab - to move focus to the next editor
- Shift+Tab - to return to the previous editor.
Keyboard navigation mode
In this mode keyboard is used both for navigating and editing grid cells with the help of the predefined keys or keys combinations.
- Enter - to open/close the editor
- Space bar - to open the editor
- Arrow keys - to navigate grid cells
- Shift+Right Arrow Key - to move a task right, i.e. to make a nested task, while the above task becomes a project
- Shift+Left Arrow Key - to turn a project into a simple task
- Shift+Up Arrow Key - to collapse a branch with tasks
- Shift+Down Arrow Key - to expand a branch with tasks
To enable keyboard navigation for editing, you need to:
- enable the keyboard_navigation plugin using the gantt.plugins method.
gantt.plugins({
    keyboard_navigation: true
});
- enable keyboard navigation and navigation by cells:
gantt.config.keyboard_navigation = true;
gantt.config.keyboard_navigation_cells = true;
Additionally, you can activate a placeholder row, an empty row displayed at the end of the list of tasks. Your end user can edit it to add new tasks into gantt.
gantt.config.placeholder_task = true;
Alternatively, if you want the focus to move to the placeholder task after adding of a new task, use the following configuration:
gantt.config.placeholder_task = {
    focusOnCreate: true
};
If needed, you can also add automatic detection of the types of tasks:
gantt.config.auto_types = true;
Inline editing - keyboard navigation mode
Custom inline editing
You can also provide custom keyboard mapping, i.e. describe the logic of editors opening by a user, specify handlers of editor-related events (opening, closing of editors, start and end of editing, etc.) in a separate object and then pass this object to the special method that will apply your mapping scheme:
const mapping = {
    init: (inlineEditors) => {
        // inlineEditor module is initialized
        // add global listeners for starting/ending editing
    },

    onShow: (inlineEditors, node) => {
        // the editor is displayed
    },

    onHide: (inlineEditors, node) => {
        // the editor is hidden
        // clean the onShow changes if needed
    }
};

gantt.ext.inlineEditors.setMapping(mapping);
Inline editing - Custom keyboard mapping
Custom mapping for placeholder task
Let's imagine that you use keyboard navigation, inline editors and a placeholder task in your gantt and consider two real-life scenarios.
Scenario 1. When you type the name for a new placeholder task and then press Tab, you expect Gantt to open the next cell for this task. Instead, Gantt moves focus to the new placeholder task below and doesn't open the inline editor.
Scenario 2. If you type the name for a new placeholder task and then click on the next cell, Gantt moves focus to the next placeholder task instead of moving it to the cell you've clicked on.
Custom mapping will help you to deal with the problems described above. You just need to specify the logic of how the inline editor must handle the mouse and keyboard clicks. Check the example:
Related sample Gantt. Custom mapping for placeholder task
Validation of input values
You can make mistakes while editing a cell in Grid.
To avoid saving of incorrect values you need to validate the input values before closing an editor. It can be implemented in one of two ways:
- via the is_valid method of the custom editor object
- via the onBeforeSave event of the inlineEditors object
Let's consider behavior of the editor when validation is enabled.
For example, you have opened the editor in a Grid cell via a mouse pointer. The following approach will be applied for your further action:
- Pressing Escape after editing a cell will close the editor without saving any changes.
- Pressing Enter will confirm and close the editor if the value is valid, otherwise the input value will be discarded.
- Pressing Tab or using a mouse pointer while editing a cell will save the valid value and move focus to another cell, whereas the invalid value will be reset and the editor will be closed.
For information about how to perform validation on the client side or on the server side, see the Validation article.
Preventing editor from closing
When validation of editors is enabled Gantt does not save incorrect input values but resets them and closes the editor. So you need to open the cell and to change the values again.
A good way for preventing the editor from closing is to pop up an alert box that gives a user the opportunity to fix the incorrect value. For this purpose you need to use custom keyboard mapping, as in:
function customValidation() {
    const state = gantt.ext.inlineEditors.getState()
    if (!state.id){
        return
    }
    const value = gantt.ext.inlineEditors.getValue()
    if (state.columnName == "start_date" || state.columnName == "end_date") {
        if (value.getFullYear() != 2025) {
            gantt.message({ text: "Validation failed", type: "error" })
            return false
        }
    }
    if (state.columnName == "duration") {
        if (value > 4) {
            gantt.message({ text: "Validation failed", type: "error" })
            return false
        }
    }

    return true
}

const mapping = {
    init: function (inlineEditors) {
        keyNav.attachEvent("onBeforeFocus", function (e) {
            if (gantt.ext.inlineEditors.isVisible()) {
                return false;
            }
        });

        gantt.attachEvent("onTaskClick", function (id, e) {
            const cell = inlineEditors.locateCell(e.target);
            if (!gantt.ext.inlineEditors.isVisible()) {
                if (cell && inlineEditors.getEditorConfig(cell.columnName)) {
                    inlineEditors.startEdit(cell.id, cell.columnName);
                    return false;
                }
            }
            return true;

        });

        keyNav.attachEvent("onKeyDown", function (id, e) {

            const editorOpened = gantt.ext.inlineEditors.isVisible();
            if (editorOpened && e.keyCode >= 37 && e.keyCode <= 40) return false;
            return true;
        });

        gantt.attachEvent("onEmptyClick", function () {

            if (customValidation()) {
                inlineEditors.hide();
            }
            return true;
        });
    },

    onShow: function (inlineEditors, node) {

        node.onkeydown = function (e) {
            e = e || window.event;
            if (e.defaultPrevented) {
                return;
            }

            const keyboard = gantt.constants.KEY_CODES;

            let shouldPrevent = true;
            switch (e.keyCode) {
                case gantt.keys.edit_save:
                    if (customValidation()) {
                        inlineEditors.save();
                    }

                    break;
                case gantt.keys.edit_cancel:
                    inlineEditors.hide();

                    break;
                case keyboard.TAB:
                    if (e.shiftKey) {
                        inlineEditors.editPrevCell(true);
                    } else {
                        inlineEditors.editNextCell(true);
                    }
                    break;
                default:
                    shouldPrevent = false;
                    break;
            }


            if (shouldPrevent) {
                e.preventDefault();
            }
        };
    },

    onHide: function (inlineEditors, node) { }
};

gantt.ext.inlineEditors.setMapping(mapping);
gantt.init("gantt_here");
Related sample Validation for inline editors via custom mapping
Opening editor with one click
In the single selection mode, Gantt opens the inline editor after you click on a task.
In the multi selection mode, after you click on an unselected task, Gantt will select it, and will open the inline editor only after the second click. If you want Gantt to open the inline editor after the first click, enable the inline_editors_multiselect_open config.
gantt.plugins({
  multiselect: true
});

...

gantt.config.inline_editors_multiselect_open = true;