How to Start
This documentation is dedicated to the renewed dhtmlxVault of version 3.0. To get information about the previous version 2.5, follow the related documentation.
Follow this step-by-step tutorial to create a handy client-side tool for uploading/downloading files. The detailed instructions will help you create a component on a page, adjust its configuration and immediately start working with files.
Step 1. Including source files
First of all, create an HTML file and call it index.html. Then proceed with including Vault source files into the created file. The detailed description of the dhtmlxVault package is given here.
There are two necessary files:
- the JS file of dhtmlxVault
- the CSS file of dhtmlxVault
and
the link to the Google Fonts source file for correct rendering of fonts.
index.html
<!DOCTYPE html>
<html>
<head>
  <title>How to Start with dhtmlxVault</title>
  <script src="codebase/vault.js"></script>

  <link href="codebase/vault.css" rel="stylesheet">
  <link href="https://fonts.googleapis.com/css?family=Roboto:400,500"
        rel="stylesheet">
</head>
<body>
    <script>    // your code will be here    </script>
</body>
</html>
Step 2. Creating Vault
Now you are ready to add Vault to the page. First, let's create a DIV container and then place dhtmlxVault into it. So, your steps will be:
- to specify a DIV container in the index.html file
- to initialize dhtmlxVault using the
dhx.Vaultconstructor
As parameters, the constructor function takes the HTML container to place Vault into and the Vault configuration object.
index.html
<!DOCTYPE html>
<html>
<head>
  <title>How to Start with dhtmlxVault</title>
  <script src="codebase/vault.js"></script>

  <link href="codebase/vault.css" rel="stylesheet">
  <link href="https://fonts.googleapis.com/css?family=Roboto:400,500"
        rel="stylesheet">
</head>
<body>
    <div id="vault_container"></div>

    <script>     var myVault = new dhx.Vault("vault_container", {
        uploader:{
            target: "/upload"
        }
     });    </script>
</body>
</html>
Related sample: Vault. Initialization
Step 3. Setting Vault config
Now you can specify the necessary configuration options. There is a mandatory attribute you need to set via the Uploader configuration object:
- target - (string) obligatory, the path for upload.
Other configuration options are optional. See the full list of configuration options.
index.html
var vault = new dhx.Vault("vault", {
    uploader:{
        // setting the path for upload
        target: "/upload",

    },
    // enabling the grid mode of viewing files
    mode: "grid"
});
Later you can change the Vault configuration. Read about the possibilities of adjusting Vault to your needs.
Related sample: Vault. Grid mode
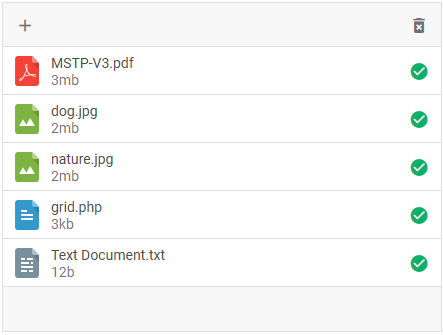
Step 4. Loading a list of files
Now you can load a list of files into Vault. Prepare data for loading in the JSON format. You can specify the data source as an inline object.
Use the parse method and pass your dataset as its parameter:
index.html
var data = [
    // files objects
    {
        name:"test.jpg",
        type:"image/jpeg",
        status:"queue",
        size:136484
    },
    {
        name:"another.svg",
        type:"image/svg+xml",
        status:"queue",
        size:352321
    }
];

// initializing dhtmlxVault
var vault = new dhx.Vault("vault_container",{
    uploader:{
        target:"/upload"
    }
});
// loading the list of files in the Vault
vault.data.parse(data);
Related sample: Vault. Initialization with data.parse()
Check the related sources to go into details:
What's Next
Now Vault is ready for uploading and downloading various types of files.
There are suggestions for further reading to continue exploring possibilities of dhtmlxVault:
- Get to know dhtmlxVault by checking the Overview article
- Explore the possibilities of the component with the Vault Guides
- Have a look behind the scenes with the dhtmlxVault API