Configuration
You can use configuration settings of dhtmlxVault to adapt the component to your needs. Check the list of possible config properties.
Inline editing
It is possible to edit the name of a file in the vault by double-clicking on it. For that, the library provides you with the editable property which is set to true by default:
const vault = new dhx.Vault("vault", {
    mode: "grid",
    uploader: {
        target: "https://docs.dhtmlx.com/vault/backend/upload",
    },
    downloadURL: "https://docs.dhtmlx.com",
    editable: true
});
Related sample: Vault. Inline editing and disabled file preview
If you need to disable the feature, set the editable property to false.
Keyboard navigation
You can use key navigation while working with the vault. Here is the list of the available keys:
| Enter | Adds selection to a file in focus, activates editor in the selected file, closes editor with saving changes |
| Esc | Closes editor without saving changes |
| ArrowUp | Moves focus to the previous vertical file |
| ArrowDown | Moves focus to the next vertical file |
| ArrowLeft | Moves focus to the previous horizontal file |
| ArrowRight | Moves focus to the next horizontal file |
| Ctrl+A (Cmd+A) | Selects all files |
| Delete | Removes selected files |
Path to the upload script
The URL to the server-side script that will process file upload is set in the uploader configuration object with the target property. It is an obligatory property for Vault initialization:
var vault = new dhx.Vault("vault",{
    uploader:{
        target:"/upload"
    }
});
Related sample: Vault. Initialization
Download URL
It is possible to specify the full path for file download via the downloadURL property of the Vault configuration object.
var vault = new dhx.Vault("vault", {
    uploader: {
        target: "/backend/safeUpload",
    },
    downloadURL: "/backend/upload/files/"
});
The property is used to make the full path to a file on a server, in case the link attribute of the file object doesn't contain the full path. Then the link to the file on a server is built as downloadURL+link attribute of the file object.
Related sample: Vault. Upload and rename
Grid mode
Added files are displayed in a list by default. dhtmlxVault has another mode that displays files in a grid, which is especially useful for uploading images.
In the grid mode images previews are displayed in Vault. You can view the file size by moving the mouse pointer over the file preview.
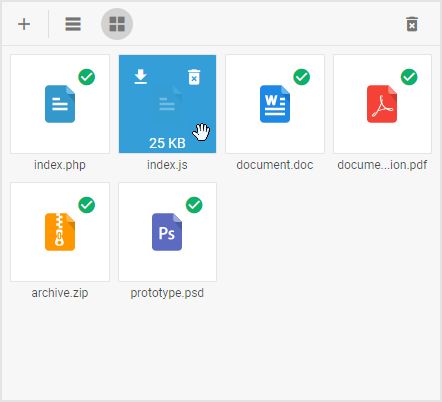
To enter the grid mode, set the mode of dhtmlxVault to the "grid" value:
var vault = new dhx.Vault("vault",{
    uploader:{
        target:"/photos"
    }
    mode:"grid"
});
By default, the value of the mode property is "list".
Related sample: Vault. Grid mode
File preview
A preview for a file is generated as an HTML canvas image. You can manage the quality of the preview image via the scaleFactor config option.
var vault = new dhx.Vault("vault_container", {
    scaleFactor: 2
});
scaleFactor:1 means that a canvas-based image has the width and height equal to 98x98 px. By default the scaleFactor is set to 4, so the size of the canvas image is 98x4=392 => 392x392 px.
You can also specify your own preview image for a file with the "uploaded" status in the preview attribute of the file object.
Hiding mode controls
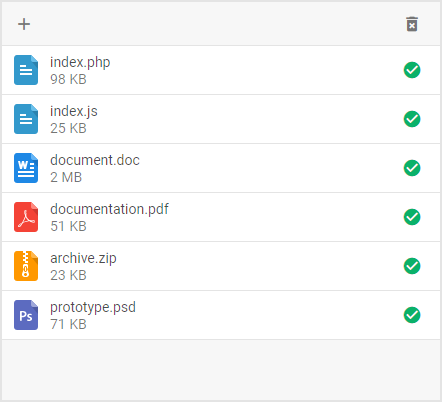
Starting from v4.0, the controls for switching between the "list" and "grid" modes are shown in the toolbar of Vault by default. You can hide the controls by setting the modeControls property to false:
var vault = new dhx.Vault("vault_container", {
    uploader: {
        // obligatory, the path for upload
        target:"/upload"
    },
    modeControls: false });
Related sample: Vault. Disable mode controls
Disabling file preview
You can increase the speed of adding files into the vault by disabling display of preview images for the newly added files.
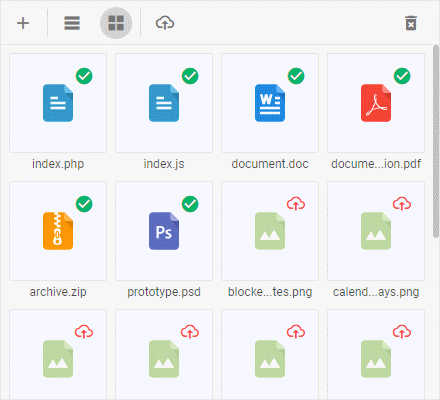
To do that, set the disablePreview property to true:
const vault = new dhx.Vault("vault", {
    mode: "grid",
    disablePreview: true,
    uploader: {
        target: "https://docs.dhtmlx.com/vault/backend/upload",
    },
});
Related sample: Vault. Inline editing and disabled file preview
Hiding toolbar
By default, dhtmlxVault has a toolbar. You can hide it by disabling the toolbar property of the dhtmlxVault configuration:
var vault = new dhx.Vault("vault_container", {
    toolbar:false
});
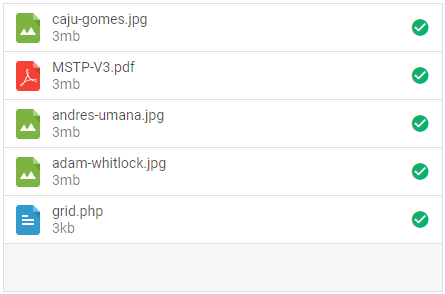
Note that if there is no toolbar, added files will be uploaded automatically.
Related sample: Vault. Without toolbar
Manual file upload
By default, files are uploaded to server automatically, as soon as you add them into Vault. If needed, you can disable automatic upload via the autosend property of the Uploader config object. In this case, users will add files into Vault first and then upload them by clicking the Upload button that will appear in the toolbar.
var vault = new dhx.Vault("vault",{
    uploader:{
        target:"/upload",
        autosend:false
    }
});
Related sample: Vault. Disable autosend
Sending all files in one request
By default, if a user adds several files for upload, they are sent to server one by one. If you want to send all files at once, you can enable sending them in one request as an array. Use the singleRequest property of the Uploader config object for this:
var vault = new dhx.Vault('vault',{
    uploader:{
        target:"/upload",
        singleRequest:true
    }
});
Related sample: Vault. Send all (single request)
Extra params for XHRequest
You can include additional parameters from the configuration into a request with the params property. For instance, if a user sends several images, files can be collected into FormData and then configuration parameters can be added into FormData.
var vault = new dhx.Vault('vault',{
    uploader:{
        target:"/upload",
        params:{
            param1:value1,
            param2:value2
        }
    }
});
Extra params for Request Headers
Starting from v4.0, it is possible to include additional parameters into request headers with the help of the headerParams property of the Uploader config object:
var vault = new dhx.Vault("vault", {
    uploader: {
        // obligatory, the path for upload
        target: "/upload",
        headerParams: {
            "firstCustomParam": "customValue",
            "secondCustomParam": "customValue",
            "thirdCustomParam": "customValue"
        }
     }
});
Related sample: Vault. Header params
Templates for Vault items and progress bar
You can define templates for rendering items both in the list and in the grid modes as well as adjust the look and feel of the progress bar.
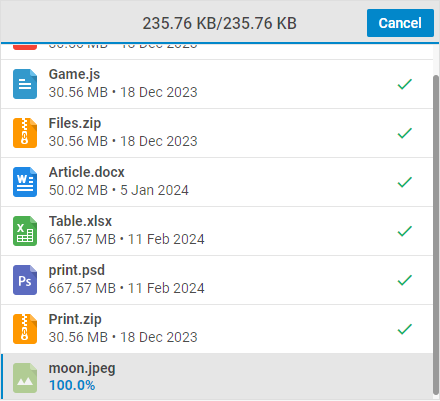
Use the templates configuration property to specify the necessary templates for Vault elements. The templates property is an object that may include the following properties:
- list - optional, the template function for the list mode. It takes the following parameter:
- item - an object of a data item
- grid - optional, the template function for the grid mode. It takes the following parameter:
- item - an object of a data item
- progressBar - optional, the template function for the progressBar. Takes the following parameters:
- percent - (number) the current percent of files uploading, a number from 0 to 100
- extra - (object) an object with additional properties. It can have two optional properties:
- current - (number) the size of the currently uploaded files in bytes
- total - (number) the total size of all files in the list in bytes
For example:
function listTemplate(item) {     return <div>" + item.name + "</div>; }
function progressBarTemplate(percent, extra) {     return getBasis(extra.current) + "/" + getBasis(extra.total); }
const vault = new dhx.Vault("vault_container", {
    uploader: {
        target: "https://docs.dhtmlx.com/vault/backend/upload"
    },
    downloadURL: "https://docs.dhtmlx.com",
    templates: {         list: listTemplate,         progressBar: progressBarTemplate,     } });
vault.data.load("https://snippet.dhtmlx.com/codebase/data/vault/01/dataset.json");
Check the snippets below to explore the ways of customizing the Vault appearance with templates:
Related sample: Vault. HTML template for the list mode
Related sample: Vault. HTML template for the grid mode
Related sample: Vault. Custom progress bar
Event handlers for the template
You can assign event handlers to HTML elements of a custom template of Vault items by using the eventHandlers configuration option. The eventHandlers object includes a set of key:value pairs, where:
- key - the name of the event. Note, that at the beginning of the event name the 'on' prefix is used (onclick, onmouseover).
- value - an object that contains a key:value pair, where the key is the CSS class name that the handler will be applied to and the value is a function that takes two parameters:
- event - an event object
- id - the id of a Vault item
Returning false from a handler function will stop the template event bubbling and block triggering of the click event when you click on the item with className.
function listTemplate(item) {
    return "<div class='class_name'>" + item.name + "</div>";
}

const vault = new dhx.Vault("vault_container", {
    uploader: {
        target: "https://docs.dhtmlx.com/vault/backend/upload"
    },
    downloadURL: "https://docs.dhtmlx.com",
    templates: {
        list: listTemplate
    },
    eventHandlers: {           onclick: {             class_name: function(event) {                 console.log("You clicked on " + event.target.tagName);                 // return false;             },         },         onmouseover: {             class_name: function(event, id) {                 console.log("Item ID: " + id);             },         }     } });
vault.data.load("https://snippet.dhtmlx.com/codebase/data/vault/01/dataset.json");
Check the snippet below to see a real-life example.
Related sample: Vault. HTML templates for the list mode
Changing name of form field
If Vault is used together with a form, the name of the file field in the form data sent to server is "file". To change the default name, set the fieldName property:
var vault = new dhx.Vault('vault',{
    uploader:{
        target:"/upload",
        fieldName:"userpic"
    }
});
Updating file attributes from server response
Each file loaded into the Vault presents a JSON object with file attributes:
var files = [
    {
        "name":"one.jpg",
        "size":36484,
    },
    {
        "name":"another.svg",
        "size":35523213
    }
];
The full list of a file object properties is given in the article Loading List of Files.
By default the values of file attributes are updated from server response. You can disable this option in the updateFromResponse property of the Uploader object:
var vault = new dhx.Vault("vault_container", {
    uploader:{
        // obligatory, the path for upload
        target:"/upload"
        updateFromResponse:false
    }
});