任务着色
对任务进行着色可以突出显示特定任务,从而吸引用户的注意力。
要为任务设置自定义样式,可以使用以下三种方法之一:
重新定义任务的模板
要通过模板为任务设置自定义样式,请使用 task_class 模板。举例来说,为了根据优先级为任务着色,可以按如下代码实现:
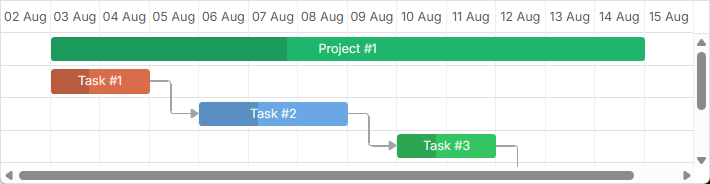
根据优先级着色任务
<style>

    /* high */
    .gantt_task_line.high {
        --dhx-gantt-task-background: #d96c49;
        --dhx-gantt-task-color: #fff;
    }

    /* medium */
    .gantt_task_line.medium {
        --dhx-gantt-task-background: #f57730;
        --dhx-gantt-task-color: #fff;
    }

    /* low */
    .gantt_task_line.low {
        --dhx-gantt-task-background: #fff;
        --dhx-gantt-task-color: #fff;
    }

</style>
gantt.templates.task_class = (start, end, task) => {
    switch (task.priority) {
        case "1":
            return "high";
        case "2":
            return "medium";
        case "3":
            return "low";
        default:
            return "";
    }
};
相关示例: Task styles
若要为任务的其他方面设置样式,请使用 时间轴区域模板 文章中列出的模板。
同样的方法也可应用于链接。更多相关内容请参阅 这里 。
在任务对象的属性中设置样式
要为任务指定自定义样式,您可以向数据对象添加 3 个额外属性(也可以只添加其中的一部分):
- color - 任务条的背景颜色
- textColor - 任务条内部文本的颜色(不影响类型为 "milestone" 的任务)
- progressColor - 进度条的颜色(默认情况下,只是在样式上使其比任务颜色稍暗,使用如下样式
background-color: rgb(54, 54, 54); opacity: 0.2)

请注意,这些是特殊属性。默认情况下,Gantt 会检测任务是否具有这些属性;若存在,则将相关数值应用到任务条和文本上。否则,将应用预定义的颜色。
在任务对象中设置任务颜色
const data = {
    tasks: [
        { id: 1, text: "Project #1", start_date: "01-04-2013", duration: 18, color: "red" },
        { id: 2, text: "Task #1", start_date: "02-04-2013", duration: 8, color: "blue", parent: 1 },
        { id: 3, text: "Task #2", start_date: "11-04-2013", duration: 8, color: "blue", parent: 1 }
    ]
};

gantt.init("gantt_here");
gantt.parse(data);

gantt.getTask(1).color = "red";
相关示例: Specify inline colors for Tasks and Links
通过 color 属性添加自定义颜色之后,紧接着会添加内联样式,该内联样式在所有样式中具有最高优先级。因此,关键路径不会被高亮,您添加的用于更改任务背景或颜色的任何自定义样式都不会生效。
为了使任务看起来是关键的,您可以使用以下代码:
.gantt_critical_task {
    --dhx-gantt-task-background: #e63030 !important;
}
相关示例: Coloring critical tasks and links
如果为任务对象的属性中分配了至少一个属性,该任务将获得额外的类名 "gantt_task_inline_color" 。
您可以使用该类覆盖任务的其他样式(对于该类,请使用选择器 .gantt_task_line.gantt_task_inline_color):
.gantt_task_line.gantt_task_inline_color .gantt_task_progress {
    background-color: rgb(54, 54, 54);
    opacity: 0.2;
}
这些属性可以取任何有效的 CSS 颜色值,例如以下记法都是有效的:
task.color = "#FF0000";
task.color = "red";
task.color = "rgb(255,0,0)";
同样的方法也可应用于链接。有关更多信息,请参阅 这里 。
从数据加载颜色
如果颜色是来自后端数据的一部分,例如任务颜色与阶段或分配给任务的资源相关联而不能直接在页面上硬编码,那么从数据中手动生成样式可能是一个不错的解决方案。
设想你有以下可以分配给任务的用户集合。任务样式应由用户记录的属性定义:
[
    { "key": 1, "label": "John", "backgroundColor": "#03A9F4", "textColor": "#FFF" },
    { "key": 2, "label": "Mike", "backgroundColor": "#f57730", "textColor": "#FFF" },
    { "key": 3, "label": "Anna", "backgroundColor": "#e157de", "textColor": "#FFF" },
    { "key": 4, "label": "Bill", "backgroundColor": "#78909C", "textColor": "#FFF" },
    { "key": 7, "label": "Floe", "backgroundColor": "#8D6E63", "textColor": "#FFF" }
]
在这种用例中,用户及其颜色由应用的不同部分创建和管理,Gantt 通�常事先不知道用户的 ID 及其颜色。
你可以在这种情况下执行以下操作:
- 为该集合定义一个命名的 serverList
gantt.serverList("people");
-
将选项加载到页面上,可以通过 使用 gantt 数据格式 或通过自定义 xhr 手动加载。
-
一旦选项加载完成,就可以从数据中生成 CSS 样式:
gantt.attachEvent("onLoadEnd", () => {
    // 使用任意的 style 元素 id
    const styleElementId = "dynamicGanttStyles";

    // 如果你在重新加载带颜色的选项 -
    // 复用之前创建的 style 元素

    let styleElement = document.getElementById(styleElementId);
    if (!styleElement) {
        styleElement = document.createElement("style");
        styleElement.id = styleElementId;
        document.head.appendChild(styleElement);
    }
    const cssRules = [];
    const peopleOptions = gantt.serverList("people");

    // 为每个选项生成 css 样式并写入到 style 元素
    peopleOptions.forEach((personOption) => {
        if (personOption.backgroundColor && personOption.textColor) {
            cssRules.push(
                `.gantt_task_line.gantt_resource_${personOption.key}{` +
                `--dhx-gantt-task-background: ${personOption.backgroundColor}; ` +
                `--dhx-gantt-task-color: ${personOption.textColor}; ` +
                `}`
            );
        }
    });
    styleElement.innerHTML = cssRules.join("");
});
如果你从 资源数据存储 获取资源,则需要使用 personOption.id 代替 personOption.key 作为资源的 id。
- 之后你就可以分配从任务模板生成的相关类:
gantt.templates.task_class = (start, end, task) => {
    const taskCssClasses = [];

    if (task.owner_id) {
        taskCssClasses.push(`gantt_resource_${task.owner_id}`);
    }

    return taskCssClasses.join(" ");
};