dhtmlxScheduler 与 ASP.NET MVC
本指南将带您一步步使用 ASP.NET 和服务器端的 REST API �构建一个 Scheduler。
如果您对 Scheduler 的其他服务器端集成方式感兴趣,可以参考以下教程:
- dhtmlxScheduler와 ASP.NET Core
- dhtmlxScheduler와 Node.js
- dhtmlxScheduler와 PHP
- dhtmlxScheduler와 PHP:Slim
- dhtmlxScheduler와 PHP:Laravel 연동하기
- dhtmlxScheduler와 SalesForce LWC 통합하기
- dhtmlxScheduler와 Ruby on Rails 연동하기
- dhtmlxScheduler와 dhtmlxConnector 연동하기
本文将使用 ASP.NET MVC 5 及 Web API 控制器来搭建 Scheduler 应用。数据库交互将依赖 Entity Framework。开发环境选用 Visual Studio IDE。
您可以在 GitHub 上找到完整的源代码。
步骤 1. 创建项目
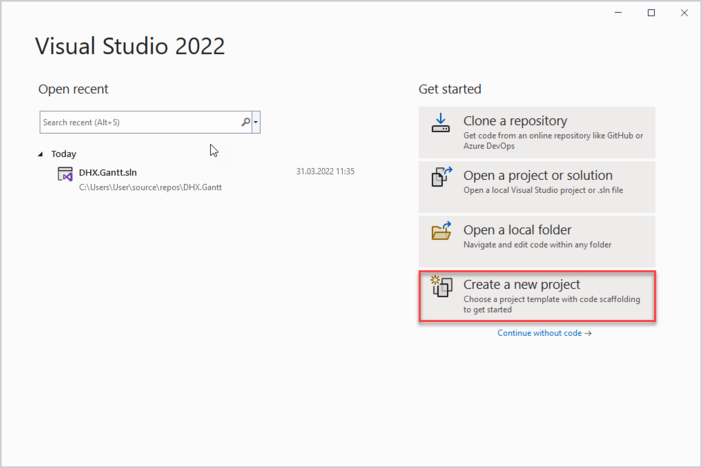
启动 Visual Studio 2022,选择 Create a new project(创建新项目)。
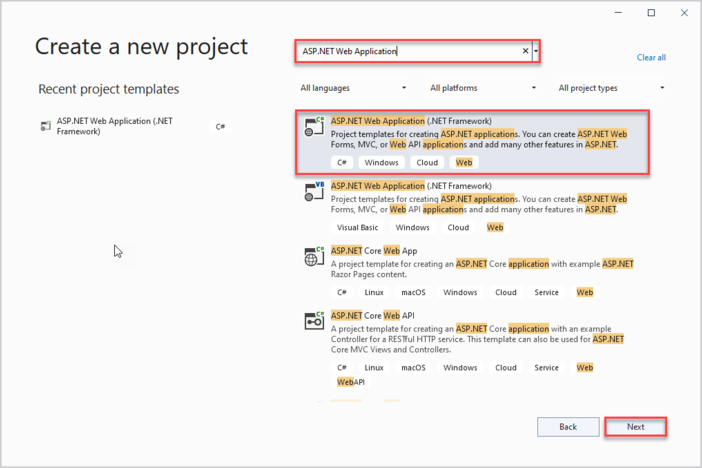
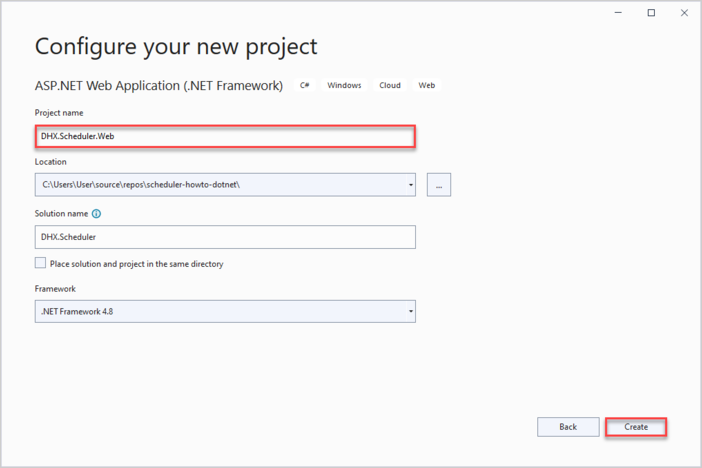
然后选择 "ASP.NET Web Application",将其命名为 DHX.Scheduler.Web。如果未找到该模板,请参考 Troubleshooting 部分。
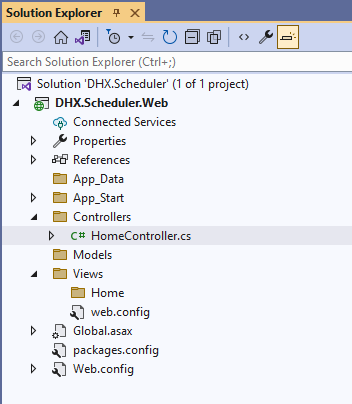
从模板中选择 Empty(空项目),并勾选右侧的 MVC 和 Web API 选项:
![]()
步骤 2. 向页面添加 Scheduler
创建控制器
空项目准备好后,下一步是添加一个 MVC 控制器,用于显示调度页面。
右键点击 Controllers 文件夹,选择 Add -> Controller。在弹出的对话框中,选择 MVC 5 Controller -> Empty,然后点击 Add。将控制器命名为 "HomeController"。
HomeController 默认包含 Index() 方法,返回 ActionResult 类型,因此无需额外逻辑。我们只需为其添加一个视图。
using System.Web.Mvc;

namespace DHX.Scheduler.Web.Controllers
{
    public class HomeController : Controller
    {
        // GET: Home
        public ActionResult Index()
        {
            return View();
        }
    }
}
创建视图
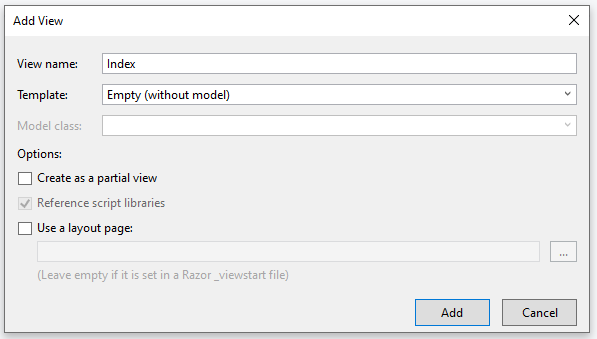
接下来创建 index 页面。进入 Views/Home,添加一个空视图,命名为 Index:
打开新建的视图,并插入以下代码:
@{
Layout = null;
}
<!DOCTYPE html>
<html>
<head>
<meta name="viewport" content="width="device-width"" />
<title>Index</title>
<link href="https://cdn.dhtmlx.com/scheduler/edge/dhtmlxscheduler.css"
rel="stylesheet" type="text/css" />
<script src="https://cdn.dhtmlx.com/scheduler/edge/dhtmlxscheduler.js"></script>
<script>
document.addEventListener("DOMContentLoaded", function(event) {
// initializing scheduler
scheduler.init("scheduler_here", new Date(2022,0,15));
// initiating data loading
scheduler.load("/api/scheduler");
// initializing dataProcessor
var dp = scheduler.createDataProcessor("/api/scheduler");
// and attaching it to scheduler
dp.init(scheduler);
// setting the REST mode for dataProcessor
dp.setTransactionMode("REST");
});
</script>
</head>
<body>
<div id="scheduler_here" className="dhx_cal_container">
<div className="dhx_cal_navline">
<div className="dhx_cal_prev_button"> </div>
<div className="dhx_cal_next_button"> </div>
<div className="dhx_cal_today_button"></div>
<div className="dhx_cal_date"></div>
<div className="dhx_cal_tab" name="day_tab"></div>
<div className="dhx_cal_tab" name="week_tab"></div>
<div className="dhx_cal_tab" name="month_tab"></div>
</div>
<div className="dhx_cal_header"></div>
<div className="dhx_cal_data"></div>
</div>
</body>
</html>
此代码实现了以下功能:
- 设置了 Scheduler 应用的基本页面布局
- 引入了 dhtmlx scheduler 的 JS 和 CSS(通过 CDN 链接)
- 在页面上创建了 scheduler
同时,将 scheduler 配置为与 RESTful API 后端 "/api/scheduler/" 协作,在加载数据时以及作为默认路由使用:
scheduler.load("/api/scheduler");
// initializing dataProcessor
var dp = scheduler.createDataProcessor("/api/scheduler");
// and attaching it to scheduler
dp.init(scheduler);
// setting the REST mode for dataProcessor
dp.setTransactionMode("REST");
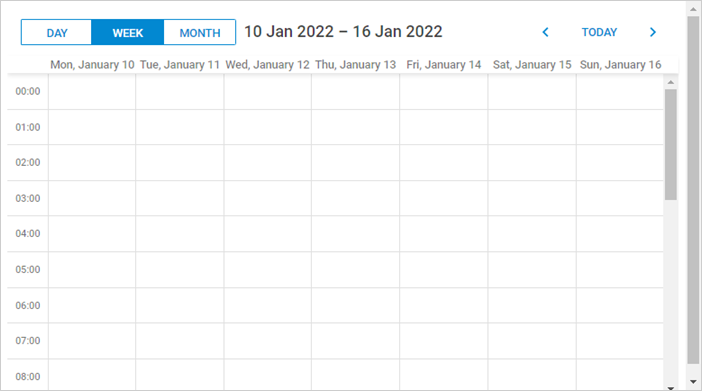
服务器端实现将在后续完成。现在,您可以运行应用并看到调度组件已显示。
步骤 3. 创建模型和数据库
创建模型
接下来需要为 scheduler 定义模型类。您需要一个用于表示调度事件的类。请注意,dhtmlxScheduler 对数据模型有特定的命名要求,这与常规 C# 风格不同。有些客户端属性可能不会存储在数据库中,而是在客户端或后端逻辑中使用。
为了解决这个问题,我们将遵循 Data Transfer Object 模式:为 EF 及内部使用定义领域模型类,为 Web API 通信定义单独的 DTO 类。稍后会配置模型之间的映射。
Scheduler 事件模型
首先创建 Event 类。以下是一个基本示例:
using System;

namespace DHX.Scheduler.Web.Models
{
    public class SchedulerEvent
    {
        public int Id { get; set; }
        public string Text { get; set; }
        public DateTime StartDate { get; set; }
        public DateTime EndDate { get; set; }

    }
}
请注意,调度事件还可以包含许多其他属性,以增强日历功能。此示例仅涵盖了基本字段。
配置数据库连接
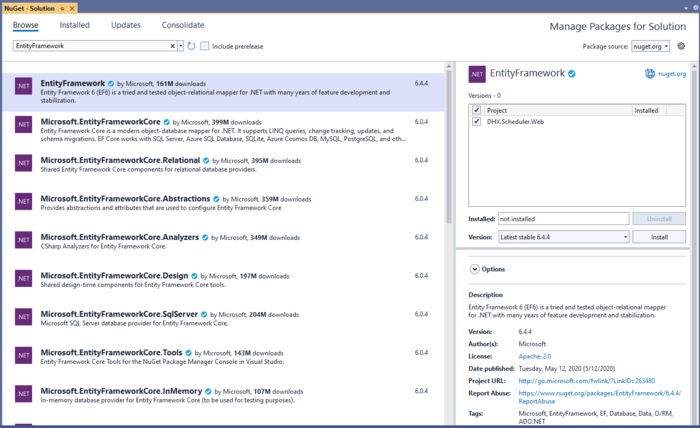
安装 Entity Framework
您可以通过 NuGet 包管理器添加 Entity Framework:
或者在包管理器控制台中运行以下命令:
PM> Install-Package EntityFramework
创建数据库上下文
接下来创建 Context 类。它代表与数据库的会话,负责数据的获取和保存。
右键点击 Models 文件夹,选择 Add -> Class,命名为 "SchedulerContext",并添加如下代码:
using System.Data.Entity;

namespace DHX.Scheduler.Web.Models
{
    public class SchedulerContext : DbContext
    {
        public DbSet<SchedulerEvent> SchedulerEvents { get; set; }
    }
}
向数据库添加初始记录
现在我们来添加一些示例数据。
Entity Framework 可以在应用启动时自动创建数据库。我们希望每当模型发生变化时,数据库会自动删除并重建。
首先,在 App_Start 下添加一个继承自 DropCreateDatabaseIfModelChanges 的数据库初始化类,命名为 "SchedulerInitializer"。
在此类中,重写 Seed() 方法,通过向 context 添加实体来填充测试数据。
以下是完整的 SchedulerInitializer 类:
using System;
using System.Collections.Generic;
using System.Data.Entity;
using DHX.Scheduler.Web.Models;
namespace DHX.Scheduler.Web.App_Start
{
public class SchedulerInitializer:DropCreateDatabaseIfModelChanges<SchedulerContext>
{
protected override void Seed(SchedulerContext context)
{
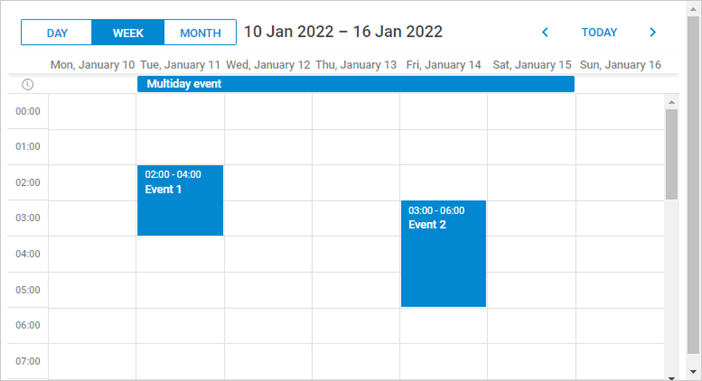
List<SchedulerEvent> events = new List<SchedulerEvent>()
{
new SchedulerEvent()
{
Id = 1,
Text = "Event 1",
StartDate = new DateTime(2022, 1, 11, 2, 0, 0),
EndDate = new DateTime(2022, 1, 11, 4, 0, 0)
},
new SchedulerEvent()
{
Id = 2,
Text = "Event 2",
StartDate = new DateTime(2022, 1, 14, 3, 0, 0),
EndDate = new DateTime(2022, 1, 14, 6, 0, 0)
},
new SchedulerEvent()
{
Id = 3,
Text = "Multiday event",
StartDate = new DateTime(2022, 1, 11, 0, 0, 0),
EndDate = new DateTime(2022, 1, 16, 0, 0, 0)
}
};
events.ForEach(s => context.SchedulerEvents.Add(s));
context.SaveChanges();
}
}
}
打开 Global.asax。该文件包含应用启动时执行的代码。添加所需命名空间,并在 Application_Start() 中为 context 设置初始化器:
using System;
using System.Web;
using System.Web.Mvc;
using System.Web.Routing;
using System.Web.Http;

using System.Data.Entity;
using DHX.Scheduler.Web.App_Start;

namespace DHX.Scheduler.Web
{
    public class Global : HttpApplication
    {
        void Application_Start(object sender, EventArgs e)
        {
            // Code that runs on application startup
            AreaRegistration.RegisterAllAreas();
            GlobalConfiguration.Configure(WebApiConfig.Register);
            RouteConfig.RegisterRoutes(RouteTable.Routes);

            Database.SetInitializer(new SchedulerInitializer()); /*!*/
        }
    }
}
定义 DTO 及映射
接下来,我们要定义 Web API 使用的 DTO 类。为了在 Model 和 DTO 之间进行映射,我们会在类中实现显式转换操作符。
以下是 WebAPIEvent 类的结构:
using System;

namespace DHX.Scheduler.Web.Models
{
    public class WebAPIEvent
    {
        public int id { get; set; }
        public string text { get; set; }
        public string start_date { get; set; }
        public string end_date { get; set; }

        public static explicit operator WebAPIEvent(SchedulerEvent schedulerEvent)
        {
            return new WebAPIEvent
            {
                id = schedulerEvent.Id,
                text = schedulerEvent.Text,
                start_date = schedulerEvent.StartDate.ToString("yyyy-MM-dd HH:mm"),
                end_date = schedulerEvent.EndDate.ToString("yyyy-MM-dd HH:mm")
            };
        }

        public static explicit operator SchedulerEvent(WebAPIEvent schedulerEvent)
        {
            return new SchedulerEvent
            {
                Id = schedulerEvent.id,
                Text = schedulerEvent.text,
                StartDate = DateTime.Parse(
                    schedulerEvent.start_date,
                    System.Globalization.CultureInfo.InvariantCulture),
                EndDate = DateTime.Parse(
                    schedulerEvent.end_date,
                    System.Globalization.CultureInfo.InvariantCulture)
            };
        }

    }
}
步骤 4. 实现 Web API
Scheduler 控制器
要添加一个新的控制器:
- 右键点击 Controllers 文件夹,选择 Add -> Controller。
- 选择 Web API 2 Controller -> Empty,然后输入 "SchedulerController" 作为控制器名称。
现在,让我们为调度事件管理设置基本的 CRUD 操作:
using System;
using System.Collections.Generic;
using System.Data.Entity;
using System.Linq;
using System.Web.Http;

using DHX.Scheduler.Web.App_Start;
using DHX.Scheduler.Web.Models;

namespace DHX.Scheduler.Web.Controllers
{
    public class SchedulerController : ApiController
    {
        private SchedulerContext db = new SchedulerContext();

        // GET: api/scheduler
        public IEnumerable<WebAPIEvent> Get()
        {
            return db.SchedulerEvents
                .ToList()
                .Select(e => (WebAPIEvent)e);
        }

        // GET: api/scheduler/5
        public WebAPIEvent Get(int id)
        {
            return (WebAPIEvent)db.SchedulerEvents.Find(id);
        }

        // PUT: api/scheduler/5
        [HttpPut]
        public IHttpActionResult EditSchedulerEvent(int id, WebAPIEvent webAPIEvent)
        {
            var updatedSchedulerEvent = (SchedulerEvent)webAPIEvent;
            updatedSchedulerEvent.Id = id;
            db.Entry(updatedSchedulerEvent).State = EntityState.Modified;
            db.SaveChanges();

            return Ok(new
            {
                action = "updated"
            });
        }

        // POST: api/scheduler/5
        [HttpPost]
        public IHttpActionResult CreateSchedulerEvent(WebAPIEvent webAPIEvent)
        {
            var newSchedulerEvent = (SchedulerEvent)webAPIEvent;
            db.SchedulerEvents.Add(newSchedulerEvent);
            db.SaveChanges();

            return Ok(new
            {
                tid = newSchedulerEvent.Id,
                action = "inserted"
            });
        }

        // DELETE: api/scheduler/5
        [HttpDelete]
        public IHttpActionResult DeleteSchedulerEvent(int id)
        {
            var schedulerEvent = db.SchedulerEvents.Find(id);
            if (schedulerEvent != null)
            {
                db.SchedulerEvents.Remove(schedulerEvent);
                db.SaveChanges();
            }

            return Ok(new
            {
                action = "deleted"
            });
        }

        protected override void Dispose(bool disposing)
        {
            if (disposing)
            {
                db.Dispose();
            }
            base.Dispose(disposing);
        }
    }
}
在此代码中:
- 调度事件从数据库加载,并在 GET 操作中返回其 DTO。
- 对于 PUT 和 POST 操作,DTO 作为输入接收,转换回 SchedulerEvent 模型,并将更改保存到数据库上下文。
通过上述设置,应用程序已经可以运行,提供了一个完整可用的调度功能。
如果 Scheduler 未能在页面上渲染事件,请查阅 백엔드 통합 문제 해결 文章。
动态加载
目前,每次调度器调用 GET 操作时,都会获取整个事件表。初期这样没问题,但随着数据量增长,传输的数据会变得相当大。实现动态加载可以让调度器仅加载特定时间范围内所需的事件,从而提高效率。
在客户端,可以通过 scheduler.setLoadMode 方法启用此功能:
scheduler.setLoadMode("day");
// 从后端加载数据
scheduler.load("/api/scheduler");
这样,调度器将在 GET 请求中包含 from 和 to 日期参数,后端即可只返回该范围内的事件。
在服务端,可以让 GET 操作接受这些参数,并相应地筛选事件:
// GET: api/scheduler
public IEnumerable<WebAPIEvent> Get(DateTime from, DateTime to)
{
    return db.SchedulerEvents
       .Where(e => e.StartDate < to && e.EndDate >= from)
       .ToList()
       .Select(e => (WebAPIEvent)e);
}
如果 Scheduler 未能在页面上渲染事件,请查阅 백엔드 통합 문제 해결 文章。
循环(周期性)事件
如需支持周期性事件(如每日重复),需要在调度器页面启用相应扩展:
scheduler.plugins({
    recurring: true
});
更新模型
模型也需要更新以存储循环信息:
using System;

namespace DHX.Scheduler.Web.Models
{
    public class SchedulerEvent
    {
        public int Id { get; set; }
        public string Text { get; set; }
        public DateTime StartDate { get; set; }
        public DateTime EndDate { get; set; }

        public int EventPID { get; set; }
        public string RecType { get; set; }
        public long EventLength { get; set; }

    }
}
DTO 也应相应更新:
using System;

namespace DHX.Scheduler.Web.Models
{
    public class WebAPIEvent
    {
        public int id { get; set; }
        public string text { get; set; }
        public string start_date { get; set; }
        public string end_date { get; set; }

        public int? event_pid { get; set; }
        public string rec_type { get; set; }
        public long? event_length { get; set; }

        public static explicit operator WebAPIEvent(SchedulerEvent schedulerEvent)
        {
            return new WebAPIEvent
            {
                id = schedulerEvent.Id,
                text = schedulerEvent.Text,
                start_date = schedulerEvent.StartDate.ToString("yyyy-MM-dd HH:mm"),
                end_date = schedulerEvent.EndDate.ToString("yyyy-MM-dd HH:mm"),

                event_pid = schedulerEvent.EventPID,
                rec_type = schedulerEvent.RecType,
                event_length = schedulerEvent.EventLength
            };
        }

        public static explicit operator SchedulerEvent(WebAPIEvent schedulerEvent)
        {
            return new SchedulerEvent
            {
                Id = schedulerEvent.id,
                Text = schedulerEvent.text,
                StartDate = DateTime.Parse(
                    schedulerEvent.start_date,
                    System.Globalization.CultureInfo.InvariantCulture),
                EndDate = DateTime.Parse(
                    schedulerEvent.end_date,
                    System.Globalization.CultureInfo.InvariantCulture),
                EventPID = schedulerEvent.event_pid != null ?
                    schedulerEvent.event_pid.Value : 0,
                EventLength = schedulerEvent.event_length != null ?
                    schedulerEvent.event_length.Value : 0,
                RecType = schedulerEvent.rec_type
            };
        }

    }
}
更新 API 控制器
最后,PUT/POST/DELETE 操作需要调整,以正确支持 周期性事件的特殊规则。
先来看 POST 操作,它处理周期性事件的一个特殊情况:当删除周期性系列中的单个实例时,需要创建一个新的数据库记录,客户端会触发插入操作:
// POST: api/scheduler/5
[HttpPost]
public IHttpActionResult CreateSchedulerEvent(WebAPIEvent webAPIEvent)
{
  var newSchedulerEvent = (SchedulerEvent)webAPIEvent;
  db.SchedulerEvents.Add(newSchedulerEvent);
  db.SaveChanges();

  // 删除周期性系列中的单个实例
  var resultAction = "inserted";
  if(newSchedulerEvent.RecType == "none")
  {
     resultAction = "deleted";
  }

  return Ok(new
  {
      tid = newSchedulerEvent.Id,
    action = resultAction
  });
}
在 PUT 操作中,确保所有模型属性都被更新。此外,当修改一个周期性系列时,必须删除该系列的所有已修改实例:
// PUT: api/scheduler/5
[HttpPut]
public IHttpActionResult EditSchedulerEvent(int id, WebAPIEvent webAPIEvent)
{
    var updatedSchedulerEvent = (SchedulerEvent)webAPIEvent;
    updatedSchedulerEvent.Id = id;
    db.Entry(updatedSchedulerEvent).State = EntityState.Modified;

    if (!string.IsNullOrEmpty(updatedSchedulerEvent.RecType) &&
        updatedSchedulerEvent.RecType != "none")
    {
      // 更新周期性系列时,需删除所有已修改的实例
      //https://docs.dhtmlx.com/scheduler/server_integration.html#recurringevents

      db.SchedulerEvents.RemoveRange(
         db.SchedulerEvents.Where(e => e.EventPID == id)
      );
    }

    db.SaveChanges();

    return Ok(new
    {
       action = "updated"
    });
}
最后,DELETE 操作需要覆盖两种特殊情况:
- 如果要删除的事件有非空的
event_pid,说明要删除的是周期性系列的某个已修改实例。此时不应直接删除记录,而应将其rec_type设为'none',这样调度器会忽略该实例。 - 如果删除整个周期性系列,则还需删除该系列的所有已修改实例。
// DELETE: api/scheduler/5
[HttpDelete]
public IHttpActionResult DeleteSchedulerEvent(int id)
{
var schedulerEvent = db.SchedulerEvents.Find(id);
if (schedulerEvent != null)
{
// 针对周期性事件的特殊逻辑
//https://docs.dhtmlx.com/scheduler/server_integration.html#recurringevents
if(schedulerEvent.EventPID != default(int))
{
// 删除周期��性系列的某个已修改实例
// 如果带有 event_pid 的事件被删除,应将 rec_type 设为 none,而不是直接删除。
schedulerEvent.RecType = "none";
}
else
{
// 删除整个周期性系列时,需删除该系列的所有已修改实例
if (!string.IsNullOrEmpty(schedulerEvent.RecType) &&
schedulerEvent.RecType != "none")
{
// 更新周期性系列时,需删除所有已修改的实例
//https://docs.dhtmlx.com/scheduler/server_integration.html#recurringevents
db.SchedulerEvents.RemoveRange(
db.SchedulerEvents.Where(ev => ev.EventPID == id)
);
}
db.SchedulerEvents.Remove(schedulerEvent);
}
db.SaveChanges();
}
return Ok(new
{
action = "deleted"
});
}
解析重复系列
在数据库中,重复事件以单条记录存储,Scheduler 会在客户端将其拆分为各个独立的事件实例。如果你需要在服务器端提取各个事件的日期,可以使用一个辅助库来解析 dhtmlxScheduler 的重复事件(适用于 ASP.NET)。
你可以在 GitHub 上找到现成的库。
错误处理
异常过滤器" 提供了一种在 CRUD 处理程序中捕获异常并返回客户端调度器可以理解的响应的方法,具体说明见 错误处理。
要为 scheduler 设置错误处理,请按照以下步骤操作:
在 App_Start 文件夹下创建一个名为 SchedulerAPIExceptionFilterAttribute 的新类:
using System.Net;
using System.Net.Http;
using System.Web.Http.Filters;

namespace DHX.Scheduler.Web.App_Start
{
 public class SchedulerAPIExceptionFilterAttribute : ExceptionFilterAttribute
  {
   public override void OnException(HttpActionExecutedContext context)
    {
      context.Response = context.Request.CreateResponse(
          HttpStatusCode.InternalServerError, new
        {
          action = "error",
          message = context.Exception.Message
        });
    }
  }
}
然后,将此属性添加到你的 WebAPI 控制器(SchedulerController)中,如下所示:
namespace DHX.Scheduler.Web.Controllers
{
    [SchedulerAPIExceptionFilter]
    public class SchedulerController : ApiController
    {
配置完成后,如果在 Web API 控制器处理请求时发生异常,客户端将收到错误状态和消息,可以根据需要进行处理或显示。
请注意,在生产环境中直接向客户端暴露异常消息可能并不安全。
应用安全
Scheduler 本身未包含对 SQL 注入、XSS 或 CSRF 等常见威胁的防护。应用安全需要由负责后端的开发者自行实现。更多信息请参考 相关文档。
XSS 防护
一个简单的做法是在向客户端发送数据时对文本字段进行编码。
如果尚未安装编码器包,可以通过 Package Manager Console 添加:
PM> Install-Package System.Text.Encodings.Web -Version 6.0.0
例如,下面的代码使用内置的 HtmlEncoder 对事件文本中的 HTML 字符进行转义。这样可以保证数据库中的数据不变,但客户端接收到的 event.text 是安全的。
using System.Text.Encodings.Web;

public static explicit operator WebAPIEvent(SchedulerEvent schedulerEvent)
{
  return new WebAPIEvent
    {
      id = schedulerEvent.Id,
      text = HtmlEncoder.Default.Encode(schedulerEvent.Text),
      start_date = schedulerEvent.StartDate.ToString("yyyy-MM-dd HH:mm"),
      end_date = schedulerEvent.EndDate.ToString("yyyy-MM-dd HH:mm")
    };
}
另外,也可以使用如 HtmlAgilityPack 这样的专业库,在保存或加载数据时彻底移除所有 HTML 内容。
故障排查
缺少 ASP.NET Web Application 模板
如果在 Visual Studio 2022 中找不到 "ASP.NET Web Application" 项目模板,请尝试以下步骤:
-
关闭 Visual Studio 2022
-
打开开始菜单,启动 Visual Studio Installer
-
找到 Visual Studio Community 2022 并点击 Modify
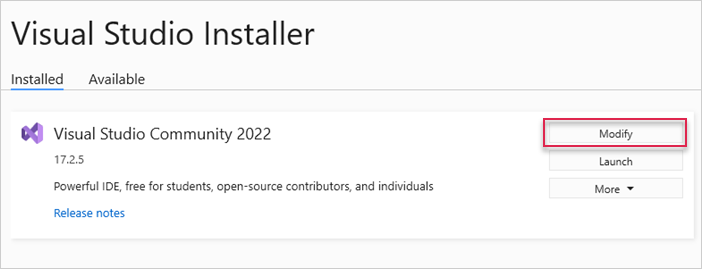
- 在弹出的窗口中,选择 Individual components,勾选列表中的 ".NET Framework Project and item templates",然后点击 Modify
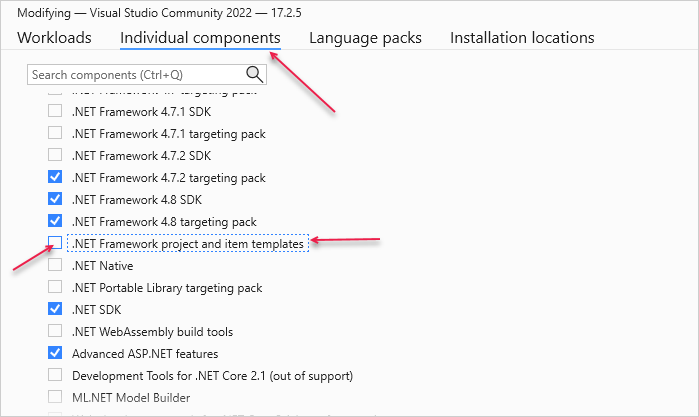
完成上述步骤后,重启 Visual Studio 2022,即可看到该模板。
渲染任务和链接的问题
如果在按照 ASP.NET MVC 集成步骤后 Scheduler 页面没有显示事件,请参考 백엔드 통합 문제 해결 文章,里面有诊断此类问题根本原因的指导。
后续操作
至此,Scheduler 已经可以正常运行。你可以在 GitHub 上查看完整源码,克隆或下载用于你的项目。
此外,还可以参阅 涵盖 Scheduler 各项功能的指南 或 与其他后端框架集成的教程。