Available only in PRO Edition
Grid 视图
此视图仅包含在 Scheduler PRO 版本中。
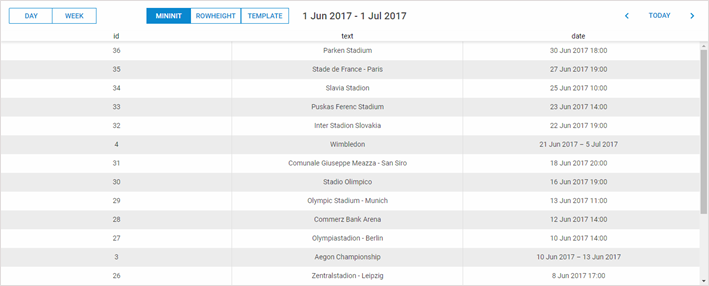
Grid 视图显示即将到来的事件列表,与 Agenda 视图不同,它允许你设置任意数量的列。
初始化
要将 Grid 视图添加到调度器中,请按照以下步骤操作:
- 在页面上启用 "grid view" 扩展:
scheduler.plugins({
    grid_view: true
});
- 将视图的标签页添加到调度器的标记中:
<div id="scheduler_here" class="dhx_cal_container" ...>
    <div class="dhx_cal_navline">
       ...
       <div class="dhx_cal_tab" name="grid_tab" style="right:300px;"></div>
    </div>
    ...
</div>
- 为标签页设置显示文本:
//'grid_tab' 是我们 div 的名称
scheduler.locale.labels.grid_tab = "Grid";
- 调用 createGridView 方法:
scheduler.createGridView({
    name:"grid",
    fields:[    // 定义 grid 的列
        {id:"id",   label:'Id',   sort:'int',  width:80,  align:'right'},
        {id:"date", label:'Date', sort:'date', width:'*'},
        {id:"text", label:'Text', sort:'str',  width:200, align:'left'}
    ],
    from:new Date(2019, 3, 10),//允许的日期范围左边界
    to:new Date(2019, 5, 23)    //允许的日期范围右边界
});
限制日期范围
此扩展允许你限制可用日期,用户无法超出指定的范围。
例如,如果你想将可用日期限制在 2010年1月1日 到 2011年1月1日,你可以这样设置:
scheduler.createGridView({
    name:"grid",
    ..
    from:new Date(2019, 0, 1),
    to:new Date(2020, 0, 1)
});
激活导航
要在 grid 中启用  按钮进行导航,只需开启 paging 属性:
scheduler.createGridView({
    name:"grid",
    ...
    paging:true
});
启用导航后,点击 按钮会使 grid 向前或向后滚动一个月。
如需调整每次滚动的默认时间间隔,可以使用 unit 和 step 属性:
- unit - (minute, hour, day, week, month, year) 滚动的时间单位。默认值为 'month'
- step - (number) 每次滚动的单位数。默认值为 1。
//每次滚动2周
scheduler.createGridView({
    name:"grid",
    ...
    paging:true,
    unit:"week",
    step:2
});
排序
点击列头会触发一个控件,显示 grid 当前按哪一列排序,以及是升序还是降序。
再次点击同一列头会反转排序顺序。
由于列中可能包含不同类型的数据(数字、字符串、日期),每种类型都需要自己的排序方式。
因此,该视图支持3种排序类型:
- int;
- date;
- str。
要启用排序并为列指定排序类型,请使用 sort 属性。
scheduler.createGridView({
    name:"grid",
    fields:[
        {id:"date",  label:'Date', sort:'date'},
        {id:"text",  label:'Text', sort:'str'}
    ]
});
自定义排序函数
如果你想使用自己的排序逻辑,可以定义一个函数并将其赋值给 sort 参数。
此函数会针对每对相邻的值调用,并应返回 1、-1 或 0:
- 1 - 第一个值排在第二个值前面;
- -1 - 第二个值排在第一个值前面;
- 0 - 两个值相等。
以下是一个通用的排序函数示例:
scheduler.createGridView({
    name:"grid",
    fields:[
        {id:"id",   label:'Id',   sort: sortById},
        {id:"text", label:'Text', sort:'str'}
    ]
});

function sortById(a,b){
    a = a.id;
    b = b.id;
    return a>b?1:(a<b?-1:0);
}
数据模板
默认情况下,每一列会显示其 id 属性指定的数据。
如果你想自定义某列的显示内容,可以使用模板函数。在这种情况下,该列会显示模板函数返回的数据。
数据模板通过 template 属性分配给列。
scheduler.createGridView({
    name:"grid",
    fields:[
      {id:"date",label:'Date',template:function(start,end,ev){return "1# "+ev.text}},
       ...
    ]
});
模板函数接收3个参数:
- start - 事件的开始日期
- end - 事件的结束日期
- ev - 事件对象