Integration with Svelte
You should be familiar with the basic concepts and patterns of Svelte before reading this documentation. To refresh your knowledge, please refer to the Svelte documentation.
DHTMLX Spreadsheet is compatible with Svelte. We have prepared code examples on how to use DHTMLX Spreadsheet with Svelte. For more information, refer to the corresponding Example on GitHub.
Creating a project
To create a Svelte JS project, run the following command:
npm create vite@latest
Let's name the project as my-svelte-spreadsheet-app.
Installation of dependencies
Go to the app directory:
cd my-svelte-spreadsheet-app
Then install dependencies and run the app. To do this, use a package manager:
- if you use yarn, you need to call the following commands:
yarn
yarn dev // or yarn dev
- if you use npm, you need to call the following commands:
npm install
npm run dev
The app should run on localhost (for instance http://localhost:3000).
Creating Spreadsheet
Now you should get the DHTMLX Spreadsheet source code. First, stop the app and install the Spreadsheet package.
Step 1. Package installation
Download the trial Spreadsheet package and follow the steps in the README file. Note that trial Spreadsheet is available for 30 days only.
Step 2. Component creation
Now you need to create a Svelte component to add Spreadsheet into the application. Create a new file in the src/ directory and name it Spreadsheet.svelte.
Importing source files
Open the Spreadsheet.svelte file and import Spreadsheet source files. Note that:
- if you use the PRO version and install the Spreadsheet package from a local folder, the import paths look like this:
<script>
import { Spreadsheet } from 'dhx-spreadsheet-package';
import 'dhx-spreadsheet-package/codebase/spreadsheet.css';
</script>
Note that depending on the used package, the source files can be minified. In this case make sure that you are importing the CSS file as spreadsheet.min.css.
- if you use the trial version of Spreadsheet, specify the following paths:
<script>
import { Spreadsheet } from '@dhx/trial-spreadsheet';
import '@dhx/trial-spreadsheet/codebase/spreadsheet.min.css';
</script>
In this tutorial you can see how to configure the trial version of Spreadsheet.
Setting the container and adding Spreadsheet
To display Spreadsheet on the page, you need to create the container for Spreadsheet, and initialize this component using the corresponding constructor:
<script>
    import { onMount, onDestroy } from "svelte";
    import { Spreadsheet } from "@dhx/trial-spreadsheet";
    import "@dhx/trial-spreadsheet/codebase/spreadsheet.min.css"

    let container; // initialize container for Spreadsheet
    let spreadsheet;

    onMount(() => {
        // initialize the Spreadsheet component
        spreadsheet = new Spreadsheet(container, {});
    });

    onDestroy(() => {
        spreadsheet.destructor(); // destruct Spreadsheet
    });
</script>

<div bind:this={container} class="widget"></div>
Adding styles
To display Spreadsheet correctly, you need to specify important styles for Spreadsheet and its container in the main css file of the project:
/* specify styles for initial page */
html,
body,
#app { /* make sure that you use the #app root container */
    height: 100%;
    padding: 0;
    margin: 0;
}

/* specify styles for the Spreadsheet container */
.widget {
    height: 100%;
}
Loading data
To add data into Spreadsheet, you need to provide a data set. Create the data.js file in the src/ directory and add some data into it:
export function getData() {
    return {
        styles: {
            bold: {
                "font-weight": "bold"
            },
            right: {
                "justify-content": "flex-end",
                "text-align": "right"
            }
        },
        data: [
            { cell: "a1", value: "Country", css:"bold" },
            { cell: "b1", value: "Product", css:"bold" },
            { cell: "c1", value: "Price", css:"right bold" },
            { cell: "d1", value: "Amount", css:"right bold" },
            { cell: "e1", value: "Total Price", css:"right bold" },

            { cell: "a2", value: "Ecuador" },
            { cell: "b2", value: "Banana" },
            { cell: "c2", value: 6.68, format: "currency" },
            { cell: "d2", value: 430 },
            { cell: "e2", value: 2872.4, format: "currency" },

            { cell: "a3", value: "Belarus" },
            { cell: "b3", value: "Apple" },
            { cell: "c3", value: 3.75, format: "currency" },
            { cell: "d3", value: 600 },
            { cell: "e3", value: 2250, format: "currency" },

            { cell: "a4", value: "Peru" },
            { cell: "b4", value: "Grapes" },
            { cell: "c4", value: 7.69, format: "currency" },
            { cell: "d4", value: 740 },
            { cell: "e4", value: 5690.6, format: "currency" },

            // more cells with data
        ]
    }
}
Then open the App.svelte file, import data, and pass it into the newly created <Spreadsheet/> component as props:
<script>
    import Spreadsheet from "./Spreadsheet.svelte";
    import { getData } from "./data.js";

    const data = getData();
</script>

<Spreadsheet data={data} />
Go to the Spreadsheet.svelte file and apply the passed props to Spreadsheet with the parse() method:
<script>
    import { onMount, onDestroy } from "svelte";
    import { Spreadsheet } from "@dhx/trial-spreadsheet";
    import "@dhx/trial-spreadsheet/codebase/spreadsheet.min.css"

    export let data;

    let container;
    let spreadsheet;

    onMount(() => {
        spreadsheet = new Spreadsheet(container, {});
        spreadsheet.parse(data);
    });

    onDestroy(() => {
        spreadsheet.destructor();
    });
</script>

<div bind:this={container} class="widget"></div>
Now the Spreadsheet component is ready to use. When the element is added to the page, it initializes Spreadsheet with data. You can provide necessary configuration settings as well. Visit our Spreadsheet API docs to check the full list of available properties.
Handling events
When a user performs an action in Spreadsheet, the widget invokes an event. You can use these events to detect the action and run the desired code for it. See the full list of events.
Open Spreadsheet.svelte and complete the onMount() method in the following way:
<script>
// ...
let spreadsheet;

onMount(() => {
    spreadsheet = new Spreadsheet(container, {})

    spreadsheet.events.on("afterFocusSet", function(cell){
        console.log("Focus is set on a cell " + spreadsheet.selection.getSelectedCell());
        console.log(cell);
    });
});

onDestroy(() => {
    spreadsheet.destructor();
});
</script>

// ...
After that, when you start the app, you should see Spreadsheet loaded with data on the page.
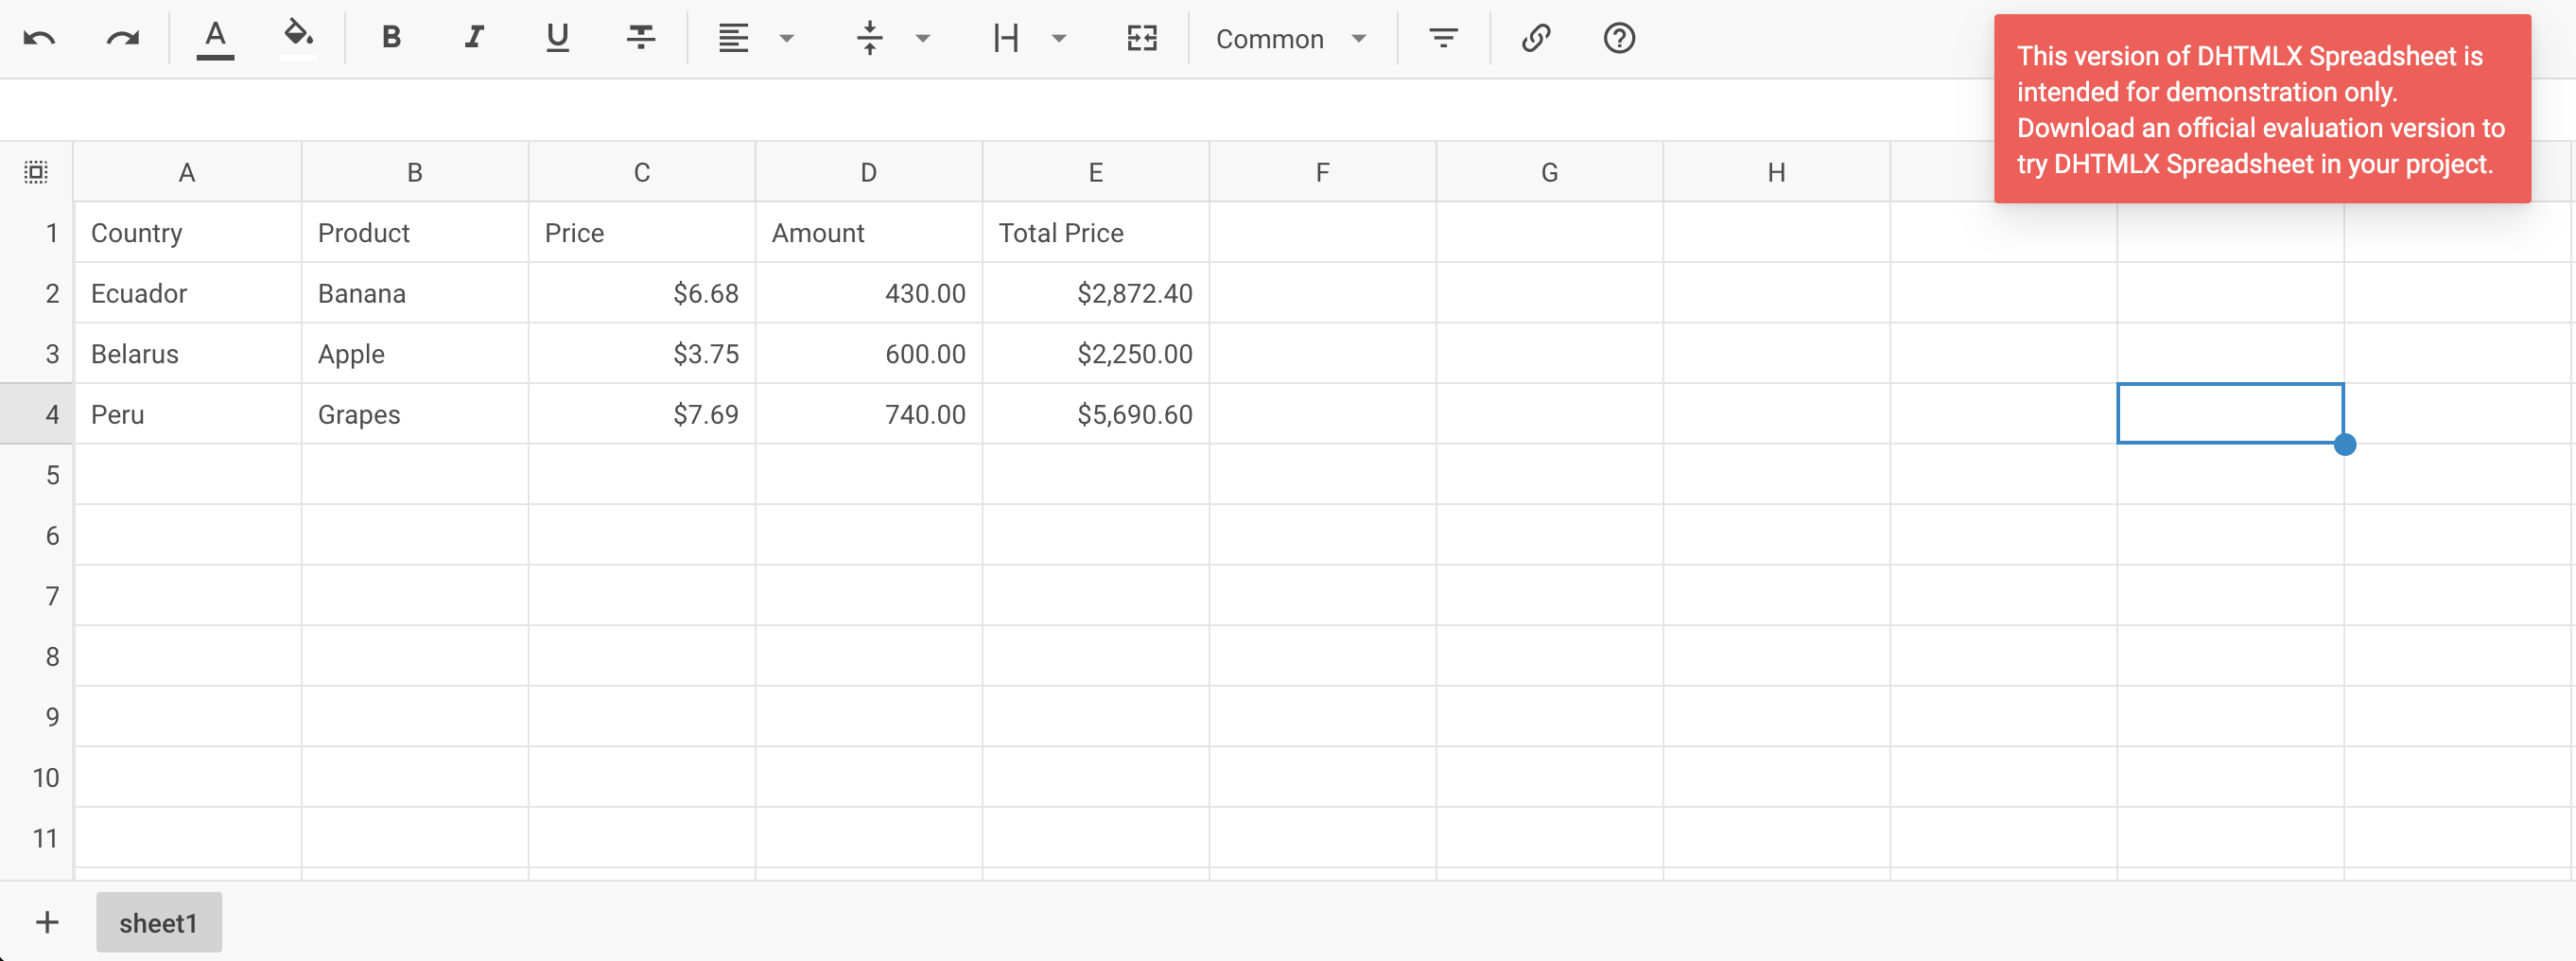
Now you should have a basic setup for integrating DHTMLX Spreadsheet with Svelte. You can customize the code according to your specific requirements. You can find the final example on GitHub.