dhtmlxGantt를 Plain JS/HTML에서 사용하기
dhtmlxGantt로 앱을 개발할 때, 가장 먼저 해야 할 일은 Gantt 차트를 페이지에 설정(렌더링)하는 것입니다.
이 가이드에서는 순수 JavaScript와 HTML을 사용하여 dhtmlxGantt를 초기화하는 방법을 다룹니다. 프론트엔드 프레임워크와 통합하는 방법은 아래 가이드를 참고하세요:
 |  |  |  |
| Angular | React | Svelte | Vue.js |
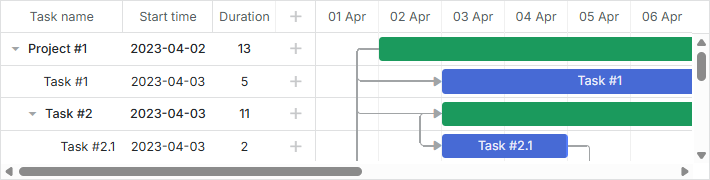
기본 Gantt 차트 생성하기
페이지에 간단한 Gantt 차트를 표시하려면 다음 세 단계를 따라야 합니다:
- dhtmlxGantt 코드 파일을 페이지에 추가합니다.
- 차트가 나타날 DIV 컨테이너를 만듭니다.
- init 메서드를 사용하여 해당 컨테이너 안에 dhtmlxGantt를 초기화합니다. 이 메서드는 Gantt 차트가 렌더링될 HTML 컨테이너 요소 또는 그 id를 파라미터로 받습니다.
<!DOCTYPE html>
<html>
<head>
   <script src="codebase/dhtmlxgantt.js"></script>
   <link href="codebase/dhtmlxgantt.css" rel="stylesheet">
</head>
<body>
    <div id="gantt_here" style='width:1000px; height:400px;'></div>
    <script type="text/javascript">
        gantt.init("gantt_here");   /*!*/
    </script>
</body>
</html>
Gantt 소스 파일을 프로젝트에 추가하는 방법
앱의 유형에 따라 Gantt 소스 파일을 프로젝트에 추가하는 방법에는 여러 가지가 있습니다:
<script> 태그로 파일 포함하기
dhtmlxGantt를 사용하려면 두 개의 파일을 페이지에 추가해야 합니다:
- dhtmlxgantt.js
- dhtmlxgantt.css
<script src="codebase/dhtmlxgantt.js"></script>
<link href="codebase/dhtmlxgantt.css" rel="stylesheet">
이 파일들이 어디에 위치하는지 dhtmlxGantt 패키지 구조를 간단히 살펴보겠습니다.
dhtmlxGantt 패키지의 주요 폴더 및 파일:
- sources - 라이브러리의 소스 코드 파일(난독화되지 않음, 디버깅에 적합)
- samples - 예제 코드 샘플
- codebase - 실제 앱에서 사용해야 하는 프로덕션용 난독화/압축된 코드 파일
ES6/7 및 TypeScript 앱에 파일 임포트하기
다음 명령어로 파일을 임포트할 수 있습니다:
import { gantt } from 'dhtmlx-gantt';
Commercial, Enterprise, Ultimate 버전의 경우:
import { gantt, Gantt } from 'dhtmlx-gantt';
Vite에서 Gantt 사용하기
프로젝트가 Vite를 사용한다면, vite.config.js 파일에 아래 설정을 추가하여 Gantt가 제대로 포함되도록 해야 합니다:
vite.config.js
optimizeDeps: {
    include: [
        'dhtmlx-gantt',
    ]
}
Svelte 프로덕션 빌드
Svelte 앱에서 Gantt를 사용하는 경우, 프로덕션 빌드를 위해 vite.config.js 파일에 다음을 추가하세요. gantt_8.0.6_evaluation을 Gantt 폴더 경로로 교체해야 합니다:
vite.config.js
build: {
    commonjsOptions: {
        include: [
            "node_modules",
            "gantt_8.0.6_evaluation/codebase/dhtmlxgantt.js"
        ]
    },
}
RequireJS 기반 앱에 파일 포함하기
RequireJS 기반 앱에 dhtmlxGantt 파일을 추가하려면 다음과 같이 작성합니다:
requirejs(["codebase/dhtmlxgantt"], function(dhx){
  var gantt = dhx.gantt;
  var Gantt = dhx.Gantt; // Enterprise 빌드용

  gantt.init("gantt_here");
  gantt.parse({
    data: [
      { id:1, text:"Project #2", start_date:"01-04-2018",
          duration:18, progress:0.4, open:true },
      { id:2, text:"Task #1", start_date:"02-04-2018",
          duration:8, progress:0.6, parent:1 },
      { id:3, text:"Task #2", start_date:"11-04-2018",
          duration:8, progress:0.6, parent:1 }
    ],
    links: [
      { id:1, source:1, target:2, type:"1" },
      { id:2, source:2, target:3, type:"0" }
    ]
  });
});
dhtmlxGantt 라이브러리는 gantt와 Gantt 필드를 가진 객체를 반환합니다(후자는 Commercial, Enterprise, Ultimate 버전용) - 이들은 여기에서 설명한 gantt 및 Gantt 객체와 동일합니다.
RequireJS에서 Gantt와 커스텀 확장 기능을 함께 사용할 때는 반드시 RequireJS의 shim 설정에서 확장 기능의 의존성을 Gantt에 명시적으로 지정해야 합니다.
커스텀 확장 파일 custom_tooltip_plugin.js를 올바르게 설정하는 예시는 아래와 같습니다:
requirejs.config({
  paths: {
    "dhtmlxgantt": "../../codebase/dhtmlxgantt",
    "ext/dhtmlxgantt_custom_tooltip": "../custom_tooltip_plugin"
  },
  shim: {
    "ext/dhtmlxgantt_custom_tooltip": ["dhtmlxgantt"]
  }
});

requirejs(["dhtmlxgantt"],
function (dhx) {
  var gantt = dhx.gantt;

  var date_to_str = gantt.date.date_to_str(gantt.config.task_date);
  var today = new Date(2018, 3, 5);
  gantt.addMarker({
    start_date: today,
    css: "today",
    text: "Today",
    title: "Today: " + date_to_str(today)
  });

  gantt.init("gantt_here");
  gantt.parse({
    data: [
      { id:1, text:"Project #2", start_date:"01-04-2018",
          duration:18, progress:0.4, open:true },
      { id:2, text:"Task #1", start_date:"02-04-2018",
          duration:8, progress:0.6, parent:1 },
      { id:3, text:"Task #2", start_date:"11-04-2018",
          duration:8, progress:0.6, parent:1 }
    ],
    links: [
      { id:1, source:1, target:2, type:"1" },
      { id:2, source:2, target:3, type:"0" }
    ]
  });
});
패키지 내의 어떤 파일이든 모듈 이름은 'codebase' 폴더 내부의 상대 경로와 파일명을 조합해서 지정해야 합니다. 예를 들면:
코어 라이브러리:
- "dhtmlxgantt": "./vendor/dhtmlxgantt/dhtmlxgantt"
전체화면 모드
브라우저별로 Gantt 차트가 전체화면에서 올바르게 표시되도록 하려면, 페이지에 아래 스타일을 추가하세요:
<style type="text/css" media="screen">
    html, body{
        margin:0px;
        padding:0px;
        height:100%;
        overflow:hidden;
    }
</style>