与 Angular 集成
在使用本文档之前,您应熟悉 Angular 的基本概念和模式。如需回顾相关知识,请参阅 Angular 文档。
DHTMLX Diagram Editor 与 Angular 兼容。我们已准备了有关如何在 Angular 中使用 DHTMLX Diagram Editor 的代码示例。有关更多信息,请参阅相应的 GitHub 示例。
创建项目
在开始创建新项目之前,请安装 Angular CLI 和 Node.js。
使用 Angular CLI 创建一个新的 my-angular-diagram-app 项目。为此,请运行以下命令:
ng new my-angular-diagram-app
如果您想按照本指南操作,请在创建新的 Angular 应用时禁用服务器端渲染(SSR)和静态站点生成(SSG/预渲染)!
上述命令会安装所有必要的工具,因此您无需运行任何其他命令。
安装依赖
之后,进入应用目录:
cd my-angular-diagram-app
安装依赖并启动开发服务器。为此,请使用 yarn 包管理器:
yarn
yarn start
该应用应在本地主机上运行(例如 http://localhost:3000)。
创建 Diagram Editor
现在您需要获取 DHTMLX Diagram Editor 的源代码。首先,请停止应用,然后继续安装 Diagram Editor 软件包。
步骤 1. 安装软件包
下载 试用版 Diagram 软件包,并按照 README 文件中提到的步骤进行操作。请注意,试用版 Diagram Editor 仅可使用 30 天。
步骤 2. 创建组件
现在您需要创建一个 Angular 组件,以便将 Diagram Editor 添加到应用程序中。在 src/app/ 目录下创建 diagram-editor 文件夹,在其中添加一个新文件并将其命名为 diagram-editor.component.ts。然后完成以下步骤。
导入源文件
打开该文件并导入 Diagram Editor 源文件。请注意:
- 如果您使用 PRO 版本,并从本地文件夹安装 Diagram Editor 软件包,则导入路径如下所示:
import { DiagramEditor } from 'dhx-diagram-package';
- 如果您使用 Diagram 的试用版,请指定以下路径:
import { DiagramEditor } from '@dhx/trial-diagram';
在本教程中,您将了解如何配置 Diagram 的 试用版。
设置容器并初始化 Diagram Editor
要在页面上显示 Diagram Editor,您需要设置用于渲染组件的容器,并使用相应的构造函数初始化 Diagram Editor:
import { DiagramEditor } from "@dhx/trial-diagram";
import { IDefaultEditorConfig } from "@dhx/trial-diagram/codebase/types/ts-diagram-editor";
import { Component, ElementRef, OnInit, ViewChild, OnDestroy, ViewEncapsulation } from '@angular/core';

@Component({
    encapsulation: ViewEncapsulation.None,
    selector: 'diagram-editor', // 在 "app.component.ts" 文件中用作 <diagram-editor/> 的模板名称
    styleUrls: ['./diagram-editor.component.css'], // 引入 css 文件
    template: `<div #container class = "widget"></div>`
})

export class DiagramEditorComponent implements OnInit, OnDestroy {
    // 初始化 Diagram Editor 的容器
    @ViewChild('container', { static: true }) editor_container!: ElementRef;

    private _diagram_editor!: DiagramEditor;

    ngOnInit() {
        // 初始化 Diagram Editor 组件
        this._diagram_editor = new DiagramEditor( this.editor_container.nativeElement, { type: "default" } as IDefaultEditorConfig);
    }

    ngOnDestroy() {
        this._diagram_editor.destructor(); // 销毁 Diagram Editor
    }
}
添加样式
为了正确显示 Diagram Editor,您需要提供相应的样式。为此,您可以在 src/app/diagram-editor/ 目录下创建 diagram-editor.component.css 文件,并为 Diagram Editor 及其容器指定重要样式:
/* 引入 Diagram Editor 样式 */
@import "@dhx/trial-diagram/codebase/diagram.min.css";

/* 为初始页面指定样式 */
html,
body {
    height: 100%;
    padding: 0;
    margin: 0;
}

/* 为 Diagram Editor 容器指定样式 */
.widget {
    height: 100%;
    width: 100%;
}
加载数据
要将数据添加到 Diagram Editor 中,您需要提供一个数据集。您可以在 src/app/diagram-editor/ 目录下创建 data.ts 文件,并向其中添加一些数据:
export function getData() {
    return [
        { id: 1, x: 880, y: 105, text: "Does user remember his password?", type: "process", lineHeight: 18, fontColor: "#fff", fill: "#3DA0E3", stroke: "#3DA0E3" },
        { id: 2, x: 1080, y: 125, width: 50, "height": 50, text: "XOR", type: "circle", lineHeight: 18, fontColor: "#fff", fill: "#7D8495", stroke: "#7D8495" },
        { id: 3, x: 1160, y: 40, text: "User forgets his password", type: "preparation", lineHeight: 18, fontColor: "#fff", fill: "#33B579", stroke: "#33B579" },
        { id: 3.1, x: 1340, y: 40, text: "Send an E-mail with new password", type: "process", lineHeight: 18, fontColor: "#fff", fill: "#3DA0E3", stroke: "#3DA0E3" },
        { id: 3.2, x: 1520, y: 40, text: "E-mail sent", type: "preparation", fontColor: "#fff", lineHeight: 18, fill: "#33B579", stroke: "#33B579" },
        { id: 4, x: 1160, y: 180, text: "User remembers his password", type: "preparation", lineHeight: 18, fontColor: "#fff", fill: "#33B579", stroke: "#33B579" },
        { id: 5, x: 1340, y: 180, text: "User types in login and password", type: "process", lineHeight: 18, fontColor: "#fff", fill: "#3DA0E3", stroke: "#3DA0E3" },
        // other data

        { from: 1, to: 2, type: "dash", forwardArrow: "filled", stroke: "#7D8495" },
        { from: 2, to: 3, type: "dash", toSide: "bottom", forwardArrow: "filled", stroke: "#7D8495" },
        { from: 2, to: 7.5, type: "dash", fromSide: "bottom", toSide: "top", backArrow: "filled", stroke: "#7D8495" },
        { from: 2, to: 3.2, type: "dash", fromSide: "top", toSide: "top", stroke: "#7D8495" },
        { from: 3, to: 3.1, type: "line", forwardArrow: "filled", stroke: "#7D8495" },
        { from: 3.1, to: 3.2, type: "line", forwardArrow: "filled", stroke: "#7D8495" },
        { from: 2, to: 4, type: "dash", toSide: "top", forwardArrow: "filled", stroke: "#7D8495" },
        { from: 4, to: 5, type: "dash", forwardArrow: "filled", stroke: "#7D8495" },
        { from: 5, to: 6, type: "dash", forwardArrow: "filled", stroke: "#7D8495" },
        // other data
    ]
}
然后打开 diagram-editor.component.ts 文件。导入包含数据的文件,并在 ngOnInit() 方法中使用 parse() 方法应用该数据,如下所示。
import { DiagramEditor } from "@dhx/trial-diagram";
import { IDefaultEditorConfig } from "@dhx/trial-diagram/codebase/types/ts-diagram-editor";
import { getData } from "./data"; // 导入数据
import { Component, ElementRef, OnInit, ViewChild, OnDestroy, ViewEncapsulation } from '@angular/core';

@Component({
    encapsulation: ViewEncapsulation.None,
    selector: 'diagram-editor',
    styleUrls: ['./diagram-editor.component.css'],
    template: `<div #container class = "widget"></div>`
})

export class DiagramEditorComponent implements OnInit, OnDestroy {
    @ViewChild('container', { static: true }) editor_container!: ElementRef;

    private _diagram_editor!: DiagramEditor;

    ngOnInit() {
        const data = getData(); // 初始化 data 属性
        this._diagram_editor = new DiagramEditor( this.editor_container.nativeElement, { type: "default" } as IDefaultEditorConfig);

        this._diagram_editor.parse(data);
    }

    ngOnDestroy() {
        this._diagram_editor.destructor();
    }
}
现在 Diagram Editor 组件已可以使用。当该元素被添加到页面中时,它将使用数据初始化 Diagram Editor。您也可以提供所需的配置设置。请访问我们的 Diagram Editor API 文档,查看完整的可用属性列表。
处理事件
当用户在 Diagram Editor 中执行某个操作时,会触发一个事件。您可以使用这些事件来检测该操作,并运行所需的代码。请参阅完整的事件列表。
打开 diagram-editor.component.ts 文件,并按如下方式完善 ngOnInit() 方法:
// ...
ngOnInit() {
    this._diagram_editor = new DiagramEditor(this.editor_container.nativeElement, { type: "default" } as IDefaultEditorConfig);

    this._diagram_editor.events.on("zoomIn", (step) => {
        console.log("The diagram in the editor is zoomed in. The step is" + step);
    });
}

ngOnDestroy() {
    this._diagram_editor.destructor();
}
步骤 3. 将 Diagram Editor 添加到应用中
要将 DiagramEditorComponent 添加到应用中,请打开 src/app/app.component.ts 文件,并将默认代码替换为以下代码:
import { Component } from "@angular/core";

@Component({
    selector: "app-root",
    template: `<diagram-editor/>` // 在 "diagram-editor.component.ts" 文件中创建的模板
})
export class AppComponent {
    name = "";
}
然后在 src/app/ 目录下创建 app.module.ts 文件,并按如下方式指定 DiagramEditorComponent:
import { NgModule } from "@angular/core";
import { BrowserModule } from "@angular/platform-browser";

import { AppComponent } from "./app.component";
import { DiagramEditorComponent } from "./diagram-editor/diagram-editor.component";

@NgModule({
    declarations: [AppComponent, DiagramEditorComponent],
    imports: [BrowserModule],
    bootstrap: [AppComponent]
})
export class AppModule {}
最后一步是打开 src/main.ts 文件,并将现有代码替换为以下代码:
import { platformBrowserDynamic } from "@angular/platform-browser-dynamic";
import { AppModule } from "./app/app.module";
platformBrowserDynamic()
    .bootstrapModule(AppModule)
    .catch((err) => console.error(err));
之后,您可以启动应用,查看页面上加载了数据的 Diagram Editor。
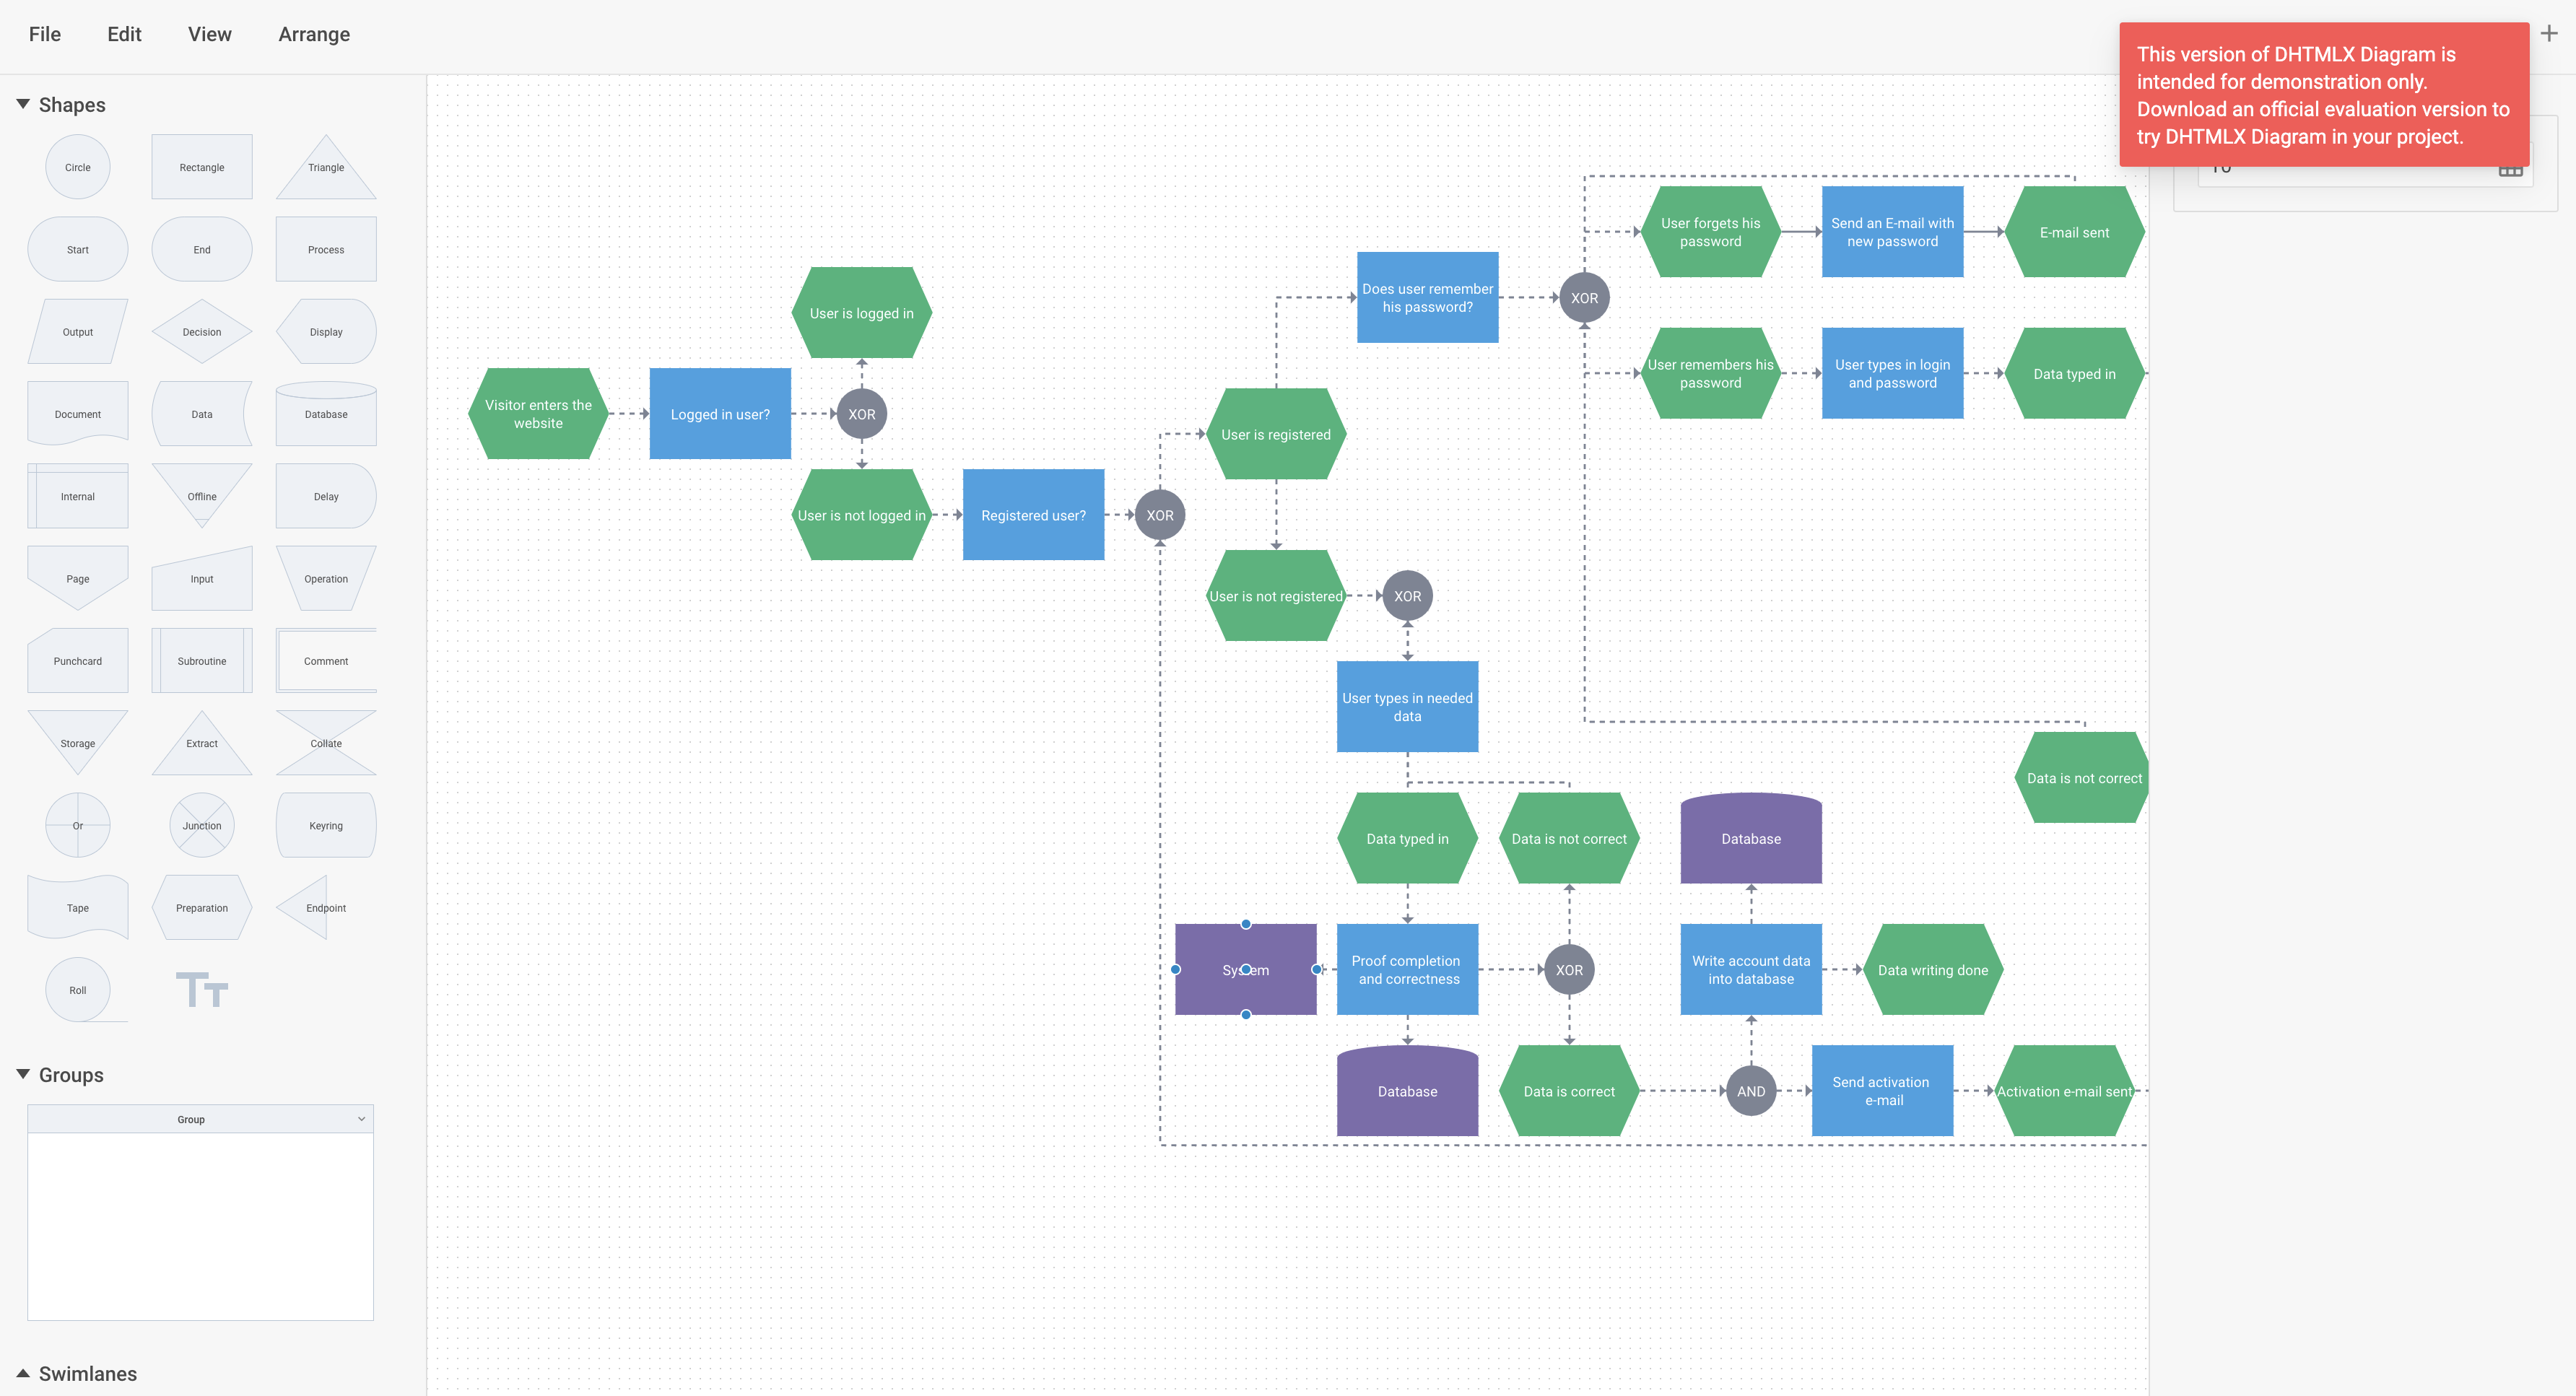
现在您已经了解了如何将 DHTMLX Diagram Editor 与 Angular 集成。您可以根据自己的具体需求自定义代码。您可以在 GitHub 上找到最终示例。