dhtmlxGantt 与 Ruby on Rails 集成
本文将介绍如何使用 Ruby on Rails 后端创建一个甘特图。示例环境为 Ruby 2.4.1、Rails 5.1.3 和 MySQL。假设你已经安装了这些前置条件。如果尚未安装,建议先参考 官方教程。
如果你使用的是其他技术栈,可以在以下文档中找到对应的集成方式:
- dhtmlxGantt와 ASP.NET Core 사용하기
- dhtmlxGantt와 ASP.NET MVC
- dhtmlxGantt와 Node.js 연동하기
- dhtmlxGantt와 Python
- dhtmlxGantt와 PHP: Laravel 연동
- dhtmlxGantt와 PHP:Slim 연동하기
- dhtmlxGantt와 Salesforce LWC 연동하기
你还可以在 GitHub 上找到演示项目:https://github.com/DHTMLX/gantt-howto-rails。
步骤 1. 创建项目
在终端中运行以下命令以创建新项目:
rails new gantt-app -d mysql
步骤 2. 将 Gantt 添加到页面
首先创建控制器及应用的默认页面。进入应用目录并生成带有 index 动作的新控制器:
cd gantt-app
rails generate controller gantt index
你会看到新文件已创建的确认信息。
设置默认路由
打开 config/routes.rb,将默认路由指向新控制器的 "index" 动作:
config/routes.rb
Rails.application.routes.draw do
  root :to => "gantt#index"
end
现在通过以下命令启动服务器:
rails server
然后在浏览器中打开 *http://localhost:3000/*。你应会看到如下的空白页面:
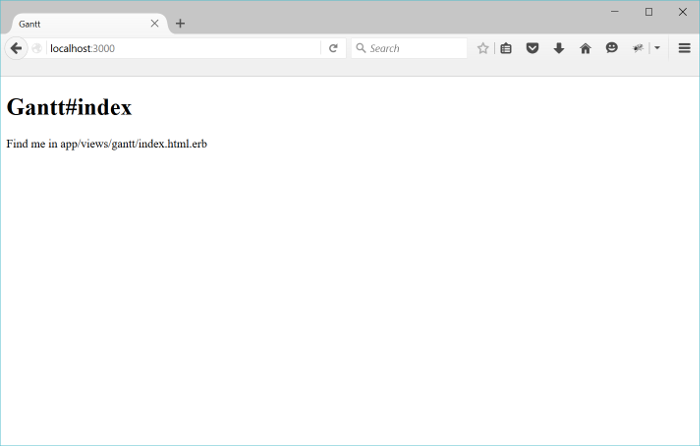
应用已运行并准备好默认页面,接下来将添加甘特图。
在视图中添加 Gantt
现在可以将甘特图嵌入页面。
打开布局文件,并在 head 标签内插入 yield,以便引入 dhtmlxGantt 文件:
app/views/layouts/application.html.erb
<!DOCTYPE html>
<html>
<head>
  <title>dhtmlxGantt</title>
  (= stylesheet_link_tag 'application', media:'all','data-turbolinks-track' => true )
  (= javascript_include_tag 'application', 'data-turbolinks-track' => true )
  (= yield(:head) ) /*!*/
  (= csrf_meta_tags )
</head>
<body>

    (= yield )

</body>
</html>
接下来,打开 gantt/index 视图并添加甘特图:
app/views/gantt/index.html.erb
( content_for :head do )
    (= stylesheet_link_tag 'https://cdn.dhtmlx.com/gantt/edge/dhtmlxgantt.css' )
    (= javascript_include_tag 'https://cdn.dhtmlx.com/gantt/edge/dhtmlxgantt.js' )
( end )

<div id="gantt_here" style='width:100%; height:800px;'></div>

<script>
    gantt.init("gantt_here");
</script>
这里,dhtmlxGantt 文件是从 CDN 加载的,而不是本地。开发时你也可以选择使用下载包中包含的源码文件。
现在再次在浏览器中打开 *http://localhost:3000/*,你应该会看到:
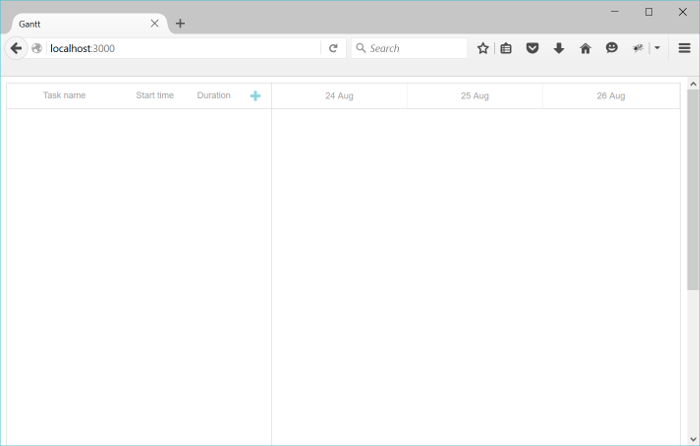
此时你已经拥有了一个可以添加和编辑任务的甘特图,但还没有保存功能。接下来将通过创建模型来实现。
步骤 3. 创建模型
由于使用的是 MySQL,请确保 config/database.yml 中的连接设置正确,例如:
config/database.yml
development:
  adapter: mysql2
  encoding: utf8
  host: localhost
  database: gantt-app
  username: root
  password:
接下来,需要为 任务和依赖 创建模型。
运行以下命令创建 Task 模型及其属性:
rails generate model Task
    text:string
    start_date:datetime
    duration:integer
    parent:integer
    progress:decimal
同样,使用更简短的命令创建 Link 模型:
rails generate model Link
    source:integer
    target:integer
    link_type:string:limit1
请注意,dhtmlxGantt 的 link 对象需要一个名为 type 的属性来指定依赖类型(如开始-开始、完成-完成等)。
由于 ActiveRecord 已经保留了 "type" 这个名称,这里属性命名为 link_type,并在控制器中进行必要的映射。
完整的必需和可选属性列表请参见 Task 对象 和 Link 对象 文档。
然后运行迁移以更新数据库:
rake db:migrate
此时可以添加一些测试数据:
- 打开 Rails 控制台:
rails c
- 添加几个任务和依赖:
Task.create :text=>"Task 1", :start_date=>"2015-10-25",  :duration=>2, :progress=>0;
Task.create :text=>"Task 2", :start_date=>"2015-10-27",  :duration=>3, :progress=>0.5;
Link.create :source=>1, :target=>2, :link_type=>"0";
- 输入 "exit" 退出控制台。
接下来将在控制器中实现数据的加载和保存。
步骤 4. 加载数据
模型和迁移准备好后,可以将数据库中的数据加载到甘特图中。
由于 dhtmlxGantt 期望以 JSON 格式 接收数据,需要在 GanttController 中添加新动作以读取、格式化并输出数据:
app/controllers/gantt_controller.rb
class GanttController < ApplicationController
  def index
  end

  def data
    tasks = Task.all
    links = Link.all

    render :json=>{
      :data => tasks.map{|task|{
        :id => task.id,
        :text => task.text,
        :start_date => task.start_date.to_formatted_s(:db),
        :duration => task.duration,
        :progress => task.progress,
        :parent => task.parent,
        :open => true
      }},
      :links => links.map{|link|{
        :id => link.id,
        :source => link.source,
        :target => link.target,
        :type => link.link_type
      }}
    }
  end
end
在 routes.rb 中为此动作添加路由:
config/routes.rb
Rails.application.routes.draw do
  root :to => "gantt#index"

  scope '/api' do/*!*/
    get "/data", :to => "gantt#data"/*!*/
  end/*!*/
end
在客户端,使用 gantt.load 方法调用该动作:
app/views/gantt/index.html.erb
gantt.config.date_format = "%Y-%m-%d %H:%i:%s";/*!*/

gantt.init("gantt_here");
gantt.load("/api/data");/*!*/
date_format 配置用于定义从服务器接收的日期格式(如 Task 的 start_date),需与 Rails 的日期格式一致。
此时启动服务器并打开 *http://localhost:3000/*,你应该会看到甘特图中已加载数据库中的任务和依赖。但此时对数据的更改还无法保存,下一步将实现保存功能。
步骤 5. 保存更改
dhtmlxGantt 可以将所有用户更改发送到后端的 RESTful API,并保存到数据库。该协议的详细信息见 这里。
要启用保存,首先在客户端激活变更的提交:
app/views/gantt/index.html.erb
gantt.config.date_format = "%Y-%m-%d %H:%i:%s";

gantt.init("gantt_here");
gantt.load("/api/data");

var dp = new gantt.dataProcessor("/api");/*!*/
dp.init(gantt);/*!*/
dp.setTransactionMode("REST");/*!*/
接下来需要添加两个控制器:一个用于 Tasks,一个用于 Links,分别实现所需的动作。
创建 Task 控制器
首先为 Tasks 生成控制器:
rails generate controller task --no-helper --no-assets --no-view-specs
由于该控制器不包含视图,--no- 选项用于避免生成不必要的文件。
实现 create、update 和 delete 动作如下:
app/controllers/task_controller.rb
class TaskController < ApplicationController
    protect_from_forgery

    def update
        task = Task.find(params["id"])
        task.text = params["text"]
        task.start_date = params["start_date"]
        task.duration = params["duration"]
        task.progress = params["progress"] || 0
        task.parent = params["parent"]
        task.save

        render :json => {:action => "updated"}
    end

    def add
        task = Task.create(
            :text => params["text"],
            :start_date=> params["start_date"],
            :duration => params["duration"],
            :progress => params["progress"] || 0,
            :parent => params["parent"]
        )

        render :json => {:action => "inserted", :tid => task.id}
    end

    def delete
        Task.find(params["id"]).destroy
        render :json => {:action => "deleted"}
    end
end
关于上述代码有几点说明:
- 这里不需要 get 动作,因为所有数据已通过 gantt#data 加载。
- progress 属性在客户端可能未初始化,因此这里赋予默认值。你也可以在模型类中设置默认值(例如通过 migration)。
- 新建项目时,action 返回新插入记录的数据库 ID 给客户端。
最后,为这些动作添加路由,使用户可以在甘特图中查看、创建、更新和删除任务:
config/routes.rb
Rails.application.routes.draw do
  root :to => "gantt#index"

  scope '/api' do
    get "/data", :to => "gantt#data"

    post "/task", :to => "task#add"/*!*/
    put "/task/:id", :to => "task#update"/*!*/
    delete "/task/:id", :to => "task#delete"/*!*/
  end
end
下一步将为依赖(links)设置类似的功能。
创建 Link 控制器
使用以下命令生成一个 Link 控制器:
rails generate controller link --no-helper --no-assets --no-view-specs
下面是实现的一个示例:
app/controllers/link_controller.rb
class LinkController < ApplicationController
    protect_from_forgery

    def update
        link = Link.find(params["id"])
        link.source = params["source"]
        link.target = params["target"]
        link.link_type = params["type"]
        link.save

        render :json => {:action => "updated"}
    end

    def add
        link = Link.create(
            :source => params["source"],
            :target => params["target"],
            :link_type => params["type"]
        )

        render :json => {:action => "inserted", :tid => link.id}
    end

    def delete
        Link.find(params["id"]).destroy
        render :json => {:action => "deleted"}
    end
end
接下来,为这些新动作添加路由:
config/routes.rb
Rails.application.routes.draw do
  root :to => "gantt#index"

  scope '/api' do
    get "/data", :to => "gantt#data"

    post "/task", :to => "task#add"
    put "/task/:id", :to => "task#update"
    delete "/task/:id", :to => "task#delete"

    post "/link", :to => "link#add"/*!*/
    put "/link/:id", :to => "link#update"/*!*/
    delete "/link/:id", :to => "link#delete"/*!*/
  end
end
就是这样。当应用运行后,你将拥有一个由 Rails 和 MySQL 支持的交互式甘特图:

想了解更多 dhtmlxGantt 的功能,请随时查阅我们的指南。
任务顺序的存储
客户端甘特图支持通过拖拽重新排序任务。如果你使用该功能,任务顺序需要被保存到数据库中。 总体说明可参见这里。
让我们将此功能添加到应用中。
在客户端启用任务排序
首先,在 Index 视图中更新 gantt 配置,启用任务排序:
app/views/gantt/index.html.erb
gantt.config.order_branch = true;/*!*/
gantt.config.order_branch_free = true;/*!*/

gantt.init("gantt_here");
现在,更新后端以反映这些更改。我们需要在模型中添加一个顺序字段,这里命名为 sortorder。更新后的模型声明如下:
rails generate model Task
    text:string
    start_date:datetime
    duration:integer
    parent:integer
    progress:decimal
    sortorder:integer  /*!*/
或者,你也可以将该属性添加到已有模型:
- 创建迁移:
rails generate migration add_sortorder_to_tasks sortorder:integer
- 编辑生成的迁移文件,为 "sortorder" 列设置默认值:
class AddSortorderToTasks < ActiveRecord::Migration[5.1]
  def change
    add_column :tasks, :sortorder, :integer, :default=>0
  end
end
然后运行迁移:
rake db:migrate
接下来,更新控制器中的 CRUD 操作:
- data 动作应按
sortorder字段返回任务:
app/controllers/gantt_controller.rb
class GanttController < ApplicationController
  def index
  end

  def data
    tasks = Task.all
    links = Link.all

    render :json=>{
      :data => tasks.order(:sortorder).map{|task|{ /*!*/
        :id => task.id,
        :text => task.text,
        :start_date => task.start_date.to_formatted_s(:db),
        :duration => task.duration,
        :progress => task.progress,
        :parent => task.parent,
        :open => true
      }},
      :links => links.map{|link|{
        :id => link.id,
        :source => link.source,
        :target => link.target,
        :type => link.link_type
      }}
    }
  end
end
- 新增任务时,分配初始的
sortorder值:
app/controllers/task_controller.rb
class TaskController < ApplicationController
    ...
    def add

        maxOrder = Task.maximum("sortorder") || 0/*!*/

        task = Task.create(
            :text => params["text"],
            :start_date=> params["start_date"],
            :duration => params["duration"],
            :progress => params["progress"] || 0,
            :parent => params["parent"],
            :sortorder => maxOrder + 1/*!*/
        )

        render :json => {:action => "inserted", :tid => task.id}
    end

end
- 最后,当用户重新排序任务时,相应地更新顺序:
app/controllers/task_controller.rb
class TaskController < ApplicationController
    protect_from_forgery

    def update
        task = Task.find(params["id"])
        task.text = params["text"]
        task.start_date = params["start_date"]
        task.duration = params["duration"]
        task.progress = params["progress"] || 0
        task.parent = params["parent"]
        task.save

        if(params['target'])/*!*/
            Task.updateOrder(task.id, params['target'])/*!*/
        end/*!*/

        render :json => {:action => "updated"}
    end

    ...
end
下面是 Task.updateOrder 的实现:
app/models/task.rb
class Task < ApplicationRecord
    def self.updateOrder(taskId, target)
        nextTask = false
        targetId = target

        if(target.start_with?('next:'))
            targetId = target['next:'.length, target.length]
            nextTask = true;
        end

        if(targetId == 'null')
            return
        end

        targetTask = self.find(targetId)

        targetOrder = targetTask.sortorder

        if(nextTask)
            targetOrder += 1
        end

        self.where("sortorder >= ?", targetOrder).
            update_all('sortorder = sortorder + 1')

        task = self.find(taskId)
        task.sortorder = targetOrder
        task.save
    end
end
应用安全
Gantt 本身不包含针对常见威胁(如 SQL 注入、XSS 或 CSRF 攻击)的保护措施。开发者需要自行负责后端实现的安全性。更多详情请参见本文。
故障排查
如果你已经按照步骤将 Gantt 集成到 Ruby on Rails,但页面上没有显示任务和链接,请查阅 백엔드 통합 문제 해결 中的故障排查指南。它提供了诊断常见问题的建议。
后续步骤
现在你的甘特图已经完全可用,你可以在 GitHub 上查看完整代码,可以克隆或下载用于你的项目。
此外,还可以探索涵盖各种甘特功能的指南或集成 Gantt 与其他后端框架的教程。