dhtmlxGantt 与 Angular 集成
本指南假设您已具备 Angular 的基础概念和模式。如果需要复习,请参考 Angular 官方文档 中的入门教程。
DHTMLX Gantt 可以与 Angular 平滑集成。您可以在 GitHub 上找到相关示例:DHTMLX Gantt with Angular Demo。
创建项目
在创建新项目之前,请确保已安装 Angular CLI 和 Node.js。
ng new my-angular-gantt-app
该命令会配置所有必要的工具和依赖项,无需额外安装命令。
安装依赖
接下来,进入您的应用目录:
cd my-angular-gantt-app
使用以下命令之一运行应用:
yarn start
或
npm start
此时,您的应用应可通过 http://localhost:4200 访问。

创建 Gantt
下一步是获取 DHTMLX Gantt 代码。首先,在命令行按 Ctrl+C 停止应用,然后继续安装 Gantt 包。
步骤 1. 安装包
库的 PRO 版本可通过 npm/yarn 从我们的私有仓库获取。请按照 此说明 获取访问权限。
获得 Gantt 的 Evaluation 版本后,使用以下命令之一进行安装:
- 使用 npm:
npm install @dhx/trial-gantt
- 使用 yarn:
yarn add @dhx/trial-gantt
另外,由于 zip 包结构为 npm 模块,您也可以 从本地文件夹安装。
步骤 2. 创建组件
为在应用中集成 Gantt,需要创建一个组件。首先在 src/app/ 目录下新建一个 gantt 文件夹,并添加两个文件:gantt.component.ts 和 gantt.component.css。
导入源文件
打开 gantt.component.ts 并导入 Gantt 源文件。根据您的安装方式,导入方式有所不同:
- 如果从本地文件夹安装,导入如下:
gantt.component.ts
import { Gantt } from 'dhtmlx-gantt';
gantt.component.css
@import "@dhtmlx-gantt/codebase/dhtmlxgantt.css";
- 如果使用试用版,导入如下:
gantt.component.ts
import { Gantt } from '@dhx/trial-gantt';
gantt.component.css
@import "@dhx/trial-gantt/codebase/dhtmlxgantt.css";
本教程使用 trial 版本。
gantt.component.ts 文件将作为 Gantt 组件的模板。添加如下代码:
gantt.component.ts
import { Component, ElementRef, OnInit,
    ViewChild, ViewEncapsulation } from '@angular/core';
import { Gantt, GanttStatic } from "@dhx/trial-gantt";

@Component({
    encapsulation: ViewEncapsulation.None,
    selector: 'gantt',
    styleUrls: ['./gantt.component.css'],
    template: `<div #gantt_here class='gantt-chart'></div>`,
})
export class GanttComponent implements OnInit {
    @ViewChild('gantt_here', { static: true }) ganttContainer!: ElementRef;
    private _gantt?: GanttStatic;

    ngOnInit() {
        let gantt = Gantt.getGanttInstance();
        gantt.init(this.ganttContainer.nativeElement);

        this._gantt = gantt;
    }
    ngOnDestroy() {
        if (this._gantt) this._gantt.destructor();
    }
}
这里,ngOnInit() 方法用于初始化 Gantt,ngOnDestroy() 在组件销毁时调用 gantt.destructor() 进行清理。
Gantt 的样式放在 gantt.component.css 文件。基础样式如下:
gantt.component.css
@import "@dhx/trial-gantt/codebase/dhtmlxgantt.css";
.gantt-chart {
    position: relative;
    width: 100%;
    height: 600px;
}
步骤 3. 将 Gantt 添加到应用中
接下来,将 Gantt 组件集成到应用中。打开 src/app/app.component.ts,用如下内容替换默认内容:
src/app/app.component.ts
import { Component } from '@angular/core';

@Component({
  selector: 'app-root',
  templateUrl: './app.component.html',
  styleUrls: ['./app.component.css']
})
export class AppComponent {
  title = 'DHTMLX Gantt with Angular';
}
在 src/app/ 目录下创建 app.module.ts,并按如下方式引入 GanttComponent:
src/app/app.module.ts
import { NgModule } from "@angular/core";
import { BrowserModule } from "@angular/platform-browser";

import { AppComponent } from "./app.component";
import { GanttComponent } from './gantt/gantt.component';

@NgModule({
  declarations: [AppComponent, GanttComponent],
  imports: [BrowserModule],
  providers: [],
  bootstrap: [AppComponent],
})
export class AppModule {}
在 src/app/app.component.html 中,用如下内容替换默认内容:
src/app/app.component.html
<gantt></gantt>
最后,更新 src/main.ts 文件内容如下:
src/main.ts
import { platformBrowserDynamic } from "@angular/platform-browser-dynamic";
import { AppModule } from "./app/app.module";

platformBrowserDynamic()
  .bootstrapModule(AppModule)
  .catch((err) => console.error(err));
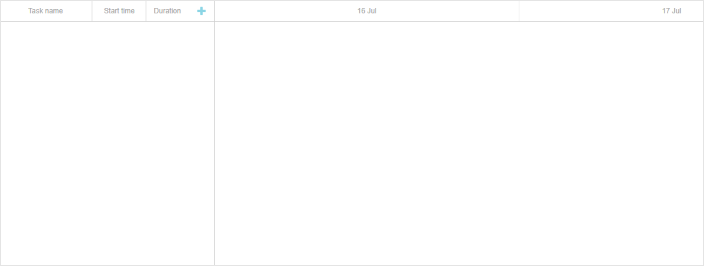
现在启动应用,将会显示一个空白的 Gantt 图表:

步骤 4. 提供数据
要在 Angular Gantt 中加载数据,需要添加任务和链接服务。在此之前,先定义任务和链接模型。
使用以下命令创建任务和链接模型:
ng generate class models/task --skip-tests
ng generate class models/link --skip-tests
在 models/task.ts 中添加:
models/task.ts
export class Task {
    id!: number;
    start_date!: string;
    text!: string;
    progress!: number;
    duration!: number;
    parent!: number;
}
在 models/link.ts 中添加:
models/link.ts
export class Link {
     id!: number;
    source!: number;
    target!: number;
    type!: string;
}
接下来,创建任务和链接服务。Angular 中的服务是用于处理特定任务或功能的类,可以在需要的地方进行注入。
使用以下命令生成服务:
ng generate service services/task --flat --skip-tests
ng generate service services/link --flat --skip-tests
在 services/task.service.ts 中添加:
services/task.service.ts
import { Injectable } from '@angular/core';
import { Task } from '../models/task';

@Injectable()
export class TaskService {
    get(): Promise<Task[]>{
        return Promise.resolve([
            { id: 1, text: 'Task #1', start_date: '2023-04-15 00:00',
                duration: 3, progress: 0.6, parent: 0 },
            { id: 2, text: 'Task #2', start_date: '2023-04-18 00:00',
                duration: 3, progress: 0.4, parent: 0 }
        ]);
    }
}
在 services/link.service.ts 中添加:
services/link.service.ts
import { Injectable } from '@angular/core';
import { Link } from '../models/link';

@Injectable()
export class LinkService {
    get(): Promise<Link[]> {
        return Promise.resolve([
            { id: 1, source: 1, target: 2, type: '0' }
        ]);
    }
}
@Injectable() 装饰器允许 Angular 的依赖注入系统实例化服务。get() 方法当前返回的是硬编码的数据 Promise,但也可以改为从服务器获取数据。
要在 Gantt 组件中使用这些服务,请在 gantt.component.ts 中导入:
gantt.component.ts
import {TaskService} from "../services/task.service";
import {LinkService} from "../services/link.service";
在 @Component 装饰器中添加服务为 providers:
gantt.component.ts
@Component({
    encapsulation: ViewEncapsulation.None,
    selector: 'gantt',
    styleUrls: ['./gantt.component.css'],
    providers: [TaskService, LinkService],
    template: `<div #gantt_here class='gantt-chart'></div>`,
})
这样,每个新的 GanttComponent 实例都会创建服务的新实例。
添加构造函数以注入服务:
gantt.component.ts
constructor(private taskService: TaskService, private linkService: LinkService) { }
更新 ngOnInit(),配置日期格式,初始化 Gantt,并从服务加载数据:
gantt.component.ts
let gantt = Gantt.getGanttInstance();
gantt.config.date_format = '%Y-%m-%d %H:%i';
gantt.init(this.ganttContainer.nativeElement);

Promise.all([this.taskService.get(), this.linkService.get()])
    .then( ([data, links]) => {
        gantt.parse({ data, links });
    });
this._gantt = gantt;
完整的 gantt.component.ts 文件如下:
gantt.component.ts
import { Component, ElementRef, OnInit,
    ViewChild, ViewEncapsulation } from '@angular/core';
import { TaskService } from '../services/task.service';
import { LinkService } from '../services/link.service';
import { Gantt, GanttStatic } from "@dhx/trial-gantt";

@Component({
    encapsulation: ViewEncapsulation.None,
    selector: 'gantt',
    styleUrls: ['./gantt.component.css'],
    providers: [TaskService, LinkService],
    template: `<div #gantt_here class='gantt-chart'></div>`,
})
export class GanttComponent implements OnInit {
    @ViewChild('gantt_here', { static: true }) ganttContainer!: ElementRef;
    private _gantt?: GanttStatic;
    constructor(private taskService: TaskService, private linkService: LinkService) { }

    ngOnInit() {
        let gantt = Gantt.getGanttInstance();
        gantt.config.date_format = '%Y-%m-%d %H:%i';
        gantt.init(this.ganttContainer.nativeElement);
        Promise.all([this.taskService.get(), this.linkService.get()])
            .then(([data, links]) => {
                gantt.parse({ data, links });
            });
        this._gantt = gantt;
    }
    ngOnDestroy() {
        if (this._gantt) this._gantt.destructor();
    }
}
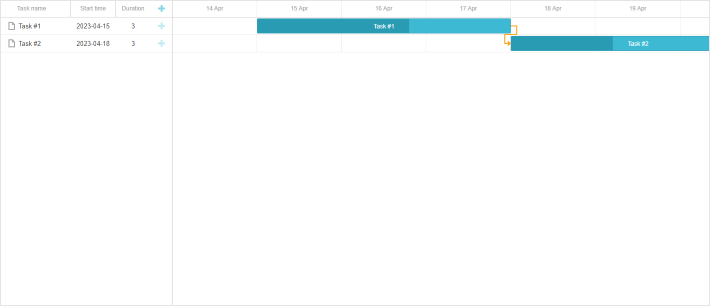
现在重新加载应用页面,Gantt 图表将显示已填充的任务数据:

步骤 5. 保存数据
要追踪 Gantt 中的更改,可以使用 dataProcessor 处理器与服务端后端进行通信。该处理器可以设置为函数或路由对象。dhtmlxGantt 支持从处理器返回 Promise,从而让 Gantt 正确处理操作完成。
可以使用 createDataProcessor() API 方法创建 DataProcessor 并捕获更改,例如:
gantt.createDataProcessor(function(entity, action, data, id) {
gantt.message(`${entity} ${action}`);
});
如果您的服务在添加新记录后会修改任务 id(很常见),请确保 Promise 返回一个带有 {id: databaseId} 或 {tid: databaseId} 的对象。这样 Gantt 能够用新的数据库 id 更新记录。更多细节请参考 server side information。
至此,您的 Angular Gantt 已配置完成。欢迎 在 GitHub 上查看完整演示。
XSS、CSRF 与 SQL 注入攻击
请注意,Gantt 本身不提供针对 SQL 注入、XSS 或 CSRF 攻击的防护。确保应用安全是后端开发人员的责任。
请参阅 应用安全 文章,了解组件最易受攻击的区域以及可采取的安全措施。
Back to top