与 React 集成
DHTMLX Booking 通过一个包装组件与 React 集成,该组件将 widget 挂载到带有 ref 的容器中。本指南将引导您完成创建 React 项目、安装 Booking 以及渲染带有数据和事件的 widget 的全过程。完整的参考实现请参阅 GitHub 上的 React 示例。
本指南假设您已熟悉 React 核心概念。如需入门介绍,请参阅 React 文档。
创建项目
在添加 Booking 集成之前,先创建一个 React 应用。可以使用 Create React App 或 React with Vite。
以下命令使用 Create React App 创建一个新的 my-react-booking-app 项目:
npx create-react-app my-react-booking-app
安装依赖
切换到项目目录。
以下命令打开新创建的应用文件夹:
cd my-react-booking-app
使用包管理��器安装依赖并启动开发服务器。
以下命令使用 yarn:
yarn
yarn start
以下命令使用 npm:
npm install
npm start
应用将在本地运行,例如 http://localhost:3000。
将 Booking 添加到应用
在安装 Booking 包之前,请先停止开发服务器,然后创建一个包装 widget 的 React 组件。
第一步:安装包
下载 Booking 试用包 并按照包中 README 的步骤操作。试用版有效期为 30 天。
第二步:创建 Booking 组件
在 src/ 目录中创建 Booking.jsx 文件,并按照以下步骤完成 widget 的连接。
导入源文件
根据您的发行版本,使用对应路径导入 Booking 类和样式文件:
- dhx-booking-package — 从本地文件夹安装的 PRO 版本
- @dhx/trial-booking — 试用版本
以下代码片段从 PRO 包导入 Booking:
import { Booking } from 'dhx-booking-package';
import 'dhx-booking-package/dist/booking.css';
如果您的 PRO 包附带压缩后的资源,请将 CSS 文件导入为 booking.min.css。
以下代码片段从试用包导入 Booking:
import { Booking } from '@dhx/trial-booking';
import "@dhx/trial-booking/dist/booking.css";
本教程使用 Booking 试用版本。
设置容器并初始化 Booking
为宿主容器声明一个 ref,并在 useEffect() 中实例化 Booking。返回一个清理函数,在 React 卸载组件时调用 destructor() 以卸载 widget。
以下代码片段声明了一个带有 ref 容器和生命周期清理的 Booking 组件:
import { useEffect, useRef } from "react";
import { Booking } from "@dhx/trial-booking";
import "@dhx/trial-booking/dist/booking.css"; // 导入 Booking 样式

export default function BookingComponent(props) {
    let container = useRef(); // Booking 的宿主容器

    useEffect(() => {
        // 创建 Booking 实例
        const booking = new Booking(container.current, {});

        return () => {
            booking.destructor(); // 卸载 Booking
        };
    }, []);

    return <div ref={container} className="widget"></div>;
}
添加样式
Booking 需要 widget 样式文件(已在上方导入)以及一个具有尺寸的容器。在项目的主 CSS 文件中为页面和 widget 容器设置全高。
以下代码片段为页面和 Booking 容器设置全高:
/* 页面样式 */
html,
body,
#root {
    height: 100%;
    padding: 0;
    margin: 0;
}

/* Booking 容器 */
.widget {
    height: 100%;
}
加载数据
要将卡片数据加载到 Booking 中,请准备符合 data 属性格式的数据集。有关完整的数据格式和加载场景,请参阅加载数据指南。
在 src/ 目录中创建 data.js 文件。
以下代码片段定义了一个返回示例数据集的 getData() 辅助函数:
export function getData() {
function getDate(addDays, hoursValue = 0, minutesValue = 0) {
const date = new Date();
const secondsValue = 0; // 精确到分钟
const msValue = 0;
date.setDate(date.getDate() + addDays);
date.setHours(hoursValue, minutesValue, secondsValue, msValue);
return date.getTime();
}
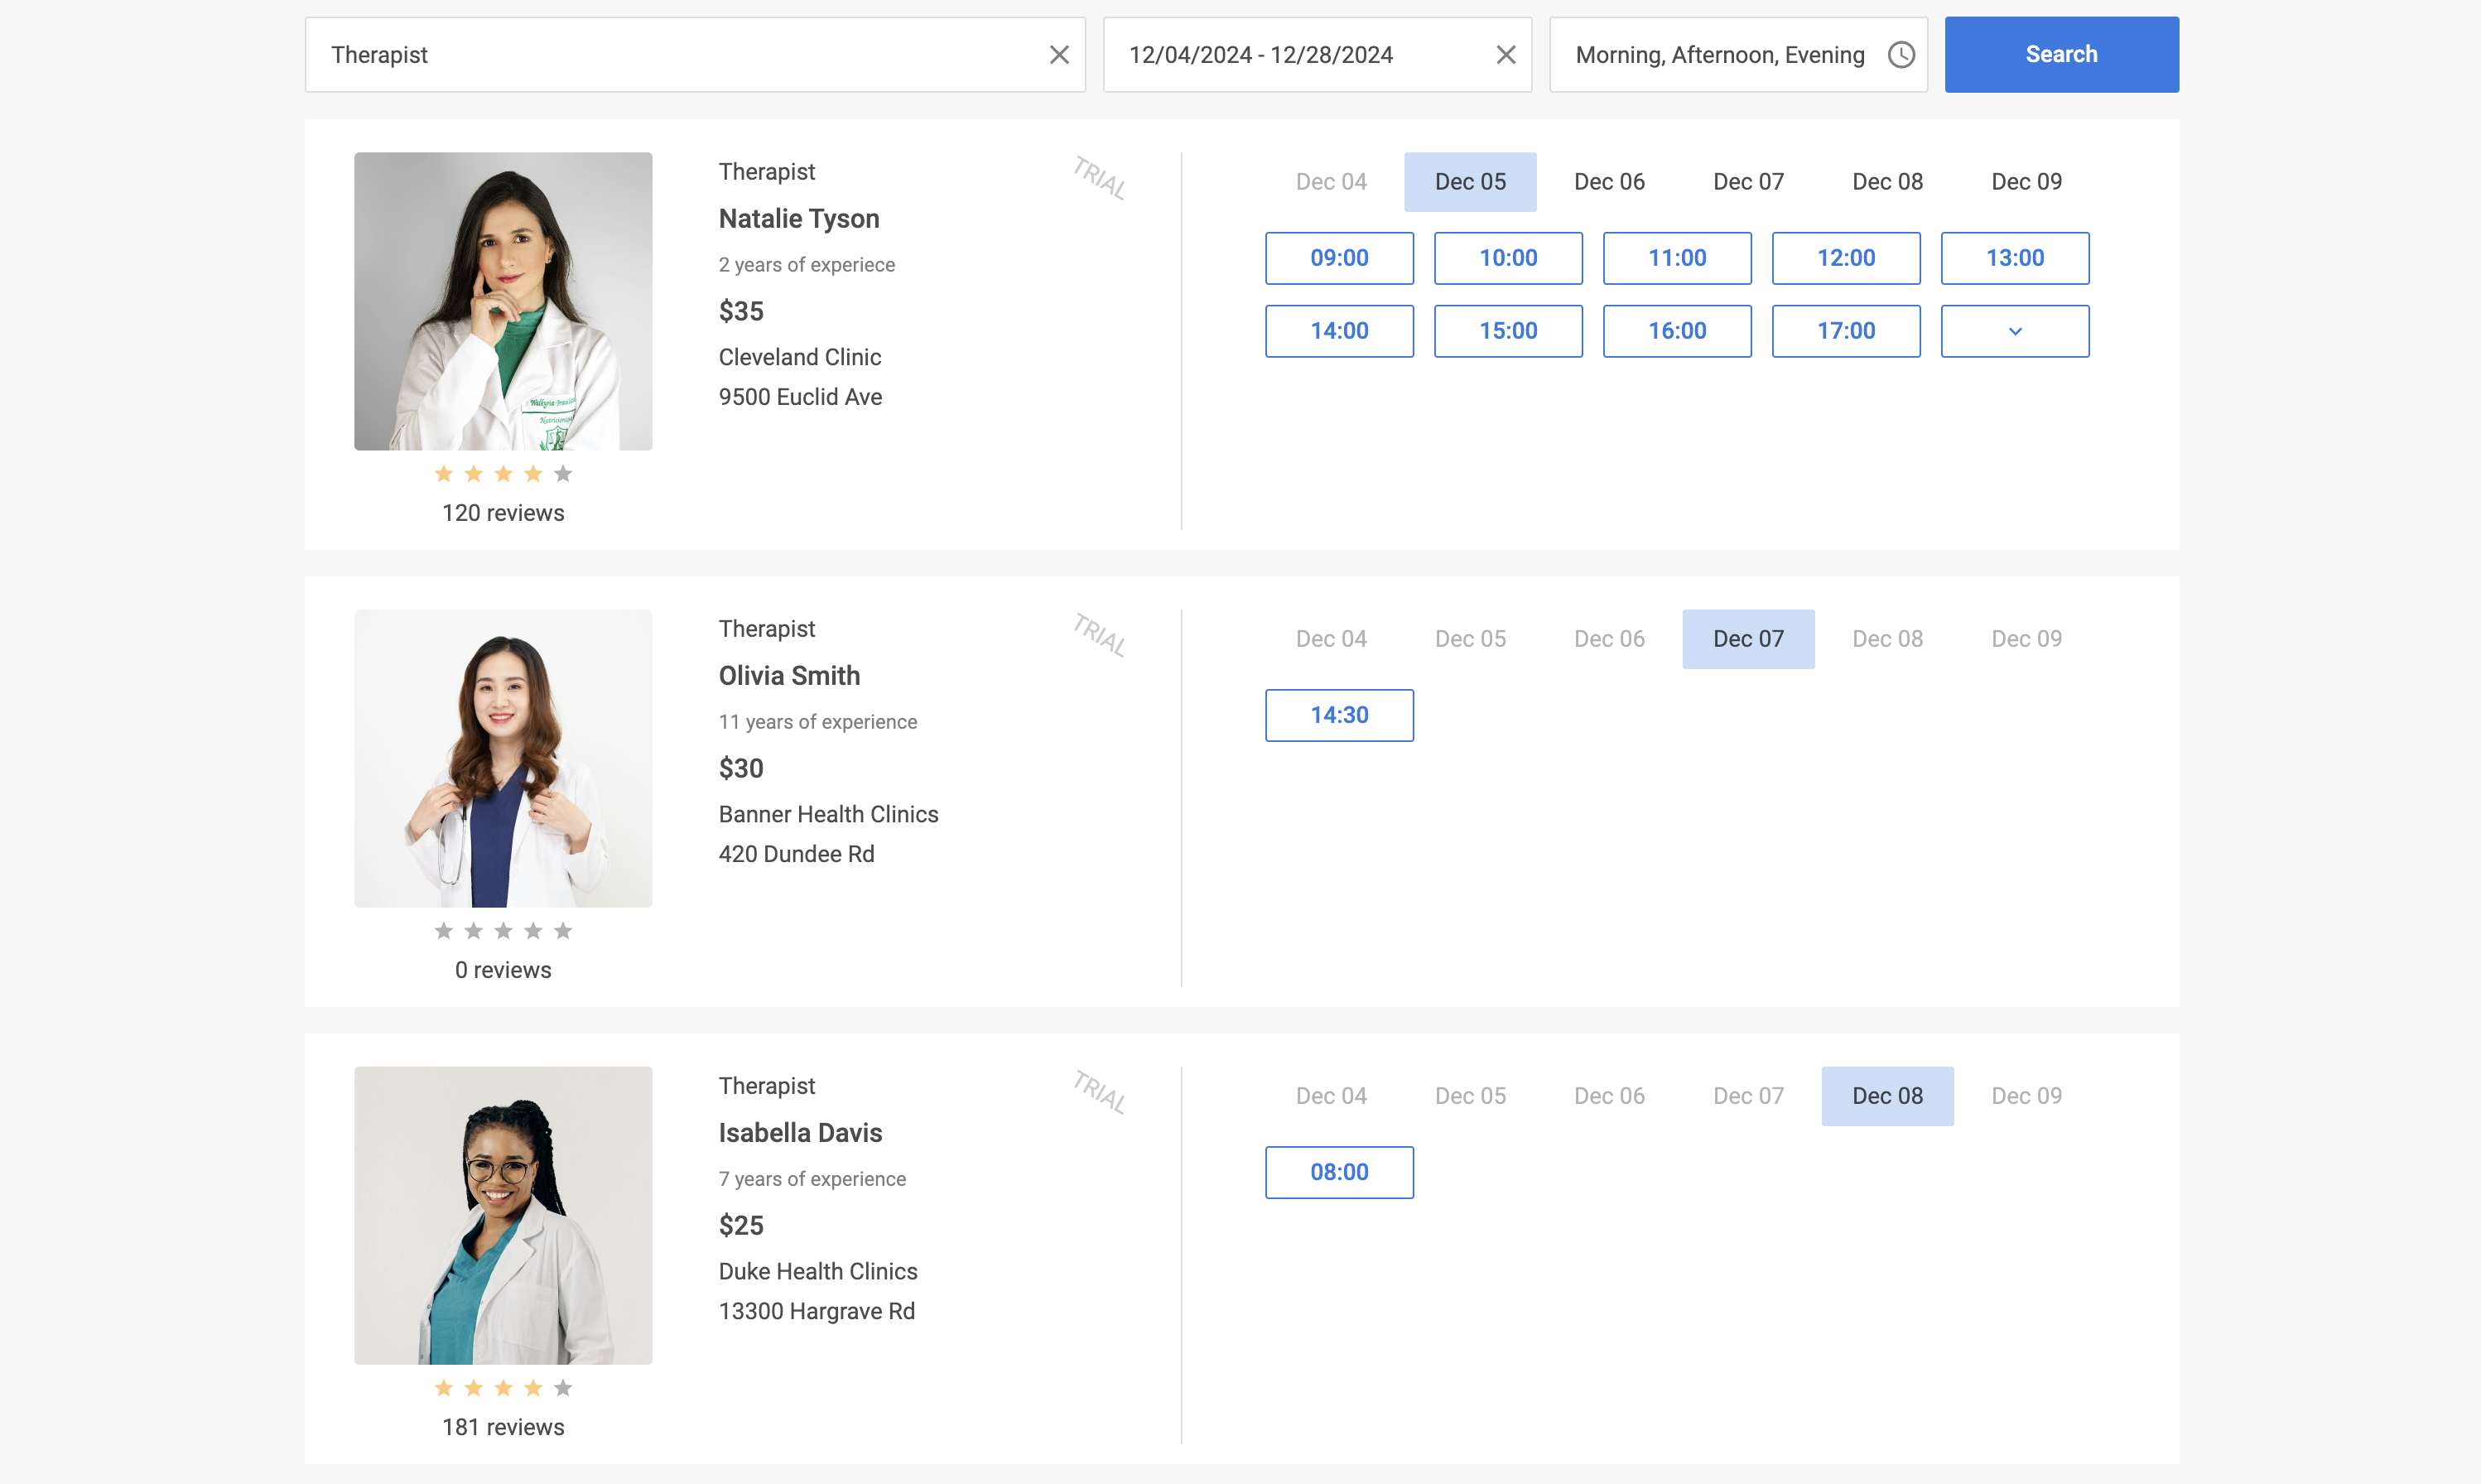
return [
{
id: "ee828b5d-a034-420c-889b-978840015d6a",
title: "Natalie Tyson",
category: "Therapist",
subtitle: "2 years of experience",
details: "Cleveland Clinic\n9500 Euclid Ave",
preview: "https://snippet.dhtmlx.com/codebase/data/booking/01/img/01.jpg",
price: "$35",
review: {
stars: 4,
count: 120
},
slots: [
{
from: 9,
to: 20,
days: [1, 2, 3, 4, 5]
},
{
from: 10,
to: 18,
days: [6, 0]
}
]
},
{
id: "9b037564-77be-429f-b719-eebbe499027a",
title: "Emma Johnson",
category: "Cardiologist",
subtitle: "2 years of experience",
details: "Stanford Health Care\n1468 Madison Ave",
preview: "https://snippet.dhtmlx.com/codebase/data/booking/01/img/03.jpg",
price: "$25",
review: {
stars: 5,
count: 10
},
slots: [
{
from: 14,
to: 17,
size: 30,
gap: 10
},
{
from: 12,
to: 19,
size: 50,
gap: 20,
days: [2],
dates: [getDate(0)]
},
{
from: "18:30",
to: 20,
size: 20,
gap: 20,
days: [3, 4, 5]
}
],
usedSlots: [getDate(0, 12), getDate(0, 18)]
},
// ...
];
}
打开 App.js,导入数据集,并将数据集作为 prop 传递给 <Booking/> 组件。
以下代码片段渲染带有 data prop 的 Booking 组件:
import Booking from "./Booking";
import { getData } from "./data";

function App() {
    const dataset = getData();
    return <Booking data={dataset} />;
}

export default App;
打开 Booking.jsx,将 data prop 转发到 Booking 的配置中。
以下代码片段将 prop 连接到 Booking 构造函数:
import { useEffect, useRef } from "react";
import { Booking } from "@dhx/trial-booking";
import "@dhx/trial-booking/dist/booking.css";

export default function BookingComponent(props) {
    let container = useRef();

    useEffect(() => {
        const booking = new Booking(container.current, {
            data: props.data
            // 其他配置属性
        });

        return () => {
            booking.destructor();
        }
    }, []);

    return <div ref={container} className="widget"></div>;
}
Booking 组件现在将渲染已加载的数据。如需进一步自定义 widget,可传入更多配置属性——完整列表请参阅属性概览。
处理事件
用户在 widget 中的操作会触发相应事件。使用 booking.api.on(eventName, handler) 订阅事件以响应操作。完整的事件列表请参阅事件概览。
打开 Booking.jsx,在 useEffect() 中添加事件订阅。
以下代码片段在用户选择时间段时记录时间段 ID:
// ...
useEffect(() => {
    const booking = new Booking(container.current, {});

    // 记录所选时间段的 id
    booking.api.on("select-slot", (obj) => {
        console.log(obj.id);
    });

    return () => {
        booking.destructor();
    }
}, []);
// ...
启动应用,即可在页面上看到加载了数据的 Booking。
根据项目需求自定义代码。完整的参考实现可在 GitHub 上查看。