DHTMLX Optimus framework
DHTMLX Optimus is a component-oriented framework for building DHTMLX-based apps. The framework is intended to simplify the app building process, namely:
- helps to organize application code in a single, structured, intuitive style;
- provides tools for exchanging data and events between application parts and an external environment (server, external services, etc.);
- can automatically adjust the life cycle of components of the app (for example, free up the unused memory and so on).
The framework enforces consistent application structure by breaking a monolithic application into a set of reusable classes. As a result, each part of an app can be developed and tested independently and used in various combinations.
DHTMLX Optimus is a fully client-side solution. There aren't any special requirements to the server. You can use any data REST backend (PHP, Nodejs, .Net, Java, etc.)
General idea
DHTMLX Optimus is based on the modern approaches of web development:
- ES6 classes and JavaScript modules;
- dividing the application into Views;
- data transfer and the life cycle of a View
Each module describes a part of UI (a single view). You can use normal DHTMLX code inside of the module to initialize a single component. Top level modules can combine multiple views. The app itself can be used as a view.
The framework provides a common event bus to allow communication between the views and some other helpers for common DHTMLX tasks.
How to start
The best way to start working with the DHTMLX Optimus framework is to create a simple application.
Running the environment
To begin with, you should configure the environment for your project.
You can use a ready project with configured settings from GitHub. To run the project on the local server, use:
npm install
npm start
In other cases, DHTMLX Optimus can be added into your own project via the npm package manager. For that, run the following commands in your project directory:
- to install "dhx-optimus":
npm i dhx-optimus
- to install the "dhx-optimus-store" state manager:
npm i dhx-optimus-store
DHTMLX Optimus requires the files of the DHTMLX Suite library as dependencies. Thus, you'll need to add js/css files of DHTMLX Suite to provide the correct work of DHTMLX Optimus.
Creating an application
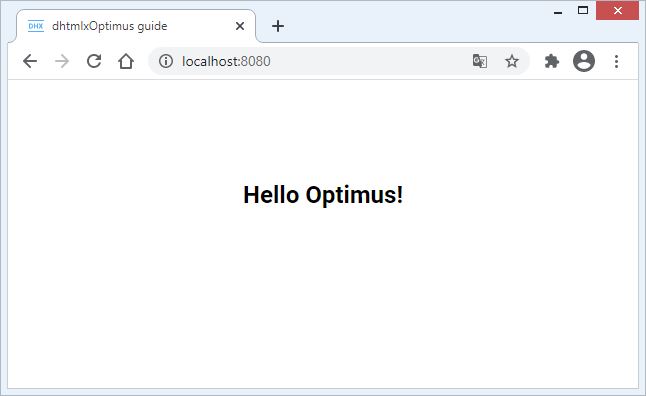
After running the project on the local server and opening http://localhost:8080/ in your browser, you will see the following result:
Let's consider how we've created our demo application:
1. First, we've created a new index.html file in the src folder and defined a container to render our app there:
<!DOCTYPE html>
<html lang="en">
    <head>
        <title>dhtmlxOptimus guide</title>
    </head>
    <body>
        <!-- Create a container with the unique id -->
        <section id="app" class="main__container"></section>
    </body>
</html>
2. Next, we've created an index.js file - the entry point of the app.
import "./assets/css/index.css"; // import css styles
import { App } from "dhx-optimus";

export class MyApp extends App {}
Here we've created the MyApp class that renders our application. The MyApp class is inherited from the App class included from the "dhx-optimus" library.
3. After that, we've added our first View. For that, we've created the TopLayout.js file in the views folder.
We recommend that you use the capital letter at the beginning of the name of the file that have a view => TopLayout.js. This is the common practice.
import { View } from "dhx-optimus";

export class TopLayout extends View {
    init() {
        return `<h1>Hello Optimus!</h1>`;
    }
}
As you can see, we've created the TopLayout class that is inherited from the View class included from the "dhx-optimus" library. To create the initial view, we've returned an HTML element in the init() method.
4. Then, to render the just created view, we've included the view into the index.js file and rendered it via the show() method:
import "./assets/css/index.css";

import { App } from "dhx-optimus";
import { TopLayout } from "./views/TopLayout";

export class MyApp extends App {
    init() {
        this.show(null, TopLayout);
    }
}
You can find more details on API methods below.
5. Finally, we've initialized our application via updating the code of the index.html file with the following:
<!DOCTYPE html>
<html lang="en">
    <head>
        <title>dhtmlxOptimus guide</title>
        <!-- Suite -->
        <script type="text/javascript" src="https://cdn.dhtmlx.com/suite/edge/suite.js"></script>
        <link rel="stylesheet" href="https://cdn.dhtmlx.com/suite/edge/suite.css" />
        <!-- App -->
        <script type="text/javascript" src="./app.js"></script>
        <link rel="stylesheet" href="./app.css" />
    </head>
    <body>
        <section id="app" class="main__container"></section>
        <script>
            const app = new optimusguide.MyApp();
            app.render("#app");
        </script>
    </body>
</html>
Everything is pretty straightforward here:
- we've included a free version of DHTMLX from our CDN. It is necessary to include files of DHTMLX Suite as dependencies for correct work of DHTMLX Optimus;
- we've included the app.js and app.css files to configure webpack;
- we've initialized the app via the
render()method that takes the ID of the container as a parameter.
That's all!
To get acquainted with the principles of developing with DHTMLX Optimus at a professional level, follow our step-by-step guide. The guide is suitable for both experienced users and beginners in the world of JavaScript and DHTMLX.
Application structure
To create a structure of your own app, extend the existing classes. DHTMLX Optimus contains three main classes:
App class
The App class is the main class of the application.
Note, that:
- A new app class is created via extending the App class;
- The
init()method defines the initial view to show; - The
show()method allows rendering the main View of the app
import { App } from "dhx-optimus";
import { TopLayout } from "./views/TopLayout";

export class MyApp extends App {
    init() {
        this.show(null, TopLayout);
    }
}
View class
View class ia a base class intended to create and hierarchically arrange different visual components, to add widgets of Suite, and also to pass data to child components.
To create an application of the desired structure you need to be able to connect different views and set hierarchy of components on a page.
Note, that:
- A new view class is inherited from the View class;
- The
init()method returns a View either as an HTML element or as a DHTMLX widget; - The
ready()method allows you to create the necessary logic after rendering the View to the DOM and to get an HTML container of the rendered View as a parameter of the method - The
destroy()method allows you to destroy your own views. DHTMLX Optimus destroys views automatically. The method can be useful for destroying the parts of your own logic.
Here are some examples:
- the example of the View returned as an HTML element:
import { View } from "dhx-optimus";

export class TopLayout extends View {
    init() {
        return `<h1>Hello Optimus!</h1>`;
    }
    ready(root) {
        console.log(`This root container:`, root);
    }
}
As a result, the parent container of the View will be returned to the console, as in:
<section id="app" class="main__container">
    <h1>Hello Optimus!</h1>
</section>
- the example of the View returned as a DHTMLX widget:
import { View } from "dhx-optimus";

export class DataView extends View {
    init() {
        this.dataView = new dhx.DataView(null, {
            data: this.params.dataCollection,
            itemsInRow: 2,
            gap: 20,
            template: ({ name, post }) => `
                <div className="personal-card">
                    <div className="personal-card__container">
                        <h3>${name}</h3>
                        <p>${post}</p>
                    </div>
                </div>
            `,
        });
        return this.dataView;
    }
}
The example is pretty simple. We've just initialized the DHTMLX DataView widget and returned it as a view.
- the example of the View returned as a DHTMLX widget that contains several Views:
import { View } from "dhx-optimus";

import { ToolbarView } from "./ToolbarView";
import { DataView } from "./content/DataView";

export class TopLayout extends View {
    init() {
        this.layout = new dhx.Layout(null, {
            rows: [
                {
                    id: "toolbar",
                    height: "content",
                    init: cell => this.show(cell, ToolbarView),
                },
                {
                    id: "content",
                    init: cell => this.show(cell, DataView, {
                        dataCollection: this.params.persons,
                    }),
                },
            ],
        });
        return this.layout;
    }
}
The above sample shows that the DHTMLX Layout component possesses the init property. The property allows you to display the View in the specified cell of the layout via the show() method in a short form.
You can create any number of Views for your app and render them via the cells of DHTMLX Layout. For more details on API and useful properties of the DHTMLX widgets, see below.
Component class
Component class is a service class that intended to create additional logic of the app without its further rendering. A new component class is inherited from the Component class.
The advantages of the class inherited from the Component class are:
- the ability to use the event bus of the app;
- the ability to exchange data;
- the ability to destroy events automatically.
Let's consider the Component class on the example of DHTMLX Uploader:
import { Component } from "dhx-optimus";

export default class Uploader extends Component {
    init() {
        this.uploader = new dhx.Uploader({
            target: this.params.target,
        });
        ...
    }
}
The above code shows that:
- the
init()method does not return anything; - we've passed the additional parameter (this.params.target) via the parent component.
The Component class also provides access to the events of the app via the fire(), on() methods. See more details below.
The following example shows that it is possible to use the class inherited from the Component class by calling it in the class inherited from the App class via the use() method.
import { App } from "dhx-optimus";

import TopLayout from "./views/TopLayout";
import Uploader from "./components/Uploader";

export class FileExplorer extends App {
    init() {
        ...

        this.show(null, TopLayout, { folders: this.folders });
        this.use(Uploader, { target: "./backend/upload"});

        ...
    }
}
Subscribing to global events
Subscribing to a global event allows tracking changes made in a component. You can register an event handler in the global event bus and define a function to be triggered when the event is fired.
Let's consider an example. We want to display different content in the View, based on the button selected in the toolbar. For that, we will use the global event bus.
To subscribe to the global viewChange event, we'll apply the this.on() method:
import { View } from "dhx-optimus";

import { ToolbarView } from "./ToolbarView";
import { EmptyView } from "./EmptyView";

export class TopLayout extends View {
    init() {
        return (this.layout = new dhx.Layout(null, {
            rows: [
                {
                    id: "toolbar",
                    height: "content",
                    init: cell => this.show(cell, ToolbarView),
                },
                {
                    id: "content",
                    init: cell => this.show(cell, EmptyView),
                },
            ],
        }));
    }

    ready() {
        this.on("viewChange", id => {
            this.show(this.layout.getCell("content"), EmptyView, { content: id });
        });
    }
}
The event will change the views via the this.show() method.
To call the viewChange event, we'll use the this.fire() API:
import { View } from "dhx-optimus";

export class ToolbarView extends View {
    init() {
        return (this.toolbar = new dhx.Toolbar(null, {
            css: "toolbar",
            data: [
                {
                    type: "spacer",
                },
                {
                    id: "first",
                    value: "First",
                    group: "views",
                },
                {
                    id: "second",
                    value: "Second",
                    group: "views",
                },
                {
                    id: "third",
                    value: "Third",
                    group: "views",
                },
                {
                    type: "spacer",
                },
            ],
        }));
    }

    ready() {
        this.toolbar.events.on("click", id => {
            this.fire("viewChange", [id]);
        });
    }
}
As you can see, whenever the user clicks the button in the toolbar, the this.fire() method will be called and the handler will be executed.
We should also pass the changed state to the child component:
import { View } from "dhx-optimus";

export class EmptyView extends View {
    init() {
        return `
            <div className="empty__container">
                This is the ${this.params.content || "empty"} view
            </div>`;
    }
}
Here we are! After clicking the button in the toolbar, the necessary content will be displayed in the View.
The following code sample shows that the global event, defined in the App class, is available from any point of the application:
import { App } from "dhx-optimus";
import { TopLayout } from "./views/TopLayout";

export class MyApp extends App {
    init() {
        this.show(null, TopLayout);

        this.on("viewChange", id => {
            console.log("You clicked on:", id);
        });
    }
}
Passing data to child components
There is a possibility to pass data from parent components to the child components. It allows configuring the child components within the context of the parent ones or changing configuration of the child depending on the parent's state.
Let's take a look at the code snippet from the previous point:
import { View } from "dhx-optimus";

...

export class TopLayout extends View {
    init() {
        ...
    }

    ready() {
        this.on("viewChange", id => {
            this.show(this.layout.getCell("content"), EmptyView, { content: id });
        });
    }
}
We've added an event handler to the viewChange event of the global event bus. When the id is changed, the show(target, view, params) method is called. The method takes 3 parameters, but we're interested in the last one. It allows passing an object with the necessary parameters. For instance:
this.show(this.layout.getCell("content"), EmptyView, { content: id });
It is possible to get this parameter in the child component:
import { View } from "dhx-optimus";

export class EmptyView extends View {
    init() {
        return `
            <div className="empty__container">
                This is the ${this.params.content} view
            </div>`;
    }
}
Initializing the app's global state
It is also possible to use the App class for exchanging data between the components via initializing Observable Store which allows managing the global state of the application. To be able to access the state, you need to create a global store and subscribe to its changes.
Let's consider how you can create a global store, retrieve the state of the store and use it in your app.
The below code example demonstrates the part of the application sample. The full code is available on GitHub.
At first, we've initialized the global state of the app in the App class via creating the global store and subscribing to the changes of the store. To retrieve the current state of the store, we've used the getState() method.
import { App } from "dhx-optimus";
import Store from "dhx-optimus-store";

import { TopLayout } from "./views/TopLayout";

const initialState = {
    active: "first",
};

export class MyApp extends App {
    init() {
        // create a global store
        this.store = new Store(initialState);
        this.params.store = this.store;
        this.state = this.store.getState();

        this.show(null, TopLayout);

        // subscribe to Store changes
        this.on("viewChange", id => {
            this.state.active = id;
        });
    }
}
Then, we've used the toolbar component to generate the changes of the state there. The fire() method calls the handler each time the user clicks the button in the toolbar:
import { View } from "dhx-optimus";

export class ToolbarView extends View {
    init() {
        return (this.toolbar = new dhx.Toolbar(null, {...}));
    }

    ready() {
        this.observe(
            state => state.active,
            active => {
                this.toolbar.data.update(active, { active: true });
            }
        );

        this.toolbar.events.on("click", id => {
            this.fire("viewChange", [id]);
        });
    }
}
The above code implements the following logic:
- each time the user clicks the button in the toolbar, the
viewChangeevent is called in the ToolbarView class via thefire()method; - the id of the button pressed in the toolbar is passed to the
fire()method; - the state of the app changes on triggering of the global
viewChangeevent in the MyApp class; - the active global state gets the current state of the app via the id of the toolbar button.
Using the observe() method helps to asynchronously observe the changes made to the global store from any point of the application:
import { View } from "dhx-optimus";

import { ToolbarView } from "./ToolbarView";
import { EmptyView } from "./EmptyView";

export class TopLayout extends View {
    init() {
        return (this.layout = new dhx.Layout(null, {...}));
    }

    ready() {
        this.observe(
            state => state.active,
            active => {
              this.show(this.layout.getCell("content"), EmptyView, {content: active});
            }
        );
    }
}
Working with widgets of Suite
You can easily build your app based on the components of DHTMLX Suite by using Optimus.
You can create your first app with DHTMLX Optimus with the help of our step-by-step guide.
DHTMLX Optimus automatically destroys components and events, so you can not worry about the life cycle of the component.
The small and fast microframework is intended to build DHTMLX-based apps easier and faster. Thus, you just need to follow the main principles of the work with Optimus that are given below.
Initialization of the DHTMLX Suite components
In most cases creating a View based on the component of the Suite library is pretty simple:
import { View } from "dhx-optimus";

export class CalendarView extends View {
    init() {
        return new dhx.Calendar(null, {
            value: new Date,
        });
    }
    ready() {
        console.log("Calendar is ready");
    }
    destroy() {
        console.log("Calendar is destroy");
    }
}
In the above example, we've initialized the view that returns DHTMLX Calendar.
Let's consider the code in detail:
- the
init()method returns the configured DHTMLX Calendar; - the
ready()method will be called after the View is rendered in a DOM tree. You can implement your own logic and don't be afraid that the component has not been rendered yet; - the
destroy()method will be called after the View is deleted from the DOM tree. At this moment, Optimus destroys as the DHTMLX components as events related to the View. You can also describe your own logic here, if needed.
Initialization of the DHTMLX Window component
Creating a view based on DHTMLX Window is similar to creating a View based on the other components of Suite. The only difference is rendering of the View.
Let's create the view based on DHTMLX Window and then render it in the TopLayout view.
The initialization of the DHTMLX Window component is the same as initialization of the other components:
import { View } from "dhx-optimus";

export class WindowView extends View {
    init() {
        return this.window = new dhx.Window({
            title: "DHX Window",
            resizable: true,
            movable: true
        });
    }
    ready() {
        console.log("DHX Window is ready");
    }
    destroy() {
        console.log("DHX Window is destroy");
    }
}
But rendering of the View based on DHTMLX Window will look like this:
import { View } from "dhx-optimus";
...
import { WindowView } from "./WindowView";
...
export class TopLayout extends View {
    init() {
        return (this.layout = new dhx.Layout(null, {...}));
    }

    ready() {
        ...
        this.show(null, WindowView);
    }
}
To listen to the changes made to the global state, we should update the code of WindowView and apply the observe() method. As a result, the WindowView will be rendered when switching to the second page of the app:
import { View } from "dhx-optimus";

export class WindowView extends View {
    init() {
        return this.window = new dhx.Window({ ... });
    }
    ready() {
        console.log("DHX Window is ready");
        this.observe(
            state => state.active,
            active => {
                if (active === "second") {
                    this.window.show();
                } else {
                    this.window.hide();
                }
            }
        );
    }
    destroy() { ... }
}
Thus, it is possible to display the DHTMLX Window based View in any necessary View.
Initialization of the DHTMLX Layout component
Let's consider 3 methods of rendering a View via the show() method, one of which implies rendering of the View directly in the DHTMLX Layout component:
1. It is possible to render views with the help of the show() method:
import { View } from "dhx-optimus";

import { ToolbarView } from "./ToolbarView";
import { EmptyView } from "./EmptyView";

export class TopLayout extends View {
    init() {
        this.layout = new dhx.Layout(null, {
            rows: [
                {
                    id: "toolbar",
                    height: "content",
                },
                {
                    id: "content",
                }
            ]
        });

        this.show(this.layout.getCell("toolbar"), ToolbarView);
        this.show(this.layout.getCell("content"), EmptyView);

        return this.layout;
    }
}
2. It is possible to call the show() method right in the layout via the init option. The option returns the current Layout cell as a parameter. You can use this way when you need to get the static layout without changing the view.
import { View } from "dhx-optimus";

import { ToolbarView } from "./ToolbarView";
import { EmptyView } from "./EmptyView";

export class TopLayout extends View {
    init() {
        return new dhx.Layout(null, {
            rows: [
                {
                    id: "toolbar",
                    height: "content",
                    init: cell => this.show(cell, ToolbarView),
                },
                {
                    id: "content",
                    init: cell = this.show(cell, EmptyView)
                }
            ]
        });
    }
}
3. You can also combine the above two methods if you need to change views in the Layout cell:
import { View } from "dhx-optimus";

import { ToolbarView } from "./ToolbarView";
import { DataView } from "./content/DataView";
import { ChartView } from "./content/ChartView";
import { GridView } from "./content/GridView";

export class TopLayout extends View {
    init() {
        return (this.layout = new dhx.Layout(null, {
            rows: [
                {
                    id: "toolbar",
                    height: "content",
                    init: cell => this.show(cell, ToolbarView),
                },
                {
                    id: "content",
                }
            ]
        }));
    }

    ready() {
        this.observe(
            state => state.active,
            active => {
                switch (active) {
                    case "first":
                        this.show(this.layout.getCell("content"), DataView);
                        break;
                    case "second":
                        this.show(this.layout.getCell("content"), ChartView);
                        break;
                    case "third":
                        this.show(this.layout.getCell("content"), GridView);
                        break;
                }
            }
        );
    }
}
API
The DHTMLX Optimus provides the following API methods that are available from any point of the app:
| show() | shows the specified view in a cell of the app. It takes three parameters:
|
| use() | initializes Component. It takes 2 parameters:
|
| on() | registers an event handler in the global event bus. It takes 2 parameters:
|
| fire() | calls an event handler of the global event bus. It takes 2 parameters:
|
| detach() | unsubscribes an event handler from the global event bus. It takes one parameter:
|
Methods used inside the classes
- The App's constructor provides the following method:
| init() | mandatory, allows initializing available views and logic of the components. For more details, see the App class. |
- The Component's constructor provides the following methods:
| init() | mandatory, allows initializing the logic of the Component. This logic will be called on initialization of the Component. For more details, see the Component class. |
| destroy() | the method is called on destroying the Component |
- The View's constructor provides the following methods:
| init(): string|DHXWidget | obligatory, allows initializing and returning the view. For more details, see the View class. |
| ready() | allows implementing an additional logic after rendering View to DOM. It takes one parameter:
|
| destroy() | allows implementing an additional logic on destroying the component, and unmounts the View from DOM. In most cases, you don't need to use this method, as the views based on the DHTMLX widgets are destroyed automatically. |
- The App's constructor also provides the method that can be called outside the application:
| render() | renders an application inside the specified container. It takes one parameter:
|
Other materials
- How to start with Optimus step-by-step guide
- DHTMLX Optimus demo on GitHub
- Other demos build with Optimus: