Form Builder
DHTMLX Form Builder is an online tool intended for making the process of creating forms easier. It allows you not to write huge amounts of code for positioning and arranging elements in a form.
You just add columns and blocks and fill them up with desired controls. Then take the ready-made code and insert it into your application. As simple as that. Try and enjoy!
Form Builder Overview
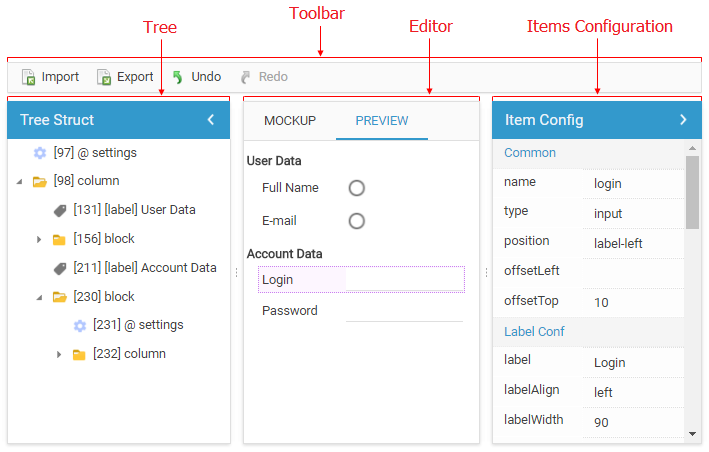
Form Builder consists of 4 main parts:
- Toolbar - contains buttons to manipulate data export/import and allows repeating or canceling actions.
- Tree - takes the left part of the Form Builder, presents the arrangement of form elements in a hierarchical way:
- The biggest form components - columns are displayed as folders.
- Blocks/fieldsets with form controls are placed as nested folders inside columns.
- Controls are located inside of columns, blocks or lie separately.
- The Settings elements define configuration settings for each block/fieldset of controls.
- Editor - the middle and most prominent part of the tool, allows building the form layout and defining the place of each element, as well as lets evaluate the result of each action at once.
It presents the created form in two tabs:
- Mockup - lets you define the order of form elements arrangement and relations between them
- Preview - is intended for previewing the resulting form.
- Item Configuration Block - the very right part of the Form Builder, displays the list of possible elements' properties that can be tuned to get the desired interface.
Step 1. Creating a Mockup
Start creating the layout of your future form in the Mockup tab of the Editor view.
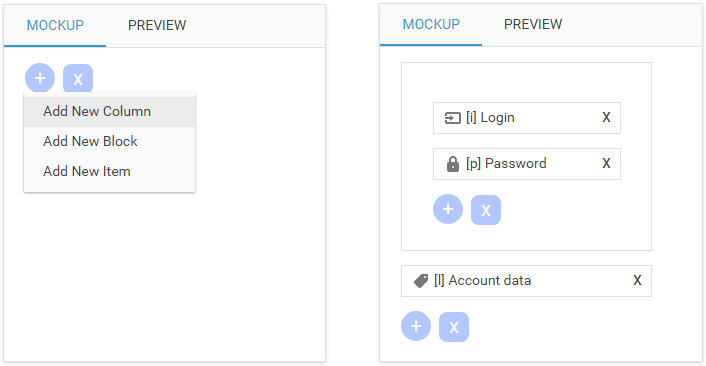
Adding elements
To add a new block, a column or a separate control click the ![]() icon.
icon.
Importing ready config
You can also import form configuration into Form Builder in JSON format.
Click the Import button and choose one of the two options:
- Import - to insert a JSON object in the appearing popup
- Import from File - to select a file that contains form structure as a JSON object
Deleting elements
To remove a column or a block, click the ![]() icon. To delete an unnecessary item, use the cross sign in the input container.
icon. To delete an unnecessary item, use the cross sign in the input container.
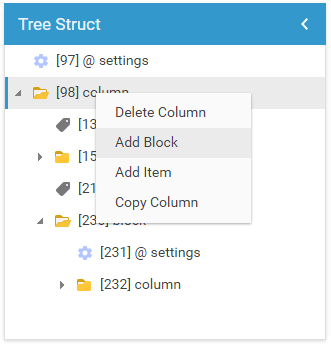
Manipulating form elements in the Tree view
You can also add, delete or copy a column, a block or an item in the Tree view. Just call the context menu by right-clicking the needed form element and choose the corresponding menu item.
Step 2. Configuring Items
By default, all items are added into the mockup as inputs.
To set the desired type of the control, select it in the Mockup tab or the Tree view and choose the type you need in the Items Config view.
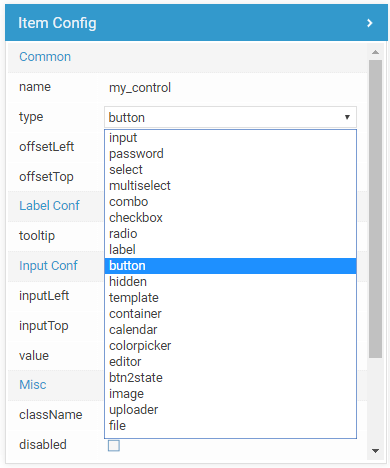
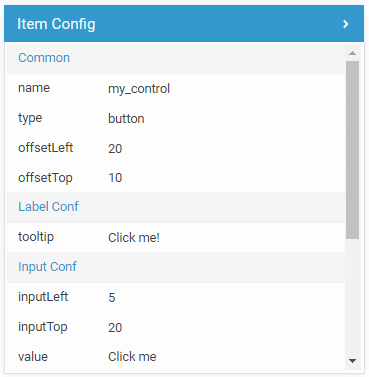
To tune the appearance and position of a form control in a proper way, define values of other control's properties in the Items Config view.
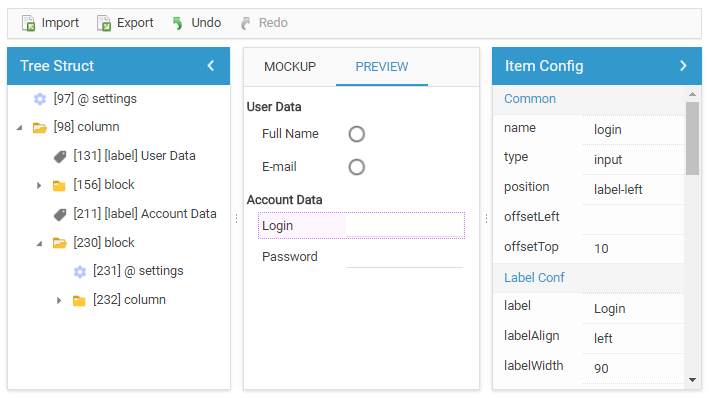
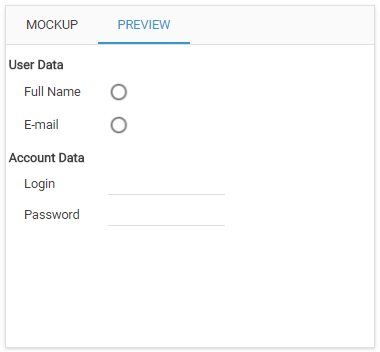
Step 3. Previewing the Result
To see the current result and fix the elements position and arrangement, go to the Preview tab of the Editor.
Step 4. Exporting Form
To save the created form configuration, click the Export button. The resulting code of your form will appear in the popup window.

Click "Save to File" and form structure will be exported into a file as a JSON object.
Back to top