与 Svelte 集成
在阅读本文档之前,您应该熟悉 Svelte 的基本概念和模式。如需温习相关知识,请参阅 Svelte 文档。
DHTMLX Spreadsheet 与 Svelte 兼容。我们已准备了如何将 DHTMLX Spreadsheet 与 Svelte 配合使用的代码示例。更多信息,请参阅相应的 GitHub 示例。
创建项目
要创建 Svelte JS 项目,请运行以下命令:
npm create vite@latest
将项目命名为 my-svelte-spreadsheet-app。
安装依赖
进入应用目录:
cd my-svelte-spreadsheet-app
然后安装依赖并运行应用。请使用包管理器执行以下操作:
- 如果您使用 yarn,需要执行以下命令:
yarn
yarn dev // or yarn dev
- 如果您使用 npm,需要执行以下命令:
npm install
npm run dev
应用应在 localhost 上运行(例如 http://localhost:3000)。
创建 Spreadsheet
现在您需要获取 DHTMLX Spreadsheet 源代码。首先停止应用并安装 Spreadsheet 包。
第一步:安装包
下载试用版 Spreadsheet 包并按照 README 文件中的步骤操作。请注意,试用版 Spreadsheet 仅可使用 30 天。
第二步:创建组件
现在您需要创建一个 Svelte 组件,将 Spreadsheet 添加到应用中。在 src/ 目录中创建一个新文件,命名为 Spreadsheet.svelte。
导入源文件
打开 Spreadsheet.svelte 文件并导入 Spreadsheet 源文件。请注意:
- 如果您使用专业版并从本地文件夹安装 Spreadsheet 包,导入路径如下:
<script>
import { Spreadsheet } from 'dhx-spreadsheet-package';
import 'dhx-spreadsheet-package/codebase/spreadsheet.css';
</script>
请注意,根据所使用的包,源文件可能已被压缩。此情况下,请确保导入的 CSS 文件为 spreadsheet.min.css。
- 如果您使用 Spreadsheet 试用版,请指定以下路径:
<script>
import { Spreadsheet } from '@dhx/trial-spreadsheet';
import '@dhx/trial-spreadsheet/codebase/spreadsheet.min.css';
</script>
本教程演示如何配置 Spreadsheet 的试用版本。
设置容器并添加 Spreadsheet
要在页面上显示 Spreadsheet,您需要创建 Spreadsheet 的容器,并使用相应的构造函数初始化该组件:
<script>
    import { onMount, onDestroy } from "svelte";
    import { Spreadsheet } from "@dhx/trial-spreadsheet";
    import "@dhx/trial-spreadsheet/codebase/spreadsheet.min.css"

    let container; // initialize container for Spreadsheet
    let spreadsheet;

    onMount(() => {
        // initialize the Spreadsheet component
        spreadsheet = new Spreadsheet(container, {});
    });

    onDestroy(() => {
        spreadsheet.destructor(); // destruct Spreadsheet
    });
</script>

<div bind:this={container} class="widget"></div>
添加样式
为了正确显示 Spreadsheet,您需要在项目的主 CSS 文件中为 Spreadsheet 及其容器指定重要样式:
/* specify styles for initial page */
html,
body,
#app { /* make sure that you use the #app root container */
    height: 100%;
    padding: 0;
    margin: 0;
}

/* specify styles for the Spreadsheet container */
.widget {
    height: 100%;
}
加载数据
要向 Spreadsheet 中添加数据,您需要提供一个数据集。在 src/ 目录中创建 data.js 文件,并向其中添加一些数据:
export function getData() {
    return {
        styles: {
            bold: {
                "font-weight": "bold"
            },
            right: {
                "justify-content": "flex-end",
                "text-align": "right"
            }
        },
        data: [
            { cell: "a1", value: "Country", css:"bold" },
            { cell: "b1", value: "Product", css:"bold" },
            { cell: "c1", value: "Price", css:"right bold" },
            { cell: "d1", value: "Amount", css:"right bold" },
            { cell: "e1", value: "Total Price", css:"right bold" },

            { cell: "a2", value: "Ecuador" },
            { cell: "b2", value: "Banana" },
            { cell: "c2", value: 6.68, format: "currency" },
            { cell: "d2", value: 430 },
            { cell: "e2", value: 2872.4, format: "currency" },

            { cell: "a3", value: "Belarus" },
            { cell: "b3", value: "Apple" },
            { cell: "c3", value: 3.75, format: "currency" },
            { cell: "d3", value: 600 },
            { cell: "e3", value: 2250, format: "currency" },

            { cell: "a4", value: "Peru" },
            { cell: "b4", value: "Grapes" },
            { cell: "c4", value: 7.69, format: "currency" },
            { cell: "d4", value: 740 },
            { cell: "e4", value: 5690.6, format: "currency" },

            // more cells with data
        ]
    }
}
然后打开 App.svelte 文件,导入数据,并将其作为 props 传递给新创建的 <Spreadsheet/> 组件:
<script>
    import Spreadsheet from "./Spreadsheet.svelte";
    import { getData } from "./data.js";

    const data = getData();
</script>

<Spreadsheet data={data} />
进入 Spreadsheet.svelte 文件,使用 parse() 方法将传入的 props 应用到 Spreadsheet:
<script>
    import { onMount, onDestroy } from "svelte";
    import { Spreadsheet } from "@dhx/trial-spreadsheet";
    import "@dhx/trial-spreadsheet/codebase/spreadsheet.min.css"

    export let data;

    let container;
    let spreadsheet;

    onMount(() => {
        spreadsheet = new Spreadsheet(container, {});
        spreadsheet.parse(data);
    });

    onDestroy(() => {
        spreadsheet.destructor();
    });
</script>

<div bind:this={container} class="widget"></div>
现在 Spreadsheet 组件已准备好使用。当元素被添加到页面时,它会使用数据初始化 Spreadsheet。您也可以提供必要的配置设置。请访问我们的 Spreadsheet API 文档查看可用属性的完整列表。
处理事件
当用户在 Spreadsheet 中执行操作时,widget 会触发相应事件。您可以使用这些事件检测操作并为其运行所需代码。请查看事件完整列表。
打开 Spreadsheet.svelte 并按以下方式完善 onMount() 方法:
<script>
// ...
let spreadsheet;

onMount(() => {
    spreadsheet = new Spreadsheet(container, {})

    spreadsheet.events.on("afterFocusSet", function(cell){
        console.log("Focus is set on a cell " + spreadsheet.selection.getSelectedCell());
        console.log(cell);
    });
});

onDestroy(() => {
    spreadsheet.destructor();
});
</script>

// ...
完成上述步骤后,启动应用时,您应该会看到 Spreadsheet 已在页面上加载数据。
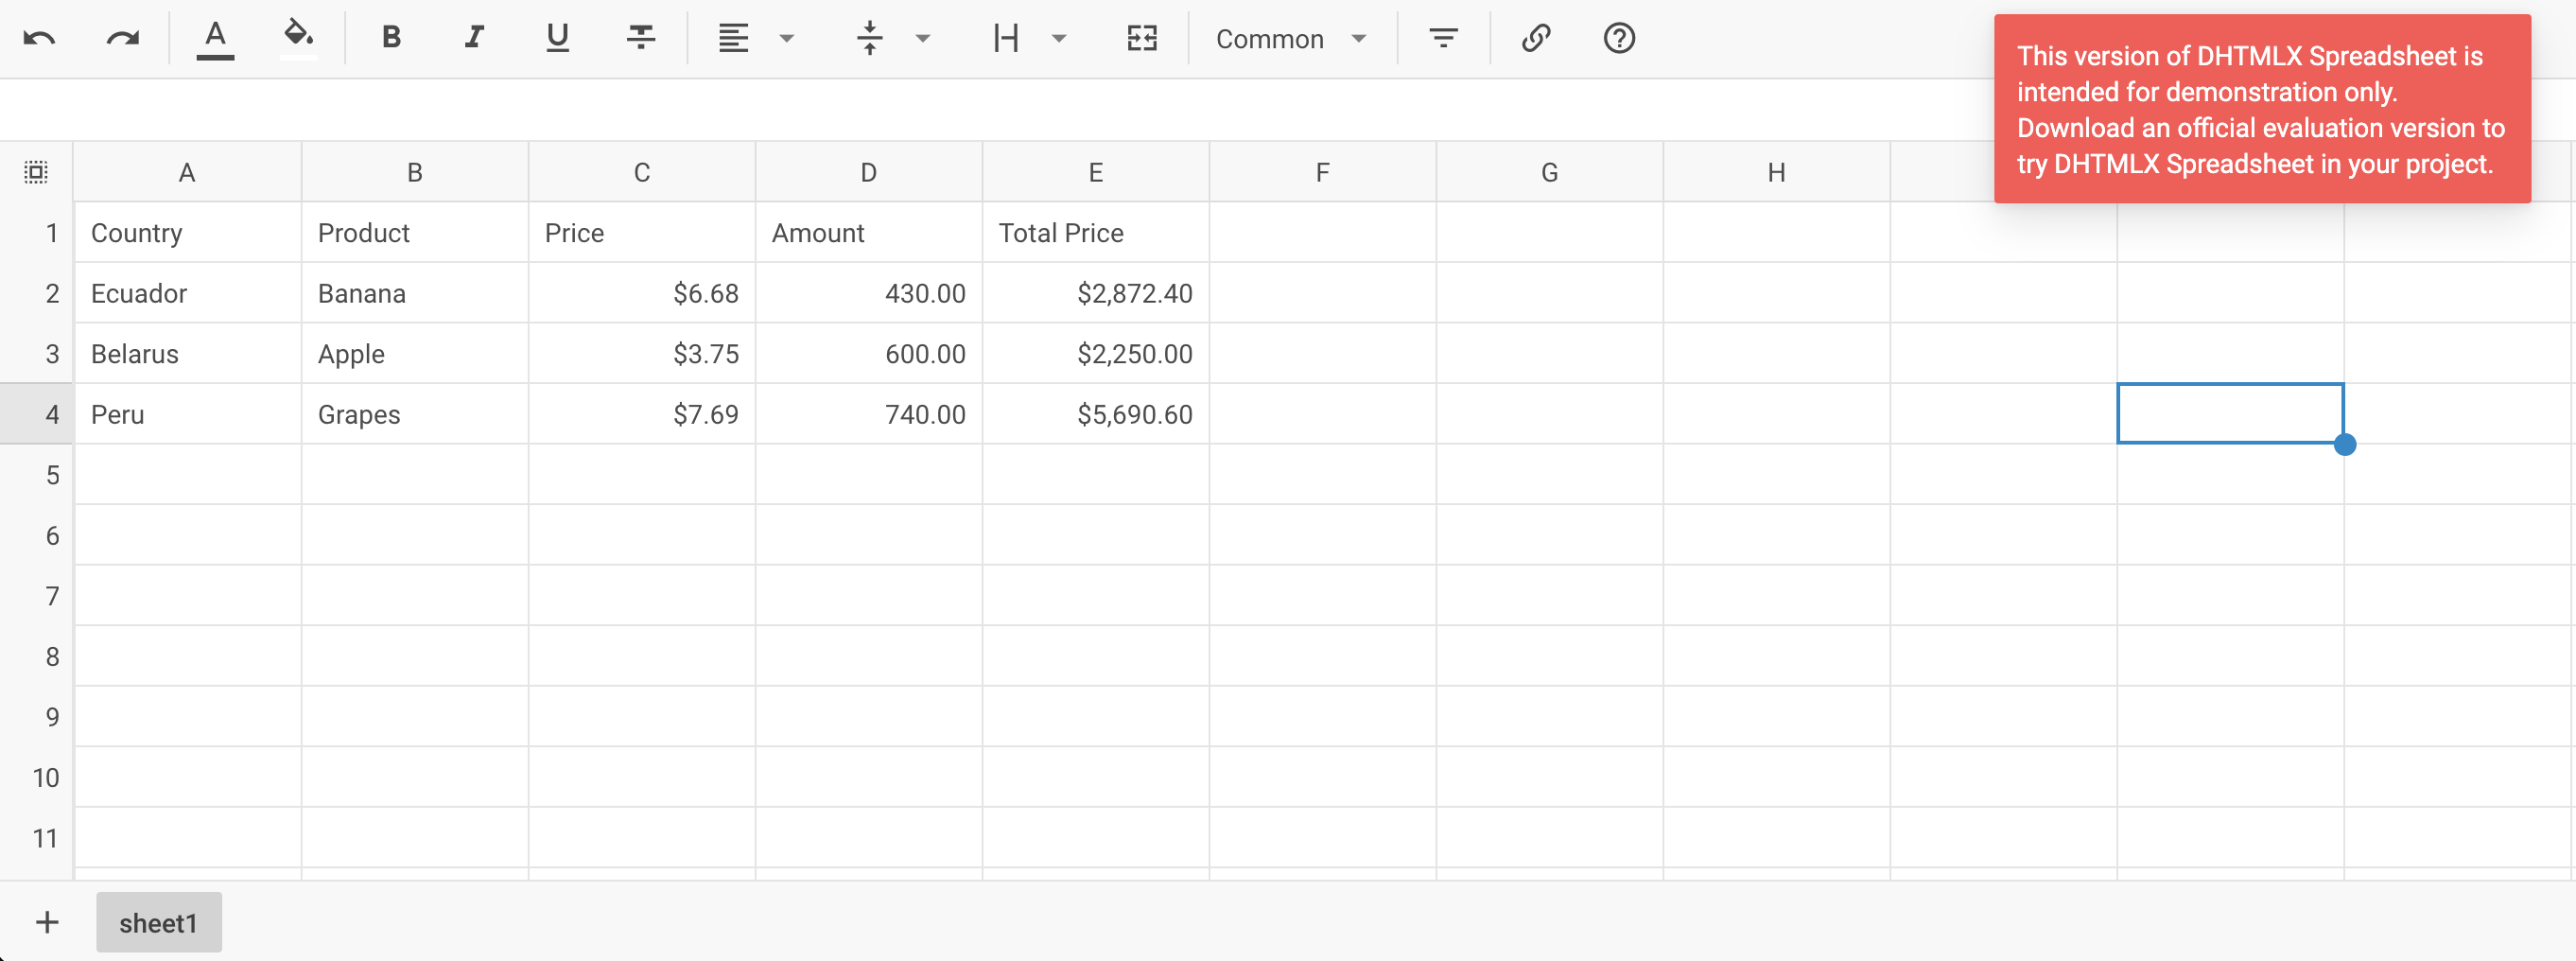
现在您已完成将 DHTMLX Spreadsheet 与 Svelte 集成的基本设置。您可以根据具体需求自定义代码。您可以在 GitHub 上找到最终示例。