Configuration
Adjust the settings of DHTMLX To Do List to fit your needs. The available configuration options let you:
- configure the appearance of the badge that displays task completion progress
- configure the format of dates
- configure or disable drag-n-drop of tasks
- disable validation for due dates of tasks
- change the mode used for marking tasks done
- configure the appearance of the toolbar
- manage the history of changes
- configure how completed tasks are hidden
- initialize the To Do List in read-only mode
To change configuration parameters dynamically after initialization, use the setConfig() method. The method destroys the current component and recreates it with the merged settings. Call the matching Toolbar setConfig() afterward to rebind the toolbar to the new API.
Tasks
Counter of completed subtasks
Change the counter type that shows how many child tasks are complete.
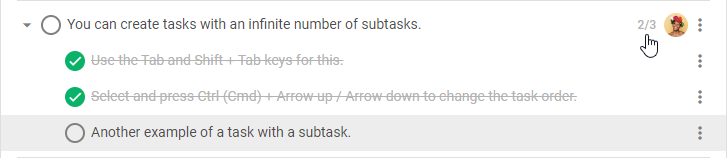
By default, each parent task shows a counter as a ratio of completed child tasks to the total number of child tasks.
To display the counter value as a percentage, set taskShape.counter.type to "percentage". See the taskShape reference for details. The example below switches the counter to percentage mode:
const list = new ToDo("#root", {
    tasks,
    users,
    projects,
    taskShape: {
        counter: {
            type: "percentage" // "number" by default
        }
    }
});
Related sample: To do list. Subtask counter and date format
Date format
By default, the To Do List displays dates in the "%d %M %Y" format (for example, 09 Mar 2033). To specify another format, use the date parameter of the taskShape property. The following snippet sets a slash-separated date format:
const list = new ToDo("#root", {
    tasks,
    users,
    projects,
    taskShape: {
        date: {
            format: "%d/%m/%Y", // "%d %M %Y" by default
            validate: true
        }
    }
});
Related sample: To do list. Subtask counter and date format
Check the list of available characters.
Drag-n-drop
Drag-n-drop is enabled by default. Select one or several tasks and drag the whole selection at once. To create a copy of the selected tasks, hold the Alt key during drag-n-drop.
Use the drag property to:
- prevent collapsed tasks from expanding on hover during drag-n-drop
- disable drag-n-drop entirely
The example below keeps collapsed tasks closed when the user drags items over them:
const list = new ToDo("#root", {
    tasks: [
        { id: "1", text: "Task 1 #tag1" },
        ...
    ],
    drag: {
        expand: false // true by default
    }
});
The following snippet disables drag-n-drop entirely:
const list = new ToDo("#root", {
    tasks: [
        { id: "1", text: "Task 1 #tag1" },
        ...
    ],
    drag: false // true by default
});
Subscribe to drag events to track the drag-n-drop lifecycle:
start-drag— fires when the user starts dragging tasks; provides the source task id and the mode ("move"or"copy")drag— fires while the user drags tasksend-drag— fires when the drag completes; provides the target id, drop position ("top","bottom","in", ornull), and the mode
The snippet below logs the start and end of a drag operation:
list.api.on("start-drag", ({ start, mode }) => {
    console.log("drag started from", start, "in", mode, "mode");
});

list.api.on("end-drag", ({ target, dropPosition, mode }) => {
    console.log("dropped on", target, "at", dropPosition, "in", mode, "mode");
});
Change log: The start-drag and end-drag events were added in v1.1.
Due date validation
If you specify a due date for a task, due date validation tracks task completion. The due date appears in green until the task becomes overdue.

Dates of overdue tasks appear in red.

Validation is enabled by default. To disable it, set taskShape.date.validate to false. See the taskShape reference for details. The code snippet below turns off due date validation:
const list = new ToDo("#root", {
    tasks,
    users,
    projects,
    taskShape: {
        date: {
            format: "%d %M %Y",
            validate: false // true by default
        }
    }
});
In this configuration, the due dates appear gray.
Mode of marking tasks complete
By default, the To Do List checks and unchecks tasks in "auto" mode:
- mark all children of a task as completed → the parent task becomes completed automatically
- mark the parent task as completed → all child tasks become completed automatically
- mark at least one child of a completed task as uncompleted → the parent task becomes uncompleted automatically
- mark the parent task as uncompleted → all child tasks become uncompleted automatically
To disable this behavior and activate "manual" mode, set taskShape.completed.behavior to "manual". See the taskShape reference for details. The example below activates manual mode:
const list = new ToDo("#root", {
    tasks,
    users,
    projects,
    taskShape: {
        completed: {
            behavior: "manual" // "auto" by default
        }
    }
});
Related sample: To do list. Two variants of marking a parent task done
History of changes
The To Do List tracks the history of changes by default. Users can revert and repeat operations through the undo() and redo() methods.
Use the history property to configure this behavior. The property accepts a boolean (short form) or an object with extended settings:
projects— enable branching of history so that each project keeps a separate history; the whole app shares one history when set tofalselimit— maximum number of history operations to keep
The example below limits history to 20 operations and disables per-project branching:
const list = new ToDo("#root", {
    tasks,
    users,
    projects,
    history: { projects: false, limit: 20 }
});

list.addTask({ task: { text: "New task" } });
list.undo(); // revert the last action
list.redo(); // restore it
To disable history management entirely, set the property to false. The undo() and redo() methods become unavailable, and the corresponding Toolbar controls disappear.
Change log: The history config, undo(), and redo() methods were added in v1.3.
Toolbar
The toolbar appears at the top of the component and is initialized and configured separately.
To change the default structure of the toolbar, use the items configuration property of the Toolbar component. The snippet below keeps only the search and combo controls:
const toolbar = new Toolbar("#toolbar", {
    api: list.api,
    items: ["search", "combo"]
});
The items property defines which controls the toolbar renders. List them in the order you want.
Hiding mode for completed tasks
See Hide completed tasks for details.
Read-only mode
The Read-only mode section explains how to make the To Do List read-only.