dhtmlxScheduler 与 PHP:Slim 3
本教程介绍了如何使用 Slim 3 框架和后端 REST API 构建基于 PHP 的 Scheduler 的基本步骤。
本教程使用的是较旧的 Slim Framework v3.x。若需最新版,请参见 Slim Framework v4.x 指南。
我们还提供了与其他平台和框架集成的教程:
- dhtmlxScheduler와 ASP.NET Core
- dhtmlxScheduler와 ASP.NET MVC
- dhtmlxScheduler와 Node.js
- dhtmlxScheduler와 PHP
- dhtmlxScheduler와 PHP:Laravel 연동하기
- dhtmlxScheduler와 PHP:Slim
- dhtmlxScheduler와 SalesForce LWC 통합하기
- dhtmlxScheduler와 Ruby on Rails 연동하기
- dhtmlxScheduler와 dhtmlxConnector 연동하기
在开发 PHP 应用程序时,通常会使用成熟的框架,而不是从零开始开发所有内容。
本示例将使用 Slim 3 框架,结合服务器端的 REST API,并使用 MySQL 作为数据存储。CRUD 操作通过 PDO 实现,设计上也可灵活适配其他框架。
你可以在 GitHub 上查看完整演示。按照以下分步说明构建此应用。
完整源码可在 GitHub 获取。
步骤 1. 初始化项目
创建项目
首先,使用 Slim 3 的 skeleton application 作为起点。
通过 Composer 创建应用:
$ composer create-project slim/slim-skeleton scheduler-slim-howto
$ cd scheduler-slim-howto/
$ composer require illuminate/database "~5.1"
步骤 2. 将 Scheduler 添加到页面
接下来,把 scheduler 添加到页面。这只需两个简单步骤。
创建视图
在 templates 文件夹下创建 scheduler.phtml 文件:
<!doctype html>
<html>
<head>
<title> Getting started with dhtmlxScheduler</title>
<meta charSet="utf-8"/>
<script src="https://cdn.dhtmlx.com/scheduler/edge/dhtmlxscheduler.js"></script>
<link href="https://cdn.dhtmlx.com/scheduler/edge/dhtmlxscheduler.css"
rel="stylesheet" type="text/css" charSet="utf-8">
<style>
html, body{
margin:0px;
padding:0px;
height:100%;
overflow:hidden;
}
</style>
</head>
<body>
<div id="scheduler_here" className="dhx_cal_container">
<div className="dhx_cal_navline">
<div className="dhx_cal_prev_button"> </div>
<div className="dhx_cal_next_button"> </div>
<div className="dhx_cal_today_button"></div>
<div className="dhx_cal_date"></div>
<div className="dhx_cal_tab" name="day_tab"></div>
<div className="dhx_cal_tab" name="week_tab"></div>
<div className="dhx_cal_tab" name="month_tab"></div>
</div>
<div className="dhx_cal_header"></div>
<div className="dhx_cal_data"></div>
</div>
<script>
scheduler.config.xml_date="%Y-%m-%d %H:%i";
scheduler.init('scheduler_here', new Date(2019,0,20), "week");
scheduler.load("/events");
var dp = scheduler.createDataProcessor("/events");
dp.setTransactionMode("REST"); // use to transfer data with REST
dp.init(scheduler);
</script>
</body>
</html>
配置路由
视图页面准备好后,在 src/routes.php 中配置路由,以便通过浏览器访问:
$app->get('/', function (Request $request, Response $response, array $args) {
    return $this->renderer->render($response, 'scheduler.phtml', $args);
});
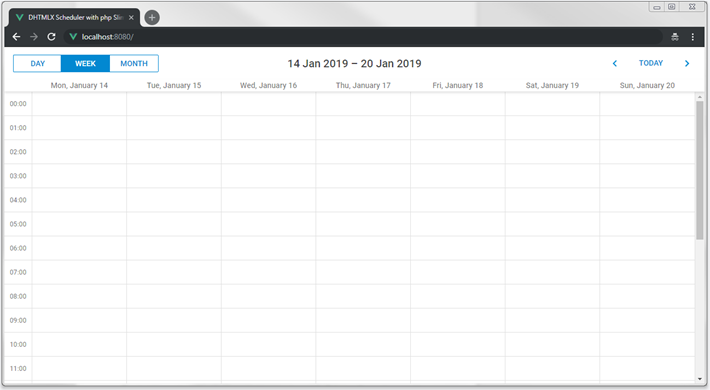
现在可以启动应用并看到 scheduler 已显示:
步骤 3. 准备数据库
此时 scheduler 还没有数据。下一步是创建数据库并连接到应用。
创建数据库
你可以使用常用的 MySQL 客户端或控制台来创建数据库。以下 SQL 用于创建日历事件所需的数据库和数据表:
CREATE DATABASE  IF NOT EXISTS `scheduler_howto_php`;
USE `scheduler_howto_php`;

DROP TABLE IF EXISTS `events`;
CREATE TABLE `events` (
  `id` int(11) AUTO_INCREMENT,
  `start_date` datetime NOT NULL,
  `end_date` datetime NOT NULL,
  `text` varchar(255) DEFAULT NULL,
  PRIMARY KEY (`id`)
) DEFAULT CHARSET="utf8;"
如需通过 MySQL 控制台导入,可将上述内容保存为 dump.sql 文件并运行:
$ mysql -uuser -ppass scheduler < mysql_dump.sql
接下来,打开 src/settings.php,添加数据库配置数组,并使用你的数据库信息进行更新:
'pdo' => [
    'engine' => 'mysql',
    'host' => 'localhost',
    'database' => 'scheduler_howto_php',
    'username' => 'user',
    'password' => 'pass',
    'charset' => 'utf8',
    'collation' => 'utf8_unicode_ci',

    'options' => [
        PDO::ATTR_ERRMODE => PDO::ERRMODE_EXCEPTION,
        PDO::ATTR_DEFAULT_FETCH_MODE => PDO::FETCH_ASSOC,
        PDO::ATTR_EMULATE_PREPARES => true,
    ],
]
然后,在 src/dependencies.php 中,将 PDO 实例添加到应用容器中:
// Inject a new instance of PDO into the container
$container['database'] = function($container) {

   $config = $container->get('settings')['pdo'];
   $dsn = "{$config['engine']}:host="{$config["'host']};dbname="{$config["'database']};
   charSet="{$config["'charset']}";
   $username = $config['username'];
   $password = $config['password'];

   return new PDO($dsn, $username, $password, $config['options']);
};
步骤 4. 加载数据
scheduler 已设置为通过 "/events" 获取事件数据。现在需要为该请求添加处理器以提供真实数据。
由于后面会有多个处理器,建议使用 路由分组 进行组织。
打开 src/routes.php,为 "/events" 添加分组及 GET 操作:
$app->group('/events', function () {
    $this->get('', function (Request $request, Response $response, array $args) {
        $db = $this->database;
        $queryText = 'SELECT * FROM `events`';

        $query = $db->prepare($queryText);
        $query->execute();
        $result = $query->fetchAll();

        return $response->withJson($result);
    });
});
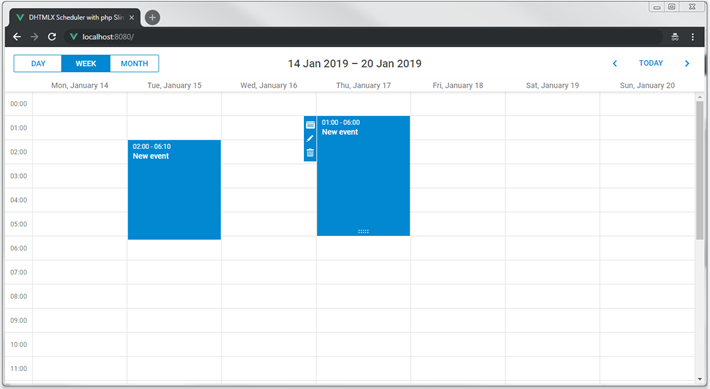
当你向数据库添加一些事件后,它们会在 scheduler 上显示出来。
动态加载
此时 scheduler 会一次性加载所有事件,适合小型数据集。但若用于计划或预订等场景且旧记录不删除,事件数量会迅速增长,每次页面加载时都会传输大量数据。
动态加载通过只请求当前日期范围内可见的事件来优化性能。每当用户切换视图时,scheduler 只会加载相关数据。
要启用此功能,在客户端设置 setLoadMode 选项为 "day"、"week" 或 "month":
scheduler.config.xml_date="%Y-%m-%d %H:%i";
scheduler.init("scheduler_here", new Date(2019, 0, 20), "week");
scheduler.setLoadMode("day");
scheduler.load("/events");
在服务器端,按如下方式处理日期过滤:
$app->group('/events', function () {
    $this->get('', function (Request $request, Response $response, array $args) {
        $db = $this->database;
        $queryText = 'SELECT * FROM `events`';

        $params = $request->getQueryParams(); /*!*/
        $queryParams = []; /*!*/

        if (isset($params['from']) && isset($params['to'])) {/*!*/
            $queryText .= " WHERE `end_date`>=? AND `start_date` < ?;";/*!*/
            $queryParams = [$params['from'], $params['to']];/*!*/
        }/*!*/

        $query = $db->prepare($queryText);
        $query->execute($queryParams);/*!*/
        $result = $query->fetchAll();

        return $response->withJson($result);
    });
});
步骤 5. 保存更改
实现后端处理器
此时 scheduler 已能从后端读取数据,接下来需要把更改保存到数据库。
客户端以 REST 模式工作,对事件操作分别发送 POST、PUT 和 DELETE 请求。 参考 scheduler 使用的请求格式和路由。
定义控制器处理这些操作,配置路由,并在客户端启用保存功能。
在 src/routes.php 中添加 POST 处理器以插入新事件:
$this->post('', function (Request $request, Response $response, array $args) {
    $db = $this->database;
    $body = $request->getParsedBody();

    $queryText = 'INSERT INTO `events` SET
                `start_date`=?,
                `end_date`=?,
                `text`=?';

    $queryParams = [
        $body['start_date'],
        $body['end_date'],
        $body['text']
    ];

    $query = $db->prepare($queryText);
    $query->execute($queryParams);

    $result = [
        'tid' => $db->lastInsertId(),
        'action' => 'inserted'
    ];

    return $response->withJson($result);
});
插入新事件时,服务器会在响应的 tid 属性中返回其 ID。JSON 响应还可以包含其他可在客户端访问的属性。
同理,添加 PUT 处理器用于更新事件:
$this->put('/{id}', function (Request $request, Response $response, array $args) {
    $db = $this->database;
    $id = $request->getAttribute('route')->getArgument('id');
    $body = $request->getParsedBody();

    $queryText = 'UPDATE `events` SET
            `start_date`=?,
            `end_date`=?,
            `text`=?
            WHERE `id`=?';

    $queryParams = [
        $body['start_date'],
        $body['end_date'],
        $body['text'],
        $id
    ];

    $query = $db->prepare($queryText);
    $query->execute($queryParams);

    $result = [
        'action' => 'updated'
    ];

    return $response->withJson($result);
});
再添加 DELETE 处理器用于删除事件:
$this->delete('/{id}', function (Request $request, Response $response, array $args) {
    $db = $this->database;
    $id = $request->getAttribute('route')->getArgument('id');
    $queryText = 'DELETE FROM `events` WHERE `id`=? ;';

    $query = $db->prepare($queryText);
    $query->execute([$id]);

    $result = [
        'action' => 'deleted'
    ];

    return $response->withJson($result);
});
启用客户端数据保存
接下来,让我们配置客户端以与刚刚创建的 API 协同工作:
scheduler.config.xml_date="%Y-%m-%d %H:%i";
scheduler.init("scheduler_here", new Date(2019, 0, 20), "week");
scheduler.setLoadMode("day");

// 从后端加载数据
scheduler.load("/events");

// 将更新发送到后端
var dp = scheduler.createDataProcessor("/events"); /*!*/
dp.init(scheduler);/*!*/

// 设置数据交换模式
dp.setTransactionMode("REST");/*!*/
重启应用后,你就可以在调度器中创建、删除和修改事件。所有更改在刷新页面后都会被保留。
循环事件
如需启用循环(如"每天重复事件")功能,需要在调度器页面添加相应的扩展:
...
<body>
    ...
    <script>
        scheduler.plugins({
            recurring: true /*!*/
        });
        scheduler.init('scheduler_here', new Date(2019,0,20), "week");
        ...
       </script>
</body>
"events" 表需要增加额外的字段来存储循环事件的数据。以下是用于创建循环事件表的 SQL 语句:
CREATE DATABASE  IF NOT EXISTS `scheduler_howto_php`;
USE `scheduler_howto_php`;

DROP TABLE IF EXISTS `events`;
CREATE TABLE `events` (
  `id` int(11) AUTO_INCREMENT,
  `start_date` datetime NOT NULL,
  `end_date` datetime NOT NULL,
  `text` varchar(255) DEFAULT NULL,
  `event_pid` int(11) DEFAULT 0,
  `event_length` bigint(20) unsigned DEFAULT 0,
  `rec_type` varchar(25) DEFAULT '',
  PRIMARY KEY (`id`)
) DEFAULT CHARSET="utf8;"
或者,也可以使用以下命令在之前的 events 表基础上添加这些字段:
ALTER TABLE `events` ADD COLUMN `event_pid` int(11) DEFAULT '0';
ALTER TABLE `events` ADD COLUMN `event_length` bigint(20) unsigned DEFAULT '0';
ALTER TABLE `events` ADD COLUMN `rec_type` varchar(25) DEFAULT '';
更新后端
后端处理逻辑也需要相应更新,详细说明请参考本节。
首先,更新 POST 路由的 SQL 语句以包含新增字段。
同时,需要处理循环事件的特殊情况:删除循环系��列中的某一特定事件时,需要创建一条新记录。客户端会调用 insert 操作:
$this->post('', function (Request $request, Response $response, array $args) {
    $db = $this->database;
    $body = $request->getParsedBody();

    $queryText = 'INSERT INTO `recurring_events` SET
                `start_date`=?,
                `end_date`=?,
                `text`=?,
                `event_pid`=?,/*!*/
                `event_length`=?,/*!*/
                `rec_type`=?';/*!*/
    $queryParams = [
        $body['start_date'],
        $body['end_date'],
        $body['text'],
        // 循环事件字段
        $body['event_pid'] ? $body['event_pid'] : 0,/*!*/
        $body['event_length'] ? $body['event_length'] : 0,/*!*/
        $body['rec_type']/*!*/
    ];

    // 从循环系列中删除单个事件
    $resultAction = 'inserted';/*!*/
    if ($body['rec_type'] === "none") {/*!*/
        $resultAction = 'deleted';//!
    }
    /*
    循环事件数据处理结束
    */

    $query = $db->prepare($queryText);
    $query->execute($queryParams);

    $result = [
        'tid' => $db->lastInsertId(),
        'action' => $resultAction
    ];

    return $response->withJson($result);
});
PUT 处理逻辑也需要类似更新。此外,修改循环系列时,必须删除该系列所有已修改的事件:
$this->put('/{id}', function (Request $request, Response $response, array $args) {
    $db = $this->database;

    $id = $request->getAttribute('route')->getArgument('id');
    $body = $request->getParsedBody();

    $queryText = 'UPDATE `recurring_events` SET
            `start_date`=?,
            `end_date`=?,
            `text`=?,
            `event_pid`=?,/*!*/
            `event_length`=?,/*!*/
            `rec_type`=?/*!*/
            WHERE `id`=?';
    $queryParams = [
        $body['start_date'],
        $body['end_date'],
        $body['text'],

        $body['event_pid'] ? $body['event_pid'] : 0,/*!*/
        $body['event_length'] ? $body['event_length'] : 0,/*!*/
        $body['rec_type'],//!

        $id
    ];

    if ($body['rec_type'] && $body['rec_type'] != 'none') {/*!*/
      // 更新循环系列时应删除所有已修改的事件
      // https://docs.dhtmlx.com/scheduler/server_integration.html#recurringevents
        $subQueryText = 'DELETE FROM `recurring_events` WHERE `event_pid`=? ;';
        $subQuery = $db->prepare($subQueryText);
        $subQuery->execute([$id]);
    }

    $query = $db->prepare($queryText);
    $query->execute($queryParams);

    $result = [
        'action' => 'updated'
    ];

    return $response->withJson($result);
});
最后,DELETE 操作需要处理两种特殊情况:
- 如果要删除的事件的
event_pid不为空,说明用户正在删除循环系列中的某个已修改事件。此时无需从数据库中移除该记录,而是将其rec_type设置为 'none',这样调度器会跳过该事件。 - 如果用户删除整个循环系列,则还需删除该系列下所有已修改的事件。
$this->delete('/{id}', function (Request $request, Response $response, array $args) {
    $db = $this->database;
    $id = $request->getAttribute('route')->getArgument('id');

    // 循环事件相关逻辑
    // https://docs.dhtmlx.com/scheduler/server_integration.html#recurringevents
    $subQueryText = 'SELECT * FROM `recurring_events` WHERE id="?" LIMIT 1;';/*!*/
    $subQuery = $db->prepare($subQueryText);/*!*/
    $subQuery->execute([$id]);/*!*/
    $event = $subQuery->fetch(PDO::FETCH_ASSOC);/*!*/

    if ($event['event_pid']) {/*!*/
        // 删除循环系列中的某个已修改事件
        // 实际操作是将 rec_type 更新为 'none'
       $subQueryText='UPDATE `recurring_events` SET `rec_type`='none' WHERE `id`=?;';
       $subQuery = $db->prepare($subQueryText);
       $subQuery->execute([$id]);

        $result = [
            'action' => 'deleted'
        ];

        return $response->withJson($result);
    }

    if ($event['rec_type'] && $event['rec_type'] != 'none') {//!
        // 删除循环系列时,移除所有已修改的事件
        $subQueryText = 'DELETE FROM `recurring_events` WHERE `event_pid`=? ;';
        $subQuery = $db->prepare($subQueryText);
        $subQuery->execute([$id]);
    }

    /*
     循环事件数据处理结束
    */
    $queryText = 'DELETE FROM `recurring_events` WHERE `id`=? ;';

    $query = $db->prepare($queryText);
    $query->execute([$id]);

    $result = [
        'action' => 'deleted'
    ];

    return $response->withJson($result);
});
解析循环系列
循环事件在数据库中以单条记录存储,但在客户端由 Scheduler 自动展开为各个实例。
如果需要在服务器端处理单独的事件日期,可以考虑使用 dhtmlxScheduler 的 PHP 辅助库来解析循环事件。
你可以在 GitHub 上获取现成的库。
应用安全
dhtmlxScheduler 是一款客户端工具,为了保持灵活性,并未内置安全机制。因此,单靠客户端无法保证安全性。
这意味着后端开发者需要负责应用的安全性。主要注意事项包括:
- SQL 注入:本示例始终使用参数化 SQL 查询,可有效防止注入攻击。
- XSS 攻击:客户端不会在发送数据前对用户输入进行过滤,服务端在渲染页面前也未对数据清洗。本示例未包含 XSS 过滤,如要在实际应用中使用,请务必添加相关防护。
错误处理
如果后端操作失败,客户端期望收到如此处所述的 "error" 状态响应。
一种处理方式是添加 middleware,将处理逻辑包裹在 try-catch 中,若出错则返回错误信息给客户端。
可以在 src/routes.php 中定义此中间件:
$schedulerApiMiddleware = function ($request, $response, $next) {
    try {
        $response = $next($request, $response);
    } catch (Exception $e) {
        // 重置响应并发送错误详情
        $response = new SlimHttpResponse();
        return $response->withJson([
            'action' => 'error',
            'message' => $e->getMessage()
        ]);
    }
    return $response;
};
然后将其附加到路由组:
$app->group('/events', function () {
   ...
})->add($schedulerApiMiddleware);
在客户端,可以通过 dataProcessor 的 onAfterUpdate 事件捕捉这些错误:
dp.init(scheduler);
dp.attachEvent("onAfterUpdate", function(id, action, tid, response){
    if(action == "error"){
        // 在此处理错误
    }
});
故障排查
如果你已按步骤操作但 Scheduler 页面未显示事件,请参考 백엔드 통합 문제 해결 文章获取定位问题的指导。
后续步骤
至此,你已经拥有一个完整可用的 Scheduler。完整代码可在 GitHub 获取,方便你克隆、下载或用于自己的项目。
你还可以进一步阅读 Scheduler 更多功能的指南 或关于 与其他后端框架集成的教程。