RTL 모드(오른쪽에서 왼쪽으로)
스케줄러에서 RTL 모드를 활성화하려면 rtl 구성 옵션을 사용하세요.
scheduler.config.rtl = true;
RTL 모드를 구현하면 달력의 모든 요소가 자동으로 오른쪽에서 왼쪽으로 표시되지만, 스케줄러 헤더의 요소는 제외됩니다.
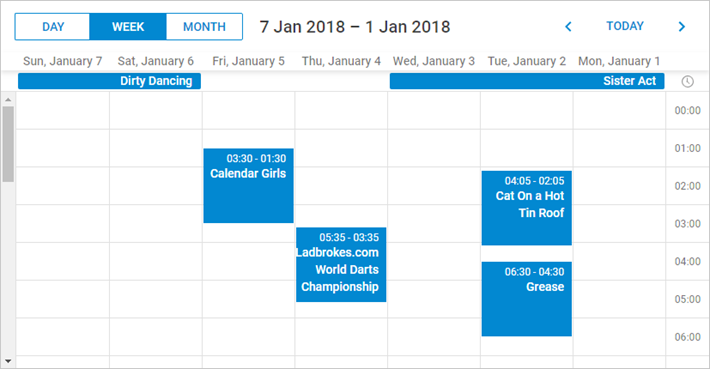
스케줄러 헤더의 요소 순서를 재정렬하려면 아래처럼 요소의 CSS 클래스를 재정의해야 합니다:
<style type="text/css" >
    html, body{
        margin:0px;
        padding:0px;
        height:100%;
        overflow:hidden;
    }

      .dhx_cal_prev_button{right: auto !important; left: 16px !important;}
      .dhx_cal_next_button{right: auto !important; left: 148px !important;}
      .dhx_cal_today_button{right: auto !important; left: 57px !important;}
      .dhx_cal_tab[name="day_tab"]{left: auto !important; right: 16px !important;}
      .dhx_cal_tab[name="week_tab"]{left: auto !important; right: 103px !important;}
      .dhx_cal_tab[name="month_tab"]{left: auto !important; right: 192px !important;}
      .dhx_cal_container_rtl  .dhx_cal_tab {
        border-right-style: solid;
        border-right-width: 1px;
       }
</style>
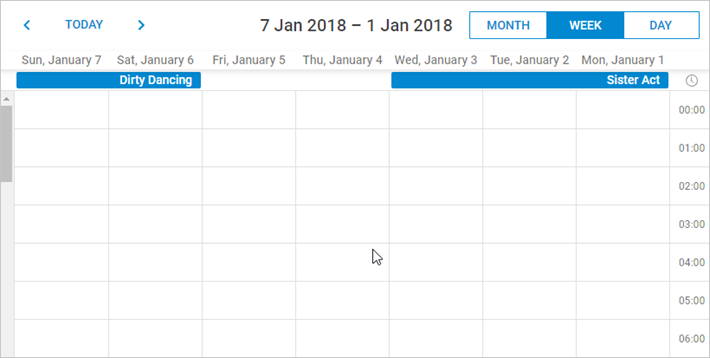
RTL 모드 예시
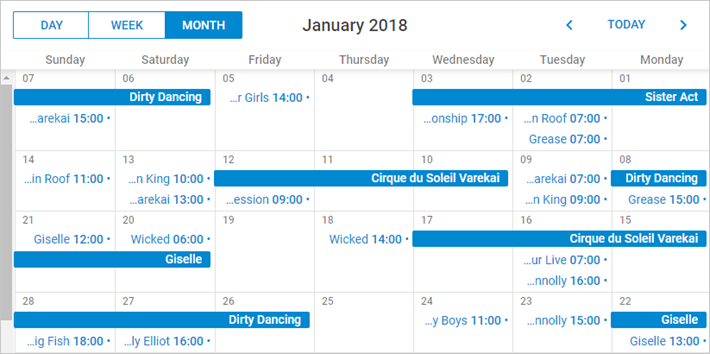
RTL 모드의 월 뷰RTL 모드에서 월 뷰가 어떻게 보이는지 확인해 봅시다. 이벤트의 제목과 세부 정보는 이제 이벤트 상자의 오른쪽에 위치합니다.
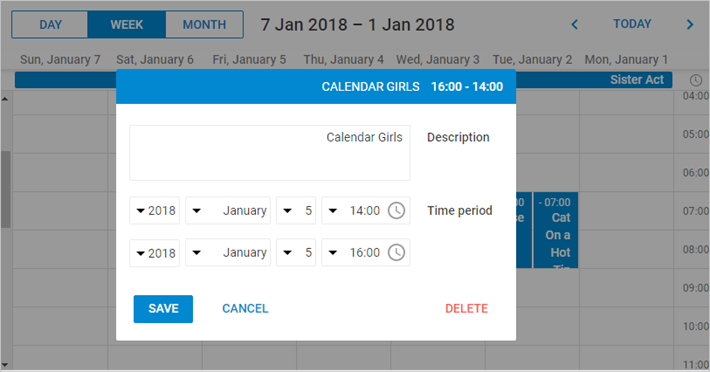
아래 그림은 RTL 모드를 적용한 후 이벤트 상세 정보가 담긴 창의 모양이 어떻게 바뀌는지에 대한 좋은 예시입니다.
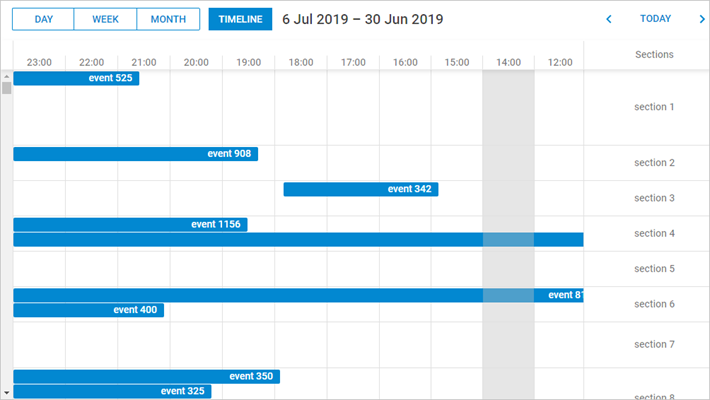
RTL 모드는 스케줄러의 타임라인을 자동으로 오른쪽에서 왼쪽으로 배치합니다.
RTL 모드에서 요소 맞춤 설정
RTL 모드에서 각 요소에 고유한 스타일을 적용하려면 추가 CSS 클래스를 사용할 수 있습니다.
다음은 설정 가능한 CSS 클래스 목록입니다:
- dhx_cal_container_rtl - 컨테이너 전체에 스타일을 적용합니다
- dhx_tooltip_rtl - 툴팁에 스타일을 적용합니다
- dhx_quick_info_rtl - '빠른 정보(quick info)' 팝업에 스타일을 적용합니다
- dhx_cal_light_rtl - 라이트박스에 스타일을 적용합니다
예를 들면:
.dhx_cal_container_rtl .dhx_cal_event{
    margin-right: -5px;
}
스케줄러 컨테이너의 모든 이벤트는 오른쪽으로 5px 만큼 이동합니다.
Need help?
Got a question about the documentation? Reach out to our technical support team for help and guidance. For custom component solutions, visit the Services page.