Angular와의 통합
Angular의 기본 개념과 패턴에 익숙하다고 가정합니다. 복습이 필요하다면 Angular 문서를 참조하세요.
DHTMLX Pivot은 일반 컴포넌트로서 Angular와 통합됩니다. 완전한 동작 예제는 GitHub의 Angular Pivot 데모를 참조하세요.
프로젝트 생성
시작하기 전에 Angular CLI와 Node.js를 설치하세요.
다음 명령어로 my-angular-pivot-app이라는 새 Angular 프로젝트를 생성합니다:
ng new my-angular-pivot-app
Angular CLI의 안내에 따라 서버 사이드 렌더링(SSR)과 정적 사이트 생성(SSG/Prerendering)을 비활성화하세요. 이 가이드는 클라이언트 렌더링 앱을 기준으로 합니다.
명령어를 실행하면 필요한 모든 도구가 설치됩니다. 추가 명령어는 필요하지 않습니다.
의존성 설치
새 프로젝트 디렉토리로 이동합니다:
cd my-angular-pivot-app
yarn 패키지 매니저로 의존성을 설치하고 개발 서버를 시작합니다:
yarn
yarn start # 또는: yarn dev
앱이 로컬 포트(예: http://localhost:3000)에서 실행됩니다.
Pivot 생성
프로젝트에 Pivot 패키지를 추가한 후, Angular 컴포넌트로 Pivot을 감쌉니다.
1단계. 패키지 설치
Pivot 체험판 패키지를 다운로드하고 README의 단계를 따르세요. Pivot 체험판 패키지는 30일간 유효합니다.
2단계. 컴포넌트 생성
Pivot을 마운트하는 Angular 컴포넌트를 생성합니다. src/app/ 아래에 pivot 폴더를 추가하고 src/app/pivot/pivot.component.ts를 생성합니다. 그런 다음 아래 단계를 따르세요:
소스 파일 가져오기
src/app/pivot/pivot.component.ts를 열고 Pivot 패키지를 가져옵니다. 가져오기 경로는 패키지 버전에 따라 다릅니다:
- PRO 버전 (로컬 폴더에서 설치):
import { Pivot } from 'dhx-pivot-package';
- 체험판 버전:
import { Pivot } from '@dhx/trial-pivot';
이 튜토리얼은 Pivot 체험판을 사용합니다.
컨테이너 설정 및 Pivot 마운트
페이지에 Pivot을 표시하려면 컴포넌트 템플릿에 컨테이너 요소를 정의한 후, 생성자를 사용하여 ngOnInit 훅에서 Pivot을 초기화합니다. ngOnDestroy 훅에서 Pivot을 소멸시킵니다.
다음 코드 스니펫은 최소한의 Pivot Angular 컴포넌트를 정의합니다:
import { Pivot } from '@dhx/trial-pivot';
import { Component, ElementRef, OnInit, ViewChild, OnDestroy, ViewEncapsulation } from '@angular/core';

@Component({
    encapsulation: ViewEncapsulation.None,
    selector: "pivot", // "app.component.ts" 파일에서 <pivot />으로 사용되는 템플릿 이름
    styleUrls: ["./pivot.component.css"], // CSS 파일 포함
    template: `<div #container className="widget"></div>`,
})

export class PivotComponent implements OnInit, OnDestroy {
    // Pivot의 컨테이너 참조
    @ViewChild('container', { static: true }) pivot_container!: ElementRef;

    private _table!: Pivot;

    ngOnInit() {
        // Pivot 컴포넌트 초기화
        this._table = new Pivot(this.pivot_container.nativeElement, {});
    }

    ngOnDestroy(): void {
        this._table.destructor(); // 언마운트 시 Pivot 소멸
    }
}
스타일 추가
Pivot을 올바르게 렌더링하려면 src/app/pivot/pivot.component.css를 생성하고 페이지와 Pivot 컨테이너에 대한 스타일을 작성합니다:
/* Pivot 스타일 가져오기 */
@import "@dhx/trial-pivot/dist/pivot.css";

/* 초기 페이지 스타일 */
html,
body {
    margin: 0;
    padding: 0;
    height: 100%;
}

/* Pivot 컨테이너 스타일 */
.widget {
    width: 100%;
    height: 100%;
}
데이터 로드
Pivot에 데이터를 제공하려면 데이터셋을 준비합니다. src/app/pivot/data.ts를 생성하고 데이터와 필드 메타데이터를 내보냅니다:
export function getData() {
    const dataset = [
        {
            "cogs": 51,
            "date": "10/1/2018",
            "inventory_margin": 503,
            "margin": 71,
            "market_size": "Major Market",
            "market": "Central",
            "marketing": 46,
            "product_line": "Leaves",
            "product_type": "Herbal Tea",
            "product": "Lemon",
            "profit": -5,
            "sales": 122,
            "state": "Colorado",
            "expenses": 76,
            "type": "Decaf"
        },
        {
            "cogs": 52,
            "date": "10/1/2018",
            "inventory_margin": 405,
            "margin": 71,
            "market_size": "Major Market",
            "market": "Central",
            "marketing": 17,
            "product_line": "Leaves",
            "product_type": "Herbal Tea",
            "product": "Mint",
            "profit": 26,
            "sales": 123,
            "state": "Colorado",
            "expenses": 45,
            "type": "Decaf"
        }, // 다른 데이터 항목
    ];

    const fields: any = [
        {
            "id": "cogs",
            "label": "Cogs",
            "type": "number"
        },
        {
            "id": "date",
            "label": "Date",
            "type": "date"
        }, // 다른 필드
    ];

    return { dataset, fields };
};
src/app/pivot/pivot.component.ts를 열고 getData를 가져온 후 ngOnInit()에서 데이터셋을 적용합니다:
import { Pivot } from '@dhx/trial-pivot';
import { getData } from "./data"; // 데이터 가져오기
import { Component, ElementRef, OnInit, ViewChild, OnDestroy, ViewEncapsulation } from '@angular/core';

@Component({
    encapsulation: ViewEncapsulation.None,
    selector: "pivot",
    styleUrls: ["./pivot.component.css"],
    template: `<div #container className="widget"></div>`,
})

export class PivotComponent implements OnInit, OnDestroy {
    @ViewChild('container', { static: true }) pivot_container!: ElementRef;

    private _table!: Pivot;

    ngOnInit() {
        const { dataset, fields } = getData(); // 데이터와 필드 메타데이터 가져오기
        this._table = new Pivot(this.pivot_container.nativeElement, {
            fields,
            data: dataset,
            config: {
                rows: ["state", "product_type"],
                columns: ["product_line", "type"],
                values: [
                    {
                        field: "profit",
                        method: "sum"
                    }, // 다른 값
                ]
            },
            // 다른 구성 속성
        });
    }

    ngOnDestroy(): void {
        this._table.destructor();
    }
}
이제 컴포넌트를 사용할 준비가 되었습니다. 마운트 시 Pivot은 제공된 데이터로 렌더링됩니다. 구성 속성의 전체 목록은 Pivot API 문서를 참조하세요.
이벤트 처리
Pivot에서의 사용자 동작은 구독할 수 있는 이벤트를 발생시킵니다. 이벤트의 전체 목록은 이벤트 개요를 참조하세요.
다음 코드 스니펫은 사용자가 필터를 열 때 필드 ID를 로그에 출력하는 open-filter 이벤트 리스너를 ngOnInit에 추가합니다:
// ...
ngOnInit() {
    const { dataset, fields } = getData();
    this._table = new Pivot(this.pivot_container.nativeElement, {
        fields,
        data: dataset,
        config: {
            rows: ["state", "product_type"],
            columns: ["product_line", "type"],
            values: [
                {
                    field: "profit",
                    method: "sum"
                }, // 다른 값
            ]
        }
    });

    this._table.api.on("open-filter", (ev) => {
        console.log("The field id for which the filter is activated:", ev.id);
    });
}

ngOnDestroy(): void {
    this._table.destructor();
}
3단계. 앱에 Pivot 추가
PivotComponent를 앱에 포함하려면 src/app/app.component.ts를 열고 기본 코드를 다음으로 교체합니다:
import { Component } from "@angular/core";

@Component({
    selector: "app-root",
    template: `<pivot/>` // "pivot.component.ts" 파일에서 생성된 템플릿
})
export class AppComponent {
    name = "";
}
그런 다음 src/app/app.module.ts를 생성하고 PivotComponent를 등록합니다:
import { NgModule } from "@angular/core";
import { BrowserModule } from "@angular/platform-browser";

import { AppComponent } from "./app.component";
import { PivotComponent } from "./pivot/pivot.component";

@NgModule({
    declarations: [AppComponent, PivotComponent],
    imports: [BrowserModule],
    bootstrap: [AppComponent]
})
export class AppModule {}
마지막으로, src/main.ts를 열고 내용을 다음 부트스트랩 코드로 교체합니다:
import { platformBrowserDynamic } from "@angular/platform-browser-dynamic";
import { AppModule } from "./app/app.module";
platformBrowserDynamic()
    .bootstrapModule(AppModule)
    .catch((err) => console.error(err));
앱을 시작하면 Pivot이 페이지에 데이터를 렌더링하는 것을 확인할 수 있습니다.
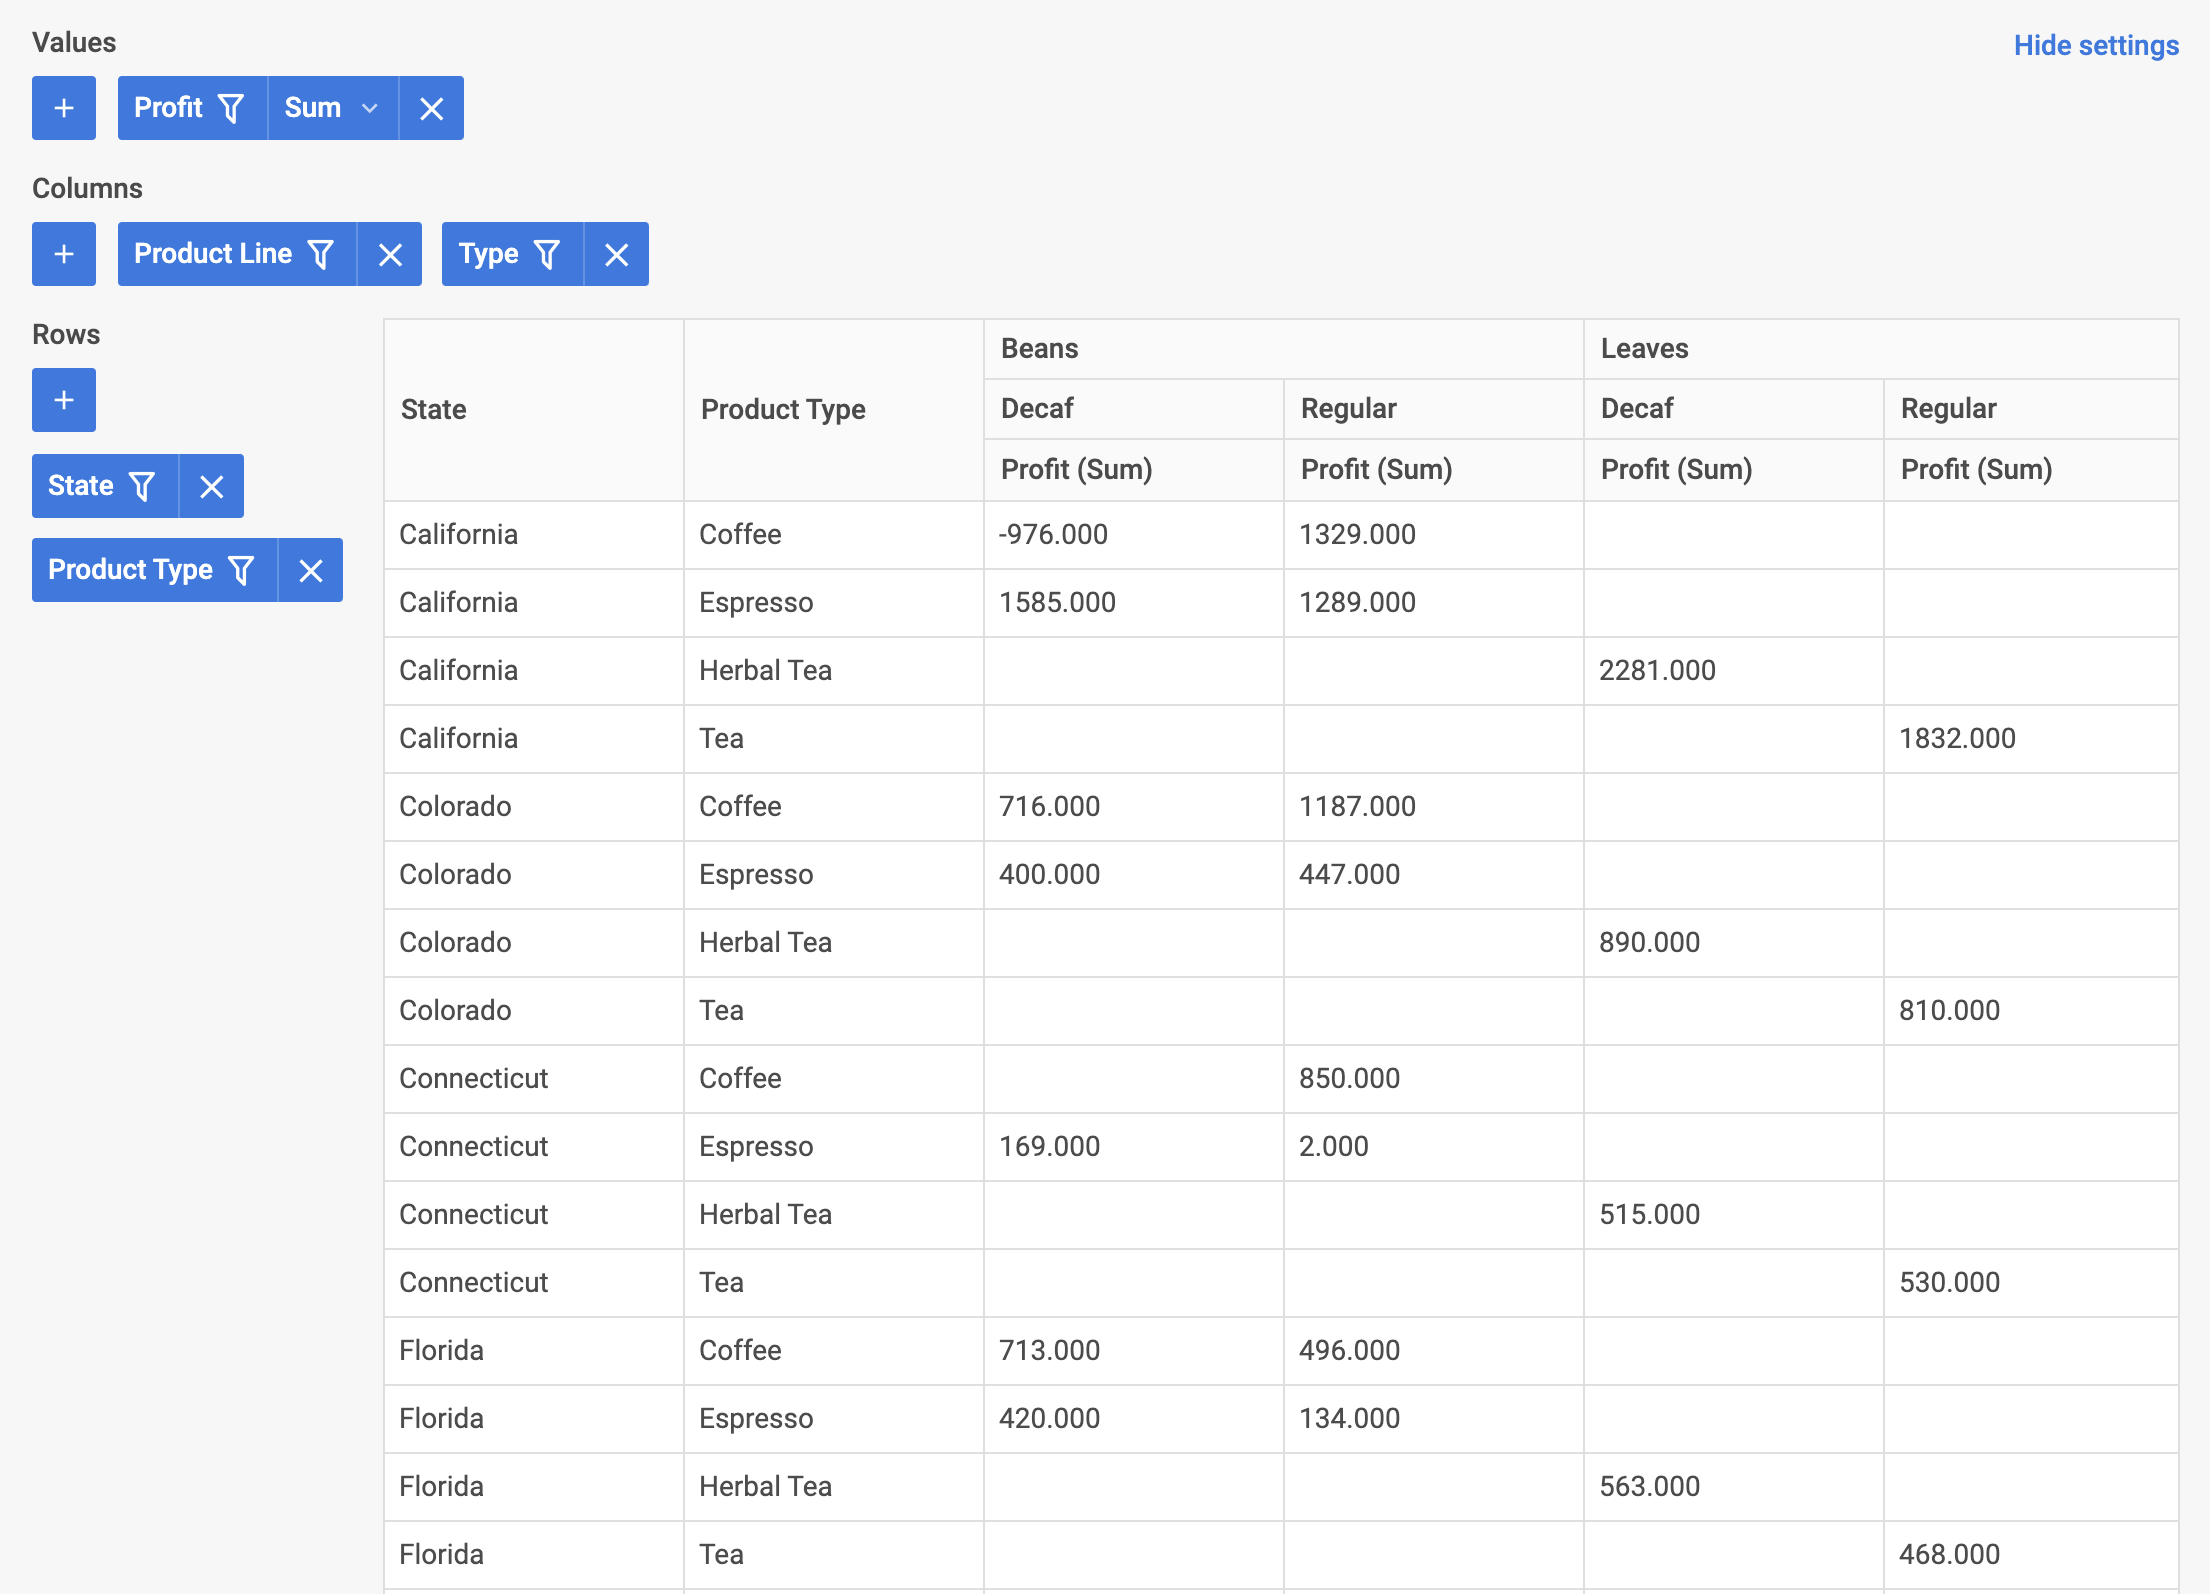
이제 Pivot이 Angular와 통합되었습니다. 프로젝트 요구 사항에 맞게 구성을 커스터마이즈하세요. 최종 예제는 GitHub의 angular-pivot-demo를 참조하세요.