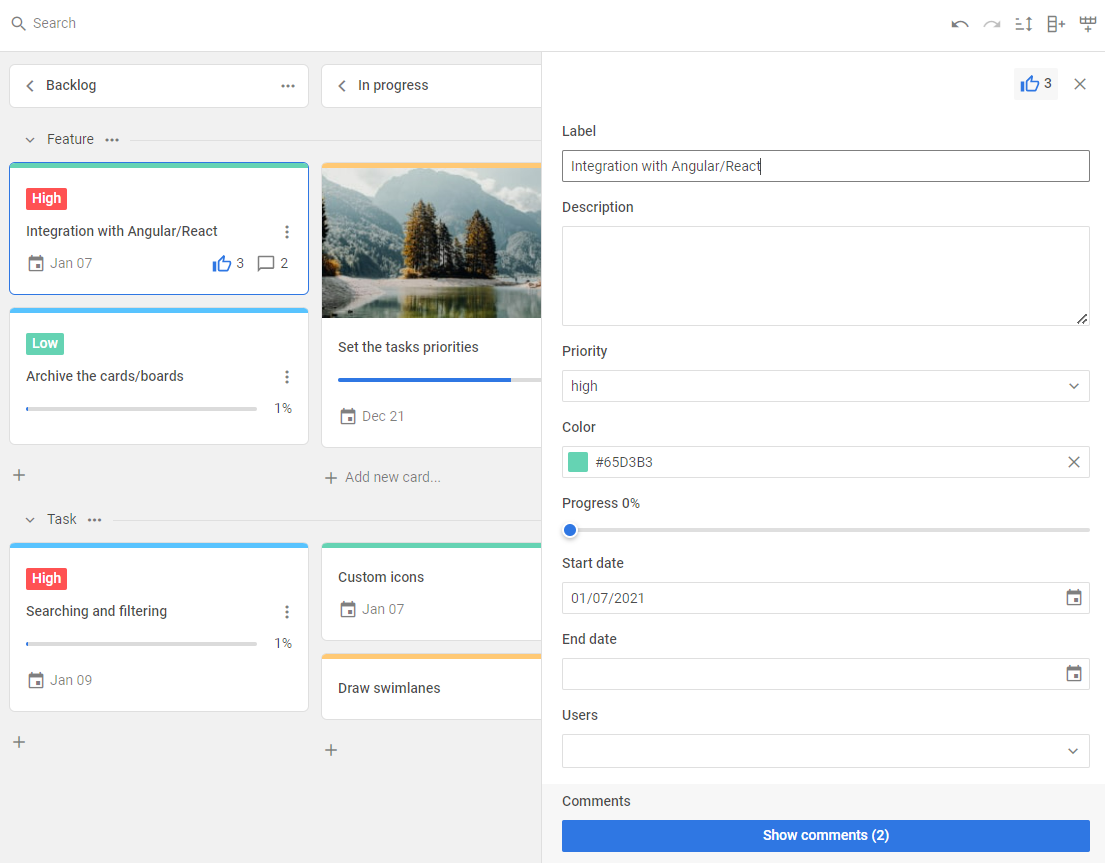
How to start
This clear and comprehensive tutorial will guide your through the steps you need to take in order to get a full-functional Kanban on a page.

Step 1. Including source files
Start from creating an HTML file and call it index.html. Then proceed to include Kanban source files into the created file.
There are two necessary files:
- the JS file of Kanban
- the CSS file of Kanban
<!DOCTYPE html>
<html>
    <head>
        <title>How to Start with Kanban</title>
        <script src="./dist/kanban.js"></script>
        <link href="./dist/kanban.css" rel="stylesheet">
    </head>
    <body>
        <script>
        // your code will be here
        </script>
    </body>
</html>
Installing Kanban via npm or yarn
You can import JavaScript Kanban into your project using yarn or npm package manager.
Installing trial Kanban via npm or yarn
If you want to use trial version of Kanban, download the trial Kanban package and follow steps mentioned in the README file. Note that trial Kanban is available 30 days only.
Installing PRO Kanban via npm or yarn
You can access the DHTMLX private npm directly in the Client's Area by generating your login and password for npm. A detailed installation guide is also available there. Please note that access to the private npm is available only while your proprietary Kanban license is active.
Step 2. Creating Kanban
Now you are ready to add Kanban to the page. First, let's create the DIV containers for Kanban and its Toolbar. So, take the following steps:
- specify two DIV containers in the index.html file
- initialize Kanban and its Toolbar using the kanban.Kanban and kanban.Toolbar constructors
The Toolbar is an optional part of the Kanban interface. To create Kanban without Toolbar, you can specify only one DIV container and initialize the widget via the kanban.Kanban constructor
As parameters, constructors take the IDs of HTML containers where the Kanban and Toolbar will be placed into, as well as corresponding configuration objects.
<!DOCTYPE html>
<html>
    <head>
        <title>How to Start with Kanban</title>
        <script src="./dist/kanban.js"></script>
        <link href="./dist/kanban.css" rel="stylesheet">
    </head>
    <body>
        <div id="toolbar"></div>
        <div id="root"></div>

        <script>
            const board = new kanban.Kanban("#root", {
                // configuration properties
            });

            new kanban.Toolbar("#toolbar", {
                // configuration properties
            });
        </script>
    </body>
</html>
Step 3. Configuring Kanban
Next you can specify configuration properties you want the Kanban component to have when initialized.
To start working with Kanban, first you need to provide the initial data for cards and columns (and rows). Beside the initial data, you can configure the cards, editor and toolbar appearance.
const board = new kanban.Kanban("#root", {
    cards,
    columns,
    rows,
    rowKey: "row",
    cardShape,
    editorShape
});

new kanban.Toolbar("#toolbar", {
    api: board.api,
    items: [
        "search",
        "spacer",
        "sort",
        "addColumn",
        "addRow"
    ]
});
What's next
That's all. Just three simple steps and you have a handy tool for visualizing and managing the workflow. Now you can start working with your tasks or keep exploring the inner world of JavaScript Kanban.