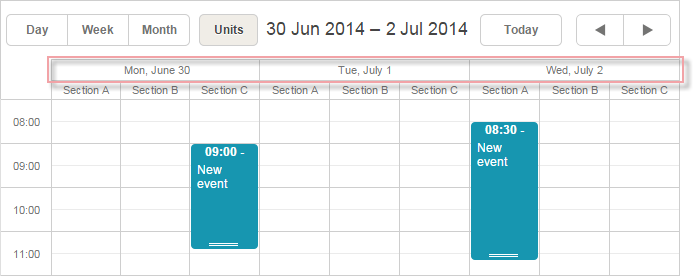
Units 视图
此视图仅在 Scheduler PRO 版本中提供。
Units 视图根据事件的特定属性(而不仅仅是时间)来组织 X 轴。

初始化
要将 Units 视图添加到调度器,请按照以下步骤操作:
- 在页面上启用 Units 扩展:
scheduler.plugins({
    units: true
});
- 将视图的选项卡添加到调度器的标记中:
<div id="scheduler_here" class="dhx_cal_container" ...>
    <div class="dhx_cal_navline">
       ...
       <div class="dhx_cal_tab" name="unit_tab"></div>
    </div>
    ...
</div>
- 为选项卡设置标签:
//'unit_tab' 是我们 div 的名称
scheduler.locale.labels.unit_tab = "Unit"
- 使用 createUnitsView 方法创建视图:
scheduler.createUnitsView({
    name:"unit",
    property:"unit_id", // 映射单位的事件属性
    list:[              // 定义视图中显示的单位
        {key:1, label:"Section A"},
        {key:2, label:"Section B"},
        {key:3, label:"Section C"}
    ]
});
向视图加载数据
与 Day、Month 或 Year 等标准视图不同,Units 和 Timeline 等多资源视图要求事件包含一个额外的必填字段:
- property - (string) 用于将事件分配到特定单位的数据属性名称
scheduler.createUnitsView({
    name:"unit",
    property:"unit_id",
    list:[
        {key:1, label:"Section A"},
        {key:2, label:"Section B"},
        {key:3, label:"Section C"}
    ]
});

scheduler.init('scheduler_here');
scheduler.parse([
    {id:1, text:"Task1", start_date:"2019-09-17 12:00", end_date:"2019-09-18 21:00",
    unit_id:"1"},
     {id:2, text:"Task2", start_date:"2019-09-17 09:00", end_date:"2019-09-17 21:00",
    unit_id:"3"},
     {id:3, text:"Task3", start_date:"2019-09-17 15:00", end_date:"2019-09-18 15:00",
    unit_id:"2"}
]);
事件通过 unit_id 的值与 list.key 对应来分配到相应的单位。
动态更改分区
要在 Units 视图中动态更新单位列表,可以使用 serverList 和 updateCollection 方法。
多天单位显示
要显示跨越多天的单位,请使用 days 参数:
scheduler.createUnitsView({
    name:"week_unit",
    property:"section_id",
    list:sections,
    days:3 /*!*/
});
这样会增加一个显示日期的第二层横向刻度。
如需自定义第二层刻度的显示格式,可使用 scheduler.templates[name+"_second_scale_date"] 模板:
scheduler.templates.units_second_scale_date = function(date) {
    return scheduler.templates.week_scale_date(date);
};
注意:
- 第一层刻度照常通过 scale_text_template 定义。其高度可通过 scale_height 调整。
- 可参考 뷰의 X축에서 시간 단위 숨기기 中的方法,在第二层横向刻度中隐藏不需要的时间单位。
- size 和 step 参数不适用于多天单位。
- PDF 导出仅支持 新服务,不支持 旧版导出工具。
- 如需调整显示区间的起始日,请使用 scheduler.date.(units_name)_start 函数:
scheduler.date.units_start = function (date) {
    return scheduler.date.week_start(date);
};
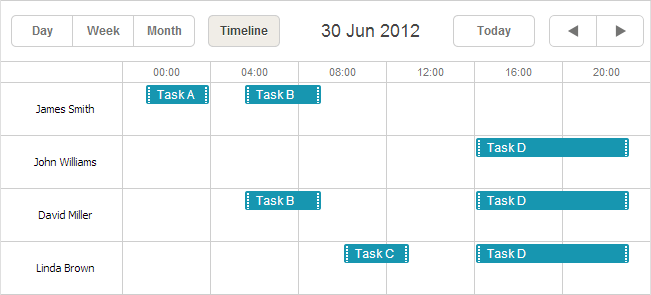
为事件分配多个单�位
从 4.1 版本开始,可以将事件同时分配到多个单位。
启用此功能的方法:
- 在页面上激活 Multisection 扩展
- 将 multisection 属性设置为 true
- (可选)启用 "multiselect" 扩展,以便使用 Multiselect 控件更方便地切换分区
<script src="codebase/dhtmlxscheduler.js"></script>
<link rel="stylesheet" href="codebase/dhtmlxscheduler.css" type="text/css">

<script>
    scheduler.plugins({
        multisection: true, /*!*/
        multiselect: true,
        units: true
    });
    scheduler.config.multisection = true; /*!*/
    scheduler.init('scheduler_here');
</script>
之后,可以在事件对应属性中指定多个分区(默认用逗号分隔,参见 section_delimiter),事件将在所有这些单位中显示:
scheduler.createUnitsView({
    name: "unit",
    list: [
        {key: 1, label: "James Smith"},
        {key: 2, label: "John Williams"},
        {key: 3, label: "David Miller"},
        {key: 4, label: "Linda Brown"}],
    property: "section_id", /*!*/
    ...
});
scheduler.init('scheduler_here', new Date(2019, 5, 30), "unit");

scheduler.parse([
    { id:1, text:"Task A", section_id:'1',         ...},/*!*/
    { id:2, text:"Task B", section_id:'1,3',     ...},/*!*/
    { id:3, text:"Task C", section_id:'4',         ...},/*!*/
    { id:4, text:"Task D", section_id:'2,3,4',     ...}/*!*/
]);
Multisection events in Timeline and Units view
X 轴分区的数据
X 轴上显示的值通过 list 参数设置:
scheduler.createUnitsView({
    name:"unit",
    ...
    list:[
        {key:1, label:"Section A"},
        {key:2, label:"Section B"},
        {key:3, label:"Section C"}
    ]
});
list 中的每一项都必须包含两个必需属性:
- key - 唯一标识符
- label - 显示名称
从��服务器获取 X 轴分区数据
如需从服务器加载分区数据,请使用:
- 客户端 - serverList 方法:
scheduler.createUnitsView({
    name:"unit",
    property:"type_id",
    list:scheduler.serverList("units"),
    size:20,
    step:1
});
其中 serverList 返回名为 'units' 的列表。
- 服务器端
load 方法的响应应包含带有服务器列表名称的集合,JSON 格式如下:
{
   "data":[
      {
          "id":"1",
          "start_date":"2019-03-02 15:00:00",
          "end_date":"2019-03-04 16:00:00",
          "text":"Team meeting",
          "type_id":"1"
      },
      {
          "id":"2",
          "start_date":"2019-03-02 17:00:00",
          "end_date":"2019-03-04 18:00:00",
          "text":"Strategy meeting",
          "type_id":"2"
      }
   ],
   "collections": {/*!*/
      "units":[/*!*/
         {"value":"1","label":"Conference room 1"},/*!*/
         {"value":"2","label":"Conference room 2"},/*!*/
         {"value":"3","label":"Conference room 3"}/*!*/
      ]/*!*/
   }/*!*/
}
或者,可以使用 OptionsConnector 连接器:
<?php
    include('connector-php/codebase/scheduler_connector.php');//包含文件

    $res="mysql_connect(""localhost","root","");//连接数据库服务器
    mysql_select_db("sampleDB");//连接数据库,'sampleDB' 为数据库名

    $list = new OptionsConnector($res, $dbtype);
    $list->render_table("types","type_id","type_id(value),name(label)");

    $scheduler = new schedulerConnector($res, $dbtype);
    //设置与客户端相同的名称 - 'units'
    $scheduler->set_options("units", $list);
    $scheduler->render_table("events","id","start_date,end_date,text,type_id");
?>

你也可以不使用 dhtmlxConnector,手动构建集合。在这种情况下,可使用 updateCollection 方法更新集合:
scheduler.updateCollection("units", new_sections_array);
Loading Units sections from the server
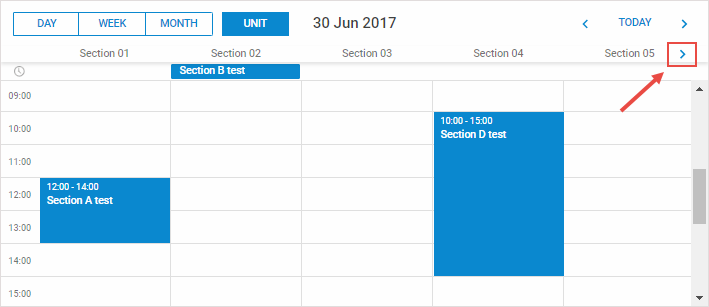
单位滚动
当单位数量较多时,可通过 size 和 step 属性启用横向滚动:
scheduler.createUnitsView({
    name:"unit",
    ...
    size:10, // 一次可见的单位数
    step:5   // 每次滚动的单位数
});
Horizontal scrolling sections in Units view
跳过不属于任何单位的事件
默认情况下,不匹配任何已定义单位的事件会显示在第一个单位中。从 3.0 版本开始,可以选择完全跳过这些事件。
要启用此功能,请设置 skip_incorrect 属性:
scheduler.createUnitsView({
    name:"unit",
    ...
    skip_incorrect:true
});