이벤트 객체 조작
이벤트 객체 가져오기
이벤트 객체를 가져오려면 getEvent 메서드를 사용합니다:
scheduler.parse([
   {id:1, start_date:"2027-05-13 6:00", end_date:"2027-05-13 8:00", text:"Event 1"},
   {id:2, start_date:"2027-06-09 6:00", end_date:"2027-06-09 8:00", text:"Event 2"}
]);
...
const eventObj = scheduler.getEvent(1);
//->{id:1, start_date:"2027-05-13 6:00", end_date:"2027-05-13 8:00", text:"Event 1"}
지정된 기간의 이벤트 가져오기
지정된 기간 동안 발생하는 이벤트 컬렉션을 가져오려면 getEvents 메서드를 사용합니다:
const evs = scheduler.getEvents(new Date(2027,1,10),new Date(2027,2,10));
//where evs is an array of events' objects
스케줄러의 모든 이벤트 가져오기
스케줄러에 로드된 모든 이벤트를 가져오려면 매개변수 없이 getEvents 메서드를 호출합니다:
const evs = scheduler.getEvents();
// returns all events as an array of objects
현재 날짜에서 시작하는 다음 이벤트 가져오기
const evs = scheduler.getEvents(new Date(), new Date(9999,1,1));
//evs - list of all oncoming events
evs.sort(function(a,b){ return (a.start_date > b.start_date ? 1 : -1); });
//evs[0] - 가장 가까운 다가오는 이벤트
이벤트의 ID 얻기
이벤트의 속성 값 중 하나를 사용하여 이벤트의 ID를 얻으려면 다음과 같은 방법을 사용합니다:
예: 이벤트의 텍스트로 이벤트의 ID를 얻기.
scheduler.parse([
   {id:1, start_date:"2027-05-13 6:00", end_date:"2027-05-13 8:00", text:"Event 1"},
   {id:2, start_date:"2027-06-09 6:00", end_date:"2027-06-09 8:00", text:"Event 2"}
]);
...

const evs = scheduler.getEvents(); // scheduler의 모든 이벤트를 가져옴
for(let i = 0; i < evs.length; i++){  // 필요한 이벤트를 찾기 위해 모든 이벤트를 순회
    if (evs[i].text == "Event 2")
        const eventId = evs[i].id;// -> 2
};
필요 이벤트가 발생하는 대략적인 시간을 알고 있다면, 앱의 속도를 높이기 위해 반환되는 이벤트 컬렉션을 제한하는 것이 좋습니다:
const evs = scheduler.getEvents(new Date(2027,05,01),new Date(2027,05,10));
for(let i = 0; i < evs.length; i++){
    if (evs[i].text == "Event 2")
        const eventId = evs[i].id;// -> 2
};
이벤트의 ID 변경
현재 이벤트의 ID를 변경하려면 changeEventId 메서드를 아래와 같이 사용할 수 있습니다:
scheduler.changeEventId("ev15", "ev25"); //changes the event id "ev15" -> "ev25"
라이트박스 옵션의 레이블을 이벤트의 텍스트로 설정하기
기본적으로 스케줄러 이벤트의 텍스트는 라이트박스의 매핑된 텍스트 필드를 통해 설정됩니다.
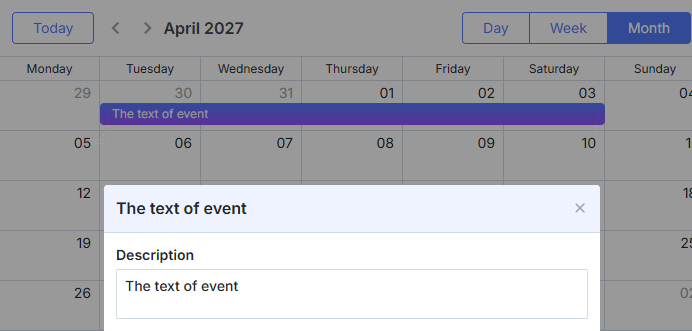
또한 기본 동작을 재정의하고 콤보박스에서 선택된 옵션의 레이블을 이벤트의 텍스트로 사용하는 것도 가능합니다.
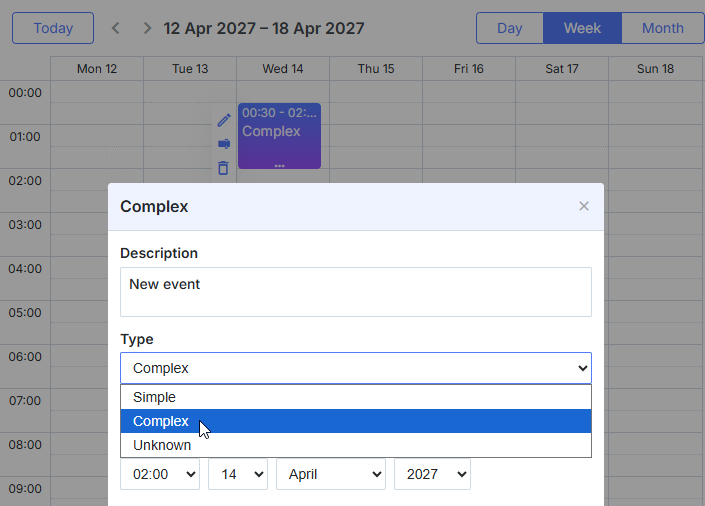
이벤트의 텍스트는 뷰의 유형에 따라 다음 템플릿 중 하나(event_text 또는 event_bar_text)으로 지정됩니다. 따라서 이벤트에 텍스트를 추가하는 방식을 변경하려면 해당 템플릿을 재정의해야 합니다.
scheduler.config.lightbox.sections = [
    { name:"type", height:21, inputWidth:400, map_to:"type", type:"select",
        options:scheduler.serverList("options", [
            {key:1, label:"Simple"},
            {key:2, label:"Complex"},
            {key:3, label:"Unknown"}
        ]
    )},
    {name:"time", height:72, type:"time", map_to:"auto"}
];

scheduler.templates.event_text = scheduler.templates.event_bar_text = function(start, end, event){
    const options = scheduler.serverList("options");

    for(let i = 0; i < options.length; i++){
        if(options[i].key == event.type){
            return options[i].label;
        }
    }

    return "";
};
다음과 같은 주의사항이 위 코드에 관련하여 있습니다:
-
serverList 메서드는 콤보박스의 옵션을 제공하고 템플릿 안에서 이를 가져오는 데 사용됩니다. JSON 컬렉션을 통해 이벤트 데이터와 함께 옵션을 로드하고(데이터 형식 참조: Data formats) 나중에 updateCollection으로 업데이트할 수 있습니다.
-
템플릿 내부에는 선택된 항목에 대한 선형 탐색이 존재합니다. 이벤트/옵션이 많아지면 성능에 눈에 띄는 영향을 줄 수 있는데, 이러한 템플릿은 자주 호출될 수 있기 때문입니다. 이 문제를 해결하려면 배열을 계속 반복하는 대신 빠른 검색을 위한 해시를 만들어 사용할 수 있습니다.
-
클라이언트 측에는 표시를 위해 옵션의 전체 목록이 있어야 합니다. 그렇지 않으면 예를 들어 자동완성 검색 기능을 사용하는 경우 필요한 옵션을 동적으로 로드해야 하므로 옵션을 수동으로 로드해야 할 수 있습니다.