React와의 통합
DHTMLX Kanban은 React와 호환됩니다. 전체 코드 예제는 GitHub에서 확인할 수 있습니다.
프로젝트 생성
기본 React 프로젝트(또는 Vite와 함께 React)를 생성하세요. 프로젝트 이름은 my-react-kanban-app으로 지정합니다:
npx create-react-app my-react-kanban-app
의존성 설치
새로 생성된 앱 디렉터리로 이동합니다:
cd my-react-kanban-app
패키지 매니저 중 하나를 사용하여 의��존성을 설치하고 개발 서버를 시작하세요:
- yarn의 경우:
yarn
yarn start
- npm의 경우:
npm install
npm run dev
앱이 로컬호스트 주소(예: http://localhost:3000)에서 실행됩니다.
Kanban 생성
개발 서버를 중지하고 Kanban 패키지를 설치하세요.
1단계. 패키지 설치
평가판 Kanban 패키지를 다운로드하고 README 파일의 지침을 따르세요. 평가판은 30일 동안 사용할 수 있습니다.
2단계. 컴포넌트 생성
애플리케이션에 Kanban을 추가하는 React 컴포넌트를 생성하세요. src/ 디렉터리에 새 파일을 추가하고 이름을 Kanban.jsx로 지정하세요.
소스 파일 가져오기
Kanban.jsx를 열고 Kanban 소스 파일을 import 하세요. import 경로는 패키지 버전에 따라 다릅니다:
- 로컬 폴더에서 설치한 PRO 버전의 경우:
import { Kanban, Toolbar } from 'dhx-kanban-package';
import 'dhx-kanban-package/dist/kanban.css';
패키지에 minify된 소스 파일이 포함된 경우, CSS 파일을 kanban.min.css로 import하세요.
- 평가판의 경우:
import { Kanban, Toolbar } from '@dhx/trial-kanban';
import "@dhx/trial-kanban/dist/kanban.css";
이 튜토리얼에서는 Kanban 평가판을 사용합니다.
컨테이너 설정 및 Kanban 초기화
Kanban과 Toolbar를 표시하려면 두 개의 컨테이너를 만들고 생성자를 호출하세요. 다음 코드 스니펫은 ref를 연결하고 useEffect() 내에서 컴포넌트를 인스턴스화합니다:
import { useEffect, useRef } from "react";
import { Kanban, Toolbar } from '@dhx/trial-kanban';
import '@dhx/trial-kanban/dist/kanban.css'; // include Kanban styles

export default function KanbanComponent(props) {
    let toolbar_container = useRef(); // initialize container for Toolbar
    let kanban_container = useRef(); // initialize container for Kanban

    useEffect(() => {
        // initialize the Kanban component
        const kanban = new Kanban(kanban_container.current, {});

        // initialize the Toolbar component
        const toolbar = new Toolbar(toolbar_container.current, {
            api: kanban.api, // provide Kanban inner API
            // other configuration properties
        });

        return () => {
            kanban.destructor(); // destroy Kanban
            toolbar.destructor(); // destroy Toolbar
        };
    }, []);

    return  <div className="component_container">
                <div ref={toolbar_container}></div>
                <div ref={kanban_container} className="widget"></div>
            </div>
}
스타일 추가
메인 CSS 파일에 Kanban과 컨테이너에 대한 스타일을 추가하세요:
/* specify styles for initial page */
html,
body,
#root {
    height: 100%;
    padding: 0;
    margin: 0;
}

/* specify styles for Kanban and Toolbar container */
.component_container {
    height: 100%;
    margin: 0 auto;
}

/* specify styles for Kanban container */
.widget {
    height: calc(100% - 56px);
}
데이터 로딩
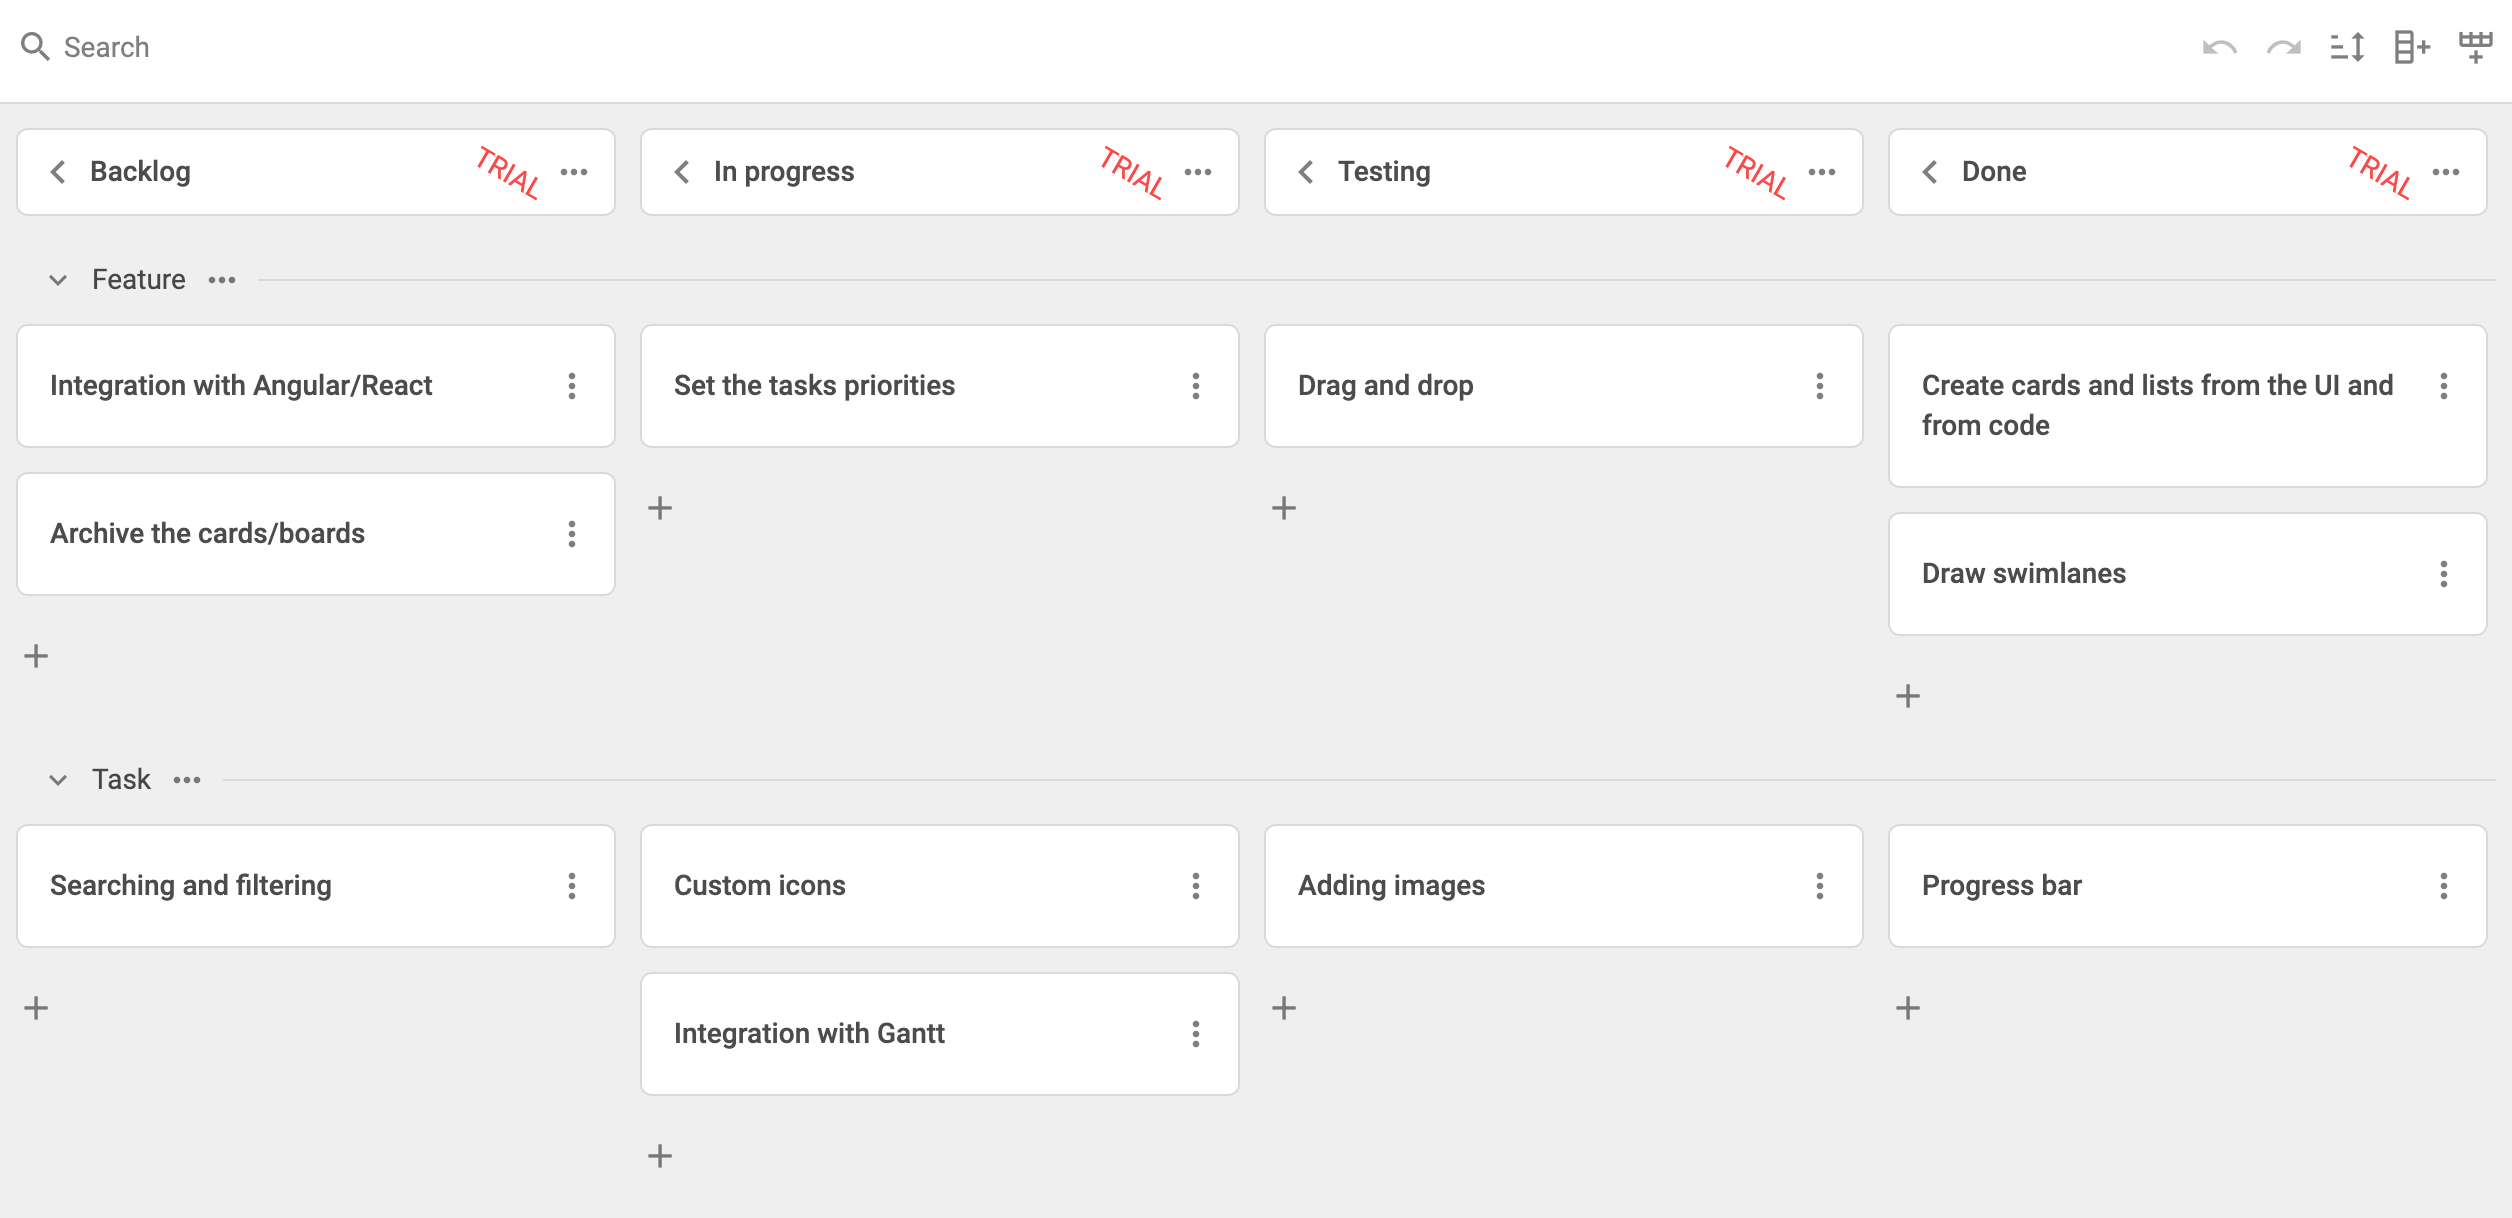
Kanban에 데이터를 채우려면 데이터 셋을 제공하세요. src/ 디렉터리에 data.js 파일을 생성하세요:
export function getData() {
    const columns = [
        {
            label: "Backlog",
            id: "backlog"
        },
        {
            label: "In progress",
            id: "inprogress"
        },
        // ...
    ];

    const cards = [
        {
            id: 1,
            label: "Integration with Angular/React",
            priority: 1,
            color: "#65D3B3",
            start_date: new Date("01/07/2021"),
            users: [3, 2],
            column: "backlog",
            type: "feature",
        },
        {
            label: "Archive the cards/boards ",
            priority: 3,
            color: "#58C3FE",
            users: [4],
            progress: 1,
            column: "backlog",
            type: "feature",
        },
        // ...
    ];

    const rows = [
        {
            label: "Feature",
            id: "feature",
        },
        {
            label: "Task",
            id: "task",
        }
    ];

    return { columns, cards, rows };
}
App.js를 열고 데이터 셋을 import 한 뒤, 새 <Kanban/> 컴포넌트에 props로 값을 전달하세요:
import Kanban from "./Kanban";
import { getData } from "./data";

function App() {
    const { columns, cards, rows } = getData();
    return <Kanban columns={columns} cards={cards} rows={rows} />;
}

export default App;
Kanban.jsx를 열고 props를 Kanban 설정 객체에 적용하세요:
import { useEffect, useRef } from "react";
import { Kanban, Toolbar } from "@dhx/trial-kanban";
import "@dhx/trial-kanban/dist/kanban.css";

export default function KanbanComponent(props) {
    let kanban_container = useRef();
    let toolbar_container = useRef();

    useEffect(() => {
        const kanban = new Kanban(kanban_container.current, {
            columns: props.columns, // apply column data
            cards: props.cards, // apply card data
            rows: props.rows, // apply row data
            rowKey: "type",
            // other configuration properties
        });

        const toolbar = new Toolbar(toolbar_container.current, {
            api: kanban.api,
            // other configuration properties
        });

        return () => {
            kanban.destructor();
            toolbar.destructor();
        };
    }, []);

    return  <div className="component_container">
                <div ref={toolbar_container}></div>
                <div ref={kanban_container} className="widget"></div>
            </div>
}
또는 인스턴스 생성 후 useEffect() 내에서 setConfig() 또는 parse()로 데이터를 로드할 수 있습니다:
import { useEffect, useRef } from "react";
import { Kanban, Toolbar } from "@dhx/trial-kanban";
import "@dhx/trial-kanban/dist/kanban.css";

export default function KanbanComponent(props) {
    let kanban_container = useRef();
    let toolbar_container = useRef();

    let columns = props.columns;
    let cards = props.cards;
    let rows = props.rows;

    useEffect(() => {
        const kanban = new Kanban(kanban_container.current, {
            columns: [],
            cards: [],
            rows: [],
            rowKey: "type",
            // other configuration properties
        });

        const toolbar = new Toolbar(toolbar_container.current, {
            api: kanban.api,
            // other configuration properties
        });

        kanban.setConfig({ columns, cards, rows });
        // or kanban.parse({ columns, cards, rows });

        return () => {
            kanban.destructor();
            toolbar.destructor();
        };
    }, []);

    return  <div className="component_container">
                <div ref={toolbar_container}></div>
                <div ref={kanban_container} className="widget"></div>
            </div>
}
이제 Kanban 컴포넌트가 준비되었습니다. 요소가 렌더링되면 Kanban이 데이터와 함께 초기화됩니다. 지원되는 설정 속성의 전체 목록은 Kanban API 레�퍼런스를 참고하세요.
이벤트 처리
Kanban에서 사용자 동작이 발생하면 이벤트가 트리거됩니다. 이벤트를 수신하여 특정 동작에 반응할 수 있습니다. 전체 목록은 Kanban 이벤트 레퍼런스를 참고하세요.
Kanban.jsx를 열고 useEffect() 호출을 확장하세요:
// ...
useEffect(() => {
    const kanban = new Kanban(kanban_container.current, {});

    kanban.api.on("add-card", (obj) => {
        console.log(obj.columnId);
    });

    return () => {
        kanban.destructor();
    };
}, []);
// ...
앱을 실행하여 페이지에 Kanban 보드가 데이터와 함께 표시되는지 확인하세요.
완성된 프로젝트는 GitHub에서 확인하세요.