dhtmlxScheduler와 PHP:Laravel 연동하기
이 가이드는 dhtmlxScheduler를 Laravel 애플리케이션에 통합하는 방법을 안내합니다.
다른 플랫폼에서 서버 사이드 연동을 위한 가이드도 제공됩니다:
- "dhtmlxScheduler와 ASP.NET Core"
- "dhtmlxScheduler와 ASP.NET MVC"
- "dhtmlxScheduler와 Node.js"
- "dhtmlxScheduler와 PHP"
- "dhtmlxScheduler와 PHP:Slim"
- "dhtmlxScheduler와 SalesForce LWC 통합하기"
- "dhtmlxScheduler와 Ruby on Rails 연동하기"
- "dhtmlxScheduler와 dhtmlxConnector 연동하기"
GitHub에서 전체 데모를 확인하거나, 아래 단계별 설명을 따라해 보세요.
전체 소스 코드는 GitHub에 호스팅되어 있습니다.
1단계. 프로젝트 초기화
프로젝트 생성
먼저, Composer를 사용하여 새로운 Laravel 애플리케이션을 생성합니다:
composer create-project laravel/laravel scheduler-howto-laravel
이 과정은 필요한 파일을 다운로드하고 설정하는 데 약간의 시간이 소요됩니다. 완료 후 아래 명령어로 정상적으로 설치되었는지 확인할 수 있습니다:
cd scheduler-howto-laravel
php artisan serve
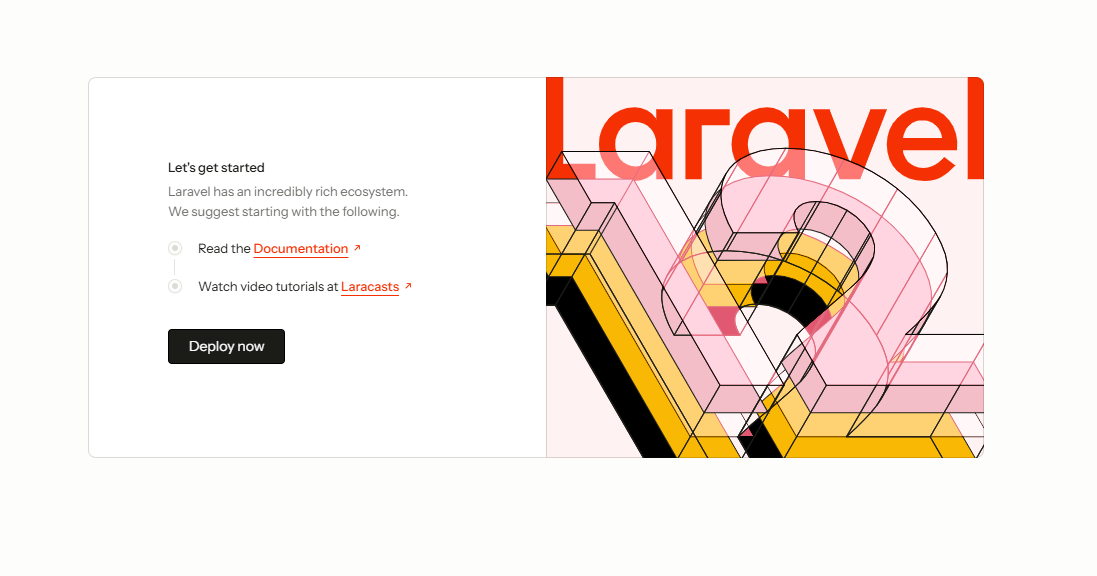
정상적으로 실행되면 기본 Laravel 환영 페이지가 나타납니다:
2단계. 페이지에 Scheduler 추가
View 추가
이제 애플리케이션에 dhtmlxScheduler가 포함된 새 페이지를 추가합니다. resources/views 디렉토리에 scheduler.blade.php라는 새 뷰 파일을 생성하세요:
<!DOCTYPE html>
<head>
<meta http-equiv="Content-type" content="text/html; charSet="utf-8"">
<script src="https://cdn.dhtmlx.com/scheduler/edge/dhtmlxscheduler.js"></script>
<link href="https://cdn.dhtmlx.com/scheduler/edge/dhtmlxscheduler.css"
rel="stylesheet">
<style type="text/css">
html, body{
height:100%;
padding:0px;
margin:0px;
overflow: hidden;
}
</style>
</head>
<body>
<div id="scheduler_here" className="dhx_cal_container">
<div className="dhx_cal_navline">
<div className="dhx_cal_prev_button"> </div>
<div className="dhx_cal_next_button"> </div>
<div className="dhx_cal_today_button"></div>
<div className="dhx_cal_date"></div>
<div className="dhx_cal_tab" name="day_tab"></div>
<div className="dhx_cal_tab" name="week_tab"></div>
<div className="dhx_cal_tab" name="month_tab"></div>
</div>
<div className="dhx_cal_header"></div>
<div className="dhx_cal_data"></div>
</div>
<script type="text/javascript">
scheduler.init("scheduler_here");
</script>
</body>
이 코드는 기본 HTML 구조를 설정하고, CDN에서 dhtmlxScheduler 리소스를 불러오며, init 메서드를 사용해 스케줄러를 초기화합니다.
body와 스케줄러 컨테이너 모두 100% 높이로 설정된 점에 유의하세요. 스케줄러는 컨테이너 크기에 맞춰 동작하므로, 이러한 크기 지정이 필요합니다.
기본 라우트 변경
새 페이지에 접근할 수 있도록 기본 라우트를 수정하여 앱 접속 시 스케줄러가 나타나도록 합니다.
routes/web.php 파일을 열어 루트 라우트를 다음과 같이 변경하세요:
<?php

Route::get('/', function () {
    return view('scheduler');
});
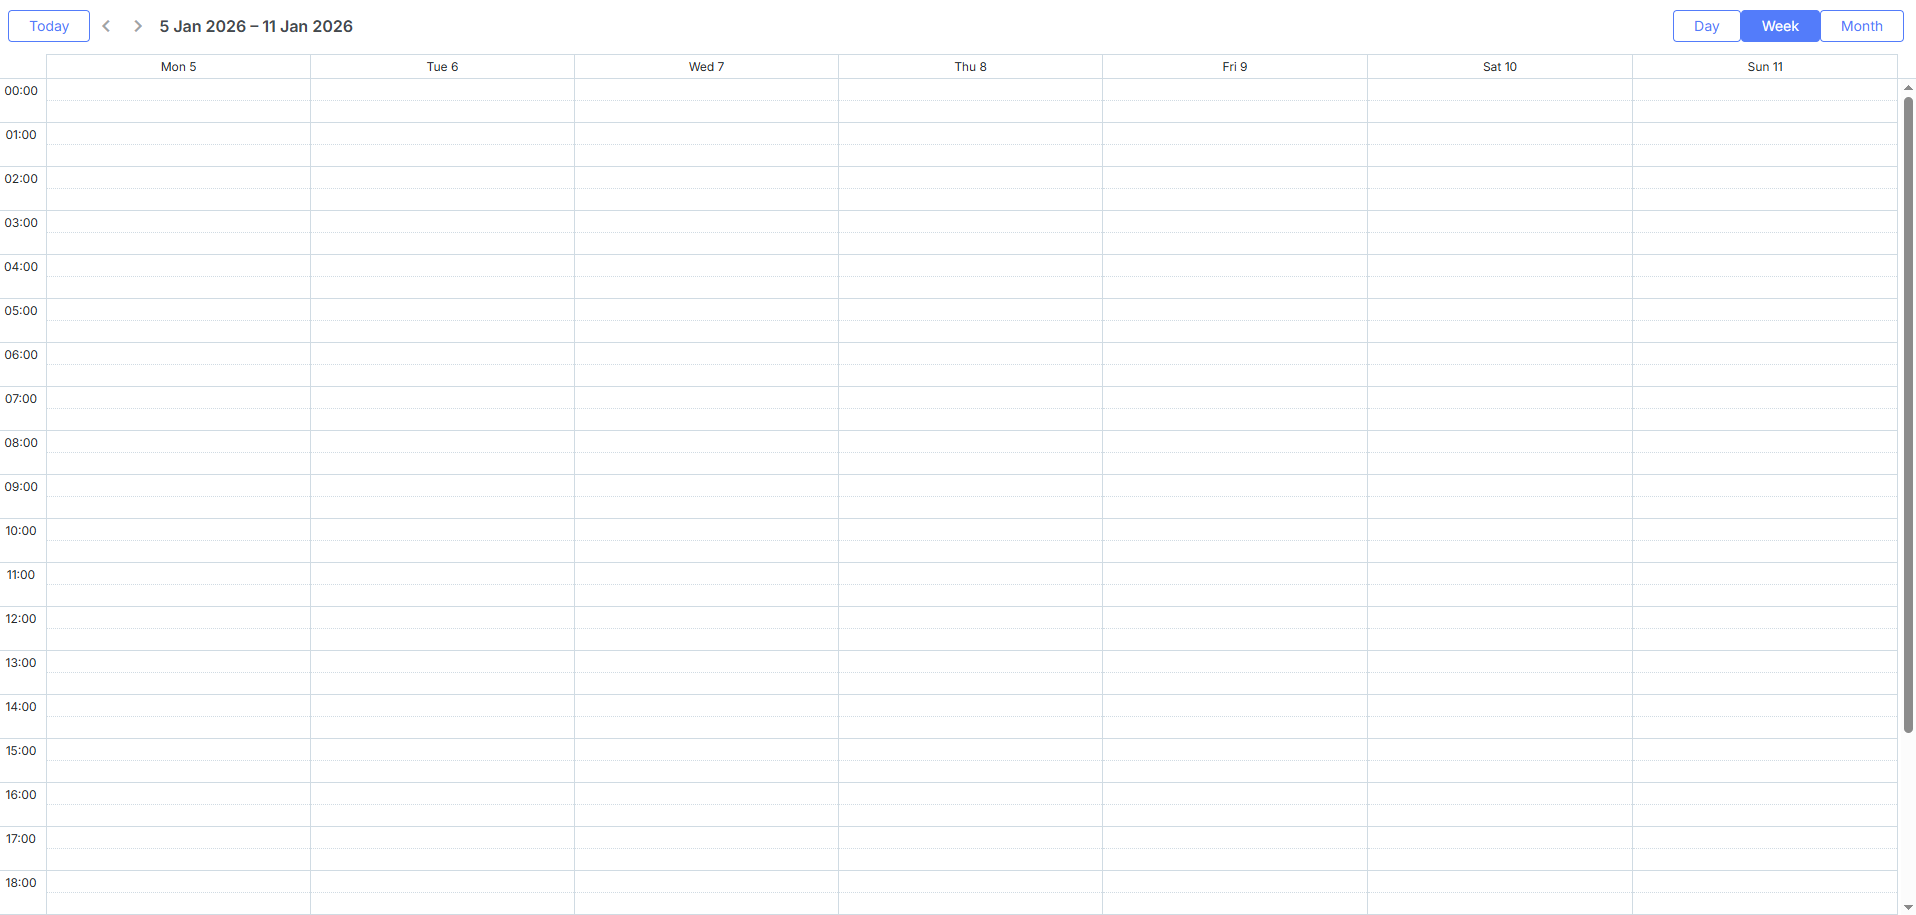
앱을 재시작한 후 스케줄러 페이지가 정상적으로 표시되는지 확인하세요:
3단계. 데이터베이스 준비
현재 스케줄러는 비어 있습니다. 이제 데이터베이스와 연결하고 데이터를 채워보겠습니다.
데이터베이스 생성
먼저 .env 파일에서 데이터베이스 연결 정보를 설정하세요. 예시:
DB_CONNECTION="mysql"
DB_HOST="127.0.0.1"
DB_PORT="3306"
DB_DATABASE="scheduler-test"
DB_USERNAME="root"
DB_PASSWORD=
이후 모델 클래스와 마이그레이션을 Artisan으로 생성합니다:
php artisan make:model Event --migration
이 명령으로 database/migrations 폴더에 마이그레이션 파일이 생성됩니다. Scheduler에서 요구하는 테이블 구조를 참고하여 스키마를 정의하세요.
아래는 Events 테이블 마이그레이션 코드입니다:
<?php

use IlluminateSupportFacadesSchema;
use IlluminateDatabaseSchemaBlueprint;
use IlluminateDatabaseMigrationsMigration;

class CreateEventsTable extends Migration
{
    /**
     * Run the migrations.
     *
     * @return void
     */
    public function up()
    {
        Schema::create('events', function (Blueprint $table) {
            $table->increments('id');
            $table->string('text');
            $table->dateTime('start_date');
            $table->dateTime('end_date');
            $table->timestamps();
        });
    }

    /**
     * Reverse the migrations.
     *
     * @return void
     */
    public function down()
    {
        Schema::dropIfExists('events');
    }
}
마이그레이션을 실행하여 테이블을 생성합니다:
php artisan migrate
만약 "Syntax error or access violation: 1071 Specified key was too long; max key length is 1000 bytes"와 같은 오류가 발생한다면, 아래 방법을 참고하세요.
이 문제를 해결하려면 app/Providers/AppServiceProvider.php 파일을 열고 AppServiceProvider 클래스에 다음 코드를 추가하세요:
<?php

namespace AppProviders;

use IlluminateSupportServiceProvider;
use IlluminateSupportFacadesSchema; /*!*/

class AppServiceProvider extends ServiceProvider
{
   public function boot()
   {
       Schema::defaultStringLength(191); /*!*/
   }
   ...
}
다음으로, seeder 클래스를 생성해 샘플 데이터를 추가합니다:
php artisan make:seeder EventsTableSeeder
EventsTableSeeder에 샘플 이벤트를 추가하세요:
<?php
use IlluminateDatabaseSeeder;
class EventsTableSeeder extends Seeder
{
   public function run()
   {
       DB::table('events')->insert([
           ['id'=>1, 'text'=>'Event #1', 'start_date'=>'2018-12-05 08:00:00',
                'end_date'=>'2018-12-05 12:00:00'],
           ['id'=>2, 'text'=>'Event #2', 'start_date'=>'2018-12-06 15:00:00',
                'end_date'=>'2018-12-06 16:30:00'],
           ['id'=>3, 'text'=>'Event #3', 'start_date'=>'2018-12-04 00:00:00',
                'end_date'=>'2018-12-20 00:00:00'],
           ['id'=>4, 'text'=>'Event #4', 'start_date'=>'2018-12-01 08:00:00',
                'end_date'=>'2018-12-01 12:00:00'],
           ['id'=>5, 'text'=>'Event #5', 'start_date'=>'2018-12-20 08:00:00',
                'end_date'=>'2018-12-20 12:00:00'],
           ['id'=>6, 'text'=>'Event #6', 'start_date'=>'2018-12-25 08:00:00',
                'end_date'=>'2018-12-25 12:00:00']
       ]);
   }
}
그 다음 DatabaseSeeder.php에서 이 seeder를 호출합니다:
<?php

use IlluminateDatabaseSeeder;

class DatabaseSeeder extends Seeder
{
    public function run()
    {
        $this->call(EventsTableSeeder::class);
    }
}
마지막으로 아래 명령어로 데이터베이스에 샘플 데이터를 추가하세요:
php artisan db:seed
모델 클래스 정의
데이터 처리는 Eloquent model 클래스를 통해 이루어집니다. 앞서 생성한 Event 모델은 추가 설정 없이 바로 스케줄러에서 사용할 수 있습니다.
4단계. 데이터 불러오기
데이터베이스와 모델이 준비되었으니, 이제 스케줄러에 데이터를 로드해봅니다. 클라이언트는 특정 포맷의 날짜 데이터를 기대하므로, 이에 맞는 JSON 구조를 반환하는 컨트롤러 액션을 생성해야 합니다.
컨트롤러를 생성하려면 아래 명령어를 실행하세요:
php artisan make:controller EventController
app/Http/Controllers/EventController.php 파일을 열고 index 메서드를 추가합니다:
<?php
namespace AppHttpControllers;
use AppEvent; /*!*/

class EventController extends Controller
{
    public function index(){ /*!*/
        $events = new Event();

        return response()->json([
            "data" => $events->all()
        ]);
    }
}
클라이언트가 이 액션에 접근할 수 있도록 라우트를 등록합니다. api.php 라우트 파일에 아래 코드를 추가하세요:
<?php

use IlluminateHttpRequest;

Route::get('/data', 'EventController@index');
마지막으로, 스케줄러 뷰에서 이 엔드포인트로 데이터를 불러오도록 수정합니다:
scheduler.config.date_format = "%Y-%m-%d %H:%i:%s";
scheduler.init("scheduler_here", new Date(2018, 11, 3), "week");

scheduler.load("/api/data");
scheduler.load 메서드는 지정된 URL로 AJAX 요청을 보내고, 위와 같이 포맷된 JSON 응답을 기대합니다.
date_format 값을 지정하면 스케줄러가 어떤 날짜 포맷을 사용할지 알 수 있어, 클라이언트에서 올바른 파싱이 가능합니다.
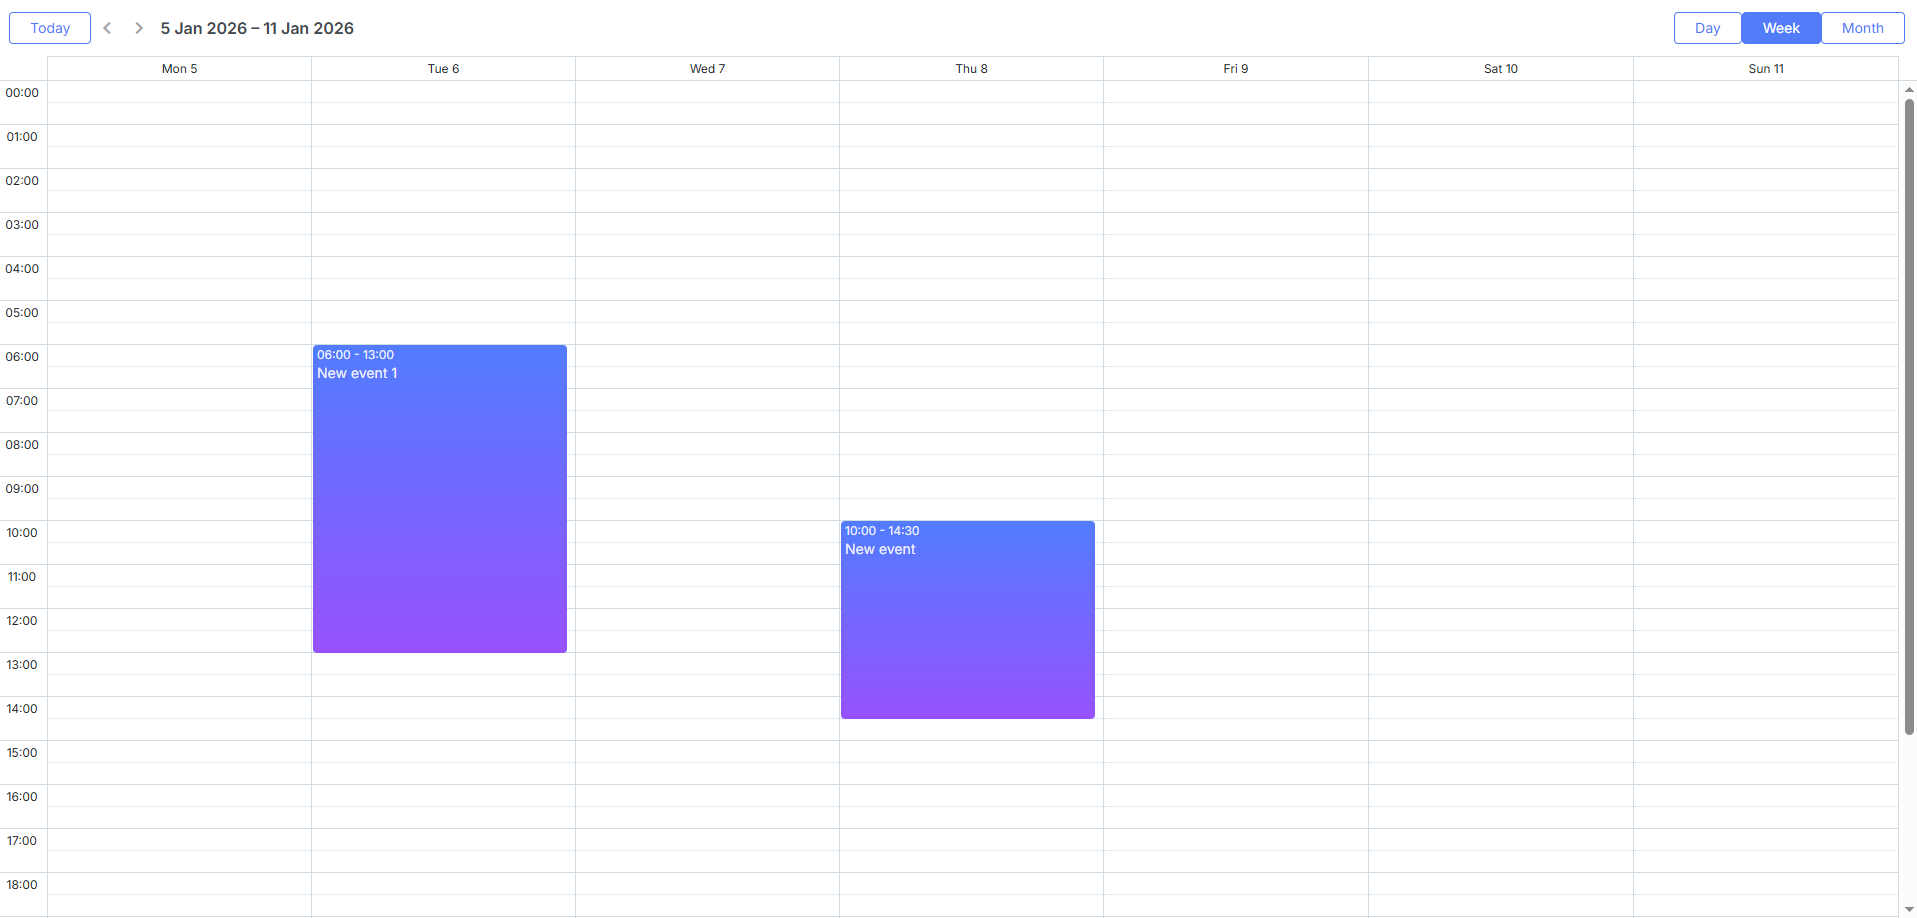
이제 스케줄러에 데이터베이스에서 불러온 이벤트가 표시됩니다:
동적 로딩
현재는 스케줄러 시작 시 모든 이벤트를 한 번에 불러옵니다. 데이터 양이 적을 때는 괜찮지만, 예약이나 일정 관리 등 시간이 지날수록 데이터가 많아지는 경우에는 비효율적일 수 있습니다.
동적 로딩을 사용하면, 현재 표시 중인 날짜 범위의 이벤트만 불러오도록 할 수 있습니다. 사용자가 날짜를 이동할 때마다 해당 구간의 데이터만 가져오게 됩니다.
동적 로딩을 활성화하려면 resources/views/scheduler.blade.php에 아래 라인을 추가하세요:
scheduler.config.date_format = "%Y-%m-%d %H:%i:%s";

scheduler.setLoadMode("day"); /*!*/

scheduler.init("scheduler_here", new Date(2018, 5, 6), "week");
scheduler.load("/api/events");
컨트롤러도 요청받은 날짜 범위에 따라 이벤트를 필터링하도록 수정합니다:
class EventController extends Controller
{
    public function index(Request $request){
        $events = new Event();

        $from = $request->from;
        $to = $request->to;

        return response()->json([
            "data" => $events->
                where("start_date", "<", $to)->
                where("end_date", ">=", $from)->get()
        ]);
    }
}
5단계. 변경 사항 저장하기
지금까지 스케줄러는 백엔드에서 데이터를 읽어올 수 있습니다. 다음 단계는 변경 사항을 데이터베이스에 저장하는 기능을 추가하는 것입니다.
클라이언트는 REST 모드로 동작하며, 이벤트 추가/수정/삭제 시 POST, PUT, DELETE 요청을 보냅니다. 요청 및 라우트 포맷 자세히 보기
이제 이러한 액션을 처리할 컨트롤러를 만들고, 라우트를 정의하며, 클라이언트에서 데이터 저장을 활성화해야 합니다.
컨트롤러 추가
먼저 컨트롤러를 설정합니다. 각 모델마다 resource controller를 생성하여, 모델 추가/삭제/수정 메서드를 포함시킵니다.
이벤트용 컨트롤러
<?php

namespace AppHttpControllers;

use IlluminateHttpRequest;
use AppEvent;

class EventController extends Controller
{
   public function index(Request $request){
       $events = new Event();

       $from = $request->from;
       $to = $request->to;

       return response()->json([
           "data" => $events->
               where("start_date", "<", $to)->
               where("end_date", ">=", $from)->get()
       ]);
   }

   public function store(Request $request){

       $event = new Event();

       $event->text = strip_tags($request->text);
       $event->start_date = $request->start_date;
       $event->end_date = $request->end_date;
       $event->save();

       return response()->json([
           "action"=> "inserted",
           "tid" => $event->id
       ]);
   }

   public function update($id, Request $request){
       $event = Event::find($id);

       $event->text = strip_tags($request->text);
       $event->start_date = $request->start_date;
       $event->end_date = $request->end_date;
       $event->save();

       return response()->json([
           "action"=> "updated"
       ]);
   }

   public function destroy($id){
       $event = Event::find($id);
       $event->delete();

       return response()->json([
           "action"=> "deleted"
       ]);
   }
}
그리고 다음은 관련 route입니다:
<?php

use IlluminateHttpRequest;

Route::resource('events', 'EventController');
이 코드에 대한 몇 가지 설명:
- 새로운 작업이 추가되면, 서버는 응답 객체의 tid 속성에 해당 id를 포함하여 응답합니다.
- progress 파라미터는 기본값을 가집니다. 많은 요청 파라미터가 선택 사항이기 때문에, 클라이언트 측 작업에서 포함하지 않으면 서버로 전송되지 않습니다.
- JSON 응답에는 추가 속성이 포함될 수 있으며, 이 모든 속성은 클라이언트 측 핸들러에서 접근할 수 있습니다.
클라이언트 측 데이터 저장 활성화
다음 단계로, 우리가 방금 만든 API와 연동하도록 클라이언트 측을 설정합니다:
scheduler.config.date_format = "%Y-%m-%d %H:%i:%s";
scheduler.setLoadMode("day"); /*!*/

scheduler.init("scheduler_here", new Date(2018, 11, 3), "week");

scheduler.load("/api/events"); /*!*/
var dp = scheduler.createDataProcessor("/api/events"); /*!*/
dp.init(scheduler);
dp.setTransactionMode("REST");
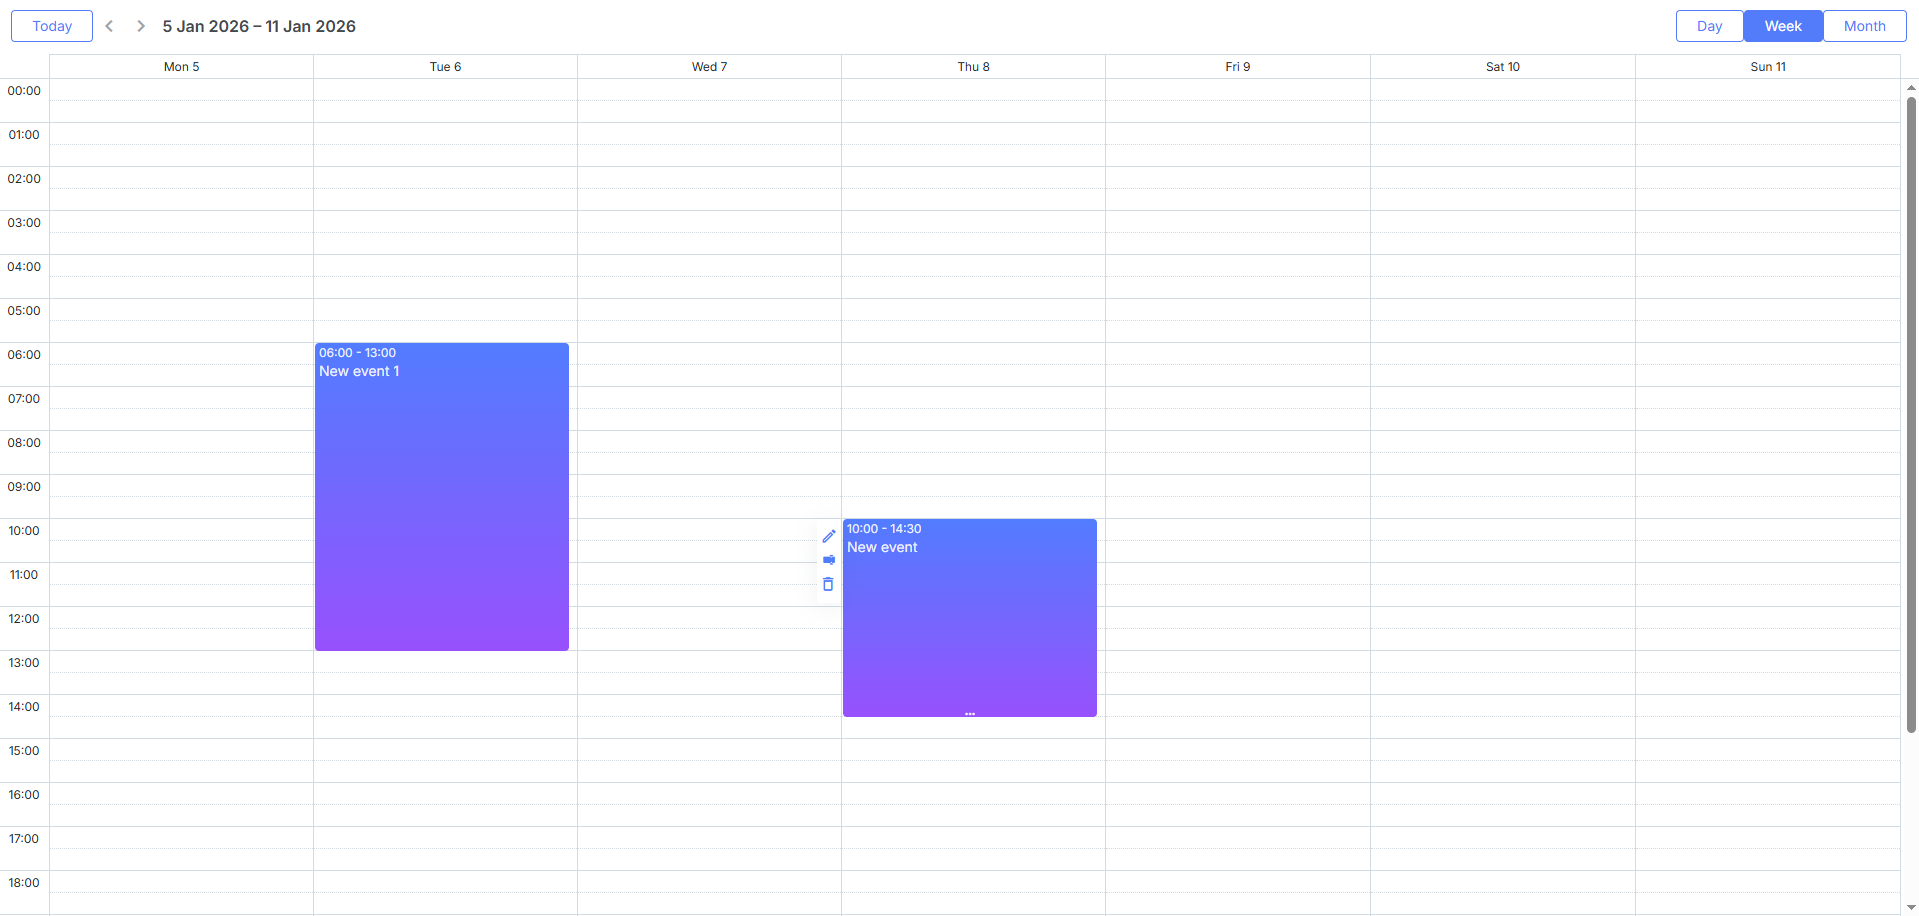
이렇게 하면 이벤트를 조회, 추가, 수정, 삭제할 수 있는 완전한 인터랙티브 스케줄러가 완성됩니다.
더 많은 기능은 가이드 문서를 참고하세요.
반복 이벤트
반복 이벤트(예: 매일 반복)를 지원하려면 scheduler.blade.php에 확장 기능을 추가하고, 모델을 업데이트하며 Events 컨트롤러도 수정해야 합니다.
먼저 scheduler.blade.php에서 반복 확장 기능을 활성화합니다:
<!DOCTYPE html>
...
<body>
    ...
    <script type="text/javascript">
        scheduler.plugins({
            recurring: true /*!*/
        });

        scheduler.config.date_format = "%Y-%m-%d %H:%i:%s";
        scheduler.init("scheduler_here", new Date(2018, 11, 3), "week");
    </script>
</body>
다음으로 모델을 업데이트합니다.
처음부터 시작한다면 전체 스키마는 다음과 같습니다:
Schema::create('events', function (Blueprint $table) {
    $table->increments('id');
    $table->string('text');
    $table->dateTime('start_date');
    $table->dateTime('end_date');

    $table->string('rec_type')->nullable();
    $table->bigInteger('event_length')->nullable();
    $table->string('event_pid')->nullable();

    $table->timestamps();
});
또는 다음과 같이 마이그레이션을 생성할 수 있습니다:
php artisan make:migration add_recurrings_to_events_table --table="events"
<?php

use IlluminateSupportFacadesSchema;
use IlluminateDatabaseSchemaBlueprint;
use IlluminateDatabaseMigrationsMigration;

class AddRecurringsToEventsTable extends Migration
{
    /**
     * Run the migrations.
     *
     * @return void
     */
    public function up()
    {
        Schema::table('events', function (Blueprint $table) {
            $table->string('rec_type')->nullable();
            $table->bigInteger('event_length')->nullable()->default(null);
            $table->string('event_pid')->nullable();
        });
    }

    /**
     * Reverse the migrations.
     *
     * @return void
     */
    public function down()
    {
        Schema::table('events', function (Blueprint $table) {
            $table->dropColumn('rec_type');
            $table->dropColumn('event_length');
            $table->dropColumn('event_pid');
        });
    }
}
이제 마이그레이션을 실행하세요:
php artisan migrate
이제 컨트롤러를 업데이트합니다.
데이터 로딩 부분은 변경할 필요가 없지만, 쓰기 작업에서는 반복 시리즈 편집이 특정 단계가 필요하기 때문에 일부 수정을 해야 합니다.
먼저 "store"와 "update" 메서드에 새 Event 모델 속성을 포함하세요:
public function store(Request $request){

    $event = new Event();

    $event->text = strip_tags($request->text);
    $event->start_date = $request->start_date;
    $event->end_date = $request->end_date;
    $event->rec_type = $request->rec_type;
    $event->event_length = $request->event_length;
    $event->event_pid = $request->event_pid;
    $event->save();

    return response()->json([
        "action"=> "inserted",
        "tid" => $event->id
    ]);
}

public function update($id, Request $request){
    $event = Event::find($id);

    $event->text = strip_tags($request->text);
    $event->start_date = $request->start_date;
    $event->end_date = $request->end_date;
    $event->rec_type = $request->rec_type;
    $event->event_length = $request->event_length;
    $event->event_pid = $request->event_pid;
    $event->save();

    return response()->json([
        "action"=> "updated"
    ]);
}
추가로 처리해야 할 세 가지 경우가 더 있습니다.
반복 시리즈 자체는 하나의 레코드로 저장되며, 시리즈 내에서 삭제된 인스턴스는 시리즈와 연결된 개별 레코드로 저장되고 'deleted'로 표시됩니다. 서버가 이러한 항목을 만나면 "deleted" 상태로 응답해야 합니다. 이 레코드는 $event->rec_type == "none" 인지 확인하여 감지할 수 있습니다:
public function store(Request $request){

    $event = new Event();

    $event->text = strip_tags($request->text);
    $event->start_date = $request->start_date;
    $event->end_date = $request->end_date;
    $event->rec_type = $request->rec_type;
    $event->event_length = $request->event_length;
    $event->event_pid = $request->event_pid;
    $event->save();

    $status = "inserted";
    if($event->rec_type == "none"){
        $status = "deleted";
    }

    return response()->json([
        "action"=> $status,
        "tid" => $event->id
    ]);
}
수정된 반복 인스턴스 역시 반복 시리즈와 연결된 개별 레코드로 저장되며, 타임스탬프로 원래 인스턴스의 렌더링을 방지합니다. 사용자가 수정된 인스턴스를 삭제할 때는 실제로 삭제하지 않고 rec_type을 "none"으로 설정해야 합니다:
public function destroy($id){
    $event = Event::find($id);

    // 반복 시리즈의 수정된 인스턴스 삭제
    if($event->event_pid){
        $event->rec_type = "none";
        $event->save();
    }else{
        // 일반 인스턴스 삭제
        $event->delete();
    }

    $this->deleteRelated($event);
    return response()->json([
        "action"=> "deleted"
    ]);
}
마지막으로, 반복 시리즈가 업데이트되거나 삭제될 때, 해당 시리즈의 모든 수정된 인스턴스도 함께 삭제해야 합니다. 수정된 인스턴스는 타임스탬프로 원본과 연결되어 있으므로 이 단계가 필요합니다:
private function deleteRelated($event){
  if($event->event_pid && $event->event_pid !== "none"){
      Event::where("event_pid", $event->id)->delete();
  }
}

public function update($id, Request $request){
        $event = Event::find($id);

        $event->text = strip_tags($request->text);
        $event->start_date = $request->start_date;
        $event->end_date = $request->end_date;
        $event->rec_type = $request->rec_type;
        $event->event_length = $request->event_length;
        $event->event_pid = $request->event_pid;
        $event->save();
        $this->deleteRelated($event); /*!*/
        return response()->json([
        "action"=> "updated"
    ]);
}

public function destroy($id){
    $event = Event::find($id);

       // 반복 시리즈의 수정된 인스턴스 삭제
    if($event->event_pid){
        $event->rec_type = "none";
        $event->save();
    }else{
         // 일반 인스턴스 삭제
        $event->delete();
    }
    $this->deleteRelated($event);/*!*/
    return response()->json([
          "action"=> "deleted"
    ]);
}
반복 시리즈 파싱
반복 이벤트는 데이터베이스에 하나의 레코드로 저장되지만, 클라이언트 측의 Scheduler에서는 개별 인스턴스로 분리할 수 있습니다. 서버에서 각각의 이벤트 날짜가 필요하다면, PHP에서 반복 이벤트를 파싱할 수 있는 헬퍼 라이브러리를 사용하는 것을 고려해보세요.
GitHub에서 제공하는 라이브러리를 참고할 수 있습니다.
애플리케이션 보안
Scheduler 자체에는 SQL 인젝션, XSS, CSRF 공격 등과 같은 위협에 대한 내장 보호 기능이 없습니다. 애플리케이션의 보안을 유지하는 것은 백엔드 개발자의 책임입니다. 자세한 내용은 관련 문서를 참고하세요.
문제 해결
Scheduler와 PHP를 연동하는 단계를 모두 따라 했음에도 이벤트가 표시되지 않는다면, "백엔드 통합 문제 해결" 문서를 참고하세요. 일반적인 문제의 원인과 해결 방법을 안내합니다.
다음 단계
이제 완전히 동작하는 Scheduler를 갖추게 되었습니다. 전체 코드는 GitHub에서 확인할 수 있으며, 프로젝트에 복제하거나 다운로드하여 사용할 수 있습니다.
또한 Scheduler의 다양한 기능 가이드나 다른 백엔드 프레임워크와의 연동 튜토리얼도 참고해보세요.