dhtmlxScheduler와 ASP.NET Core
이 가이드는 서버 측에서 ASP.NET Core를 사용하여 Scheduler를 만드는 과정을 안내합니다.
다른 서버 사이드 플랫폼에 대한 튜토리얼도 확인하실 수 있습니다:
- "dhtmlxScheduler와 ASP.NET MVC"
- "dhtmlxScheduler와 Node.js"
- "dhtmlxScheduler와 PHP"
- "dhtmlxScheduler와 PHP:Slim"
- "dhtmlxScheduler와 PHP:Laravel 연동하기"
- "dhtmlxScheduler와 SalesForce LWC 통합하기"
- "dhtmlxScheduler와 Ruby on Rails 연동하기"
- "dhtmlxScheduler와 dhtmlxConnector 연동하기"
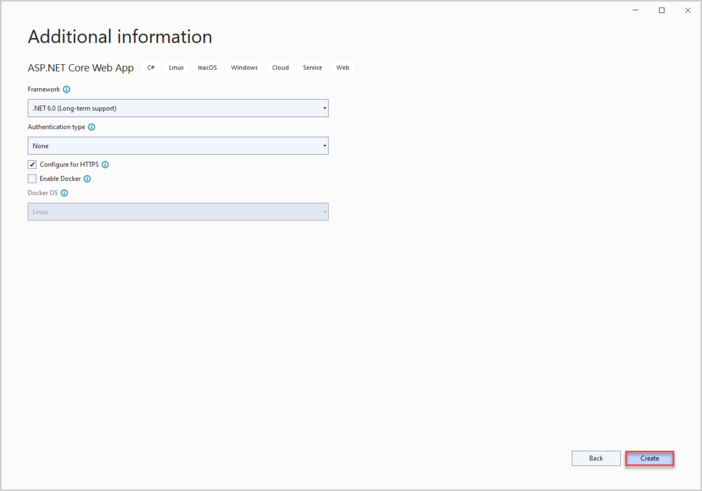
데이터베이스 연동은 Entity Framework Core를 통해 처리됩니다. 본 예제는 Visual Studio 2022를 이용하여 개발되었습니다.
전체 소스 코드는 GitHub에서 확인하실 수 있습니다.
1단계. 프로젝트 생성
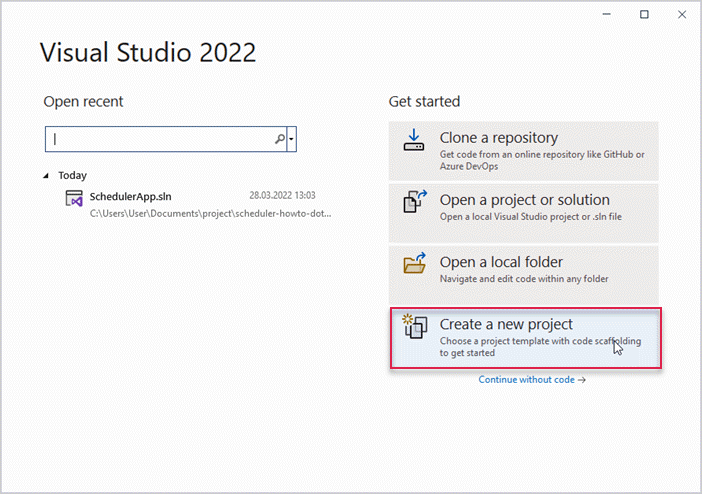
Visual Studio 2022를 실행한 후 "Create a new project"를 선택하여 새 프로젝트를 생성하세요.
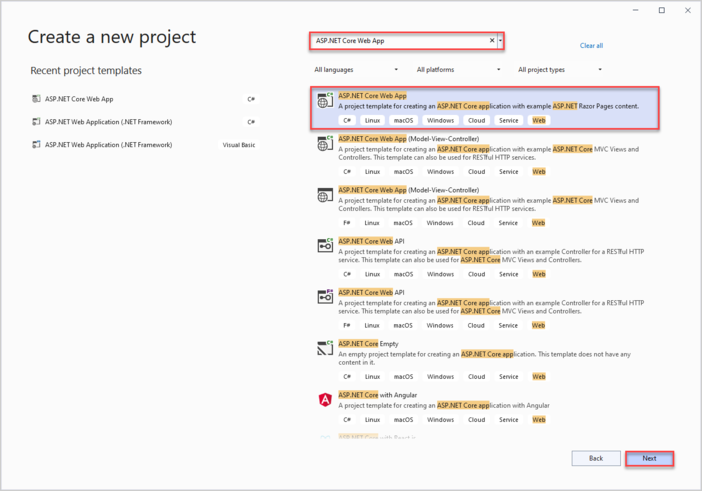
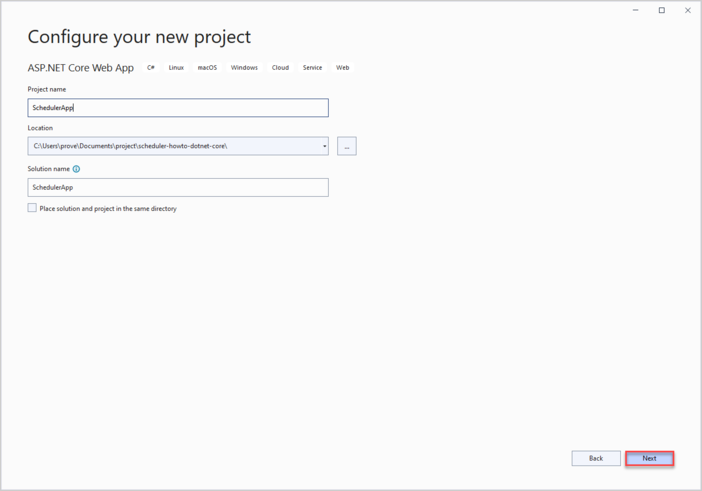
이후 "ASP.NET Core Web App"을 선택하고, 프로젝트 이름을 SchedulerApp으로 지정합니다.
이제 프로젝트 준비가 완료되�었으니, Scheduler를 위한 마크업과 스크립트를 추가하는 단계로 넘어가겠습니다.
2단계. 페이지에 Scheduler 추가
wwwroot로 이동하여 index.html이라는 새 파일을 생성하세요.
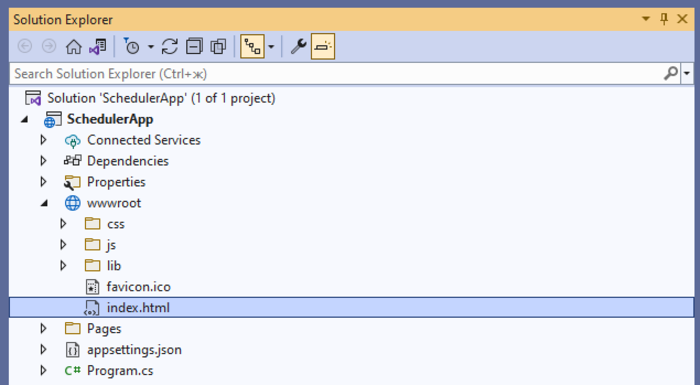
이 파일에 Scheduler를 표시할 간단한 페이지를 작성합니다.
이 예제에서는 Scheduler 파일이 CDN에서 로드된다는 점에 유의하세요. Professional 에디션을 사용하시는 경우에는 Scheduler 파일을 프로젝트에 직접 추가해야 합니다.
<!DOCTYPE html>
<html>
<head>
<title>Getting started with dhtmlxScheduler</title>
<meta charSet="utf-8"/>
<script src="https://cdn.dhtmlx.com/scheduler/edge/dhtmlxscheduler.js"></script>
<link href="https://cdn.dhtmlx.com/scheduler/edge/dhtmlxscheduler.css"
rel="stylesheet" type="text/css" charSet="utf-8">
<style>
html, body {
margin: 0px;
padding: 0px;
}
</style>
</head>
<body>
<div id="scheduler_here" className="dhx_cal_container">
<div className="dhx_cal_navline">
<div className="dhx_cal_prev_button"> </div>
<div className="dhx_cal_next_button"> </div>
<div className="dhx_cal_today_button"></div>
<div className="dhx_cal_date"></div>
<div className="dhx_cal_tab" name="day_tab"></div>
<div className="dhx_cal_tab" name="week_tab"></div>
<div className="dhx_cal_tab" name="month_tab"></div>
</div>
<div className="dhx_cal_header"></div>
<div className="dhx_cal_data"></div>
</div>
<script>
scheduler.init('scheduler_here', new Date(2019, 0, 20), "week");
</script>
</body>
</html>
그 다음, Program.cs를 열고 wwwroot 폴더에서 정적 파일을 제공하도록 애플리케이션을 구성하세요.
app.UseDefaultFiles() 메서드를 추가합니다.
자세한 내용은 여기에서 확인하실 수 있습니다.
var builder = WebApplication.CreateBuilder(args);

// Add services to the container.
builder.Services.AddRazorPages();

var app = builder.Build();

// Configure the HTTP request pipeline.
if (!app.Environment.IsDevelopment())
{
    app.UseExceptionHandler("/Error");
    // The default HSTS value is 30 days.
    // You may want to change this for production scenarios,
    // see https://aka.ms/aspnetcore-hsts.
    app.UseHsts();
}

app.UseHttpsRedirection();

app.UseDefaultFiles(); /*!*/

app.UseStaticFiles();

app.UseRouting();

app.UseAuthorization();

app.MapRazorPages();

app.Run();
app.UseDefaultFiles() 미들웨어는 wwwroot 폴더에서 아래와 같은 기본 ��파일을 찾아 제공할 수 있도록 해줍니다:
- index.html
- index.htm
- default.html
- default.htm
이 중 어떤 파일을 사용해도 되지만, 본 튜토리얼에서는 "index.html"을 사용합니다.
UseDefaultFiles()는 URL을 기본 파일로 재작성만 하므로, 실제 파일을 제공하려면 UseStaticFiles()도 반드시 필요합니다.
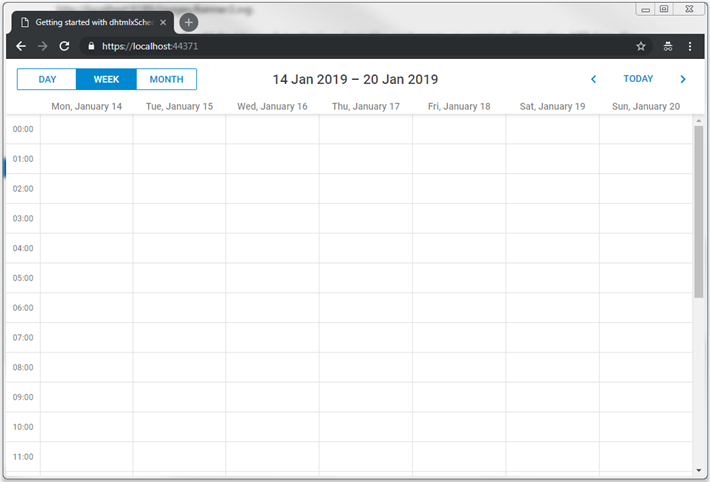
이 변경 후 앱을 실행하면 페이지에 빈 Scheduler가 표시됩니다.
다음 단계에서는 백엔드 API를 만들고 Scheduler를 연결하는 방법을 안내합니다.
3단계. 모델 및 데이터베이스 생성
데이터 모델부터 시작합니다. Scheduler 이벤트는 클래스로 표현해야 합니다. dhtmlxScheduler는 일반적인 .NET 명명 규칙과는 다른 속성명을 사용하므로, Data Transfer Object(DTO) 패턴을 적용합니다. 즉:
- EF Core 및 내부 앱에서 사용할 도메인 모델 클래스
- Web API와 통신할 DTO 클래스
이 모델들 간의 매핑도 구현하게 됩니다.
모델
프로젝트에 Models라는 새 폴더를 추가하세요. 이 폴더에 모델 클래스와 EF 컨텍스트를 보관합니다.
이벤트 모델
캘린더 이벤트를 나타내는 클래스를 생성합니다. Models 폴더 내부에 SchedulerEvent.cs 파일을 추가하세요.
아래는 모델의 간단한 예시입니다:
namespace SchedulerApp.Models
{
    public class SchedulerEvent
    {
        public int Id { get; set; }
        public string? Name { get; set; }
        public DateTime StartDate { get; set; }
        public DateTime EndDate { get; set; }
    }
}
Scheduler 이벤트에는 더 많은 속성이 포함될 수 있지만, 본 예제에서는 필수 항목만 다룹니다.
데이터베이스 컨텍스트
먼저, ASP.NET Core용 Entity Framework Core를 설치해야 합니다. NuGet 패키지 관리자를 통해 설치할 수 있습니다:

또는 패키지 관리자 콘솔에서 아래 명령어를 실행하세요:
PM> Install-Package Microsoft.EntityFrameworkCore.SqlServer
PM> Install-Package Microsoft.EntityFrameworkCore
PM> Install-Package Microsoft.EntityFrameworkCore.Design
Entity Framework Core는 앱과 데이터베이스 간의 데이터 통신을 담당합니다.
Entity 컨텍스트 생성
다음으로, 데이터베이스 세션을 정의하고 데이터의 로드 및 저장을 가능하게 하는 Context 클래스를 생성합니다:
- Models 폴더에 SchedulerContext.cs 파일 추가
- 데이터베이스 컨텍스트를 아래와 같이 정의
using Microsoft.EntityFrameworkCore;

namespace SchedulerApp.Models
{
    public class SchedulerContext : DbContext
    {
        public SchedulerContext(DbContextOptions<SchedulerContext> options)
           : base(options)
        {
        }
        public DbSet<SchedulerEvent> Events { get; set; } = null!;
    }
}
데이터베이스에 첫 레코드 추가
이제 데이터베이스에 초기 레코드를 추가할 차례입니다. 샘플 이벤트로 데이터베이스를 채워주는 이니셜라이저를 생성합니다.
Models 폴더에 SchedulerSeeder라는 클래스를 추가하세요. 이 클래스에는 이벤트를 데이터베이스에 삽입하는 Seed() 메서드가 포함됩니다.
using System;
using System.Collections.Generic;
using System.Linq;

namespace SchedulerApp.Models
{
    public static class SchedulerSeeder
    {
        public static void Seed(SchedulerContext context)
        {
            if (context.Events.Any())
            {
                return;   // DB has been seeded
            }

            var events = new List<SchedulerEvent>()
            {
                new SchedulerEvent
                {
                    Name = "Event 1",
                    StartDate = new DateTime(2019, 1, 15, 2, 0, 0),
                    EndDate = new DateTime(2019, 1, 15, 4, 0, 0)
                },
                new SchedulerEvent()
                {
                    Name = "Event 2",
                    StartDate = new DateTime(2019, 1, 17, 3, 0, 0),
                    EndDate = new DateTime(2019, 1, 17, 6, 0, 0)
                },
                new SchedulerEvent()
                {
                    Name = "Multiday event",
                    StartDate = new DateTime(2019, 1, 15, 0, 0, 0),
                    EndDate = new DateTime(2019, 1, 20, 0, 0, 0)
                }
            };

            events.ForEach(s => context.Events.Add(s));
            context.SaveChanges();
        }
    }
}
데이터베이스 등록하기
다음 단계는 Program.cs 파일에서 데이터베이스를 등록하는 것입니다. 그 전에 연결 문자열이 필요합니다. 이 문자열은
애플리케이션 설정의 JSON 파일에 저장됩니다.
프로젝트를 API 템플릿으로 생성했다면 해당 파일이 이미 프로젝트 폴더에 존재합니다. Empty template을 사용했다면 이 파일을 새로 만들어야 합니다.
appsettings.json 파일을 생성하거나(이�미 있다면 열어서) 데이터베이스 연결 문자열을 추가하세요:
{
  "ConnectionStrings": {
    "DefaultConnection":"Server="(localdb)mssqllocaldb;"
        Database=SchedulerDatabase;Trusted_Connection=True;"  }
}
그 다음, 의존성 주입을 통해 데이터베이스 컨텍스트를 등록합니다.
Program.cs에 다음 네임스페이스를 추가합니다:
using Microsoft.EntityFrameworkCore;
using SchedulerApp.Models;
using Microsoft.Extensions.Configuration;
등록 코드는 다음과 같습니다:
var connectionString = builder.Configuration.GetConnectionString("DefaultConnection");
builder.Services.AddDbContext<SchedulerContext>(
    options => options.UseSqlServer(connectionString));
컨트롤러를 활성화하려면 services.AddControllers() 메서드를 호출해야 합니다.
builder.Services.AddControllers();
아래는 Program.cs의 전체 내용입니다:
using Microsoft.EntityFrameworkCore;
using SchedulerApp.Models;
using Microsoft.Extensions.Configuration;

var builder = WebApplication.CreateBuilder(args);

// Add services to the container.
builder.Services.AddRazorPages();

var connectionString = builder.Configuration.GetConnectionString("DefaultConnection");
builder.Services.AddDbContext<SchedulerContext>(
    options => options.UseSqlServer(connectionString));

builder.Services.AddControllers();

var app = builder.Build();

// Configure the HTTP request pipeline.
if (!app.Environment.IsDevelopment())
{
    app.UseExceptionHandler("/Error");
    // The default HSTS value is 30 days.
    // You may want to change this for production scenarios,
    // see https://aka.ms/aspnetcore-hsts.
    app.UseHsts();
}

app.UseHttpsRedirection();

app.UseDefaultFiles();

app.UseStaticFiles();

app.UseRouting();

app.UseAuthorization();

app.MapRazorPages();

app.MapControllers();

app.Run();
마지막으로, 앱이 시작될 때 데이터베이스를 초기화하고 시드해야 합니다. 일반적으로 마이그레이션을 사용하지만 여기서는 단순화를 위해 �생략합니다.
초기화를 처리할 클래스를 먼저 생성하세요. Models 폴더에 SchedulerInitializerExtension.cs 파일을 추가합니다:
using Microsoft.Extensions.DependencyInjection;
using Microsoft.AspNetCore.Hosting;

namespace SchedulerApp.Models
{
 public static class SchedulerInitializerExtension
   {
    public static IHost InitializeDatabase(this IHost webHost)
     {
      var serviceScopeFactory =
      (IServiceScopeFactory?)webHost.Services.GetService(typeof(IServiceScopeFactory));

        using (var scope = serviceScopeFactory!.CreateScope())
        {
           var services = scope.ServiceProvider;
           var dbContext = services.GetRequiredService<SchedulerContext>();
           dbContext.Database.EnsureDeleted();
           dbContext.Database.EnsureCreated();
           SchedulerSeeder.Seed(dbContext);
        }

        return webHost;
     }
   }
}
그런 다음 **InitializeDatabase()**를 호출합니다:
app.InitializeDatabase();
이 부분이 완료되었습니다. 이제 Scheduler에 집중하세요.
DTO 및 매핑 정의
이제 Web API용 DTO 클래스를 정의할 차례입니다. Models 폴더에 파일을 만들고 WebAPIEvent.cs 클래스를 정의하세요:
using System;

namespace SchedulerApp.Models
{
    public class WebAPIEvent
    {
        public int id { get; set; }
        public string? text { get; set; }
        public string? start_date { get; set; }
        public string? end_date { get; set; }

        public static explicit operator WebAPIEvent(SchedulerEvent ev)
        {
            return new WebAPIEvent
            {
                id = ev.Id,
                text = ev.Name,
                start_date = ev.StartDate.ToString("yyyy-MM-dd HH:mm"),
                end_date = ev.EndDate.ToString("yyyy-MM-dd HH:mm")
            };
        }

        public static explicit operator SchedulerEvent(WebAPIEvent ev)
        {
            return new SchedulerEvent
            {
                Id = ev.id,
                Name = ev.text,
                StartDate = ev.start_date != null ? DateTime.Parse(ev.start_date,
                  System.Globalization.CultureInfo.InvariantCulture) : new DateTime(),
                EndDate = ev.end_date != null ? DateTime.Parse(ev.end_date,
                  System.Globalization.CultureInfo.InvariantCulture) : new DateTime()
            };
        }
    }
}
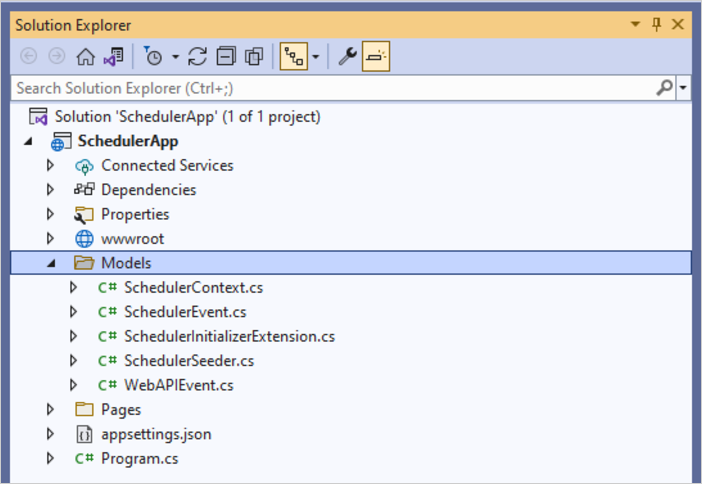
이 작업을 마치면 폴더 구조는 다음과 같아야 합니다:
이 시점에서 앱을 실행하여 모든 것이 올바르게 설정되었는지 확인할 수 있습니다. 런타임 오류가 없다면 설정이 성공적으로 완료된 것입니다.
Step 4. Web API 구현
다음은 REST API 구현입니다.
API 컨트롤러 추가
Controllers 폴더를 만들고 이벤트를 위한 빈 API 컨트롤러를 추가하세요:
using System.Collections.Generic;
using System.Linq;
using Microsoft.AspNetCore.Mvc;
using SchedulerApp.Models;

namespace SchedulerApp.Controllers
{
    [Route("api/[controller]")]
    [ApiController]
    public class EventsController : ControllerBase
    {
        private readonly SchedulerContext _context;
        public EventsController(SchedulerContext context)
        {
            _context = context;
        }

        // GET api/events
        [HttpGet]
        public IEnumerable<WebAPIEvent> Get()
        {
            return _context.Events
                .ToList()
                .Select(e => (WebAPIEvent)e);
        }

        // GET api/events/5.md
        [HttpGet("{id}")]
        public SchedulerEvent? Get(int id)
        {
            return _context
                .Events
                .Find(id);
        }

        // POST api/events
        [HttpPost]
        public ObjectResult Post([FromForm] WebAPIEvent apiEvent)
        {
            var newEvent = (SchedulerEvent)apiEvent;

            _context.Events.Add(newEvent);
            _context.SaveChanges();

            return Ok(new
            {
                tid = newEvent.Id,
                action = "inserted"
            });
        }

        // PUT api/events/5.md
        [HttpPut("{id}")]
        public ObjectResult? Put(int id, [FromForm] WebAPIEvent apiEvent)
        {
            var updatedEvent = (SchedulerEvent)apiEvent;
            var dbEvent = _context.Events.Find(id);
            if (dbEvent == null)
            {
                return null;
            }
            dbEvent.Name = updatedEvent.Name;
            dbEvent.StartDate = updatedEvent.StartDate;
            dbEvent.EndDate = updatedEvent.EndDate;
            _context.SaveChanges();

            return Ok(new
            {
                action = "updated"
            });
        }

        // DELETE api/events/5.md
        [HttpDelete("{id}")]
        public ObjectResult DeleteEvent(int id)
        {
            var e = _context.Events.Find(id);
            if (e != null)
            {
            _context.Events.Remove(e);
            _context.SaveChanges();
            }

            return Ok(new
            {
                action = "deleted"
            });
        }

    }
}
클라이언트 구성
Web API가 준비되면, HTML 페이지로 돌아가 스케줄러가 API와 연동되도록 설정하세요:
scheduler.config.date_format = "%Y-%m-%d %H:%i";
scheduler.init("scheduler_here", new Date(2019, 0, 20), "week");

// load data from backend
scheduler.load("/api/events");
// connect backend to scheduler
var dp = scheduler.createDataProcessor("/api/events");
dp.init(scheduler);
// set data exchange mode
dp.setTransactionMode("REST");
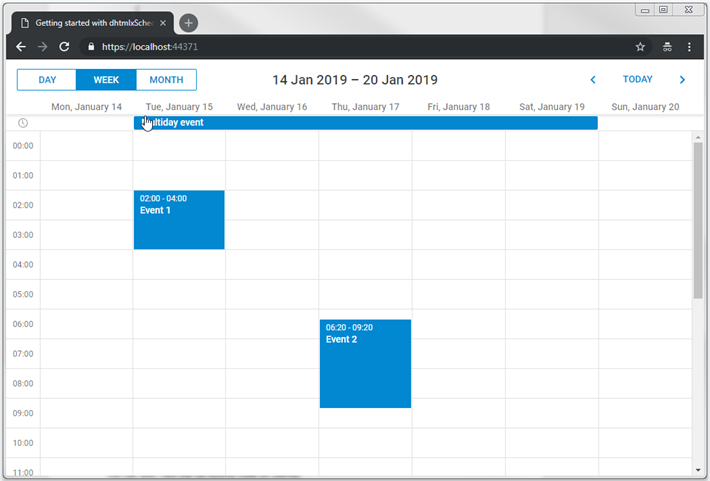
이제 모든 준비가 완료되었습니다. 애플리케이션을 실행하면 완전히 동작하는 스케줄러를 볼 수 있습니다.
동적 로딩
현재 스케줄러가 GET 액션을 호출할 때마다 전체 이벤트 테이블을 가져옵니다. 처음에는 괜찮지만, 시간이 지나며 데이터 양이 크게 증가할 수 있습니다.
동적 로딩을 구현하면 필요한 범위의 이벤트만 가져올 수 있습니다.
클라이언트 측에서는 scheduler.setLoadMode 메서드를 사용하여 활성화할 수 있습니다:
scheduler.setLoadMode("day");
// load data from backend
scheduler.load("/api/events");
이후 스케줄러는 GET 요청에 from과 to 날짜 파라미터를 추가하여, 백엔드에서 해당 기간의 이벤트만 반환할 수 있게 됩니다.
백엔드에서는 이 파라미터를 받아 이벤트를 필터링하면 됩니다:
// GET api/events
[HttpGet]
public IEnumerable<WebAPIEvent> Get([FromQuery] DateTime from, [FromQuery] DateTime to)
{
    return _context.Events
        .Where(e => e.StartDate < to && e.EndDate >= from)
        .ToList()
        .Select(e => (WebAPIEvent)e);
}
반복 이벤트
반복 이벤트(예: "매일 반복되는 이벤트")를 지원하려면 스케줄러 페이지에서 해당 확장 기능을 활성화해야 합니다:
scheduler.plugins({
    recurring: true
});
모델 업데이트
모델이 반복(Recurrence) 정보를 올바르게 처리할 수 있도록 업데이트해야 합니다:
using System;

namespace SchedulerApp.Models
{
    public class SchedulerEvent
    {
        public int Id { get; set; }
        public string? Name { get; set; }
        public DateTime StartDate { get; set; }
        public DateTime EndDate { get; set; }

        public int EventPID { get; set; } /*!*/
        public string? RecType { get; set; } /*!*/
        public long EventLength { get; set; } /*!*/

    }
}
마찬가지로, 데이터 전송 객체도 다음과 같이 업데이트해야 합니다:
using System;
using System.Text.Encodings.Web;

namespace SchedulerApp.Models
{
    public class WebAPIEvent
    {
        public int id { get; set; }
        public string? text { get; set; }
        public string? start_date { get; set; }
        public string? end_date { get; set; }

        public int? event_pid { get; set; } /*!*/
        public string? rec_type { get; set; } /*!*/
        public long? event_length { get; set; } /*!*/

        public static explicit operator WebAPIEvent(SchedulerEvent ev)
        {
            return new WebAPIEvent
            {
                id = ev.Id,
                text = HtmlEncoder.Default.Encode(ev.Name != null ? ev.Name : ""),
                start_date = ev.StartDate.ToString("yyyy-MM-dd HH:mm"),
                end_date = ev.EndDate.ToString("yyyy-MM-dd HH:mm"),
                event_pid  = ev.EventPID,
                rec_type = ev.RecType,
                event_length = ev.EventLength
            };
        }

        public static explicit operator SchedulerEvent(WebAPIEvent ev)
        {
            return new SchedulerEvent
            {
                Id = ev.id,
                Name = ev.text,
                StartDate = ev.start_date != null ? DateTime.Parse(ev.start_date,
                  System.Globalization.CultureInfo.InvariantCulture) : new DateTime(),
                EndDate = ev.end_date != null ? DateTime.Parse(ev.end_date,
                  System.Globalization.CultureInfo.InvariantCulture) : new DateTime(),
    ///
                EventPID = ev.event_pid != null ? ev.event_pid.Value : 0,
                EventLength = ev.event_length != null ? ev.event_length.Value : 0,
                RecType = ev.rec_type
            };
        }
    }
}
API 컨트롤러 업데이트
반복 이벤트와 관련된 특수한 경우를 올바르게 처리하려면 PUT, POST, DELETE 액션을 조정해야 합니다. 자세한 내용은 반복 이벤트 처리에서 확인할 수 있습니다.
먼저 POST 액션은 반복 시리즈에서 단일 항목을 삭제할 때 새로운 데이터베이스 레코드를 추가해야 하는 특별한 경우를 처리합니다. 이 경우 클라이언트는 insert 액션을 호출합니다:
// POST api/events
[HttpPost]
public ObjectResult Post([FromForm] WebAPIEvent apiEvent)
{
   var newEvent = (SchedulerEvent)apiEvent;

   _context.Events.Add(newEvent);
   _context.SaveChanges();

  // delete a single occurrence from a recurring series
  var resultAction = "inserted"; /*!*/
  if(newEvent.RecType == "none") /*!*/
  {
     resultAction = "deleted"; /*!*/
  }

  return Ok(new
  {
     tid = newEvent.Id,
     action = resultAction /*!*/
  });
}
PUT 액션에서는 모든 모델 속성을 업데이트해야 하며, 반복 시리즈를 수정할 때 해당 시리즈의 모든 수정된 항목을 삭제해야 합니다:
// PUT api/events/5.md
[HttpPut("{id}")]
public ObjectResult? Put(int id, [FromForm] WebAPIEvent apiEvent)
{
    var updatedEvent = (SchedulerEvent)apiEvent;
    var dbEvent = _context.Events.Find(id);
    if (dbEvent == null)
    {
        return null;
    }
    dbEvent.Name = updatedEvent.Name;
    dbEvent.StartDate = updatedEvent.StartDate;
    dbEvent.EndDate = updatedEvent.EndDate;
    dbEvent.EventPID = updatedEvent.EventPID;
    dbEvent.RecType = updatedEvent.RecType;
    dbEvent.EventLength = updatedEvent.EventLength;

    if (!string.IsNullOrEmpty(updatedEvent.RecType) && updatedEvent.RecType != "none")
    {
     //all modified occurrences must be deleted when we update a recurring series
     //https://docs.dhtmlx.com/scheduler/server_integration.html#recurringevents

        _context.Events.RemoveRange(
            _context.Events.Where(e => e.EventPID == id)
        );
    }

    _context.SaveChanges();

    return Ok(new
    {
        action = "updated"
    });
}
마지막으로, DELETE 액션에서는 두 가지 시나리오를 처리해야 합니다:
- 삭제할 이벤트에
event_pid가 비어있지 않으면, 반복 시리즈의 수정된 인스턴스를 삭제하는 것입니다. 이 경우 레코드를 삭제하지 않고rec_type='none'으로 업데이트하여 해당 항목을 스케줄러에서 건너뜁니다. - 전체 반복 시리즈를 삭제할 경우, 해당 시리즈의 모든 수정된 인스턴스도 함께 삭제해야 합니다.
[HttpDelete("{id}")]
public ObjectResult DeleteEvent(int id)
{
  var e = _context.Events.Find(id);
  if (e != null)
  {
   //some logic specific to recurring events support
   //https://docs.dhtmlx.com/scheduler/server_integration.html#recurringevents

     if (e.EventPID != default(int))
     {
        // deleting a modified occurrence from a recurring series
        // If an event with the event_pid value was deleted, it should be updated
        // with rec_type==none instead of deleting.

        e.RecType = "none";
     }
     else
     {
      //if a recurring series deleted, delete all modified occurrences of the series
      if (!string.IsNullOrEmpty(e.RecType) && e.RecType != "none")
       {
    //all modified occurrences must be deleted when we update recurring series
    //https://docs.dhtmlx.com/scheduler/server_integration.html#recurringevents
         _context.Events.RemoveRange(
            _context.Events.Where(ev => ev.EventPID == id)
        );
       }

        _context.Events.Remove(e);
     }

     _context.SaveChanges();
  }

  return Ok(new
  {
     action = "deleted"
  });
}
반복 시리즈 파싱
반복 이벤트는 데이터베이스에 단일 레코드로 저장되며, Scheduler가 클라이언트 측에서 이를 개별 항목으로 분할합니다. 서버 측에서 각 이벤트의 날짜를 가져오려면, dhtmlxScheduler와 ASP.NET Core에서 반복 이벤트를 파싱하는 헬퍼 라이브러리를 사용할 수 있습니다.
이 라이브러리는 GitHub에서 확인할 수 있습니다.
오류 처리
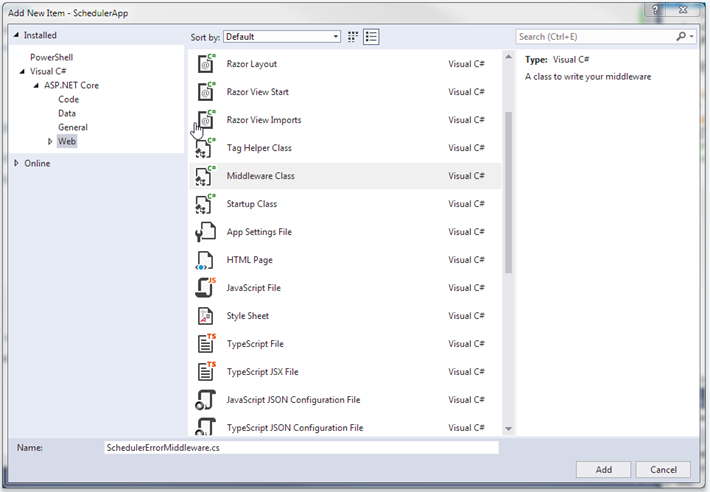
오류를 효과적으로 관리하기 위해, 미들웨어 클래스를 생성해야 합니다. 이 미들웨어는 런타임 예외를 포착하고 응답을 적절하게 포맷합니다. 미들웨어를 만든 후에는 앱의 요청 파이프라인에 추가해야 합니다. 단계는 다음과 같습니다:
- 프로젝트 폴더 내에서 템플릿을 사용하여 미들웨어 클래스를 생성합니다.
ASP.NET Core의 JSON 프레임워크와 HTTP 요청/응답 처리를 위한 HTTP 추상화 패키지를 설치해야 합니다. NuGet 패키지 관리자를 통해 설치할 수 있습니다:
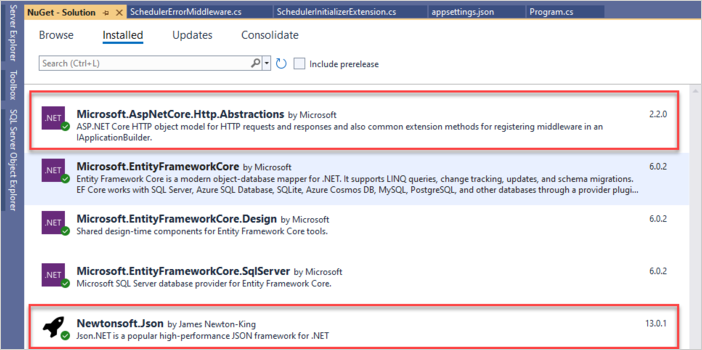
또는 패키지 관리자 콘솔에서 다음 명령어를 실행합니다:
PM> Install-Package Microsoft.AspNetCore.Http.Abstractions
PM> Install-Package Microsoft.Newtonsoft.Json
- 미들웨어 클래스에서 Invoke 메서드를 찾아 _next 호출을 확인합니다. 일부 핸들러에서 예외가 발생할 수 있으므로, _next 호출을
try-catch블록으로 감싸 오류를 포착하고 전용 핸들러로 처리합니다.
public async Task Invoke(HttpContext httpContext)
{
  try
    {
       await _next(httpContext);
    }catch (Exception ex)
      {
         await HandleExceptionAsync(httpContext, ex);
    }
}

private static Task HandleExceptionAsync(HttpContext context, Exception exception)
{
   var result = JsonConvert.SerializeObject(new{
       action = "error"
   });
   context.Response.ContentType = "application/json";
   context.Response.StatusCode = StatusCodes.Status500InternalServerError;
   return context.Response.WriteAsync(result);
}
SchedulerErrorMiddleware.cs에 다음 네임스페이스를 추가합니다:
using Newtonsoft.Json;
- 미들웨어 준비가 끝나면 Program.cs를 열고 다음 네임스페이스를 추가합니다:
using SchedulerApp;
그 다음 **app.UseSchedulerErrorMiddleware()**를 호출하여 파이프라인에 포함시킵니다:
app.UseSchedulerErrorMiddleware();
애플리케이션 보안
Scheduler 자체는 SQL 인젝션, XSS, CSRF와 같은 일반적인 보안 위협에 대한 내장 보호 기능을 제공하지 않습니다. 백엔드를 구현하는 개발자가 애플리케이션 보안을 책임져야 합니다. 자세한 내용은 전용 문서를 참고하십시오.
XSS 보호
XSS를 방지하는 간단한 방법은 클라이언트로 데이터를 보내기 전에 텍스트 속성을 인코딩하는 것입니다. 예를 들어, 아래 예시에서는 내장 HtmlEncoder를 사용하여 이벤트 텍스트의 HTML 문자를 이스케이프합니다. 이 방식은 데이터베이스의 데이터는 그대로 두고, 안전한 콘텐츠만 클라이언트에 전달합니다:
using System.Text.Encodings.Web;

public static explicit operator WebAPIEvent(SchedulerEvent ev)
{
  return new WebAPIEvent
    {
      id = ev.Id,
      text = HtmlEncoder.Default.Encode(ev.Name != null ? ev.Name : ""),
      start_date = ev.StartDate.ToString("yyyy-MM-dd HH:mm"),
      end_date = ev.EndDate.ToString("yyyy-MM-dd HH:mm")
    };
}
또는, HtmlAgilityPack과 같은 특화된 라이브러리를 사용하여 ��데이터 저장 또는 로딩 시 HTML 태그를 완전히 제거하는 방법도 있습니다.
문제 해결
Scheduler와 ASP.NET Core 연동을 위한 모든 단계를 수행했지만 이벤트가 페이지에 렌더링되지 않는 경우, "백엔드 통합 문제 해결" 문서를 참조하십시오. 이 문서에는 일반적인 문제의 진단 및 해결 방법이 안내되어 있습니다.
다음 단계
이제 Scheduler가 정상적으로 동작해야 합니다. 전체 소스 코드는 GitHub에서 복제하거나 다운로드하여 프로젝트에 활용할 수 있습니다.
추가 자료로는 Scheduler의 다양한 기능을 다루는 가이드와 다른 백엔드 프레임워크와의 연동 튜토리얼이 있습니다.