dhtmlxScheduler with SalesForce LWC
This tutorial describes how to add dhtmlxScheduler into a SalesForce Lightning Web Component.
Check the online demo on integrating DHTMLX components with Salesforce LWC (Login: user, Password: demo). The source code for the demo is provided on GitHub.
If you use some other technology, check the list of available integration variants below:
- dhtmlxScheduler with ASP.NET Core
- dhtmlxScheduler with ASP.NET MVC
- dhtmlxScheduler with PHP
- dhtmlxScheduler with PHP:Slim
- dhtmlxScheduler with PHP:Laravel
- dhtmlxScheduler with Ruby on Rails
- dhtmlxScheduler with dhtmlxConnector
We will use SalesForce CLI to create Lightning Web Component and upload it to an organization. See this article for installation guidance. You can also install Salesforce Extension Pack" to Visual Studio Code for working with development orgs.
The complete source code of the demo created in this tutorial is available on GitHub.
You can have a look at the video guide that shows how to create Scheduler with Salesforce LWC.
Prerequisites
Install SalesForce CLI if you don't have it. See this article for installation guidance.
Step 1. Creating a project
Sign up for a free developer account if you don't have one. See this article for installation guidance.
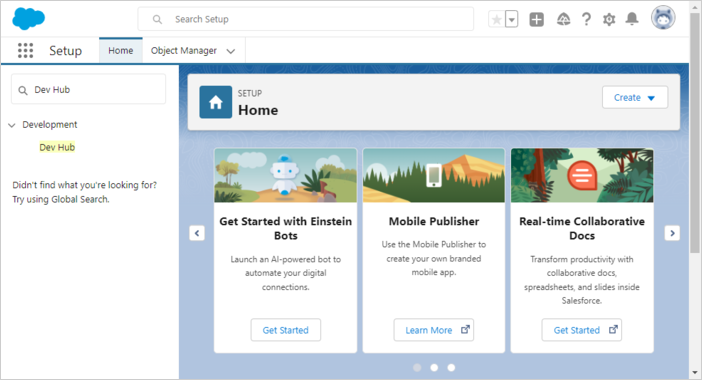
On the left in the search bar, find and select Dev Hub:
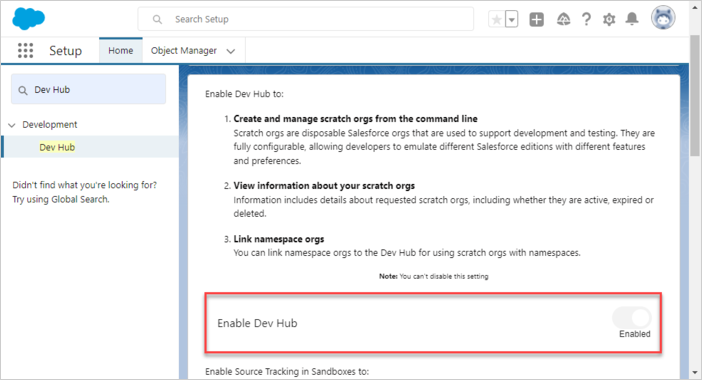
In the new settings window, select Enable Dev Hub:
Let's create a base directory for Salesforce DX project:
$ mkdir ~/salesforce
Create a Salesforce DX project via CLI:
$ cd ~/salesforce
$ sfdx project generate -n scheduler-salesforce-app
    target dir = C:UsersUsersalesforce
        create scheduler-salesforce-appconfigproject-scratch-def.json
        create guides/scheduler-salesforce-appREADME.md
        create scheduler-salesforce-appsfdx-project.json
        create scheduler-salesforce-app.huskypre-commit
        create scheduler-salesforce-app.vscodeextensions.json
        create scheduler-salesforce-app.vscodelaunch.json
        create scheduler-salesforce-app.vscodesettings.json
        create scheduler-salesforce-appforce-appmaindefaultlwc.eslintrc.json
        create scheduler-salesforce-appforce-appmaindefaultaura.eslintrc.json
        create scheduler-salesforce-appscriptssoqlaccount.soql
        create scheduler-salesforce-appscriptsapexhello.apex
        create scheduler-salesforce-app.eslintignore
        create scheduler-salesforce-app.forceignore
        create scheduler-salesforce-app.gitignore
        create scheduler-salesforce-app.prettierignore
        create scheduler-salesforce-app.prettierrc
        create scheduler-salesforce-appjest.config.js
        create scheduler-salesforce-apppackage.json
Go to the created project:
$ cd scheduler-salesforce-app
Step 2. Authorization
Authorize an Org using the Web Server Flow:
$ sfdx org login web -d

Successfully authorized ...@...com with org ID ...
Update your project configuration file (sfdx-project.json). Set the "sfdcLoginUrl" parameter to your "My Domain URL". You can find your org's "My Domain URL" on the "My Domain" setup page. For example:
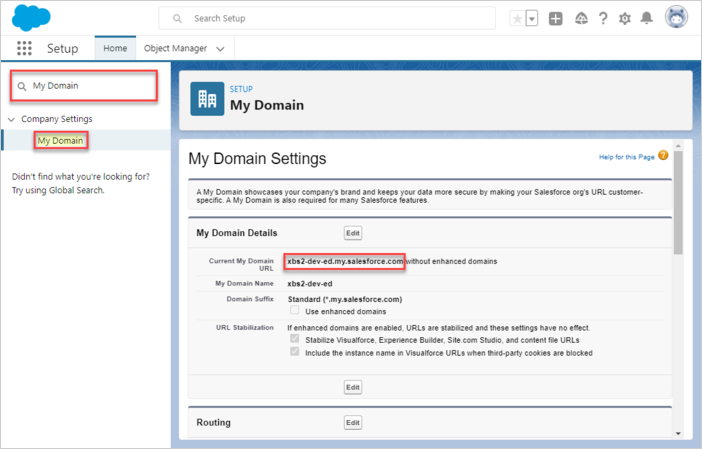
"sfdcLoginUrl" : "https://xbs2-dev-ed.my.salesforce.com"
Create a Scratch Org:
$ sfdx org create scratch -f config/project-scratch-def.json -d


Creating Scratch Org...
RequestId: 2SR8a000000PLf5GAG (https://xbs2-dev-ed.my.salesforce.com/2SR8a000000PLf5GAG)
OrgId: 00D8G000000EEMs
Username: test-3baxo2k0tpej@example.com
✓ Prepare Request
✓ Send Request
✓ Wait For Org
✓ Available
✓ Authenticate
✓ Deploy Settings
Done


Your scratch org is ready.
Step 3. Adding Scheduler to Salesforce
In order to start using the library, we need to upload it inside Salesforce as a Static Resource. Thus, open your scratch org:
$ sfdx org open
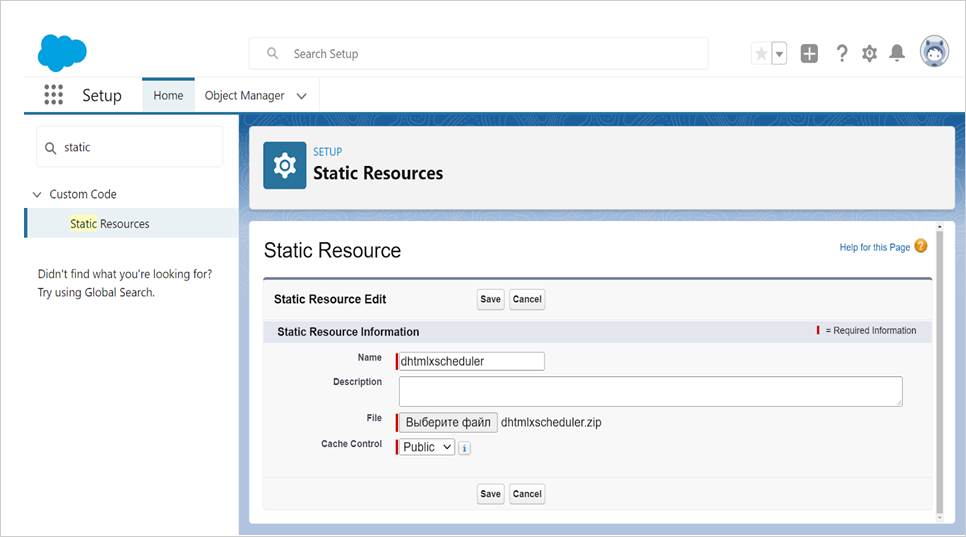
Now, open the "Static Resources" tab and press the "New" button
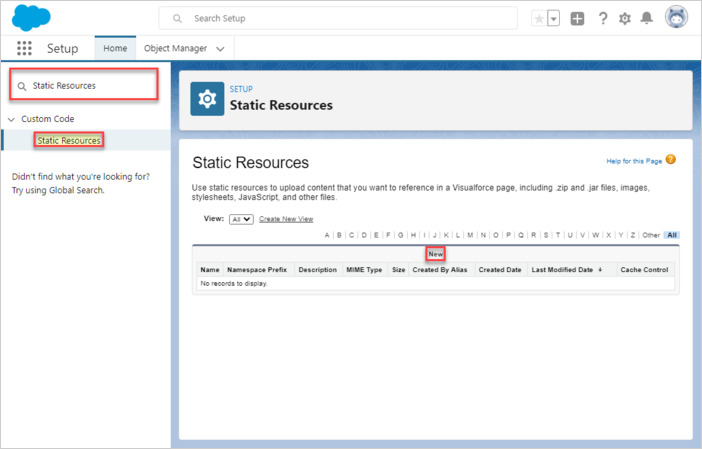
Give it a meaningful name (we use dhtmlxscheduler), choose the ZIP archive with the library itself (the archive must contain the dhtmlxscheduler.js and dhtmlxscheduler.css files), and choose the "Public" Cache Control in order to improve the performance. Press the "Save" button.
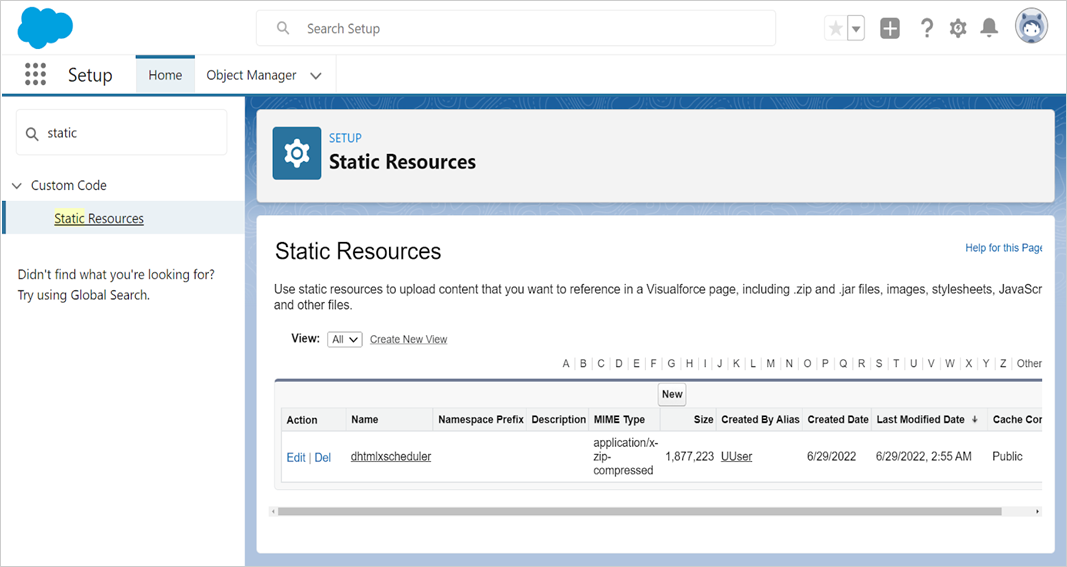
Now we have dhtmlxScheduler inside Salesforce.
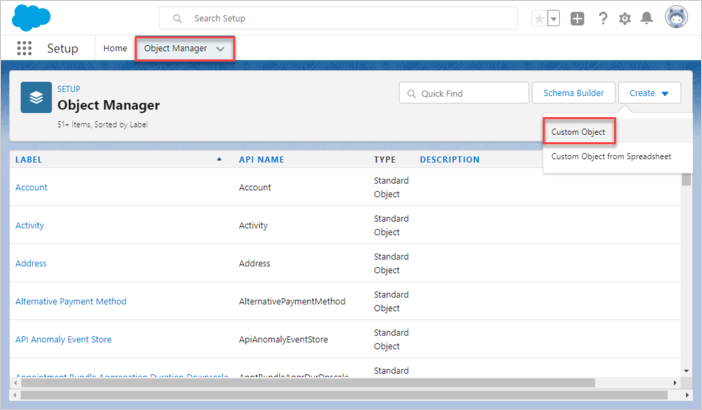
Step 4. Creating Data Model
The core dhtmlxScheduler entities are Events. A good approach is to store all properties of dhtmlxScheduler entities as plain JSON inside Salesforce. Let's create an Event object. Open the Object Manager and select "Create", then "Custom Object":
Event object
Give the name for the event object, let it be SchedulerEvent/SchedulerEvents.

The record name must match the object name, for example:
Object Name: SchedulerEvent => Record Name: SchedulerEvent Name
Press the "Save" button.
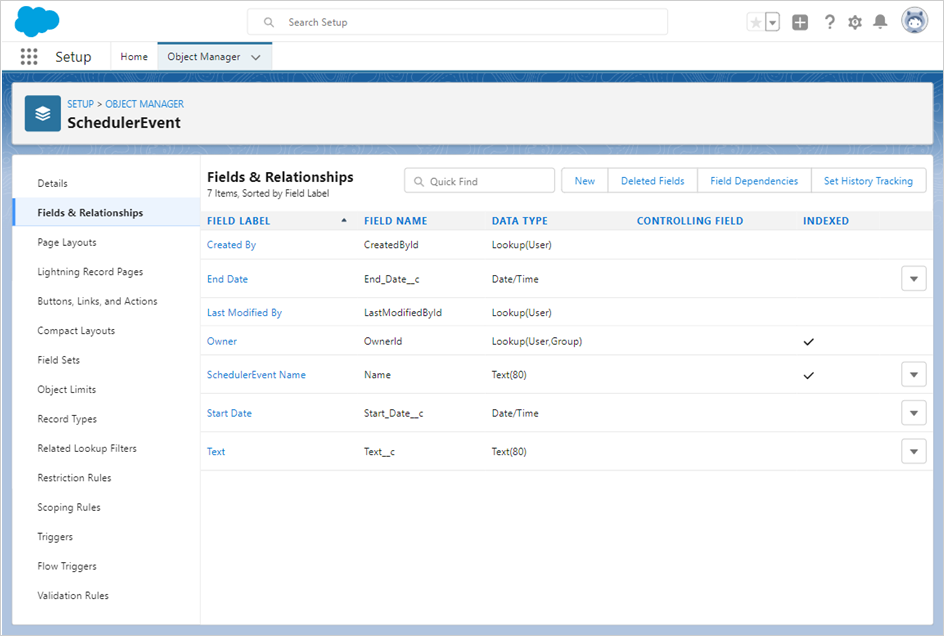
After the object is created, open the "Fields & Relationships" tab. Press the "New" button.
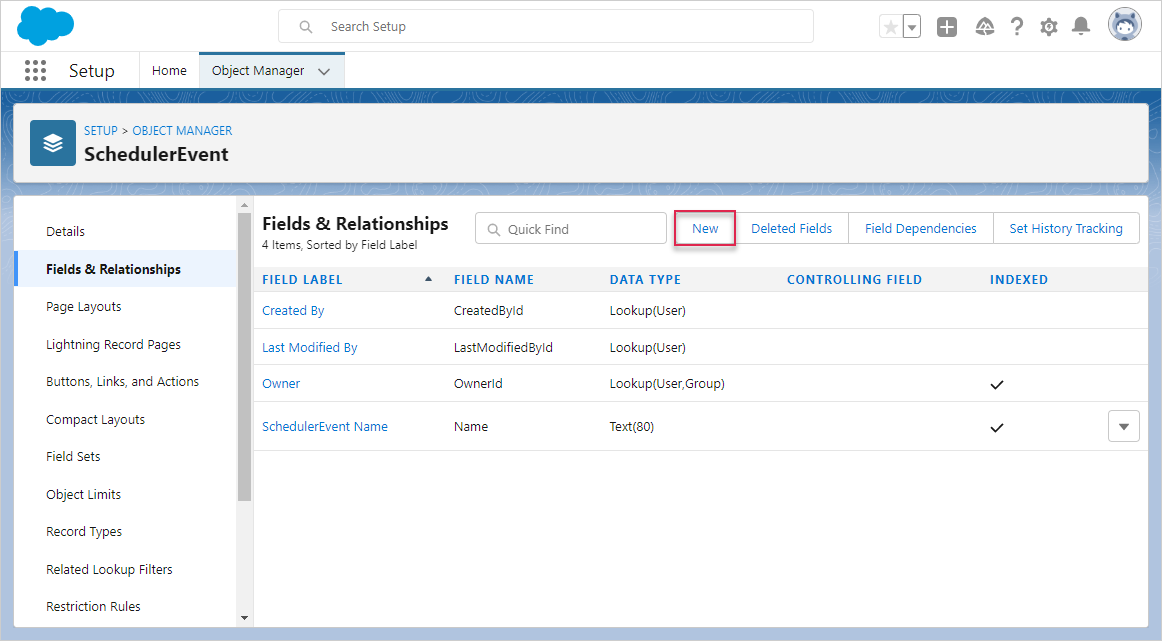
- Start Date
Select "Date/Time" as the Data Type and press the "Next" button.
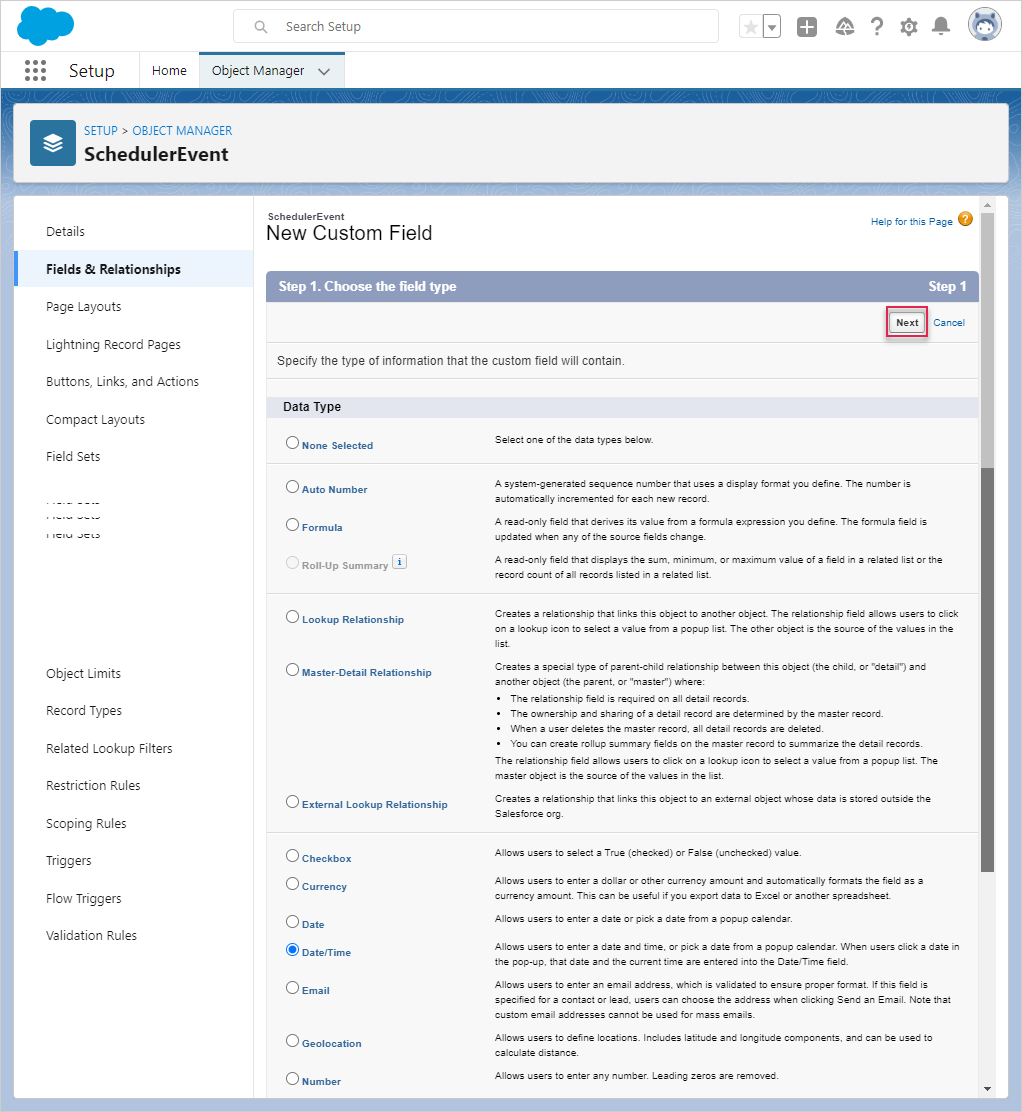
Name it "Start Date". It stores the JSON-serialized Task properties.
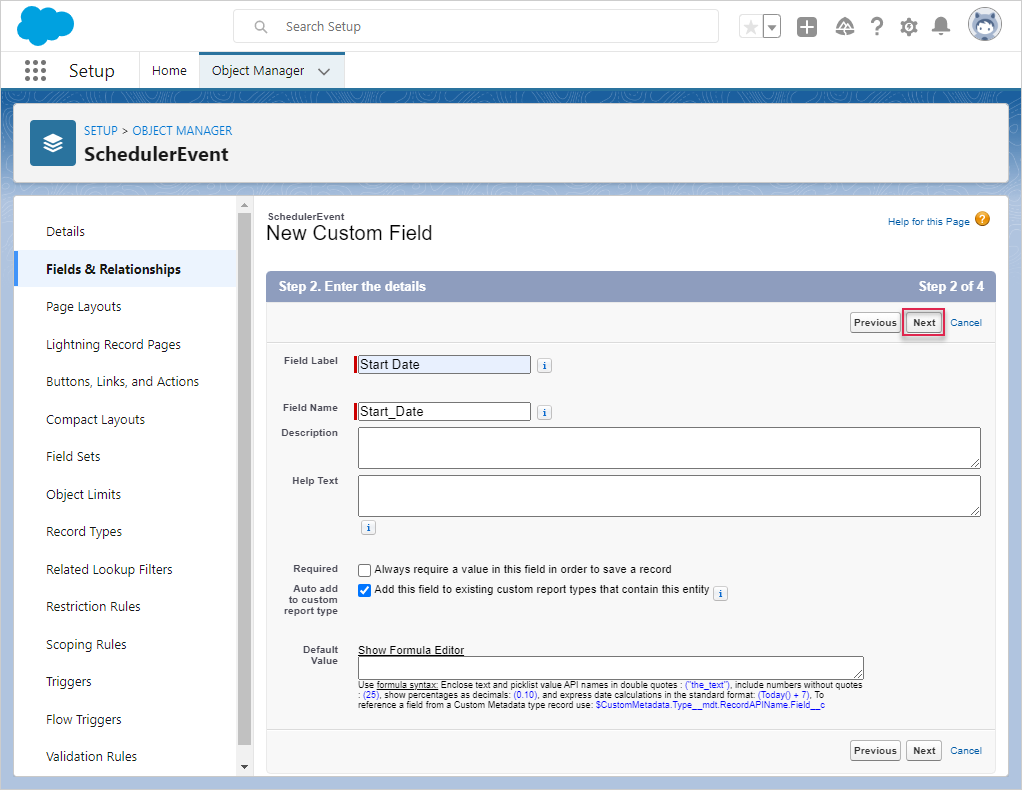
Press the "Next" button (accepting all default settings) until the "Save & New" button is available.
- End Date
Create the "End Date" field. Select "Date/Time" as the Data Type.
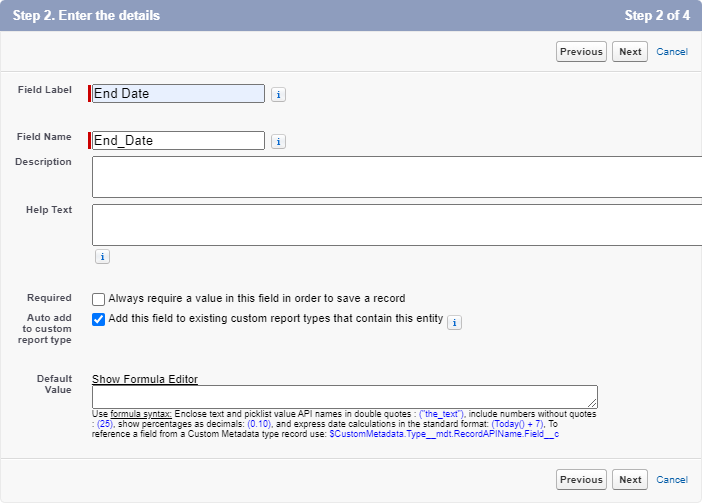
Press the "Next" button (accepting all default settings) until the "Save & New" button is available.
- Text
Create a "Text" field. Select "Text" as the Data Type.
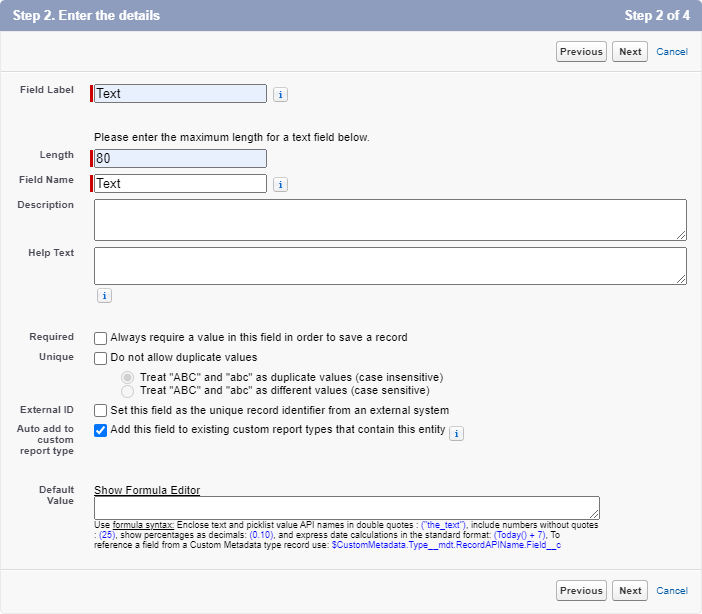
Press the "Next" button (accepting all default settings) until the "Save" button is available.
In the end it should look like this:
Step 5. Creating a Lightning Web Component
To create a Lightning Web Component, run the command:
$ sfdx lightning generate component --type lwc -n scheduler -d force-app/main/default/lwc

target dir = C:UsersUsersourcesalesforcescheduler-salesforce-appforce-appmaindefaultlwc
   create force-appmaindefaultlwcschedulerscheduler.js
   create force-appmaindefaultlwcschedulerscheduler.html
   create force-appmaindefaultlwcscheduler__tests__scheduler.test.js
   create force-appmaindefaultlwcschedulerscheduler.js-meta.xml
Change the component definition in scheduler.js-meta.xml to expose it in the Lightning App Builder:
<?xml version="1.0" encoding="UTF-8"?>
<LightningComponentBundle xmlns="http://soap.sforce.com/2006/04/metadata">
    <apiVersion>57.0</apiVersion>
    <isExposed>true</isExposed>
    <targets>
        <target>lightning__AppPage</target>
    </targets>
    <targetConfigs>
        <targetConfig targets="lightning__AppPage">
            <property name="height" label="Height" type="Integer" default="800" />
        </targetConfig>
    </targetConfigs>
</LightningComponentBundle>
Open scheduler.html and add the following code into it:
<template>
    <div className="thescheduler" lwc:dom="manual" style='width: 100%;'></div>
</template>
Open scheduler.js and add the following code into it:
/* eslint-disable guard-for-in */
/* eslint-disable no-undef */
import { LightningElement, api } from "lwc";
import { ShowToastEvent } from "lightning/platformShowToastEvent";
import { loadStyle, loadScript } from "lightning/platformResourceLoader";
import { createRecord, updateRecord, deleteRecord } from "lightning/uiRecordApi";

// Static resources
import SchedulerFiles from "@salesforce/resourceUrl/dhtmlxscheduler";

// Controllers
import getEvents from "@salesforce/apex/SchedulerData.getEvents";

function unwrap(fromSF) {
    const data = fromSF.events.map((a) => ({
        id: a.Id,
        info: a.Name,
        start_date: a.Start_Date__c,
        end_date: a.End_Date__c,
        text: a.Text__c,
    }));

    return { data };
}

export default class SchedulerView extends LightningElement {
    static delegatesFocus = true;

    @api height;
    schedulerInitialized = false;

    renderedCallback() {
        if (this.schedulerInitialized) {
            return;
        }
        this.schedulerInitialized = true;

        Promise.all([
            loadScript(this, SchedulerFiles + "/dhtmlxscheduler.js"),
            loadStyle(this, SchedulerFiles + "/dhtmlxscheduler.css")
        ])
            .then(() => {
                this.initializeUI();
            })
            .catch((error) => {
                this.dispatchEvent(
                    new ShowToastEvent({
                        title: "Error loading scheduler",
                        message: error.message,
                        variant: "error"
                    })
                );
            });
    }

    initializeUI() {
        const root = this.template.querySelector(".thescheduler");
        root.style.height = this.height + "px";

        const scheduler = window.Scheduler.getSchedulerInstance();
        scheduler.templates.parse_date = (date) => new Date(date);
        scheduler.templates.format_date = (date) => date.toISOString();
        scheduler.config.header = [
            "day",
            "week",
            "month",
            "date",
            "prev",
            "today",
            "next"
        ];

        scheduler.init(root, new Date(), "week");

        getEvents().then((d) => {

            const chartData = unwrap(d);
            scheduler.parse({
                events: chartData.data,
            });
        });

        ///↓↓↓ saving changes back to SF backend ↓↓↓
        scheduler.createDataProcessor(function (entity, action, data, id) {
            switch (action) {
                case "create":
                    console.log("createEvent", data);
                    const insert = {
                        apiName: "SchedulerEvent__c",
                        fields: {
                            Name: data.info,
                            Start_Date__c: data.start_date,
                            End_Date__c: data.end_date,
                            Text__c: data.text
                        }
                    };
                    scheduler.config.readonly = true; // suppress changes
                                                      //until saving is complete
                    return createRecord(insert).then((res) => {
                        scheduler.config.readonly = false;
                        return { tid: res.id, ...res };
                    });
                case "update":
                    console.log("updateEvent", data);
                    const update = {
                        fields: {
                            Id: id,
                            Name: data.info,
                            Start_Date__c: data.start_date,
                            End_Date__c: data.end_date,
                            Text__c: data.text
                        }
                    };
                    return updateRecord(update).then(() => ({}));
                case "delete":
                    return deleteRecord(id).then(() => ({}));
            }
        });
    }
}
Step 6. Creating an Apex class
The next step is to create a class that will make possible the interactions between the Lighting Component and our data model.
$ sfdx apex generate class -n SchedulerData -d force-app/main/default/classes

target dir = C:UsersUsersalesforcescheduler-salesforce-appforce-appmaindefaultclasses
   create force-appmaindefaultclassesSchedulerData.cls
   create force-appmaindefaultclassesSchedulerData.cls-meta.xml
After creation, open SchedulerData.cls and add the following code into it:
public with sharing class SchedulerData {

    @RemoteAction
    @AuraEnabled(cacheable="true)"
    public static Map<String, Object> getEvents() {

        // fetching the Records via SOQL
        List<SchedulerEvent__c> Events = new List<SchedulerEvent__c>();
        Events = [SELECT Id, Name, Start_Date__c, End_Date__c,
            Text__c FROM SchedulerEvent__c];

        Map<String, Object> result = new Map<String, Object>{'events' => Events };
        return result;
   }
}
Pull Source from the Scratch Org to Your Project:
$ sfdx project retrieve start
and then push the sources to the Scratch Org:
$ sfdx project deploy start
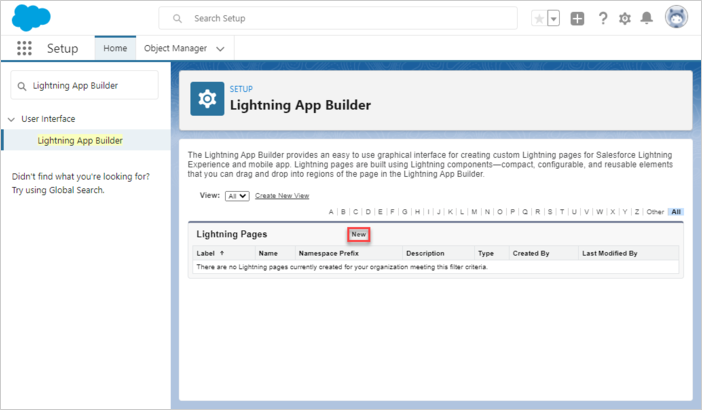
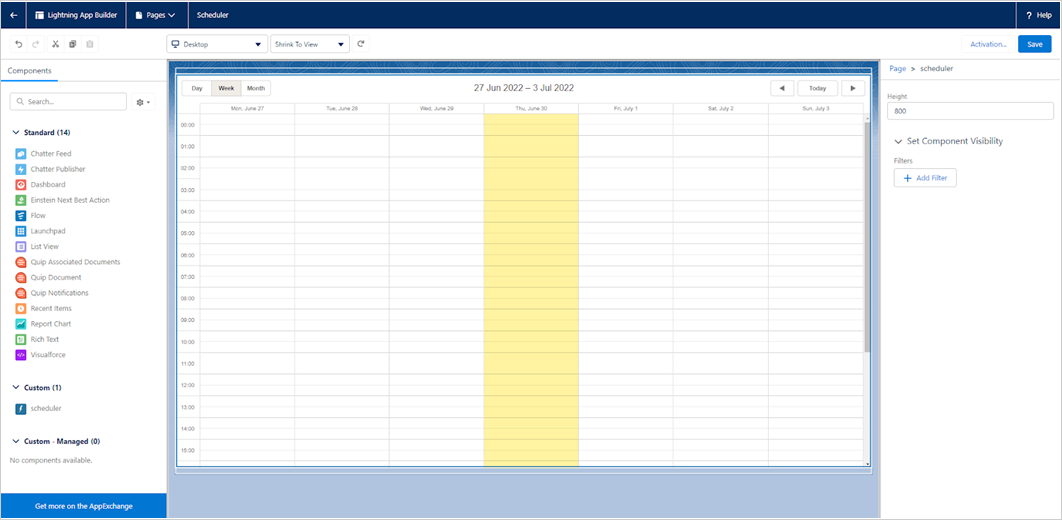
Step 7. Creating Lightning Page
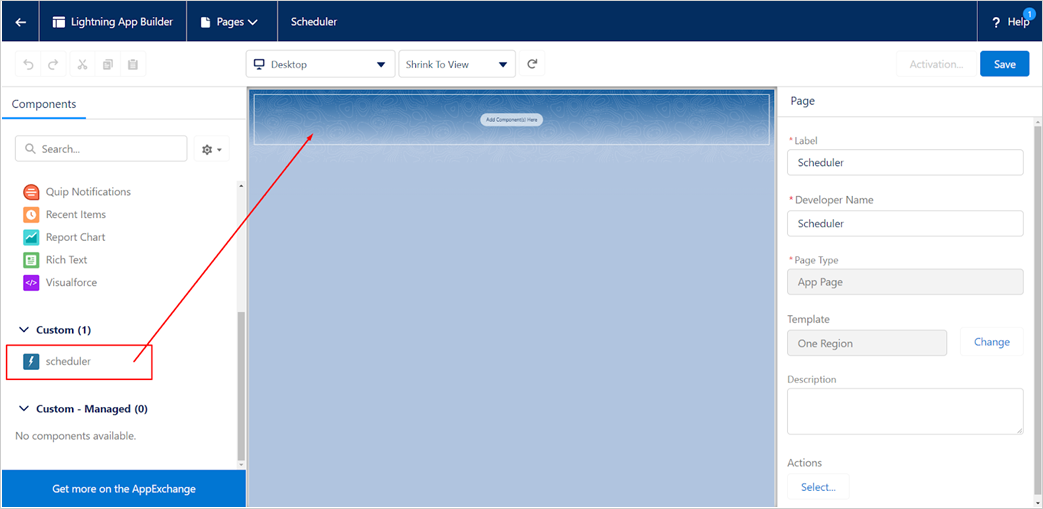
Open the "Lightning App Builder", create a new Lightning Page.
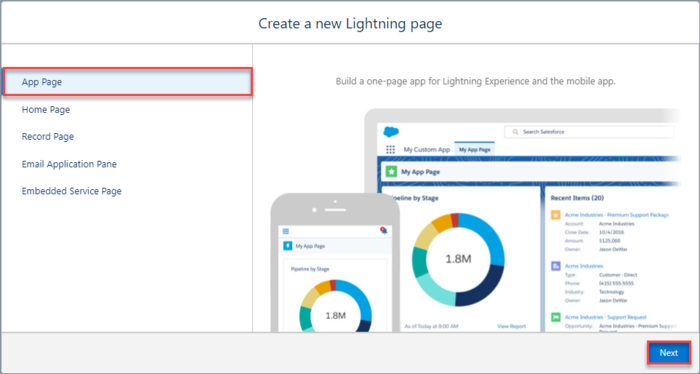
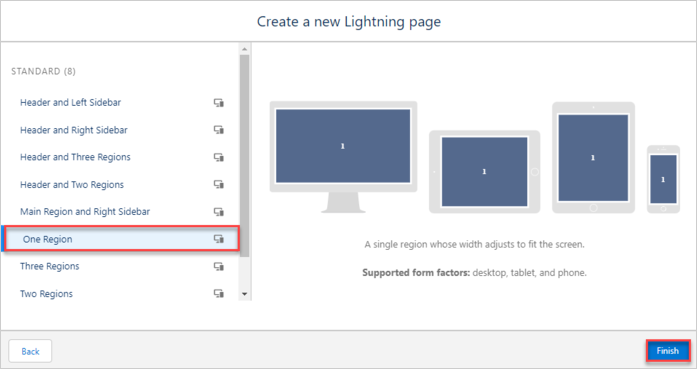
Pick "App Page" then page name and layout.

You should see a Scheduler custom component available for the new page. Append it to any region and save.
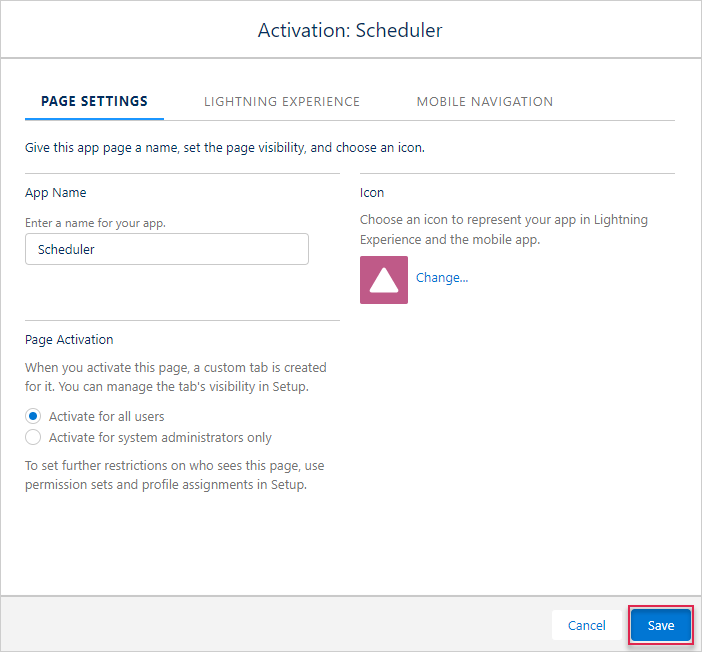
Activate the page.
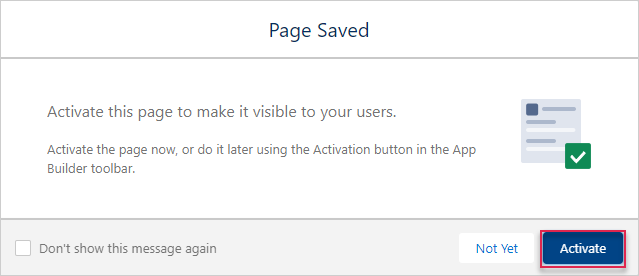
Save the changes.
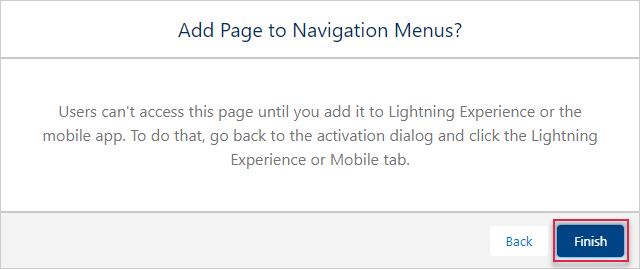
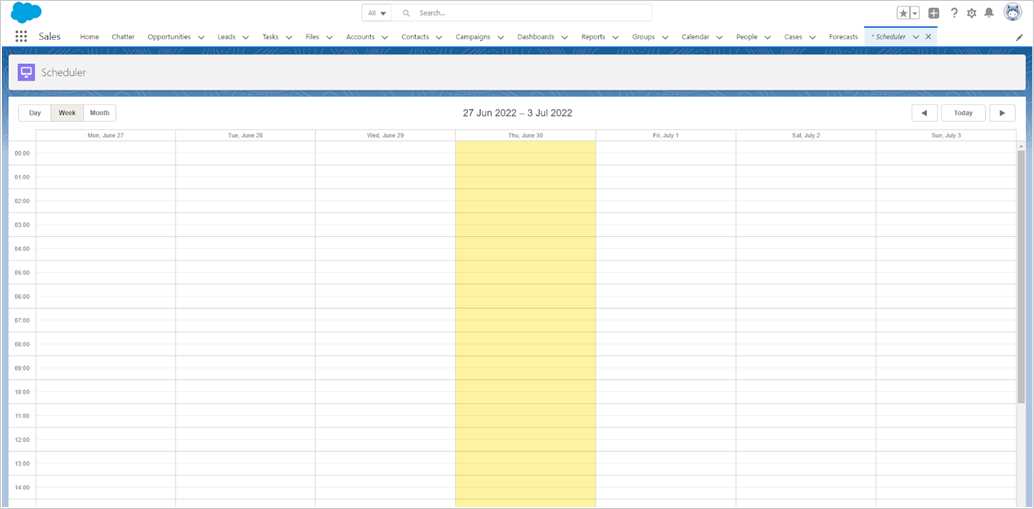
Open the application page. It should be accessible in the app launcher if you click it and type Scheduler.

If everything went well, you should see a simple Scheduler demo running in the Lightning Page.
Application security
Scheduler doesn't provide any means of preventing an application from various threats, such as SQL injections or XSS and CSRF attacks. It is important that responsibility for keeping an application safe is on the developers implementing the application. Read the details in the corresponding article Salesforce is built with security to protect your data and applications. You can also implement your own security scheme to reflect the structure and needs of your organization. For more information, please see the Salesforce Security Guide. Here you can find out what you need to be secure.
Trouble shooting
In case you've completed the above steps to implement Scheduler integration with Salesforce, but Scheduler doesn't render events on a page, have a look at the Troubleshooting Backend Integration Issues article. It describes the ways of identifying the roots of the problems.
What's next
Now you have a fully functioning Scheduler. You can view the full code on GitHub, clone or download it and use it for your projects.
You can check guides on the numerous features of Scheduler or tutorials on integration of Scheduler with other backend frameworks.