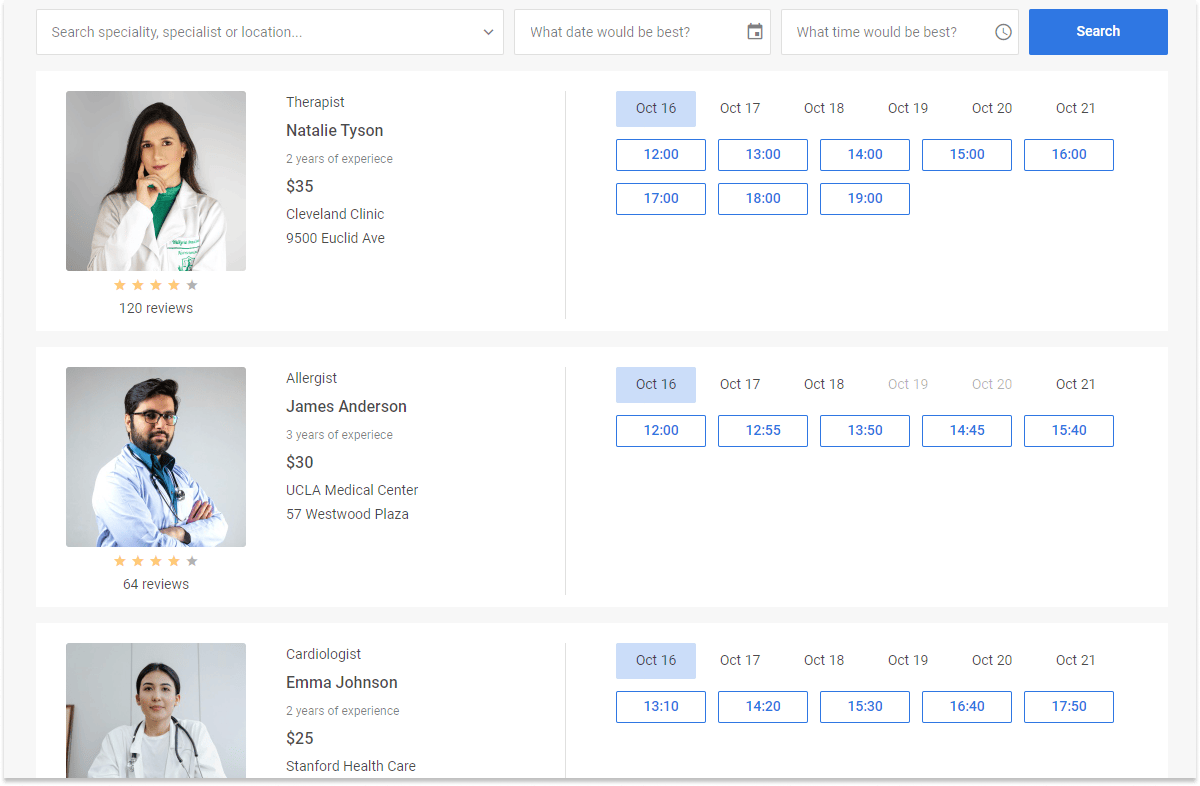
How to start
This clear and comprehensive tutorial will guide your through the steps you need to take in order to get a full-functional Booking application on a page.

Step 1. Downloading and installing packages
Download the package and unpack it into a folder of your project.
You can import JavaScript Booking into your project using yarn or npm package manager.
Installing trial Booking via npm or yarn
If you want to use the trial version of Booking, download the trial booking package and follow the steps mentioned in the README file. Note that trial booking is available for 30 days only.
Installing PRO Booking via npm or yarn
You can access the DHTMLX private npm directly in the Client's Area by generating your login and password for npm. A detailed installation guide is also available there. Please note that access to the private npm is available only while your proprietary Booking license is active.
Step 2. Including source files
Start from creating an HTML file and call it index.html. Then proceed to include Booking source files into the created file.
There are two necessary files:
- the JS file of booking
- the CSS file of booking
<!DOCTYPE html>
<html>
    <head>
        <title>How to Start with Booking</title>
        <script src="./dist/booking.js"></script>
        <link href="./dist/booking.css" rel="stylesheet">
    </head>
    <body>
        <script>
        // your code will be here
        </script>
    </body>
</html>
If you want to integrate JavaScript Booking into React, Angular or Vue projects, refer to the corresponding Examples on CodeSandbox for more information.
Step 3. Creating booking
Now you are ready to add booking to the page. First, let's create the DIV container for Booking.
<!DOCTYPE html>
<html>
    <head>
        <title>How to Start with Booking</title>
        <script src="./dist/booking.js"></script>
        <link href="./dist/booking.css" rel="stylesheet">
    </head>
    <body>
        <div id="root"></div>
        <script>
            const booking = new booking.Booking("#root", {
                // configuration properties
            });
        </script>
    </body>
</html>
Step 4. Configuring Booking
To start working with Booking, first you need to provide the initial data, and then you can add other configuration properties you want to be applied at the initialization. The example below creates Booking with two cards:
- the
dataproperty allows adding data to each card, such as title, image, rating data, and booking slots - the
cardShapeproperty helps to configure which cards' data fields to display
const data = [
    {
        id: "ee828b5d-a034-420c-889b-978840015d6a",
        title: "Natalie Tyson",
        category: "Therapist",
        subtitle: "2 years of experience",
        details: "Cleveland Clinic\n9500 Euclid Ave",
        preview: "https://snippet.dhtmlx.com/codebase/data/booking/01/img/01.jpg",
        price: "$35",
        review: {
            stars: 4,
            count: 120
        },
        slots: [
            {
                from: 9,
                to: 20,
                days: [1, 2, 3, 4, 5]
            },
            {
                from: 10,
                to: 18,
                days: [6, 0]
            }
        ]
    },
    {
        id: "5c9b64ad-1830-4e5b-a5f9-8acea10706df",
        title: "James Anderson",
        category: "Allergist",
        subtitle: "3 years of experience",
        details: "UCLA Medical Center\n57 Westwood Plaza",
        preview: "https://snippet.dhtmlx.com/codebase/data/booking/01/img/11.jpg",
        price: "$30",
        review: {
            stars: 4,
            count: 64
        },
        slotSize: 45,
        slotGap: 10,
        slots: [
            {
                from: "9:15",
                to: 17,
                days: [1, 2, 3, 4, 5]
            }
        ]
    }
];

const cardShape = {
    review: false,
    subtitle: false,
    price: false
};

new booking.Booking("#root", {
    data,
    cardShape,
    // other parameters
});
What's next
That's all you need to create a simple Booking on a page. Now you are ready to embark on a journey with the Booking API:
- Guides pages provide instructions about installation, loading data, styling, and other helpful tips to go smoothly with the Booking configuration
- API reference gives description of the Booking functionality