DHTMLX Booking overview
Overview
JavaScript Booking library is a ready-made component designed to be easily incorporated into your application. It provides end-users with functionality for scheduling appointments online and wide filtering options. The widget is made responsive and optimised for mobile devices.
Booking structure
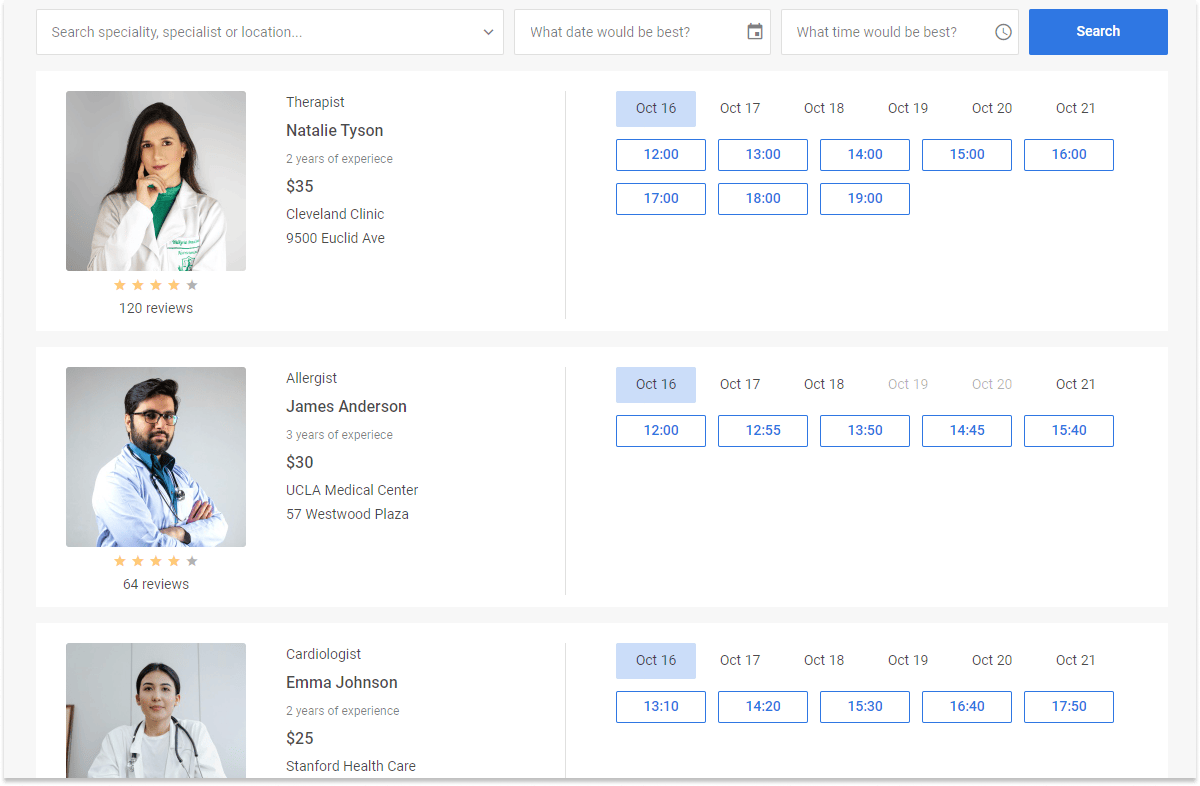
The Booking UI includes the two main parts: the filter area and the list of cards with slots. Each card's view consists of the card's information block and slots available for booking.

Cards list
All cards are displayed as a list. The left side of each card in the list shows the following information items:
- preview: card image
- review: rating information with the number of rating stars (out of five) and the number of reviews
- category: the subtitle of a card
- title: the title of a card (for example, a specialist's name)
- subtitle: the subtitle of a card (for example, experience details)
- price: the price of the service
- details: other details of a card
Slots
The right side of each card has clickable slots available for booking. Slots are displayed for the current month starting from the current date.
A single card view
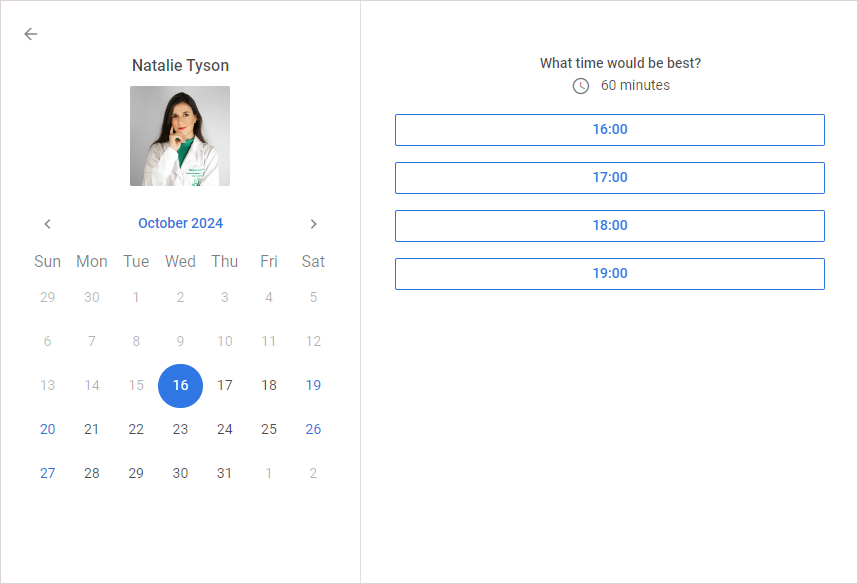
To open the view of a single card, click inside the left area of a card. The single card dialog shows the card's title, calendar and available slots for the date selected in the calendar.

Booking dialog
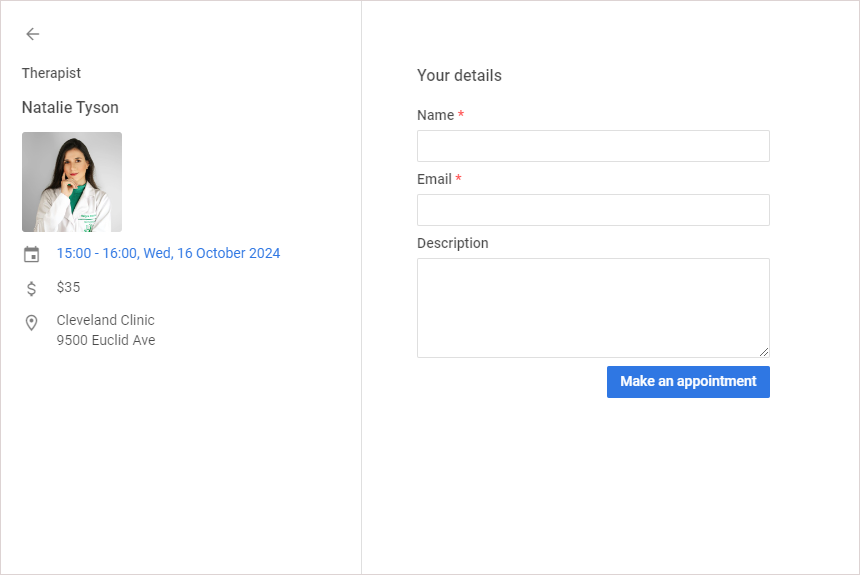
The booking dialog allows booking a slot of the selected card. To open it, click the time slot button.

For the instruction about booking, please, refer to Making an appointment
Filtering data
To filter cards by different text fields, date and time, a user should enter the required values in the input fields and click the Search button. A user can filter cards by category and title by default. The next default time ranges are available for filtering:
- from: 8, to: 12 (Morning)
- from: 12, to: 17 (Afternoon)
- from: 17, to: 20 (Evening)
It's possible to configure the filter settings via API: Configuring the filter
Making an appointment
To schedule an appointment, click the time slot button for the required card, and in the Booking dialog, fill in the fields, and then click Make an appointment.
You can also make an appointment via the single card view:
- Click inside the left area of a card.
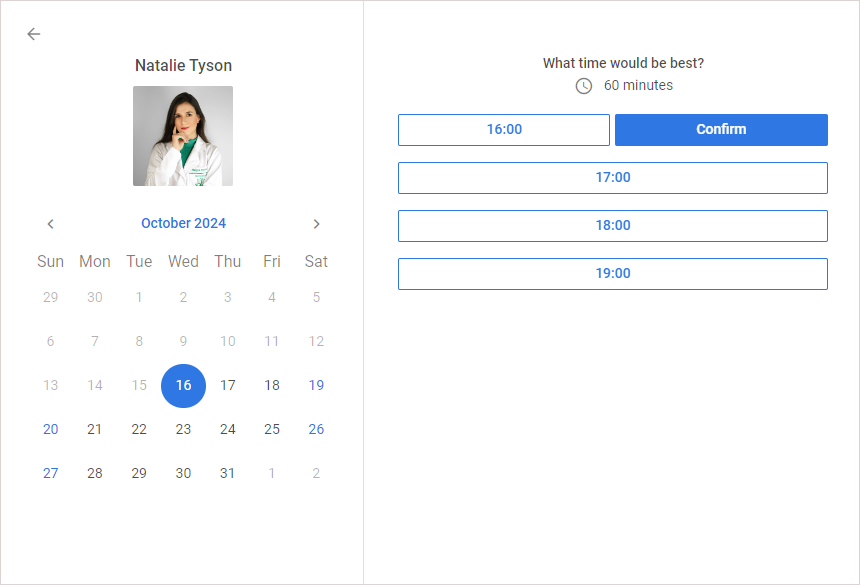
- In the single card view that opens, select the required date and time.
- Next to the selected time, click Confirm.
- In the Booking dialog that appears, fill in the fields, and then click Make an appointment.

What's next
Now you can start with creating a simple Booking widget on your page.