Step 3. Add Toolbar to the Page
The next stop in our journey is a toolbar. We will add a panel with some items to the top of the layout.
We won't provide any handlers for the added items - just will place a toolbar on the page as a part of the overall interface.
To present toolbars on the page, the DHTMLX library provides the dhtmlxToolbar component. The component allows adding various items (buttons, labels, inputs etc.).
We will specify toolbar's items as an object in the XML format that is rather similar to the format used for a standard HTML form.
To attach a toolbar to the layout:
- Call the attachToolbar() method to attach a toolbar to the layout:
'index.html' file
dhtmlxEvent(window,"load",function(){
    var myLayout = new dhtmlXLayoutObject(document.body,"2U");
    myLayout.cells("a").setWidth(250);
    myLayout.cells("a").setText("Files");
    myLayout.cells("b").hideHeader();
    var myToolbar = myLayout.attachToolbar(); });
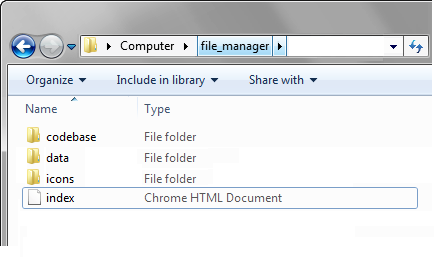
- Copy the "icons " folder from the demo app to the "file_manager " folder.
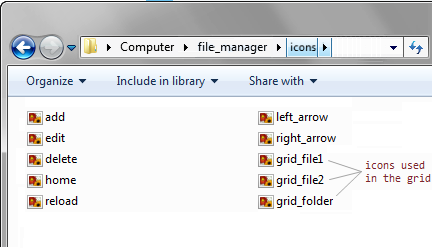
- Call the setIconsPath() method to set
the path to custom images specified for the toolbar's items in the "toolbarStruct.xml" file:
'index.html' file
dhtmlxEvent(window,"load",function(){
    var myLayout = new dhtmlXLayoutObject(document.body,"2U");
    myLayout.cells("a").setWidth(250);
    myLayout.cells("a").setText("Files");
    myLayout.cells("b").hideHeader();
    var myToolbar = myLayout.attachToolbar();
    myToolbar.setIconsPath("icons/");});
- Create a subfolder with the name "data " in the "file_manager " folder.
- Create a new XML file in the "data " folder and name it "toolbarStruct.xml ".
- Open the "toolbarStruct.xml " file and specify the toolbar's items there:
'toolbarStruct.xml' file
<?xml version="1.0" encoding="UTF-8"?>
<toolbar>
    <item id="back"   type="button" img="left_arrow.png"/>
    <item id="fwd"    type="button" img="right_arrow.png"/>
    <item id="reload" type="button" img="reload.png"/>
    <item id="home"   type="button" img="home.png"/>
    <item id="add"    type="button" img="add.png"    text="Add"/>
    <item id="edit"   type="button" img="edit.png"   text="Edit"/>
    <item id="delete" type="button" img="delete.png" text="Delete"/>
</toolbar>
- Call the loadStruct() method to load the specified items to the toolbar:
'index.html' file
dhtmlxEvent(window,"load",function(){
    var myLayout = new dhtmlXLayoutObject(document.body,"2U");
    myLayout.cells("a").setWidth(250);
    myLayout.cells("a").setText("Files");
    myLayout.cells("b").hideHeader();
    var myToolbar = myLayout.attachToolbar();
    myToolbar.setIconsPath("icons/");
    myToolbar.loadStruct("data/toolbarStruct.xml");});
